
In this article, we will explore 10 creative DIY decorative storage box ideas that will not only help you organize your belongings but also add a touch of style and personality to your home. Whether you are looking for ways to store your accessories, office supplies, or even toys, these unique and visually appealing storage box ideas will inspire you to get crafty and transform ordinary boxes into functional and decorative pieces. Let’s dive into the world of DIY storage box ideas and unleash your creativity!
- 1. Introduction
- 1.1. What are DIY decorative storage boxes?
- 1.2. Why use DIY decorative storage boxes?
- 1.3. Benefits of DIY decorative storage boxes
- 1.4. Materials needed for DIY decorative storage boxes
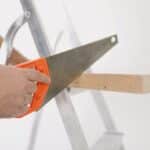
- 1.5. Tools required for DIY decorative storage boxes
- 2. Step-by-Step Guide to Making DIY Decorative Storage Boxes
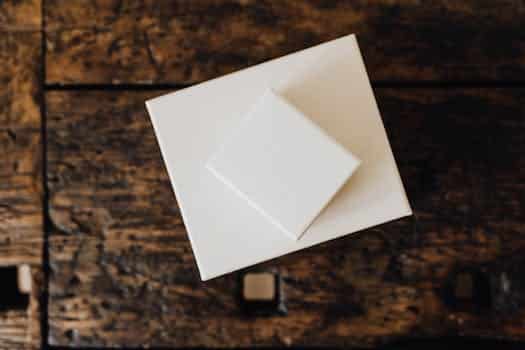
- 2.1. Choosing the right box
- 2.2. Preparing the box for decoration
- 2.3. Selecting decorative materials
- 2.4. Applying adhesive
- 2.5. Adding finishing touches
- 3. Creative Ideas for DIY Decorative Storage Boxes
1. Introduction
Decorative storage boxes are a fantastic way to add style and functionality to your home. Whether you need a place to store small items or want to organize your living space, DIY decorative storage boxes can be the perfect solution. In this article, we will explore 10 creative ideas for making your own decorative storage boxes. From repurposing old shoeboxes to transforming plain cardboard boxes, these DIY projects are not only fun and easy to do, but they also allow you to personalize your storage solutions to match your home decor. So, let’s dive into these inspiring DIY ideas and get ready to create beautiful and practical storage boxes!
1.1. What are DIY decorative storage boxes?
DIY decorative storage boxes are a popular trend in home organization and design. These boxes are versatile and can be used to store various items while adding a touch of style to any room. Whether you are looking to declutter your space or simply want to add a decorative element, DIY decorative storage boxes offer a practical and creative solution.
These boxes can be made from a variety of materials such as cardboard, fabric, or wood, allowing you to customize them to match your personal style and home decor. They can be painted, decoupage, or covered with fabric to create unique designs that reflect your individual taste.
Not only do DIY decorative storage boxes provide a functional storage solution, but they also serve as eye-catching decor pieces. You can stack them on shelves, place them on a coffee table, or use them as stylish organizers in your closet. The possibilities are endless!
In addition to their aesthetic appeal, DIY decorative storage boxes can help you stay organized. You can label them or use different patterns and colors to categorize your belongings, making it easier to find what you need when you need it.
Whether you are a crafty individual looking for a fun project or someone in need of practical storage solutions, DIY decorative storage boxes are a great option. In the following sections, we will explore ten creative ideas to inspire you in transforming ordinary boxes into functional and beautiful storage pieces.
1.2. Why use DIY decorative storage boxes?
Decorative storage boxes are not only functional but also add a touch of style to any space. Whether you are organizing your living room, bedroom, or office, DIY decorative storage boxes can be a great solution. These boxes are versatile, customizable, and cost-effective. They offer a unique way to store and display your belongings while complementing your existing decor.
By opting for DIY decorative storage boxes, you have the opportunity to unleash your creativity and personalize them according to your taste. You can choose from a variety of materials, such as cardboard, fabric, or wood, and customize the design, color, and pattern to match your interior aesthetic. This allows you to create storage solutions that not only serve their purpose but also add a decorative element to your space.
Another advantage of using DIY decorative storage boxes is their affordability. Instead of purchasing expensive storage solutions, you can save money by repurposing existing boxes or buying affordable materials to create your own. This makes DIY decorative storage boxes a budget-friendly option for those who want to organize their space without breaking the bank.
Furthermore, DIY decorative storage boxes are not limited to a specific function or area. You can use them in various rooms of your house, including the living room, bedroom, kitchen, or even the bathroom. They can be used to store books, magazines, toys, accessories, office supplies, and more. Their versatility makes them a practical choice for any storage needs.
In conclusion, DIY decorative storage boxes offer a myriad of benefits. They allow you to unleash your creativity, personalize your storage solutions, save money, and add a decorative touch to your space. Whether you are looking for an attractive way to declutter or want to showcase your belongings, DIY decorative storage boxes are a fantastic option.
1.3. Benefits of DIY decorative storage boxes
Decorative storage boxes are not only functional, but they also add a touch of style and personality to any space. DIY (Do-It-Yourself) decorative storage boxes are a great way to unleash your creativity and create unique storage solutions that reflect your personal taste. In this article, we will explore the various benefits of using DIY decorative storage boxes and provide you with 10 creative ideas to inspire your next project.
1.4. Materials needed for DIY decorative storage boxes
When it comes to organizing and decluttering our living spaces, decorative storage boxes are a fantastic solution. Not only do they provide a practical way to store our belongings, but they also add a touch of style and personality to any room. DIY decorative storage boxes are even more special, as they allow us to customize them according to our preferences and create unique pieces that reflect our individuality. In this article, we will explore 10 creative DIY decorative storage box ideas that you can easily recreate at home. To get started, let’s take a look at the materials you will need for these projects.
1.5. Tools required for DIY decorative storage boxes
When it comes to organizing and decluttering your home, decorative storage boxes are a great solution. Not only do they provide a practical way to store items, but they can also add a touch of style and personality to any room. DIY decorative storage boxes allow you to unleash your creativity and customize the boxes to match your decor and personal preferences. To successfully create these beautiful storage solutions, you will need a few essential tools. In this section, we will explore the tools required for DIY decorative storage boxes.
2. Step-by-Step Guide to Making DIY Decorative Storage Boxes
DIY decorative storage boxes are a great way to add style and organization to any space. Whether you need a place to store small items in your office or want to add some flair to your living room, these boxes can be customized to fit your needs and personal style. In this step-by-step guide, we will walk you through the process of making your own decorative storage boxes.
1. Gather your materials: To start, you will need a sturdy cardboard box, decorative paper or fabric, scissors, a ruler, a pencil, a glue stick, and any additional embellishments you want to add.
2. Measure and cut the paper: Measure the dimensions of the box and use a ruler to mark those measurements on your decorative paper or fabric. Use scissors to carefully cut out the pieces.
3. Apply glue: Use a glue stick to apply a thin layer of glue to one side of the box. Carefully place the cut-out paper or fabric onto the glued surface, smoothing out any wrinkles or air bubbles.
4. Repeat for all sides: Repeat the gluing process for each side of the box, making sure to align the patterns or designs as desired.
5. Add embellishments: If you want to add any additional embellishments, such as ribbons, buttons, or stickers, now is the time to do so. Use glue or adhesive tape to secure them onto the box.
6. Let it dry: Allow the glue to dry completely before using or moving the box.
7. Enjoy your DIY decorative storage box: Once the glue is dry, your decorative storage box is ready to use! Place it on a shelf, desk, or coffee table to add a touch of style and keep your belongings organized.
By following these simple steps, you can create your own DIY decorative storage boxes and enhance the aesthetics of any room in your home. Have fun experimenting with different papers, fabrics, and embellishments to make each box unique and personalized.
2.1. Choosing the right box
When it comes to organizing and decluttering your space, decorative storage boxes can be a stylish and practical solution. Instead of purchasing expensive storage options, why not try making your own DIY decorative storage boxes? Not only will it save you money, but it also allows you to personalize the design to match your home decor. One of the first steps in creating these boxes is choosing the right box for the project. Here is a step-by-step guide to help you make the perfect DIY decorative storage box.
2.2. Preparing the box for decoration
Preparing the box for decoration is an important step in creating DIY decorative storage boxes. By properly preparing the box, you can ensure that the end result is a beautiful and professional-looking piece. Here is a step-by-step guide to help you with the process:
1. Start by selecting a sturdy and plain box that you want to transform into a decorative storage box. It can be made of cardboard, wood, or any other material of your choice.
2. Clean the box thoroughly to remove any dust, dirt, or debris. This will provide a clean surface for the decorations and prevent them from getting ruined.
3. If the box has any rough edges or imperfections, you can use sandpaper to smooth them out. This will give the box a polished and finished look.
4. Next, decide on the design or theme you want for your decorative storage box. You can choose to paint the box, cover it with fabric or paper, or even add embellishments like ribbons, buttons, or beads.
5. If you plan to paint the box, apply a coat of primer first to ensure better adhesion and a smoother finish. Let the primer dry completely before moving on to the next step.
6. Once the primer is dry, you can start painting the box with your chosen colors. Apply multiple thin coats for a better result, allowing each coat to dry before applying the next one.
7. If you prefer to cover the box with fabric or paper, measure and cut the material according to the size of the box. Use adhesive or glue to attach the material securely to the box, smoothing out any wrinkles or bubbles.
8. To add embellishments, use a strong adhesive to attach them to the box. Be creative and arrange them in a way that enhances the overall look of the box.
9. Allow the box to dry completely before using or displaying it. This will ensure that all the decorations are properly set and will not get damaged.
By following these steps, you can easily prepare the box for decoration and create your own DIY decorative storage box that reflects your style and personality.
2.3. Selecting decorative materials
When it comes to selecting decorative materials for DIY decorative storage boxes, there are a few factors to consider. The materials you choose will not only determine the overall look and feel of the boxes but also their durability and functionality. Here is a step-by-step guide to help you make your own DIY decorative storage boxes.
1. Determine the Size and Shape: Start by deciding the size and shape of the storage boxes you want to create. Consider the available space where you plan to place the boxes and the items you intend to store in them. This will help you determine the appropriate dimensions.
2. Choose the Base Material: The base material will form the structure of your storage boxes. Opt for sturdy materials like plywood, MDF, or thick cardboard. Make sure the material is strong enough to hold the weight of the items you plan to store.
3. Select the Decorative Covering: Once you have the base material, choose a decorative covering to give your storage boxes a stylish look. You can use various options such as patterned fabric, decorative paper, or adhesive vinyl. Ensure that the chosen material is easy to work with and complements the overall aesthetic you are aiming for.
4. Gather Necessary Tools and Supplies: Before you begin assembling the storage boxes, gather all the necessary tools and supplies. These may include a ruler, pencil, craft knife, adhesive, scissors, and any additional embellishments you want to add, such as ribbons or buttons.
5. Cut and Assemble the Base: Measure and cut the base material according to the desired dimensions. Use a craft knife or saw to ensure clean and precise cuts. Assemble the cut pieces using strong adhesive or screws, depending on the material you are working with.
6. Apply the Decorative Covering: Lay the chosen decorative covering on a flat surface and place the assembled base on top. Carefully wrap the covering around the base, ensuring it is taut and free from wrinkles or bubbles. Secure the covering in place using adhesive or double-sided tape.
7. Add Finishing Touches: Once the decorative covering is securely attached, you can add any desired finishing touches. This might include adding decorative trims, painting the edges, or attaching embellishments like buttons or bows. Let your creativity shine!
By following this step-by-step guide, you can create your own DIY decorative storage boxes that not only serve their purpose but also enhance the aesthetic appeal of your space.
2.4. Applying adhesive
When it comes to creating DIY decorative storage boxes, applying adhesive is an important step that ensures the stability and longevity of the finished product. Whether you are using cardboard, fabric, or other materials for your storage box, proper adhesive application is crucial for a successful outcome.
To begin, gather all the necessary materials including the adhesive of your choice, a brush or applicator, and the items you will be using to create the storage box. Make sure to have a clean and well-ventilated workspace to work in.
Step 1: Prepare the surfaces
Before applying adhesive, ensure that the surfaces you will be bonding together are clean and free from any dust or debris. Wipe them down with a damp cloth if needed and let them dry completely.
Step 2: Apply the adhesive
Using a brush or applicator, apply a thin layer of adhesive onto one of the surfaces you will be bonding. Be sure to spread it evenly and cover the entire area that will be in contact with the other surface.
Step 3: Press the surfaces together
Once the adhesive has been applied, carefully align the two surfaces and press them firmly together. Make sure they are properly aligned before applying any pressure to ensure a strong bond.
Step 4: Allow it to dry
After pressing the surfaces together, allow the adhesive to dry according to the manufacturer’s instructions. This may take a few minutes or several hours, depending on the type of adhesive used.
Step 5: Reinforce if necessary
If you feel that the bond between the surfaces is not strong enough, you can reinforce it by applying additional adhesive along the edges or in any areas that seem weak.
Step 6: Repeat for other sections
Repeat the above steps for each section of the storage box that requires adhesive. Take your time and ensure each bond is secure before moving on to the next section.
By following these step-by-step instructions, you can successfully apply adhesive to create DIY decorative storage boxes. Remember to choose the right adhesive for your materials and always work in a well-ventilated area for safety.
2.5. Adding finishing touches
Once you have completed the construction of your DIY decorative storage boxes, it’s time to add the finishing touches. These final steps will elevate the look of your boxes and make them truly unique. Here is a step-by-step guide to help you achieve the perfect finishing touches.
1. Sanding: Start by sanding the surface of your boxes to create a smooth and even texture. Use fine-grit sandpaper and gently sand in circular motions. This will remove any rough edges or imperfections.
2. Priming: Apply a coat of primer to the sanded surface of your boxes. This will create a base for the paint to adhere to and ensure a professional finish. Choose a primer that is suitable for the material of your boxes.
3. Painting: Once the primer is dry, it’s time to paint your boxes. Select colors that complement your decor or go for bold and vibrant hues for a statement piece. Use a brush or roller to apply an even coat of paint. Consider adding multiple layers for a more opaque finish.
4. Stenciling or Decoupage: If you want to add intricate designs or patterns to your storage boxes, consider using stencils or decoupage techniques. Stencils allow you to create precise shapes, while decoupage involves gluing decorative paper or fabric onto the surface. Get creative and experiment with different designs.
5. Sealing: To protect the painted surface and make it more durable, apply a layer of sealant or varnish. This will also give your boxes a glossy or satin finish, depending on your preference. Follow the manufacturer’s instructions for the best results.
6. Adding Hardware: Enhance the functionality and aesthetics of your decorative storage boxes by adding hardware such as handles, knobs, or decorative corners. Choose hardware that complements the style of your boxes and securely attach them using screws or adhesive.
7. Organizing: Once your DIY decorative storage boxes are complete, it’s time to put them to use. Organize your belongings inside the boxes and place them in your desired storage area. These stylish and personalized storage solutions will not only keep your space clutter-free but also add a touch of charm and creativity.
Follow these step-by-step instructions to add the perfect finishing touches to your DIY decorative storage boxes. With a little time and creativity, you can transform ordinary boxes into functional and visually appealing storage solutions that reflect your personal style.
3. Creative Ideas for DIY Decorative Storage Boxes
Decorative storage boxes are not only functional but can also add a touch of style to any room. Instead of spending money on store-bought options, why not get creative and make your own? DIY decorative storage boxes allow you to personalize the design and customize them to match your home decor. Here are 10 creative ideas to inspire you:
1. Fabric-Covered Boxes: Use leftover fabric or choose a patterned fabric that complements your room’s color scheme. Wrap the fabric tightly around the box, securing it with glue or double-sided tape.
2. Vintage Book Boxes: Turn old books into decorative storage boxes by hollowing them out and adding a fabric or paper lining. Stack the books together to create a unique vintage-inspired storage solution.
3. Painted Wooden Boxes: Give plain wooden boxes a makeover with a coat of paint. You can use different colors to create a fun and vibrant look or stick to a single color for a more cohesive design.
4. Decoupage Technique: Cut out images or patterns from magazines or printed paper and adhere them to the box using decoupage glue. Finish with a layer of clear varnish for a polished look.
5. Rope-Wrapped Boxes: Wrap thick jute or sisal rope around the box, securing it with hot glue. This rustic and natural-looking storage box is perfect for a coastal or farmhouse-themed decor.
6. Chalkboard Label Boxes: Paint the surface of the box with chalkboard paint and use chalk or chalk markers to write labels or doodle designs. This allows you to easily change the contents of the box without having to relabel it.
7. Washi Tape Design: Jazz up plain cardboard or plastic boxes with colorful washi tape. Create patterns or designs with the tape, and mix and match different colors and widths for a unique look.
8. Fabric Padded Boxes: Add a touch of luxury to your storage boxes by padding them with foam and covering them with your favorite fabric. This is a great option for storing delicate items like jewelry or accessories.
9. Stenciled Boxes: Use stencils and acrylic paint to create intricate designs on the surface of the box. You can choose from a wide variety of stencil patterns or create your own for a truly personalized touch.
10. Paper Mache Boxes: Create your own paper mache boxes in any shape or size. Use colorful tissue paper or decorative napkins to cover the boxes and give them a unique and textured look.
These DIY decorative storage box ideas offer endless possibilities for adding a personal touch to your organization and storage solutions. Get creative and have fun with your designs!
3.1. Using fabric and ribbon
Using fabric and ribbon is a great way to add a touch of creativity and personalization to your DIY decorative storage boxes. Here are some creative ideas to inspire you:
1. Fabric-Covered Boxes: Choose a fabric that complements your room’s decor and wrap it around the box, securing it with glue or adhesive. This not only adds a pop of color but also protects the box from wear and tear.
2. Ribbon Handles: Instead of using traditional handles, attach colorful ribbons to the sides of the box. This not only makes it easier to carry the box but also adds a decorative element.
3. Patchwork Design: Cut small pieces of different fabrics and create a patchwork design on the box. You can arrange them in a random or organized pattern, depending on your preference.
4. Embellishments: Add additional embellishments like buttons, beads, or sequins to the fabric-covered box. This will give it a unique and textured look.
5. Ribbon Borders: Attach ribbons along the edges of the box to create a border. You can choose ribbons of different colors, patterns, or widths to create a visually appealing design.
6. Fabric Labels: Use small pieces of fabric to create labels for your storage boxes. This not only helps in organizing but also adds a personalized touch.
7. Fabric Pockets: Attach small fabric pockets to the exterior of the box. These pockets can be used to store small items like notes, bookmarks, or trinkets.
8. Ribbon Closure: Instead of using traditional closures like clasps or latches, use ribbons to tie a bow around the box. This adds a whimsical touch and keeps the contents secure.
9. Fabric Dividers: If you have larger storage boxes, you can create fabric dividers to separate different items. This helps in keeping the contents organized and prevents them from getting jumbled.
10. Mixed Media: Experiment with combining fabric, ribbon, and other materials like paper, lace, or twine to create a mixed media effect. This adds depth and interest to your decorative storage boxes.
These are just a few ideas to get you started. Feel free to mix and match techniques or come up with your own unique ideas. Let your creativity flow and have fun decorating your DIY decorative storage boxes!
3.2. Painting and stenciling techniques
Painting and stenciling techniques are great ways to add a creative touch to DIY decorative storage boxes. By using different paint colors and patterns, you can transform plain and boring boxes into unique and eye-catching storage solutions. Here are some ideas to get you started:
1. Color-blocking: Paint the entire box in one color and then use painter’s tape to create geometric shapes or patterns. Apply a contrasting color to the exposed areas, and peel off the tape to reveal crisp lines.
2. Ombre effect: Gradually blend two or more shades of the same color on the box. Start with the darkest shade at the bottom and gradually lighten the color as you move upwards. This creates a beautiful ombre effect.
3. Stenciling: Use stencils to add intricate designs to the box. You can either paint over the stencil or use a sponge to dab the paint for a textured look.
4. Decoupage: Cut out decorative paper or fabric and adhere it to the box using decoupage glue. This technique allows you to create a variety of patterns and designs.
5. Floral motifs: Paint or stencil delicate flowers or leaves onto the box. This adds a feminine and elegant touch to your storage solution.
6. Chalkboard paint: Apply a coat of chalkboard paint to the box, allowing you to write labels or notes directly on the surface. This is a practical and customizable option.
7. Metallic accents: Use metallic paints or leafing to add a glamorous touch to your storage boxes. Paint the entire box or create metallic designs for a luxurious look.
8. Polka dots: Create a fun and playful design by painting polka dots of various sizes and colors on the box. This is a simple yet effective way to add visual interest.
9. Stripes: Paint horizontal or vertical stripes on the box using different colors. This creates a bold and modern look.
10. Nature-inspired: Paint or stencil nature-inspired elements like trees, birds, or landscapes on the box. This brings a touch of the outdoors into your home.
These painting and stenciling techniques offer endless possibilities for transforming plain storage boxes into personalized and decorative pieces. Get creative and have fun experimenting with different colors, patterns, and designs to make your storage solutions truly unique!
3.3. Decoupage and paper crafts
Decoupage and paper crafts are great techniques to use when creating DIY decorative storage boxes. These methods allow you to transform plain, ordinary boxes into beautiful and unique storage solutions.
One creative idea is to use decoupage to cover the entire surface of the storage box with decorative paper. You can choose from a wide variety of patterned or textured paper to suit your style and preferences. Simply apply a layer of decoupage glue to the box, place the paper on top, and smooth out any wrinkles or air bubbles. Once dry, you can add additional layers of decoupage glue to seal and protect the paper.
Another idea is to incorporate paper crafts into your storage box design. For example, you can create origami boxes or paper flowers to adorn the top of the box. These small paper crafts can add a personalized touch to your storage solution.
In addition to decoupage and paper crafts, you can also consider using other materials, such as fabric or ribbon, to embellish your storage boxes. For instance, you can wrap fabric around the sides of the box and secure it with glue or decorative ribbon. This will not only add visual interest but also provide a soft and tactile feel to the box.
By utilizing decoupage, paper crafts, and other creative techniques, you can easily transform plain storage boxes into stylish and decorative pieces for your home. These DIY projects allow you to showcase your creativity while also providing practical storage solutions.
3.4. Embellishments and accessories
Embellishments and accessories are essential elements when it comes to adding a personal touch to your DIY decorative storage boxes. These small details can transform a plain box into a stunning piece of decor that reflects your unique style and taste. Here are some creative ideas to inspire you in embellishing and accessorizing your storage boxes:
1. Decorative Paper: Choose patterned or textured paper to cover the exterior of your storage box. You can find a wide variety of beautiful papers in craft stores or online. Simply measure and cut the paper to fit the dimensions of your box, then use adhesive to secure it in place.
2. Ribbons and Bows: Add a touch of elegance by attaching ribbons and bows to your storage boxes. You can use satin ribbons, lace ribbons, or even burlap ribbons for a rustic look. Tie a bow around the box or create intricate patterns with different colored ribbons.
3. Fabric Wraps: Instead of using paper, you can also use fabric to wrap your storage boxes. Choose a fabric that complements your home decor and cut it to the appropriate size. Use fabric glue or double-sided tape to secure the fabric around the box, creating clean and seamless edges.
4. Decorative Trims: Enhance the edges of your storage boxes by adding decorative trims. These can be in the form of lace trims, pom-pom trims, or even beaded trims. Glue the trims around the edges of the box to give it a stylish and finished look.
5. Stencils and Paint: Get creative with stencils and paint to add intricate designs to your storage boxes. You can use acrylic paint and stencils to create patterns, motifs, or even personalized monograms. Allow the paint to dry completely before using or storing the boxes.
6. Vintage Embellishments: For a vintage or shabby chic look, consider adding antique or vintage-inspired embellishments to your storage boxes. These can include decorative keys, metal corners, vintage labels, or even old-fashioned lockets. Glue these embellishments onto the box for a touch of nostalgia.
7. Upholstery Tacks: If you want a more industrial or edgy look, upholstery tacks can be a great option. These metal tacks can be hammered into the surface of the box, creating a unique and eye-catching design. Arrange the tacks in a pattern or create your own custom design.
8. Personalized Labels: Add a personal touch by attaching personalized labels to your storage boxes. You can use printable labels or create your own with cardstock and a printer. Label the boxes with their contents or use them to organize different areas of your home.
9. Embroidery and Appliques: For a textured and intricate look, consider using embroidery or fabric appliques on your storage boxes. Embroider patterns or designs onto fabric and then glue or stitch the fabric onto the box. This technique adds a unique and handmade feel to your storage boxes.
10. Nature-inspired Elements: Bring a touch of nature into your storage boxes by incorporating natural elements such as dried flowers, feathers, or seashells. Use adhesive or hot glue to attach these elements onto the box, creating a whimsical and organic look.
These embellishments and accessories offer endless possibilities for creating beautiful and personalized DIY decorative storage boxes. Let your creativity soar and have fun transforming simple boxes into stunning pieces of decor!
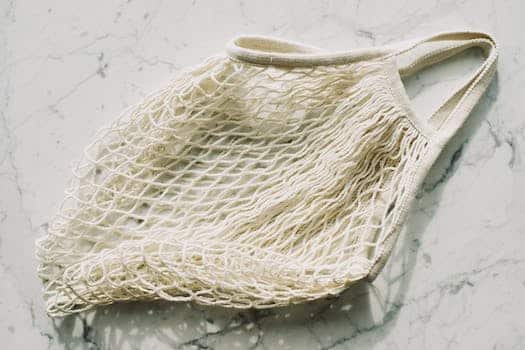
3.5. Upcycling old materials
Upcycling old materials is a great way to create unique and eco-friendly decorative storage boxes. Instead of throwing away old items, you can give them a new life by transforming them into stylish storage solutions. Here are some creative ideas for DIY decorative storage boxes:
1. Vintage Suitcase Storage: Turn an old suitcase into a charming storage box by adding a coat of paint and some decorative embellishments. Use it to store blankets, books, or any other items you want to keep organized.
2. Fabric-Covered Shoebox: Give plain shoeboxes a makeover by covering them with colorful fabric. Use fabric glue to secure the fabric to the box and add a decorative bow or ribbon for an extra touch.
3. Wine Crate Shelving: Repurpose wooden wine crates into unique storage shelves. Stack the crates vertically or horizontally, and secure them together with screws. You can use these shelves to display books, plants, or decorative items.
4. Mason Jar Organizer: Attach mason jar lids to the underside of a shelf or a wooden board. Screw the jars onto the lids, and you’ll have a handy organizer for storing small items like craft supplies, office supplies, or spices.
5. Magazine Holder from Cereal Boxes: Cut and fold cereal boxes into magazine holders. Decorate them with wrapping paper, fabric, or paint to match your decor. These holders are perfect for organizing magazines, papers, or even mail.
6. Leather Belt Storage Box: Wrap an old leather belt around a plain wooden box to give it a rustic and stylish look. Secure the belt with glue or small nails. This box can be used to store remote controls, small electronics, or other miscellaneous items.
7. Tin Can Desk Organizer: Collect and clean empty tin cans of different sizes. Paint them in coordinating colors or cover them with patterned paper. Arrange the cans in a desired configuration, and you’ll have a practical and eye-catching desk organizer.
8. Decoupage Storage Box: Choose a plain wooden box and decorate it with decoupage. Cut out images or patterns from magazines or napkins, and adhere them to the box using decoupage glue. Finish with a coat of varnish for a durable and visually appealing storage solution.
9. Rope-Wrapped Storage Baskets: Take plain storage baskets and wrap them with rope for a natural and textured look. Use hot glue to secure the rope in place as you wrap it around the baskets. These baskets are perfect for holding towels, toiletries, or toys.
10. Book Box Hidden Storage: Transform an old hardcover book into a secret storage compartment. Cut out a section of pages from the middle of the book, leaving a hollow space. Glue the remaining pages together to create a solid base. This hidden storage box can be used to store valuables or keepsakes.
These are just a few examples of how you can upcycle old materials to create beautiful and functional decorative storage boxes. Get creative and let your imagination guide you in turning everyday items into unique storage solutions.
Conclusion
In conclusion, these 10 creative DIY decorative storage box ideas offer a fun and practical solution for organizing your belongings. With a touch of creativity and some simple materials, you can transform ordinary boxes into beautiful and functional storage solutions. Whether you need a stylish way to store your accessories, office supplies, or knick-knacks, these DIY projects provide endless possibilities to personalize your space while keeping it tidy.


5 Comments
Chantal Uyekawa
1 year agoAs a normal human visitor, I find this post intriguing and scientifically relevant. The concept of organizing belongings using decorative storage boxes aligns with the principles of cognitive psychology, specifically in the area of environmental stimuli and its impact on cognitive processes. Studies have shown that a cluttered environment can lead to increased stress levels and decreased cognitive performance. Therefore, the utilization of aesthetically pleasing storage boxes can potentially create a more visually soothing and organized living space, positively influencing cognitive processes such as attention and memory. This post serves as a valuable resource for individuals seeking inspiration on how to integrate organization and style, ultimately promoting a decluttered and harmonious environment.
Nina Holms
1 year agoWow, this post couldnt have come at a more perfect time! As someone who constantly battles with clutter, Im always on the lookout for creative storage solutions. These DIY decorative storage box ideas have truly ignited my creativity and inspired me to tackle my cluttered corners head-on. From transforming ordinary cardboard boxes into vibrant and chic organizers to repurposing vintage suitcases into charming storage units, these ideas are pure genius! I can already envision the colorful fabric-covered boxes neatly stacked on my shelves, bringing a touch of personality to my space. Thank you for sharing such fabulous inspiration, its time to declutter and make way for a more organized and stylish home!
Bonnee Sanfourd
1 year agoAs an ordinary human visitor, I find this post on DIY decorative storage box ideas quite intriguing. The concept of organizing belongings in unique and stylish ways offers a refreshing approach to decluttering. I appreciate the emphasis on DIY, as it not only allows for personal customization but also encourages a sense of creativity and resourcefulness. This post seems to provide a valuable source of inspiration for those seeking to transform their storage solutions into aesthetically pleasing and functional pieces. Overall, I am motivated to embark on my decluttering journey and explore these ten innovative ideas. Thank you for sharing this insightful and practical post!
Cecilla Lidda
1 year agoThank you for sharing these 10 DIY decorative storage box ideas. Decluttering has been a constant struggle for me, and finding stylish ways to organize my belongings is something Ive been actively seeking. These ideas seem promising and Im excited to get inspired and start implementing them. Heres to a more organized and clutter-free home!
Micaela Allene
1 year agoThese 10 DIY decorative storage box ideas present a fascinating array of innovative and aesthetically pleasing solutions to the eternal issue of clutter. As a normal human visitor, I find myself captivated by the prospect of discovering unique and stylish ways to organize my belongings. The notion of transforming mundane storage boxes into visually appealing pieces of functional art is truly inspiring.
In our modern world, where the accumulation of material possessions seems to be an inevitable consequence of our consumer-driven society, finding effective methods to declutter becomes crucial. These DIY decorative storage box ideas offer an enticing avenue for individuals seeking to strike a balance between functionality and design.
The idea of repurposing ordinary storage boxes into decorative pieces is not only practical but also sustainable. By utilizing existing materials, we can reduce waste and contribute to a more eco-friendly lifestyle. Moreover, the process of personalizing these storage solutions encourages creativity and self-expression, allowing ones belongings to be organized in a manner that aligns with their unique personality and taste.
Each of the 10 DIY ideas showcased in this post exhibits a distinctive charm, making it difficult to choose a favorite. From decoupage and fabric-wrapped boxes to stenciled and hand-painted designs, these storage solutions possess an inherent beauty that extends far beyond their practical purpose. They have the potential to elevate any living space, adding a touch of elegance and personality to even the most mundane corners.
In conclusion, this post serves as an excellent source of inspiration for those of us yearning to declutter and bring order to our lives. The DIY decorative storage box ideas presented here not only provide functional organization but also allow us to infuse our personal style into our living spaces. So, let us embrace this opportunity to explore our creativity, declutter our surroundings, and embark on a journey towards a more organized and visually appealing environment.