
In this article, we will explore 10 creative DIY upcycling ideas that can help you transform your old items into something new and exciting. Whether you have old furniture, clothing, or household items lying around, these ideas will inspire you to repurpose them in innovative ways. Get ready to unleash your creativity and give your old possessions a fresh lease of life!
- 1. Introduction
- 1.1. What is DIY Upcycling?
- 1.2. Benefits of DIY Upcycling
- 1.3. Popular DIY Upcycling Projects
- 1.4. Tools and Materials Needed
- 1.5. Safety Precautions
- 2. Getting Started with DIY Upcycling
- 2.1. Finding Inspiration
- 2.2. Choosing the Right Items to Upcycle
- 2.3. Preparing the Items for Upcycling
- 2.4. Gathering Necessary Supplies
- 2.5. Setting Up Your Workspace
- 3. Step-by-Step Guide to DIY Upcycling
1. Introduction
Upcycling is a creative and sustainable way to give new life to old items that would otherwise end up in the landfill. By repurposing and transforming these items, you can not only save money but also reduce waste and contribute to a more eco-friendly lifestyle. In this article, we will explore 10 creative DIY upcycling ideas that will inspire you to transform your old items into something unique and useful. Whether it’s turning an old ladder into a bookshelf or repurposing glass jars into stylish storage containers, these ideas will unleash your creativity and help you give a second life to your old possessions.
1.1. What is DIY Upcycling?
DIY Upcycling is the process of transforming old or unused items into something new and useful. It involves repurposing materials and giving them a new life, rather than throwing them away. Upcycling is a creative way to reduce waste and promote sustainability, as it allows us to make the most out of what we already have. By using our creativity and imagination, we can turn ordinary objects into unique and personalized pieces that add character to our homes or wardrobes. Whether it’s painting an old piece of furniture, turning an empty wine bottle into a decorative vase, or transforming a pair of jeans into a trendy tote bag, DIY Upcycling offers endless possibilities for breathing new life into our belongings.
1.2. Benefits of DIY Upcycling
Upcycling, also known as creative reuse, is the process of transforming old or discarded items into something new and valuable. DIY upcycling takes this concept a step further by allowing individuals to create unique and personalized items using their own creativity and skills. This article explores the benefits of DIY upcycling and how it can help transform your old items into something fresh and exciting.
1.3. Popular DIY Upcycling Projects
Upcycling is a popular trend that involves transforming old or discarded items into something new and useful. It is not only a creative way to repurpose items but also a sustainable practice that helps reduce waste. In this article, we will explore 10 creative DIY upcycling ideas that you can use to transform your old items into unique and functional pieces for your home. These projects are not only fun and fulfilling but also allow you to add a personal touch to your space while being environmentally friendly. Let’s dive into the world of upcycling and discover some amazing projects!
1.4. Tools and Materials Needed
When it comes to upcycling your old items, having the right tools and materials is essential. These items will not only make your DIY projects easier but also help you achieve a professional and polished result. Here are some of the must-have tools and materials for your upcycling endeavors:
1. Sandpaper: A variety of sandpaper grits will come in handy for sanding down surfaces and preparing them for painting or staining.
2. Paintbrushes: Different sizes and types of paintbrushes will allow you to apply paint smoothly and precisely.
3. Spray Paint: This versatile paint option is great for covering large surfaces quickly and evenly.
4. Adhesive: Whether it’s glue, epoxy, or double-sided tape, having a reliable adhesive will help you securely attach different components.
5. Cutting tools: A set of sharp scissors, a craft knife, or a saw will assist in cutting and shaping materials during your upcycling projects.
6. Primer: Applying a primer before painting will ensure better adhesion and longevity of the paint.
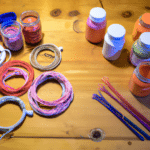
7. Decorative elements: Get creative with embellishments like beads, buttons, ribbons, or stencils to add a unique touch to your upcycled items.
8. Safety gear: Don’t forget to protect yourself with gloves, goggles, and a mask when working with potentially hazardous materials.
Remember, the specific tools and materials you need may vary depending on the project you choose. It’s always a good idea to plan ahead and gather everything you need before starting your upcycling journey. Happy crafting!
1.5. Safety Precautions
Upcycling is a fantastic way to breathe new life into your old items and reduce waste. By transforming discarded objects into something useful or aesthetically pleasing, you not only save money but also contribute to a more sustainable lifestyle. However, when undertaking any DIY upcycling project, it is crucial to prioritize safety precautions to prevent accidents or injuries. This section will outline some essential safety measures to consider before diving into your creative upcycling endeavors.
2. Getting Started with DIY Upcycling
Upcycling is a creative and sustainable way to transform your old items into something new and useful. It is a process of repurposing and giving a new life to objects that would otherwise be discarded. By upcycling, you not only save money but also contribute to reducing waste and minimizing your environmental footprint. If you’re new to DIY upcycling, here are some steps to help you get started:
2.1. Finding Inspiration
When it comes to upcycling, finding inspiration is the first step towards getting started with transforming your old items into something new and unique. The possibilities are endless, and all it takes is a little creativity and vision. Here are some ways to find inspiration for your DIY upcycling projects:
1. Nature: Take a walk in the park or spend some time in your garden. Nature is a great source of inspiration, with its colors, textures, and patterns. Look closely at the leaves, flowers, and even the insects for unique design ideas.
2. Pinterest and Instagram: These social media platforms are treasure troves of DIY upcycling ideas. Follow accounts or boards that focus on upcycling or repurposing, and you’ll have a constant stream of inspiration right at your fingertips.
3. Thrift stores and flea markets: Browse through thrift stores and flea markets for old items that can be upcycled. You never know what hidden gems you might find that can spark your creativity. Look for items with interesting shapes or materials that can be transformed into something new.
4. Upcycling communities and forums: Join online communities or forums dedicated to upcycling. These platforms are a great way to connect with like-minded individuals who share their projects, ideas, and inspiration. You can learn from others and also get feedback on your own projects.
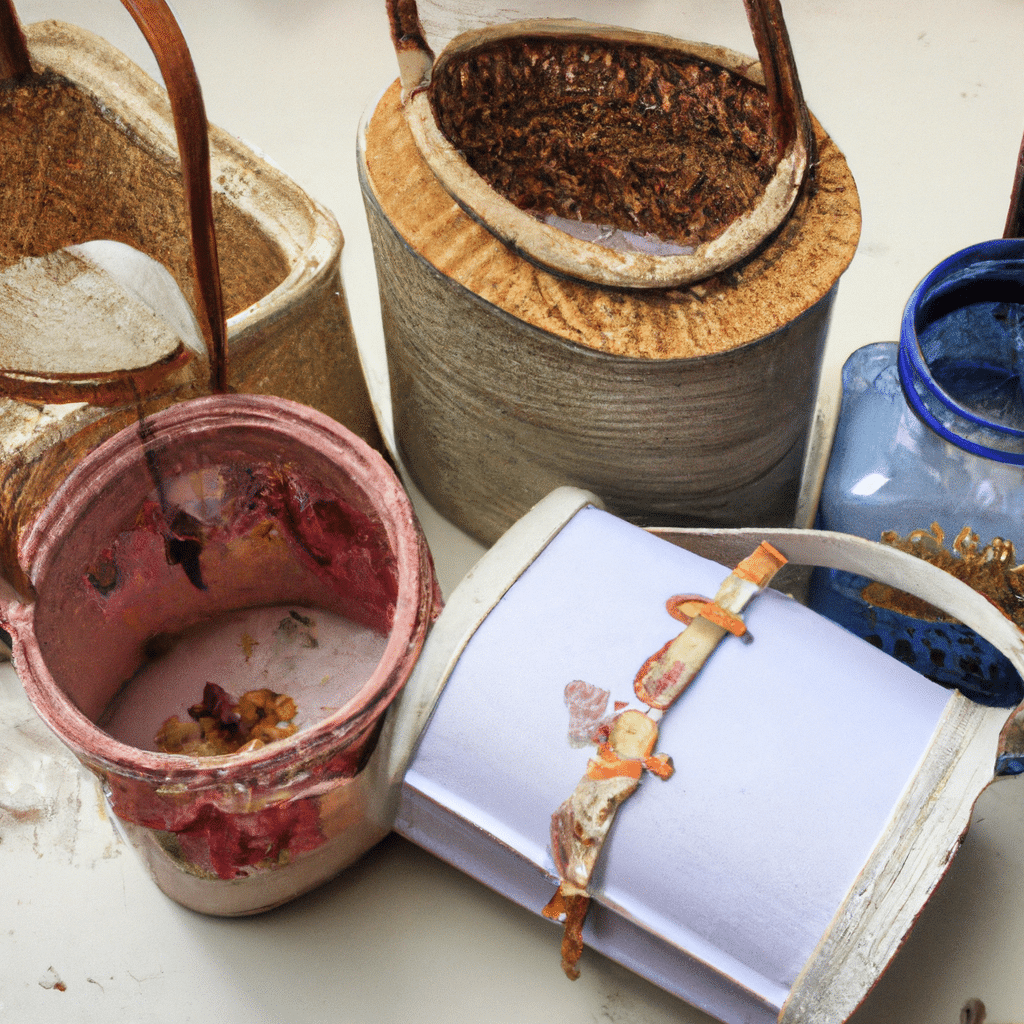
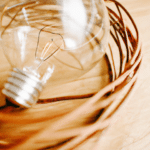
5. Everyday objects: Sometimes, inspiration can be found in the most unexpected places. Look around your home and see if there are any everyday objects that can be transformed into something unique. It could be an old jar, a piece of fabric, or even a broken piece of furniture.
Remember, the key to finding inspiration is to keep an open mind and let your imagination run wild. Don’t be afraid to experiment and think outside the box. With a little inspiration, you can turn your old items into beautiful and functional pieces that reflect your personal style.
2.2. Choosing the Right Items to Upcycle
Before diving into the world of DIY upcycling, it’s important to choose the right items to upcycle. Upcycling involves transforming old or unused items into something new and useful. To ensure successful upcycling projects, consider the following tips:
1. Assess the condition: Look for items that are in good condition and structurally sound. Avoid items that are heavily damaged or beyond repair.
2. Consider functionality: Think about how the item can be repurposed and whether it will serve a practical purpose. For example, an old wooden ladder can be transformed into a unique bookshelf.
3. Look for unique features: Choose items with unique characteristics that can be enhanced through upcycling. This could include interesting textures, patterns, or shapes.
4. Keep an open mind: Don’t limit yourself to traditional upcycling items. Get creative and think outside the box. Almost anything can be upcycled with the right vision and techniques.
By carefully selecting the right items to upcycle, you can embark on a rewarding journey of DIY upcycling and give new life to old items.
2.3. Preparing the Items for Upcycling
Before diving into the exciting world of DIY upcycling, it’s important to properly prepare the items you plan to transform. Taking the time to clean and assess the condition of each item will ensure the best results for your upcycling project. Here are some steps to follow when preparing your items for upcycling:
1. Clean the item: Start by thoroughly cleaning the item to remove any dirt, dust, or grime. Use appropriate cleaning products and techniques based on the material of the item.
2. Repair any damages: Inspect the item for any damages such as cracks, chips, or loose parts. If possible, fix these issues before starting the upcycling process.
3. Sand or strip the surface: Depending on the look you want to achieve, you may need to sand or strip the surface of the item. This step helps to remove any existing finish or roughen the surface for better paint adhesion.
4. Prime the item: Applying a primer can help improve the durability and adhesion of the paint. Choose a primer suitable for the material of the item.
5. Choose your design or color scheme: Before starting the upcycling process, decide on the design or color scheme you want to achieve. This will guide your choice of paint and other decorative elements.
By following these preparation steps, you will be ready to embark on your DIY upcycling journey and transform your old items into something new and exciting!
2.4. Gathering Necessary Supplies
Before diving into the world of DIY upcycling, it’s essential to gather all the necessary supplies. Having the right tools and materials on hand will make the process smoother and more enjoyable. Here are some basic supplies you’ll need to get started:
1. Old items: Look around your house for old items that you no longer use or are about to throw away. These can include furniture, accessories, clothing, and more.
2. Safety equipment: It’s important to prioritize safety when working on any DIY project. Make sure you have gloves, goggles, and a mask to protect yourself from any potential hazards.
3. Basic tools: Invest in a good set of basic tools such as screwdrivers, pliers, hammer, measuring tape, and a utility knife. These will come in handy for various upcycling projects.
4. Adhesives and fasteners: Depending on the project, you may need different types of adhesives like glue, epoxy, or super glue. Additionally, keep a stock of screws, nails, and other fasteners for joining materials together.
5. Paint and brushes: One of the easiest ways to transform old items is by giving them a fresh coat of paint. Stock up on different colors of paint and brushes of various sizes to add a pop of color or create unique patterns.
6. Decorative elements: Consider adding decorative elements like ribbons, beads, fabric patches, or stencils to enhance the look of your upcycled creations.
Once you have all these supplies ready, you’ll be well-equipped to start your DIY upcycling journey and turn your old items into something new and exciting!
2.5. Setting Up Your Workspace
When it comes to getting started with DIY upcycling, one of the first things you’ll need to do is set up your workspace. Having a dedicated area for your upcycling projects will not only make it easier to organize and find your materials, but it will also help you stay focused and inspired. Here are a few tips to help you create the perfect workspace for your upcycling endeavors:
1. Find a well-lit area: Natural light is ideal, but if that’s not possible, make sure you have adequate artificial lighting to work with. Good lighting will help you see the details and colors of the items you’re upcycling.
2. Clear the clutter: Before you begin, clear out any unnecessary items from your workspace. Having a clean and clutter-free area will allow you to concentrate on your projects without distractions.
3. Organize your tools and materials: Invest in storage solutions such as shelves, bins, and drawers to keep your tools and materials organized. This will save you time and frustration when searching for specific items.
4. Set up a work surface: Whether it’s a table, desk, or a dedicated workbench, make sure you have a sturdy and spacious surface to work on. This will provide you with enough room to spread out your materials and comfortably work on your projects.
5. Consider ventilation: Some upcycling projects may involve the use of paints, adhesives, or other chemicals. It’s important to have proper ventilation in your workspace to ensure a safe and healthy environment.
By setting up your workspace properly, you’ll be ready to dive into the world of DIY upcycling with ease and efficiency. Happy upcycling!
3. Step-by-Step Guide to DIY Upcycling
Upcycling, also known as creative reuse, is the process of transforming old or discarded items into something new and useful. It’s a great way to give new life to old objects while reducing waste. If you’re looking to embark on a DIY upcycling project, we’ve got you covered with this step-by-step guide. Whether you’re a beginner or a seasoned crafter, these easy-to-follow steps will help you transform your old items into unique and stylish creations. So let’s get started!
3.1. Cleaning and Preparing the Item
Before you can start the upcycling process, it’s important to thoroughly clean and prepare the item you wish to transform. Follow this step-by-step guide to ensure successful DIY upcycling:
1. Clean the item: Begin by giving the item a good clean to remove any dirt, dust, or grime. Use a mild soap or detergent and warm water to gently scrub the surface. Rinse it thoroughly and let it dry completely before moving on to the next step.
2. Sand or strip the surface: If the item has a glossy or painted surface, you may need to sand it down or strip off the existing finish. This will provide a better surface for paint or other decorative elements to adhere to. Use sandpaper or a paint stripper as needed, following the manufacturer’s instructions.
3. Repair any damages: Assess the item for any damages, such as cracks, broken parts, or loose fittings. Take the time to fix these issues before proceeding with the upcycling process. Use appropriate glue, screws, or other repair methods to ensure the item is sturdy and functional.
4. Decide on a design: Once the item is clean and repaired, brainstorm ideas for transforming it into something new and unique. Consider the purpose of the item and how it can be repurposed. Browse online for inspiration or sketch out your own design.
5. Gather necessary materials: Based on your chosen design, make a list of materials and tools you’ll need for the upcycling project. This may include paint, brushes, stencils, fabrics, adhesives, or any other supplies. Ensure you have everything on hand before starting the transformation.
6. Protect the work area: Before diving into the upcycling process, take measures to protect your work area. Lay down a plastic sheet or old newspapers to catch any spills or drips. This will make the cleanup process much easier once you’re done.
By following these steps and preparing the item properly, you’ll be ready to unleash your creativity and turn your old items into something new and exciting!
3.2. Choosing a Design or Style
When it comes to upcycling, choosing a design or style is an essential step in transforming your old items into unique and personalized creations. With so many options available, it can be overwhelming to decide where to start. However, with a step-by-step guide, you can easily navigate through the process and find the perfect design or style for your DIY upcycling project.
Firstly, consider the purpose or function of the item you want to upcycle. Are you looking to turn an old dresser into a stylish bookshelf or transform a worn-out t-shirt into a trendy tote bag? Understanding the purpose will help you determine the design elements that will best suit the item.
Next, gather inspiration from various sources such as magazines, websites, or social media platforms dedicated to upcycling and DIY projects. Create a mood board or save images that resonate with your style preferences. This will give you a clearer vision of the design or style you want to achieve.
Once you have a general idea, think about the materials and techniques you want to incorporate. Upcycling allows you to experiment with different materials, such as repurposed fabrics, reclaimed wood, or even vintage buttons. Consider the textures, colors, and patterns that will complement your chosen design or style.
Additionally, take into account your skill level and the tools you have available. If you’re a beginner, opt for simpler designs that require basic techniques and tools. As you gain confidence and experience, you can challenge yourself with more complex projects.
Lastly, don’t be afraid to add your personal touch to the design or style. Upcycling is all about expressing your creativity and making something one-of-a-kind. Whether it’s incorporating unique embellishments, adding a pop of color, or experimenting with unconventional shapes, let your imagination guide you.
By following this step-by-step guide, you’ll be well on your way to choosing the perfect design or style for your DIY upcycling project. Remember, the possibilities are endless, and the satisfaction of transforming old items into something new and beautiful is truly rewarding.
3.3. Repurposing and Transforming the Item
Repurposing and transforming old items through the DIY upcycling process is a great way to give new life to things that may have otherwise been discarded. Upcycling refers to the act of taking an item that is no longer useful or relevant in its current state and turning it into something functional or aesthetically pleasing. Not only does this save money and reduce waste, but it also allows for personal creativity and customization.
To successfully upcycle an old item, it is important to follow a step-by-step guide that ensures a smooth transformation process. Here is a comprehensive guide to DIY upcycling:
1. Identify the item: Start by selecting the item you wish to upcycle. This could be anything from old furniture, clothing, or even household objects.
2. Assess its condition: Before starting the upcycling process, assess the condition of the item. Determine if any repairs or cleaning are needed before proceeding.
3. Brainstorm ideas: Let your imagination run wild and brainstorm different ideas on how you can transform the item. Consider its potential uses, such as turning an old ladder into a bookshelf or repurposing a wooden pallet into a coffee table.
4. Gather necessary materials: Once you have a clear vision of how you want to transform the item, gather all the necessary materials and tools needed for the upcycling process. This may include paints, brushes, screws, or any other supplies.
5. Plan the transformation: Create a detailed plan or sketch of how you want the item to look after upcycling. This will help you stay organized and focused throughout the process.
6. Start the transformation: Begin by cleaning or repairing the item if necessary. Then, follow your plan and start the upcycling process. This may involve painting, sanding, cutting, or any other techniques required for the transformation.
7. Add personal touches: Don’t forget to add your personal touch to the upcycled item. This could be through unique paint colors, decorative elements, or even incorporating sentimental objects.
8. Test functionality: Once the transformation is complete, test the functionality of the upcycled item. Make sure it serves its intended purpose and is durable.
9. Showcase your creation: Display your upcycled item proudly and share it with others. Whether it’s in your home, at an art exhibition, or through social media, let others appreciate your creativity and inspire them to upcycle as well.
10. Continue exploring: Upcycling is an ongoing journey of creativity and sustainability. Continue exploring new ideas and techniques, and challenge yourself to transform more old items into something extraordinary.
3.4. Adding Finishing Touches
Once you have completed the main steps of your DIY upcycling project, it’s time to add those finishing touches that will truly transform your old items into something new and unique. These final details can make all the difference in the overall appearance and functionality of your upcycled piece. Here are some tips to help you add those perfect finishing touches:
1. Paint or stain: Depending on the material of your item, consider adding a fresh coat of paint or a stain to give it a polished look. Choose a color or finish that complements your overall design theme.
2. Decorative elements: Get creative with embellishments such as buttons, beads, ribbons, or appliques. These small additions can add a pop of color or texture to your upcycled item.
3. Hardware upgrades: Replace old or worn-out hardware with new knobs, handles, or hinges. This simple change can instantly update the look of your piece and improve its functionality.
4. Upholstery or fabric: If your upcycling project involves furniture or soft items, consider reupholstering or adding new fabric to breathe new life into them. Choose a fabric that suits your style and complements the overall design.
5. Personalize it: Add a personal touch to your upcycled item by incorporating monograms, stencils, or hand-painted designs. This will make it truly one-of-a-kind and reflect your individual style.
Remember, the finishing touches are what make your upcycled items stand out and showcase your creativity. Don’t be afraid to experiment and let your imagination run wild!
3.5. Finalizing and Evaluating Your Upcycled Creation
Once you have completed the upcycling process and transformed your old item into something new and exciting, it’s time to finalize and evaluate your creation. This step is crucial in ensuring that your upcycled creation meets your expectations and is ready to be used or displayed.
To begin, carefully inspect your upcycled creation from all angles. Look for any imperfections, such as loose screws, uneven paint, or any other flaws that need to be addressed. Make note of these issues as you will want to fix them before considering your project complete.
Next, evaluate the functionality of your upcycled creation. If it is a piece of furniture, sit on it or test its stability. If it is a decorative item, make sure it will serve its intended purpose and fit well within your space. Consider the overall usability and practicality of your creation.
Once you have assessed the physical aspects of your upcycled creation, take a step back and evaluate its aesthetic appeal. Does it align with your desired style and taste? Consider the color scheme, texture, and overall visual impact. If necessary, make any final adjustments or enhancements to achieve the desired look.
Lastly, involve others in the evaluation process. Seek feedback from family members, friends, or even online communities who share your interest in upcycling. Their input can provide valuable insights and help you identify any areas for improvement.
By finalizing and evaluating your upcycled creation, you ensure that it meets your standards of quality, functionality, and aesthetics. This step allows you to make any necessary refinements and guarantee that your transformed item is truly ready to be enjoyed or showcased.
Conclusion
In conclusion, these 10 creative DIY upcycling ideas offer a fantastic way to transform your old items into something new and unique. By repurposing and reimagining everyday objects, you can unleash your creativity and contribute to a more sustainable lifestyle. So, gather your supplies and get ready to embark on a fun and environmentally-friendly upcycling journey!
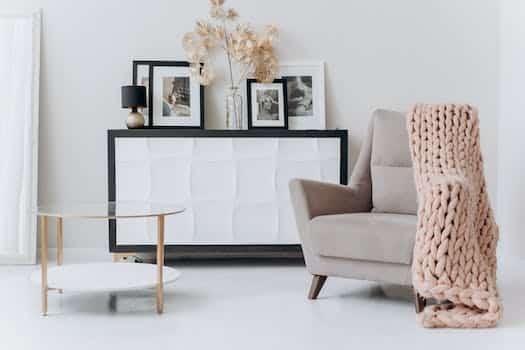

These 10 innovative and imaginative DIY home decor ideas from [object Object] provide a refreshing approach to enhancing ones living…