
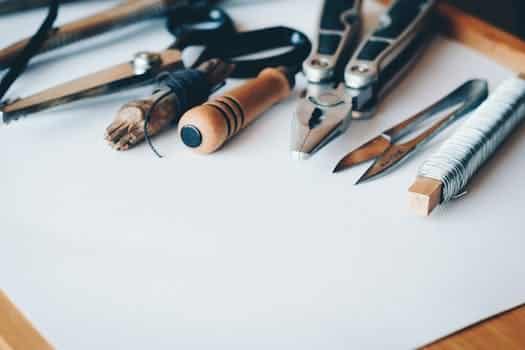
Looking for unique ways to spruce up your home without breaking the bank? Upcycling is the perfect solution! By repurposing old items, you can add a personal touch to your decor while reducing waste. Here are 10 creative DIY upcycling projects that will transform your space and showcase your creativity.
- 1. Creative DIY Upcycling Projects
- 1.1. Introduction
- 1.2. Why Upcycling?
- 1.3. Benefits of Upcycling
- 1.4. Materials You Will Need
- 1.5. Safety Tips
- 2. Project 1: Repurposed T-Shirt Tote Bag
- 2.1. Step 1: Gather Materials
- 2.2. Step 2: Cut T-Shirt
- 2.3. Step 3: Sew T-Shirt
- 2.4. Step 4: Create Handles
- 2.5. Step 5: Finishing Touches
- 3. Project 2: Mason Jar Herb Garden
- 3.1. Step 1: Gather Materials
- 3.2. Step 2: Prepare Jars
- 3.3. Step 3: Plant Herbs
- 3.4. Step 4: Label Jars
- 3.5. Step 5: Display Your Garden
- 4. Project 3: Wine Cork Coasters
- 4.1. Step 1: Gather Materials
- 4.2. Step 2: Cut Corks
- 4.3. Step 3: Arrange Corks
- 4.4. Step 4: Glue Corks
- 4.5. Step 5: Protect Your Coasters
1. Creative DIY Upcycling Projects
Upcycling is a great way to breathe new life into old items that would otherwise end up in a landfill. With a little creativity and some basic DIY skills, you can transform old and forgotten items into beautiful and functional pieces for your home. Here are 10 creative DIY upcycling projects to get you started:
1.1. Introduction
Upcycling, the process of transforming old or discarded materials into something new and functional, is a great way to give a new life to items that would otherwise end up in a landfill. With a little creativity and some basic crafting skills, you can turn everyday objects into unique and stylish pieces that will add character to your home. In this article, we’ve compiled a list of 10 creative DIY upcycling projects that will inspire you to transform your home and reduce your environmental impact.
1.2. Why Upcycling?
Upcycling is a great way to not only give a new life to old items but also to reduce waste and save money. By transforming items that would otherwise be thrown away into something new and beautiful, you can create a unique and personalized look for your home. Upcycling also allows you to exercise your creativity and DIY skills, making it a fun and fulfilling activity. So, why not give upcycling a try and see what amazing things you can create?
1.3. Benefits of Upcycling
Upcycling is not only beneficial for the environment, but it can also bring a unique touch to your home decor. By transforming old or unused items into something new and useful, you can reduce waste, save money, and showcase your creativity. Upcycling also allows you to personalize your space and add character to your home, making it more inviting and cozy.
1.4. Materials You Will Need
To get started on your creative DIY upcycling projects, you’ll need a few basic materials. These include: old items that you want to upcycle, such as furniture, clothing, or decor pieces; paint and paint brushes; sandpaper; glue or a glue gun; scissors; and any additional materials you may need for specific projects, such as fabric or stencils. With these supplies on hand, you’ll be ready to transform your home with unique and eco-friendly upcycling projects.
1.5. Safety Tips
When embarking on a DIY upcycling project, it’s important to prioritize safety. Always wear gloves and protective eyewear when handling potentially hazardous materials like glass, metal, or chemicals. Make sure to work in a well-ventilated area and keep sharp tools out of reach of children or pets. Additionally, be sure to properly dispose of any waste or materials that cannot be recycled.
2. Project 1: Repurposed T-Shirt Tote Bag
For Project 1, we will be repurposing old t-shirts into tote bags. This is a great way to reuse clothes that are no longer being worn and create a functional item. All you need is an old t-shirt, scissors, and a sewing machine (or needle and thread). Simply cut off the sleeves and neckline of the t-shirt, leaving the bottom hem intact. Then, sew the bottom of the shirt closed to create a bag. Finally, cut strips from the top of the shirt to create the handles. You can jazz up the bag with fabric paint or by adding embellishments like buttons or fringe. This tote bag is perfect for carrying groceries, books, or anything else you need to haul around.
2.1. Step 1: Gather Materials
To get started on Project 1: Repurposed T-Shirt Tote Bag, you’ll need a few materials. The first thing you’ll need is an old T-shirt that you no longer wear. The T-shirt should be made of a sturdy material like cotton, and it should be in good condition with no holes or stains. You’ll also need a pair of sharp scissors, a ruler, and a washable fabric marker. Finally, you’ll need a sewing machine or a needle and thread if you prefer to sew by hand. Once you have all your materials, you’re ready to get started on your upcycling project!
2.2. Step 2: Cut T-Shirt
To create a repurposed T-shirt tote bag, the first step is to cut the T-shirt. Lay the T-shirt flat and cut off the sleeves and the neckline. Then, cut slits along the bottom of the T-shirt, leaving about an inch of fabric in between each slit. After that, tie the strips together in knots, creating a fringe along the bottom of the T-shirt. This will create the bottom of your tote bag.
2.3. Step 3: Sew T-Shirt
To create the repurposed T-shirt tote bag, you will need to sew the bottom of the T-shirt closed. Turn the shirt inside out and sew a straight line across the bottom. Cut off the sleeves and neckline of the shirt. Then, fold the shirt in half so that the bottom seam is in the middle. Sew the sides together, leaving the top open. Turn the bag right side out and you’re done! This simple project is a great way to upcycle an old T-shirt into a useful and stylish tote bag.
2.4. Step 4: Create Handles
To create handles for your repurposed t-shirt tote bag, you will need two strips of fabric from the same t-shirt or a coordinating color. Cut the strips about 1 inch wide and 20 inches long. Fold each strip in half lengthwise and sew along the open edge to create a tube. Turn the tubes right side out and press flat. Pin the ends of each handle to the top edge of the bag, about 1 inch from the side seams. Sew the handles securely to the bag with a box stitch, reinforcing the seams by sewing over them a few times. Your tote bag is now complete and ready to use!
2.5. Step 5: Finishing Touches
To finish off your repurposed T-shirt tote bag, you can add some final touches to make it unique and personalized. You can add decorative elements such as buttons, beads, or even embroidery to really make it your own. You can also add a lining to the inside of the bag to give it a more finished look and to protect any items you may carry inside. Another option is to add pockets to the inside or outside of the bag for additional storage. Don’t be afraid to get creative and experiment with different finishing touches to make your tote bag truly one-of-a-kind.
3. Project 2: Mason Jar Herb Garden
For Project 2, we will be creating a Mason Jar Herb Garden. This is a great way to upcycle old mason jars and bring some greenery into your home. To start, gather some mason jars, potting soil, and herb seeds. Fill each jar with the potting soil and plant the herb seeds according to the instructions on the packet. Make sure to label each jar so you know which herb is growing in which jar. Place the jars on a sunny windowsill and water them regularly. In no time, you’ll have a beautiful and functional herb garden right in your home.
3.1. Step 1: Gather Materials
To get started on your Mason Jar Herb Garden project, you will need the following materials:
– Mason jars (size of your choice)
– Potting soil
– Herb seeds or small herb plants
– Pebbles or small rocks (optional)
– Labels or markers for identifying herbs (optional)
Make sure to choose herbs that will thrive in indoor conditions and pick a variety that suits your taste and cooking needs. Once you have gathered all the necessary materials, you can move on to the next step of creating your own herb garden in a Mason jar.
3.2. Step 2: Prepare Jars
After gathering all the necessary materials, it’s time to prepare the jars for your Mason Jar Herb Garden. Start by cleaning the jars thoroughly with soap and warm water. Make sure to remove any labels or stickers from the outside of the jars. Next, drill a few small holes in the bottom of each jar to allow for proper drainage. Finally, add a layer of small rocks or pebbles to the bottom of each jar to further aid in drainage and prevent the soil from becoming waterlogged. Once the jars are prepped, you’re ready to move on to planting your herbs.
3.3. Step 3: Plant Herbs
Step 3: Plant Herbs
Once you have prepared the mason jars, it’s time to plant your herbs. Herbs like basil, thyme, parsley, and cilantro are great choices for a mason jar herb garden. Fill each jar with potting soil, leaving about an inch of space at the top. Then, make a small hole in the soil and place your herb plant inside, gently patting the soil around it to secure it in place. Water the soil until it is moist but not soaked, and place the jars in a sunny window. Make sure to water the plants regularly and trim them as needed to encourage growth. With a little patience and care, you’ll soon have a beautiful and functional herb garden right in your own home.
3.4. Step 4: Label Jars
Labeling your jars is an important step in creating your own Mason Jar Herb Garden. Not only does it make it easier to identify which herbs are in which jars, but it also adds a decorative touch to your garden. To label your jars, you can use a variety of methods such as chalk paint, chalkboard labels, or even just simple paper and tape. Get creative with your labeling and have fun with it!
3.5. Step 5: Display Your Garden
Once your Mason jar herb garden is complete, it’s time to display it for all to see! Place it in a sunny spot in your kitchen or on a windowsill. You can also get creative and hang them from a wooden board or pegboard, or even on a ladder shelf. Not only will your herb garden be functional, but it will also add a touch of natural beauty to your home decor.
4. Project 3: Wine Cork Coasters
For wine lovers looking to add a touch of elegance to their living space, consider creating wine cork coasters. Not only is this an eco-friendly way to repurpose old wine corks, but it also adds a rustic charm to your home decor. Simply gather a stack of wine corks, glue them together in a circular shape, and voila! You have a set of unique and functional coasters that are sure to impress your guests.
4.1. Step 1: Gather Materials
To start creating your wine cork coasters, you will need the following materials:
– A collection of wine corks
– A sharp knife or box cutter
– A ruler or measuring tape
– Cork or felt backing
– Glue (hot glue works best)
– Sandpaper (optional)
Make sure to gather enough wine corks to create the desired amount of coasters. You can collect them from your own wine bottles or ask friends and family to save them for you. Once you have enough corks, use a sharp knife or box cutter to slice them into even pieces, about 1/4 inch thick. Use a ruler or measuring tape to ensure that each piece is the same size. If desired, use sandpaper to smooth any rough edges.
Next, cut your cork or felt backing to the same size as your cork pieces. Apply glue to the back of each cork piece and attach it to the backing. Press down firmly to ensure it sticks. Once all of your cork pieces are attached, allow the glue to dry completely. Your wine cork coasters are now ready to use!
4.2. Step 2: Cut Corks
Once you have collected enough wine corks, the next step is to cut them into thin slices. You can use a sharp knife or a cork cutter to do this. Make sure to cut them as evenly as possible to create a uniform look for your coasters. You will need about 20-25 slices per coaster, depending on the size of the cork and the coaster. Once you have your slices, you can start arranging them in a circular pattern on a flat surface. Experiment with different layouts until you find one that you like. Then, glue the slices together using a strong adhesive like E6000. Let them dry completely before using your new wine cork coasters!
4.3. Step 3: Arrange Corks
Arrange the corks in a desired pattern for your wine cork coasters. You can create a uniform pattern or mix and match different cork designs. Make sure the corks are tightly packed together and evenly aligned. You may need to trim some corks to fit them into the coaster mold. Once you have arranged the corks, carefully pour the epoxy resin over them and let it dry according to the instructions.
4.4. Step 4: Glue Corks
Apply a good amount of glue onto the flat end of each cork and start placing them onto the cardboard coaster base. Make sure the corks are tightly packed together and in a straight line. Continue gluing the corks until the entire base is covered. Allow the glue to dry completely before using the coaster.
4.5. Step 5: Protect Your Coasters
To ensure that your wine cork coasters stay in good condition, you may want to protect them from spills and stains. One option is to apply a coat of sealant, such as polyurethane, to the surface of the coasters. This will help to repel liquids and prevent them from seeping into the porous cork material. Another option is to use a waterproofing spray, which can provide a similar level of protection. Make sure to follow the manufacturer’s instructions carefully when applying any type of coating or spray, and allow the coasters to dry completely before using them.
Conclusion
Upcycling is a great way to breathe new life into old items and give your home a unique touch. These 10 DIY projects are fun, creative, and easy to do, making them the perfect way to transform your space without breaking the bank.


These 10 innovative and imaginative DIY home decor ideas from [object Object] provide a refreshing approach to enhancing ones living…