
Are you feeling inspired to transform your furniture into something unique and stylish? Look no further! In this article, we will showcase 10 creative furniture makeovers that will ignite your DIY spirit. From repurposing old pieces to adding a touch of paint, these projects will inspire you to unleash your creativity and give your furniture a new lease on life. Get ready to be inspired and embark on your next DIY adventure!
- 1. Introduction
- 1.1. Why choose creative furniture makeovers?
- 1.2. Benefits of creative furniture makeovers
- 1.3. Popular trends in creative furniture makeovers
- 1.4. Tools and materials required for creative furniture makeovers
- 1.5. Important tips for successful creative furniture makeovers
- 2. Preparation
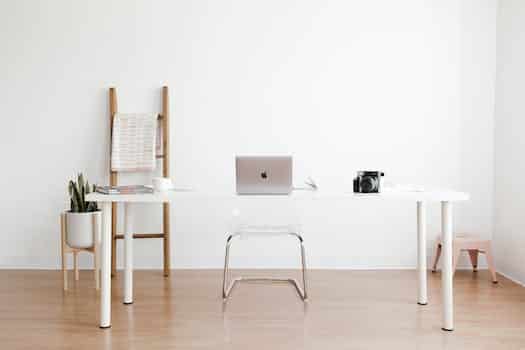
- 2.1. Selecting the right furniture pieces
- 2.2. Understanding the condition of the furniture
- 2.3. Cleaning and prepping the furniture
- 2.4. Choosing the perfect paint or finish
- 2.5. Gathering necessary tools and materials
- 3. Techniques and Ideas
1. Introduction
Are you tired of the same old furniture in your home? Do you want to add a touch of creativity and personalization to your living space? If so, you’re in luck! In this article, we will explore 10 creative furniture makeovers that will inspire your next DIY project. Whether you’re a seasoned DIY enthusiast or just starting out, these ideas will surely get your creative juices flowing. From repainting and reupholstering to transforming ordinary pieces into extraordinary ones, these furniture makeovers will not only breathe new life into your space but also save you money. So, grab your tools and let’s dive into the world of creative furniture makeovers!
1.1. Why choose creative furniture makeovers?
When it comes to DIY projects, creative furniture makeovers offer a unique and exciting opportunity to transform your living space. Whether you are looking to update your home’s decor or simply add a personal touch, these furniture makeovers can inspire and unleash your creativity. By repurposing old or unused furniture, you not only save money but also contribute to sustainable living. Additionally, creative furniture makeovers allow you to showcase your individual style and taste, making your space truly one-of-a-kind. From painting and staining to reupholstering and decoupage, the possibilities are endless. So why choose creative furniture makeovers? The answer lies in the satisfaction of creating something beautiful and functional while expressing your artistic side. In this article, we will explore ten inspiring furniture makeovers that will motivate you to embark on your next DIY adventure.
1.2. Benefits of creative furniture makeovers
Creative furniture makeovers offer numerous benefits for DIY enthusiasts. Whether you are a seasoned DIYer or just starting out, transforming old or outdated furniture into unique and stylish pieces can be incredibly rewarding. Not only does it allow you to express your creativity, but it also enables you to save money by repurposing existing furniture instead of buying new. Additionally, creative furniture makeovers provide an opportunity to personalize your living space and create a one-of-a-kind atmosphere. By incorporating clever techniques such as painting, reupholstering, or adding decorative elements, you can give your furniture a new lease on life and make a statement in your home. In this article, we will explore ten inspiring creative furniture makeovers that will surely ignite your DIY spirit and inspire your next project.
1.3. Popular trends in creative furniture makeovers
Creative furniture makeovers have become increasingly popular in recent years, as more and more people are finding joy in transforming old, worn-out pieces into stunning, one-of-a-kind creations. This trend has taken the world of DIY by storm, with countless individuals showcasing their innovative and imaginative furniture transformations. Whether it’s repainting a vintage dresser, upcycling an old wooden chair, or adding quirky designs to a plain coffee table, there are endless possibilities when it comes to giving furniture a new lease on life. In this article, we will explore 10 inspiring creative furniture makeovers that will ignite your DIY spirit and inspire your next project.
1.4. Tools and materials required for creative furniture makeovers
In order to successfully undertake creative furniture makeovers, it is important to have the right tools and materials on hand. These items will not only make the process easier but also ensure that the end result is of high quality. Here are some essential tools and materials you will need for your next DIY furniture makeover:
1. Sandpaper: This is a crucial tool for preparing the surface of the furniture and removing any existing finish or paint.
2. Paint and primer: Depending on the desired outcome, you may need to apply a fresh coat of paint or primer to achieve the desired look.
3. Brushes and rollers: These are necessary for applying paint or primer evenly and smoothly onto the furniture surface.
4. Screwdrivers and pliers: These tools come in handy for removing any hardware from the furniture, such as knobs or handles, before starting the makeover.
5. Wood filler: If the furniture has any cracks, dents, or holes, using wood filler will help restore the surface to its original condition.
6. Sanding block or electric sander: For larger furniture pieces, using a sanding block or electric sander will save time and effort in smoothing out the surface.
7. Protective gear: It is important to protect yourself while working on a furniture makeover. Safety goggles, gloves, and a dust mask are essential to prevent any accidents or health hazards.
8. Decorative elements: Depending on your creative vision, you may want to add decorative elements such as stencils, decals, or new hardware to enhance the overall look of the furniture.
By having these tools and materials ready, you will be well-equipped to embark on your next DIY furniture makeover project and transform ordinary pieces into stunning works of art.
1.5. Important tips for successful creative furniture makeovers
When it comes to DIY projects, creative furniture makeovers offer a fantastic opportunity to transform old, worn-out pieces into unique and stylish additions to your home. Whether you’re an experienced DIY enthusiast or just starting out, these 10 creative furniture makeovers will surely inspire your next project. From repainting and reupholstering to decoupage and distressing, there are countless techniques and ideas to explore. So, if you’re ready to unleash your creativity and breathe new life into your furniture, read on for some important tips to ensure a successful and satisfying DIY experience.
2. Preparation
Are you tired of your old and boring furniture? Looking for some inspiration to jazz up your living space? Look no further! In this article, we will explore 10 creative furniture makeovers that will inspire your next DIY project. Whether you’re a seasoned DIY enthusiast or just starting out, these ideas will surely spark your creativity and transform your furniture into unique pieces that reflect your personal style. So, let’s dive in and discover the endless possibilities of furniture makeovers!
2.1. Selecting the right furniture pieces
Before starting any DIY furniture project, it is essential to carefully select the right furniture pieces. This step is crucial as it will determine the success and outcome of your project. Here are some tips to guide you in selecting the perfect furniture for your next creative makeover:
1. Identify your needs: Consider the purpose and function of the furniture piece you intend to makeover. Determine whether you need a storage unit, seating, or a decorative item.
2. Assess the condition: Inspect the furniture for any damages or structural issues. Make sure it is sturdy and in a suitable condition for your intended makeover.
3. Consider the style: Choose a furniture piece that aligns with your personal style and the overall aesthetic you want to achieve. Consider the existing décor and color scheme in the space where the furniture will be placed.
4. Size matters: Measure the available space and ensure that the furniture piece fits well without overcrowding the area. Consider the proportions and scale of the piece.
5. Material and durability: Look for furniture made from high-quality materials that can withstand the intended use and any modifications you plan to make.
6. Budget considerations: Set a budget for your project and choose furniture pieces that are within your price range. Keep in mind that you may need to invest in additional materials or tools for the makeover.
By following these tips, you can confidently select the right furniture pieces for your DIY projects and create stunning, personalized makeovers that will inspire others.
2.2. Understanding the condition of the furniture
Understanding the condition of the furniture is an essential step before starting any furniture makeover project. This will help you determine the amount of work needed, the materials required, and the overall feasibility of the project. Take a close look at the furniture piece and inspect for any damages, such as scratches, dents, or loose joints. Assess the stability and structural integrity of the furniture as well. Understanding the condition will also allow you to decide whether repairs are necessary before proceeding with the makeover. By thoroughly examining the furniture, you can plan and prepare accordingly for a successful DIY project.
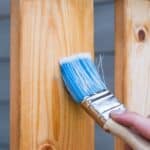
2.3. Cleaning and prepping the furniture
Cleaning and prepping the furniture is an essential step before starting any furniture makeover project. Properly preparing the furniture ensures better adhesion of paints or other finishes to the surface, resulting in a more durable and professional-looking outcome.
To begin, remove any cushions, hardware, or accessories from the furniture piece. This will make it easier to clean and work on the surface. Use a soft brush or vacuum cleaner to remove dust, dirt, and debris from all the nooks and crevices.
Next, wipe down the furniture with a mild soap and water solution or a gentle wood cleaner. Be sure to follow the manufacturer’s instructions if using any specific cleaner. This will help remove any grime or grease buildup.
If there are any stains or spots on the furniture, you can try spot cleaning with a stain remover suitable for the material. Test it on a small, inconspicuous area first to ensure it doesn’t cause any damage.
Once the furniture is clean, it’s important to sand the surface to create a smooth and even base for painting or refinishing. Use a medium-grit sandpaper to gently sand the entire piece, focusing on any rough spots or imperfections.
After sanding, wipe away any dust using a tack cloth or a damp cloth. This will ensure that there are no particles left on the surface, which can affect the finish.
Finally, if you plan to paint the furniture, consider applying a primer before the actual paint. A primer helps the paint adhere better and provides a more even finish. Follow the manufacturer’s instructions for the specific primer you choose.
By investing time and effort into cleaning and prepping the furniture, you’ll set a solid foundation for a successful furniture makeover project. This preparation step will contribute to a beautiful and professionally transformed piece of furniture that will inspire your next DIY project.
2.4. Choosing the perfect paint or finish
Choosing the perfect paint or finish:
When embarking on a furniture makeover project, one of the most important decisions you’ll need to make is choosing the perfect paint or finish. This decision will greatly impact the overall look and feel of your DIY project. Here are some tips to help you make the right choice:
1. Consider the style: Before selecting a paint or finish, think about the style you want to achieve. Are you going for a rustic, vintage look or a modern, sleek finish? Understanding the style will narrow down your options.
2. Assess the condition of the furniture: Take a close look at the furniture piece you plan to transform. If it has any imperfections, such as scratches or dents, you might want to choose a paint or finish that can easily cover them up.
3. Research different types of paint and finishes: There are numerous options available, including chalk paint, milk paint, acrylic paint, and various types of finishes like matte, satin, or gloss. Each type has its own unique characteristics and application techniques. Do some research to determine which one will work best for your project.
4. Consider durability: Depending on the purpose of the furniture, you’ll want to consider the durability of the paint or finish. If it will be frequently used or exposed to moisture, opt for a more durable and water-resistant option.
5. Test it out: It’s always a good idea to test the paint or finish on a small, inconspicuous area of the furniture before committing to the entire piece. This will give you an idea of how it will look and whether it’s the right choice.
Preparation:
Before diving into your furniture makeover project, proper preparation is key. Here are some essential steps to ensure a successful DIY project:
1. Clean the furniture: Remove any dirt, dust, or grime from the furniture surface. Use a mild soap or wood cleaner and a soft cloth to gently clean all the nooks and crannies.
2. Repair any damages: If there are any loose joints, broken pieces, or structural issues, take the time to fix them before proceeding. Use wood glue, filler, or other appropriate materials to restore the furniture’s stability.
3. Sand the surface: For a smooth and even finish, sand the furniture surface using sandpaper or an electric sander. This will help remove any existing paint or varnish, as well as create a better surface for the new paint or finish to adhere to.
4. Prime if necessary: Depending on the type of paint or finish you’ve chosen, you may need to apply a primer. Primer helps the paint adhere better and ensures a more professional-looking result.
5. Protect the surrounding area: Cover the floor or work area with a drop cloth or old newspapers to protect it from any paint spills or drips. Additionally, use painter’s tape to mask off any areas you want to keep paint-free.
By following these steps and taking the time to choose the perfect paint or finish, as well as properly preparing the furniture, you’ll be well on your way to a successful and inspiring furniture makeover project.
2.5. Gathering necessary tools and materials
To embark on a successful DIY furniture makeover project, it is essential to gather all the necessary tools and materials beforehand. Having everything you need at hand will save you time and ensure a smooth process. Here are some key items you should consider including in your toolkit:
1. Sandpaper or sanding block: This is crucial for prepping the surface of the furniture and removing any existing finish.
2. Paintbrushes: Different sizes and types of brushes will come in handy for applying paint or stain.
3. Primer: A quality primer will help create a smooth base for the paint and improve its adhesion.
4. Paint or stain: Choose the desired color or finish for your furniture makeover project. Opt for high-quality paints or stains for a long-lasting result.
5. Protective gear: Safety should always be a priority. Don’t forget to wear gloves, safety goggles, and a mask to protect yourself from harmful fumes or dust.
6. Drop cloths or old newspapers: These will protect your work area from paint spills or stains.
7. Screwdrivers and other basic tools: Depending on the type of furniture you are working on, you may need screwdrivers, pliers, or other basic tools to disassemble or reassemble pieces.
8. Wood filler and putty knife: For repairing any dents, scratches, or holes in the furniture.
9. Sanding sealer: Applying a sanding sealer after sanding will help create a smooth and even surface for the final finish.
10. Clear topcoat or sealant: This will protect the newly painted or stained surface and give it a polished look.
By gathering these essential tools and materials, you will be well-prepared to tackle your next DIY furniture makeover project with confidence and creativity.
3. Techniques and Ideas
Are you looking to transform your old furniture into something unique and stylish? Look no further! In this article, we will share with you 10 creative furniture makeovers that will inspire your next DIY project.
1. Paint and Stencil
One of the easiest ways to give your furniture a fresh look is by painting and stenciling it. Choose a color that matches your style and use stencils to create interesting patterns or designs. This simple technique can instantly transform a plain piece of furniture into a statement piece.
2. Decoupage
Decoupage is a technique that involves gluing paper or fabric onto surfaces to create a decorative effect. It’s a great way to add a pop of color or a vintage feel to your furniture. You can use patterned paper, maps, or even photos to create a unique and personalized look.
3. Upholstery
If you have old chairs or sofas that are still structurally sound but have worn-out fabric, consider reupholstering them. Choose a fabric that suits your style and skill level, and follow online tutorials to give your furniture a brand new look.
4. Distressing
Distressing is a popular technique for creating a shabby chic or vintage look. It involves intentionally making furniture look aged or weathered by sanding, scraping, or using other tools. This technique works well on wooden furniture and can add character and charm to any piece.
5. Ombre
Ombre is a trendy technique that involves blending one color into another. You can achieve this effect by using different shades of paint or by using a spray paint that creates a gradient look. This technique is perfect for adding a contemporary touch to your furniture.
6. Wallpaper
Using wallpaper to decorate your furniture is a great way to add pattern and texture. You can apply wallpaper to the entire piece or use it to create an accent on drawer fronts, tabletops, or cabinet doors. This technique allows you to easily change the look of your furniture without a lot of commitment.
7. Mosaic
If you’re feeling extra creative, try creating a mosaic design on your furniture. You can use broken tiles, glass, or even seashells to create a unique and eye-catching pattern. This technique works well on tabletops, sideboards, or even the front of a dresser.
8. Washi Tape
Washi tape is a decorative adhesive tape that comes in a wide variety of colors and patterns. It’s a simple and inexpensive way to add a pop of color or a playful design to your furniture. You can use it to create stripes, geometric shapes, or even write words or quotes on your furniture.
9. Stenciled Fabric
If you want to give your fabric furniture a new look without reupholstering it, consider stenciling a design onto the fabric. You can use fabric paint and stencils to create a pattern or a picture that matches your style. This technique is perfect for adding a personal touch to chairs, cushions, or curtains.
10. Hardware Upgrades
Don’t overlook the impact that new hardware can have on your furniture. Replace old knobs, handles, or pulls with stylish and unique ones to instantly update the look of your piece. You can find a wide variety of hardware options at home improvement stores or online.
These 10 creative furniture makeovers are just the tip of the iceberg. Let your imagination run wild and explore different techniques and ideas to transform your old furniture into something extraordinary. Happy DIY-ing!
3.1. Distressing furniture for a vintage look
Distressing furniture for a vintage look:
Distressing furniture is a popular technique used to achieve a vintage or antique look. It involves intentionally aging furniture to give it a worn and weathered appearance. This technique is perfect for those who love the charm and character of vintage pieces.
There are several techniques you can use to distress furniture. One method is sanding, where you sand down certain areas of the furniture to expose the raw wood underneath. This creates a worn effect that mimics years of use and adds a rustic touch.
Another technique is using paint and a dry brush. By lightly brushing paint onto the surface of the furniture, you can create a worn and faded look. This is especially effective when using light colors or whites.
You can also distress furniture by using a crackle medium. This product creates a cracked finish that gives the furniture an aged appearance. Simply apply the crackle medium over a painted surface and let it dry, then paint over it with a contrasting color. As the top coat dries, it will crack and reveal the base coat, creating a distressed look.
Distressing furniture is a versatile technique that can be used on various types of furniture, from dressers and tables to chairs and cabinets. It allows you to transform ordinary pieces into unique and charming additions to your home decor.
If you’re looking for inspiration for your next DIY project, consider distressing furniture. It’s a fun and creative way to give your furniture a vintage look and add character to your space.
3.2. Creating unique patterns with stencils
Creating unique patterns with stencils is a fun and creative way to add a personal touch to your furniture makeovers. Stencils offer endless possibilities for transforming plain and boring furniture into eye-catching pieces. Here are some techniques and ideas to inspire your next DIY project:
1. Geometric Patterns: Use stencils to create clean and modern geometric patterns on your furniture. You can go for simple shapes like squares or triangles, or mix and match different shapes to create a more intricate design.
2. Floral Designs: Add a touch of nature to your furniture by using stencils to create beautiful floral designs. You can choose from a variety of flower stencils and play around with different colors to create a vibrant and refreshing look.
3. Moroccan-Inspired Patterns: Give your furniture a bohemian and exotic feel by incorporating Moroccan-inspired patterns. Stencils with intricate motifs like arabesque patterns or Moroccan tiles can instantly transform your furniture into a statement piece.
4. Nautical Themes: Create a coastal or beachy vibe by using stencils to add nautical patterns to your furniture. Anchors, waves, and sea creatures are great options to bring a touch of the ocean into your home.
5. Typography: Use stencils to add meaningful quotes, words, or phrases to your furniture. This not only adds a unique design element but also allows you to personalize your pieces with messages that resonate with you.
6. Ombre Effects: Experiment with ombre effects by using stencils to gradually fade colors from light to dark or vice versa. This technique can create a stunning gradient effect on your furniture.
7. Mandala Designs: Incorporate intricate and symmetrical mandala designs on your furniture using stencils. Mandalas are not only visually appealing but also have a calming and meditative effect.
8. Animal Prints: Add a touch of the wild by using stencils to create animal prints on your furniture. Leopard spots, zebra stripes, or cow prints can instantly give your furniture a bold and adventurous look.
9. Metallic Accents: Use metallic paint and stencils to create shiny and glamorous accents on your furniture. Geometric patterns or intricate designs can be enhanced with gold, silver, or copper metallic paints.
10. Custom Designs: Don’t be afraid to think outside the box and create your own unique stencil designs. Whether it’s a favorite symbol, a silhouette, or an abstract pattern, custom stencils allow you to unleash your creativity and make your furniture truly one-of-a-kind.
Remember to prepare your furniture properly before applying stencils, and always practice on a small area before committing to the final design. With stencils, you can easily transform your furniture into stunning and personalized pieces that will impress everyone who sees them.
3.3. Using decoupage to enhance furniture design
Using decoupage to enhance furniture design:
Decoupage is a versatile technique that can greatly enhance the design of furniture. This popular crafting method involves decorating an object by gluing cut-out paper or fabric pieces onto its surface, and then sealing them with multiple coats of varnish or adhesive. When applied to furniture, decoupage can transform plain, old pieces into unique and eye-catching works of art. Here are some techniques and ideas to inspire your next furniture makeover project:
1. Vintage Maps: Use vintage maps to cover the top surface of a coffee table or a sideboard. This gives the furniture a nostalgic and adventurous vibe.
2. Floral Patterns: Choose floral patterned paper or fabric to add a touch of elegance and charm to a dresser or a wardrobe. This technique works especially well in bedrooms or as accent pieces in living rooms.
3. Typography Art: Cut out words or phrases from old books or magazines and decoupage them onto a desk or a bookshelf. This creates a unique and personalized piece that showcases your love for literature.
4. Nature-Inspired Designs: Collect leaves, pressed flowers, or botanical prints and decoupage them onto a wooden chair or a cabinet. This brings a natural and organic element to your furniture, perfect for outdoor or nature-themed spaces.
5. Fabric Patchwork: Cut out fabric squares in different patterns and colors, then decoupage them onto a dining table or a set of chairs. This adds a cozy and eclectic touch to your dining area.
6. Travel Souvenirs: Use postcards, ticket stubs, or travel brochures from your favorite destinations to decoupage a side table or a chest of drawers. This way, you can cherish your travel memories every day.
7. Geometric Shapes: Create a modern and abstract design by cutting out geometric shapes in various colors and sizes. Decoupage them onto a cabinet or a console table to add a contemporary touch to your space.
8. Animal Prints: Find paper or fabric with animal prints, such as leopard or zebra patterns, and decoupage them onto a chair or a vanity. This adds a bold and exotic element to your furniture.
9. Vintage Posters: Repurpose vintage posters or advertisements by decoupaging them onto the surface of a bar cart or a sideboard. This gives your furniture a retro and nostalgic feel.
10. Personal Photographs: Print out your favorite photographs and decoupage them onto a bedside table or a picture frame. This allows you to showcase cherished memories and add a personal touch to your furniture.
Remember to prepare the surface properly before decoupaging, ensuring it is clean and smooth. Experiment with different materials and designs to create truly unique and inspiring furniture makeovers.
3.4. Transforming furniture with upholstery
Transforming furniture with upholstery can completely change the look and feel of a piece, giving it new life and style. Upholstering furniture involves covering the existing fabric or padding with a new fabric, creating a fresh and updated appearance. There are various techniques and ideas for upholstering furniture that can inspire your next DIY project.
One technique is to use bold and vibrant fabrics to add a pop of color to a dull or outdated piece of furniture. This can instantly transform a boring chair or sofa into a statement piece. Another idea is to mix and match different patterns and textures for a unique and eclectic look. By combining different fabrics, you can create a one-of-a-kind piece that reflects your personal style.
Additionally, you can consider reupholstering furniture with durable and stain-resistant fabrics, especially if you have children or pets. This can help prolong the lifespan of your furniture while still maintaining a stylish and elegant appearance. Another technique to consider is tufting, which involves creating dimples or buttons on the surface of the upholstery. This adds a touch of sophistication and elegance to the piece.
Whether you are transforming an old chair, a worn-out sofa, or a tired ottoman, upholstery can breathe new life into your furniture. With endless fabric choices and creative techniques, the possibilities for furniture makeovers are truly limitless. Get inspired and start your next DIY project today!
3.5. Experimenting with color-blocking and ombre effects
Experimenting with color-blocking and ombre effects is a great way to add a unique and eye-catching touch to your furniture makeovers. By combining different colors and shades, you can create stunning visual effects that will instantly transform any piece of furniture. Color-blocking involves using contrasting colors to create bold and graphic designs. For example, you can paint different sections of a dresser in bright and vibrant colors, creating a modern and artistic look. Ombre effects, on the other hand, involve blending colors from light to dark or vice versa. This technique adds depth and dimension to your furniture by creating a gradual transition of colors. You can achieve the ombre effect by using a sponge or a brush to blend the colors together. Whether you choose to experiment with color-blocking or ombre effects, these techniques offer endless possibilities for creating unique and personalized furniture makeovers that will surely inspire your next DIY project.
Conclusion
In conclusion, these 10 creative furniture makeovers serve as a great source of inspiration for your next DIY project. With a little bit of creativity and some DIY skills, you can transform old and worn-out furniture into unique and stylish pieces that will add a personal touch to your home. So go ahead, unleash your creativity, and get ready to embark on an exciting furniture makeover journey!


These 10 innovative and imaginative DIY home decor ideas from [object Object] provide a refreshing approach to enhancing ones living…