
Are you trying to come up with creative ideas to change the style of your house without going over budget? Look no farther than these ten original DIY upcycling ideas for the house. This article will encourage you to let your creativity run wild and give your living area a distinctive touch by showing you how to upcycle old furniture and give commonplace items a new lease on life. Prepare to discover fascinating upcycling projects that will help you live a more sustainable lifestyle in addition to saving money. Let’s get going!
- 1. Introduction
- 1.1. Why Upcycling is a Great Home DIY Option
- 1.2. Benefits of Upcycling
- 1.3. Getting Started with Upcycling
- 1.4. Essential Tools and Materials for Upcycling
- 1.5. Safety Tips for Upcycling Projects
- 2. Creative Upcycling Ideas
- 2.1. Repurposing Old Furniture
- 2.2. Transforming Mason Jars into Decorative Pieces
- 2.3. Upcycling Clothing and Accessories
- 2.4. Revamping Kitchen Items
- 2.5. Giving New Life to Empty Containers
- 3. Step-by-Step Upcycling Tutorials
1. Introduction
In the modern world, when sustainability is becoming more and more important, upcycling has become a well-liked and environmentally responsible method of repurposing obsolete items. Upcycling is the process of making something of greater value or quality out of things or resources that have been discarded. It’s a fantastic way to save costs, cut waste, and personalize the look of your house. This post will discuss ten inventive home DIY upcycling projects that will motivate you to give commonplace objects new uses and imaginative makes. These projects, which range from upcycling glass jars to revamping outdated furniture, will inspire you to live a more environmentally conscious lifestyle while also letting your creativity run wild. Now let’s get started and explore all of the amazing potential that upcycling offers!
1.1. Why Upcycling is a Great Home DIY Option
With good cause, upcycling has been a hot trend in recent years. It provides an excellent do-it-yourself project that lets you repurpose outdated or unused materials into something fresh and functional. Upcycling is not only an inventive and enjoyable method to reuse objects, but it is also very beneficial to the environment and your pocketbook. This post will discuss ten inventive home DIY upcycling projects that will motivate you to breathe fresh life into worn-out items.
1.2. Benefits of Upcycling
Upcycling is the process of turning used or outdated materials into something fresh and functional. It is sometimes referred to as creative reuse. It provides several advantages to both individuals and communities, in addition to assisting in waste reduction and minimizing the negative effects on the environment. You can make one-of-a-kind, personalized products for your house, save money, and let your creativity run wild with upcycling. This post will discuss 10 inventive home DIY upcycling projects that will motivate you to revitalize worn-out objects and support a more environmentally friendly way of living.
1.3. Getting Started with Upcycling
Upcycling is the process of turning used or outdated items into something fresh and useful. It is sometimes referred to as creative reuse. It’s a fantastic method to cut down on waste and revitalize objects that might otherwise wind up in the trash. Not only is upcycling eco-friendly, but it also lets you use what you already own to express your creativity and save money. This post will discuss ten inventive home DIY upcycling projects that are simple to implement. Regardless of your level of skill, these projects will encourage you to explore your creative side and start upcycling.
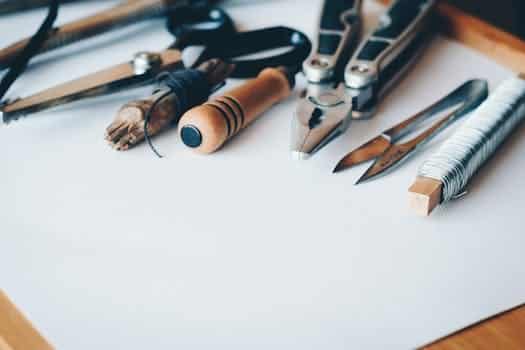
1.4. Essential Tools and Materials for Upcycling
Having the proper equipment and supplies is crucial for upcycling in order to realize your imaginative ideas. Investing in a few essential items may make upcycling more simpler and more pleasurable, regardless of experience level. We’ll look at the supplies and equipment that are a must-have for any upcycler in this part.
1. Basic Hand Tools: For any upcycling job, a set of basic hand tools is a must. These include screwdrivers, pliers, hammers, and utility knives. With the use of these instruments, you may dismantle, fix, and modify a variety of objects.
2. Paint and Brushes: Painting antiques is a common upcycling technique. You may create a range of finishes and effects by getting a number of paints, such as spray paints, acrylics, and chalk paints, in addition to various brush sizes and kinds.
3. Adhesives: For upcycling jobs where adhering various materials together is required, a robust glue is essential. When working with materials like fabric, metal, wood, or glass, having a trustworthy adhesive will help to ensure that your creations remain intact.
4. Sandpaper and Finishing Tools: Sandpaper is used to remove previous finishes, smooth off uneven edges, and get surfaces ready for painting or staining. A professional-looking polish can also be attained with the use of finishing tools like a buffing wheel or sander.
5. Safety Equipment: When working on do-it-yourself upcycling projects, safety should always come first. Gloves, safety goggles, a dust mask, and ear protection are essential pieces of safety gear, particularly while using power tools or handling potentially dangerous chemicals.
6. Materials That Can Be Recycled and Used Again: Upcycling is all about giving old things a new lease on life. You will have an abundance of resources to work with if you maintain a collection of recyclable and reusable items, such as old jars, bottles, textiles, wooden pallets, and metal scraps.
If you keep these basic supplies and equipment on hand, you’ll be ready to take on any upcycling job that comes your way. After going over the fundamentals, let’s explore some imaginative home DIY upcycling ideas to get you started on your next project!
1.5. Safety Tips for Upcycling Projects
Upcycling projects are a great way to reuse old objects and cut down on waste. When starting any upcycling project, safety should always come first, regardless of where you are in your DIY experience. While letting your creativity run wild, you can guarantee a fun and safe experience by adhering to a few basic rules. We’ll go over some important safety advice in this part for your upcycling projects.
2. Creative Upcycling Ideas
Upcycling is a creative and environmentally responsible technique to revitalize used or outdated objects. These items can be used and transformed to create one-of-a-kind, fashionable pieces for your house. The following ten inventive upcycling ideas are suitable for do-it-yourself projects:
1. Paint old wine bottles in vivid hues or adorn them with twine to transform them into attractive vases.
2. Add wooden planks to each rung of an old ladder to turn it into a bookshelf. This will give your house a rustic feel in addition to extra storage space.
3. Use chalkboard paint to breathe new life into an antique dresser. You can put down daily reminders or use it as a bulletin board in this way.
4. Create an original gallery wall out of antique picture frames. Apply various coats of paint to the frames and arrange them in a visually appealing design.
5. Repair and repurpose old wooden crates to create an attractive and useful storage solution. Put them in a stack and fasten them with screws to create a bookcase or storage piece.
6. Add mirrored glass to an old window frame to turn it into a stylish mirror. Your home’s dcor will have a touch of the past with this.
7. Repurpose old tin cans by creating chic planters out of them. To make them look like a tiny garden, paint them a bright color and add plants and dirt.
8. Reupholster old chairs with vibrant, patterned textiles to give them a new lease on life. Your living or dining area will look brand new right away after doing this.
9. Repurpose old pallets to create distinctive and useful furniture. Pallets can be used to make a garden bench, coffee table, or even a bed frame.
10. Turn outdated mason jars into chic and eye-catching lanterns. To create a warm and enchanted atmosphere in your outdoor area, place candles or fairy lights inside the jars.
These original upcycling ideas are not only inexpensive, but also a wonderful way to give your house a unique touch. So grab your used goods and get set to start your own upcycling project!
2.1. Repurposing Old Furniture
Repurposing used furniture is a great way to breathe new life into objects that might otherwise be discarded. It not only lessens waste but also gives you the chance to express your creativity and give your home decor a special touch. By using some creativity and do-it-yourself abilities, you may turn used furniture into eye-catching pieces that will be the center of attention in any space.
You may use a plethora of imaginative upcycling solutions to give your old furniture a new lease on life. One option is to transform an outdated wooden door into a chic bed headboard. Sand it down, paint it the color of your choice, and add some ornamental accents to make a unique headboard that gives your bedroom personality.
Making a distinctive kitchen island out of an old dresser is another inventive upcycling project. Just take out the drawers, install a countertop, then paint or stain the dresser to coordinate with the style of your kitchen. This gives your kitchen more workspace and storage in addition to a lovely antique flair.
Don’t discard any old ladders you may have sitting around! Make it into a chic bookcase instead. Shelves to showcase your favorite books, plants, or other things can be made by fastening wooden boards to the ladder rungs. In addition to saving you money, this repurposed bookcase will spark conversation in your living area.
In addition to enabling you to create one-of-a-kind, customized items for your house, repurposing existing furniture helps the environment by lowering the need for new furniture. Therefore, consider how you may give that old table or chair a new lease on life with inventive upcycling ideas before deciding to dump it.
2.2. Transforming Mason Jars into Decorative Pieces
Canning isn’t the only use for Mason jars these days. It’s easy to turn these multipurpose glass jars into lovely home décor with a little imagination and craft supplies. Here’s a fun and inexpensive way to add some charm and personality to your space: upcycling mason jars may be used to create distinctive centerpieces for your dining table or give a rustic touch to your kitchen.
Making chic candle holders out of mason jars is one idea. All you have to do is insert a tea light or votive candle into the jar, then observe how the room glows softly. The jars can be made uniquely for you by painting them in your own hues or adorning them with lace, ribbon, or twine.
Another inventive upcycling concept is to make flower vases out of mason jars. For a more durable arrangement, fill them with artificial flowers or fresh flowers straight from your yard. The jars can be painted to fit the color scheme of your house, or left clear for a sleek and understated appearance.
Turning mason jars into storage containers is a useful and aesthetically pleasing use for them. Utilize them to arrange your bathroom necessities, culinary utensils, and art supplies. The jars can be easily identified by attaching simple labels or labeling them with chalkboard paint.
Making ornamental objects out of mason jars not only gives your house a unique touch, but it also reduces waste because it repurposes materials that would otherwise go to waste. When working on upcycling projects, use your imagination and be creative. There are countless ways to breathe fresh life into these plain glass jars.
2.3. Upcycling Clothing and Accessories
Reusing Clothes and Accessory Items
Clothes and accessories provide an excellent chance to use creativity and breathe new life into vintage objects when it comes to upcycling. You may create original and fashionable items out of old clothing and accessories with a little creativity and basic crafting abilities. These inventive upcycling ideas can motivate you whether you want to completely change your outfit or just give your accessories a unique touch:
1. Remove the sleeves from old T-shirts and add a strong handle to transform them into stylish tote bags. To really make the bag unique, you can embellish it with embroidery, patches, or even fabric paints.
2. Repurpose your worn-out denim jeans into stylish shorts to give them a fresh look. For a contemporary and unique style, you can degrade the edges, apply decorative patches, or even bleach them.
3. Turn an old sweater into a fashionable and comfortable scarf. Cut off the sleeves, sew up the edges, and you’ll have a one-of-a-kind piece of clothing to keep you toasty throughout the winter.
4. Save those old, worn-out sneakers! Alternatively, give them a makeover by decorating them with glitter or studs or painting them with fabric paint. You’ll be sporting some specially made kicks that are bound to draw attention.
5. Do you own an assortment of mismatched earrings? Repurpose them by creating fashionable charm bracelets out of them. With the earrings fastened on a chain or a length of ribbon, you’ll have an interesting and colorful piece of jewelry that showcases your own sense of style.
Recall that upcycling is all about being creative and coming up with fresh ideas for repurposing old objects. These suggestions can help you promote sustainability and lessen waste while adding a new and unique twist to your clothes and accessories.
2.4. Revamping Kitchen Items
Repurposing Kitchenware:
If you sand down old wooden cutting boards, give them a fresh coat of food-safe paint or stain, and add decorative handles, you can turn them into chic serving trays.
2. Paint empty glass jars with chalkboard paint and label them to make them useful storage containers. They make adorable herb planters or can be used to store spices and dry items.
3. Use vivid spray paint to give your old cooking equipment a fresh makeover. Your kitchen will quickly get a splash of color with this easy makeover.
4. Repurpose an old colander to create a one-of-a-kind pendant lamp. All you have to do is take off the handles, give it a coat of your preferred color, and add a pendant light kit.
5. Convert an old ladder into a farmhouse pot rack. After sanding it down, hang it from the ceiling and paint or stain it. Pots and pans can be hung for convenient access using S-hooks.
6. Convert antique saucers and teacups into chic candlesticks. Let the light filter through the beautiful patterns in the cup by inserting a tea light or votive candle within.
7. Convert an outdated wine container into a useful spice organizer. For a creative storage idea, hang the spice box from the wall and add hooks or little shelves to accommodate spice jars.
8. Use artistic and one-of-a-kind knobs or pulls to update the hardware on your boring kitchen cabinets. Your kitchen’s appearance can be drastically changed with this one small adjustment.
9. To give your old kitchen table and chairs a brand-new look, repaint or refinish them. For a shabby chic look, think about deteriorating the wood or adding stenciled motifs.
10. Make a unique mosaic backsplash using mismatched vintage plates or bowls. Cut the plates into tiny pieces, place them on the wall, then use tile adhesive to hold them in place. For a gorgeous and distinctive kitchen accent, grout the pieces.
2.5. Giving New Life to Empty Containers
Empty containers are typically discarded after being determined to be worthless. Instead, you may breathe new life into these containers and transform them into something functional or aesthetically pleasing with a little imagination and do-it-yourself abilities. Reusing old materials to create new and enhanced products is known as upcycling, and it’s a fantastic method to cut waste and save money. Here are some imaginative ways to repurpose these empty containers:
1. Paint empty glass jars in vivid hues and insert a candle inside to transform them into chic candlesticks. Any space can benefit from the touch of elegance these handmade candle holders provide.
2. Turn old tin cans into flower pots by giving them a good washing, adding drainage holes to the bottom, and coating them with paint that will withstand the elements. Then you may fill these repurposed pots with your preferred herbs or flowers.
3. Convert plastic bottles into bird feeders to give them a new use. Create perforations in the bottle’s bottom, place a wooden dowel or stick inside for perching, and then fill it with bird seed. Watch the birds feast while hanging it outside.
4. Repurpose cardboard boxes to become fashionable storage bins by decorating them with attractive paper or fabric. These repurposed containers may be utilized to arrange your possessions and offer a splash of color to any space.
5. Create original vases out of used wine bottles. After taking off the labels, give the bottles a thorough cleaning and painting job, or tie a colorful piece of yarn or string around them. Arrange fresh flowers inside them to create a stunning centerpiece.
6. Make an organizer that hangs by using empty coffee cans. After painting the cans the color of your choice, fasten them to a wooden board or suspend them from ropes. Stow little things like pencils, keys, or craft supplies in these recycled organizers.
7. Convert empty bottles of cologne or perfume into attractive reed diffusers. After adding your preferred essential oil to the bottles, insert the reed diffuser sticks. Your house will smell fantastic as the scent gradually permeates the atmosphere.
8. Repurpose vintage mason jars by turning them into chic soap dispensers. Fill the jar with liquid soap after removing the metal cover and replacing it with a pump dispenser. These repurposed soap dispensers can give your bathroom a country feel.
9. Attach a tiny magnet to the back of empty wine or beer bottle lids to make them into magnets. You can use these repurposed magnets to put to-do lists, pictures, or messages on your refrigerator.
10. Remove the plastic inserts from old CD cases and replace them with printed images to create stylish photo frames. To highlight your most treasured memories, use these repurposed picture frames on shelves or hang them from the wall.
These are just few ideas on how you may creatively upcycle empty containers to give them new life. There are countless options, and all it takes is a little creativity to turn garbage into treasure!
3. Step-by-Step Upcycling Tutorials
Reusing and upcycling old objects is a fantastic method to cut down on waste. You’re in the right place if you’re searching for some original DIY upcycling ideas for your home. We’ve included step-by-step upcycling tutorials in this section to help you get inspired for your next project. Whether you’re a novice or an expert craftsman, these ideas will help you express your creativity and turn ordinary objects into something special and lovely. So gather your supplies and let’s get going!
3.1. DIY Bookshelf from Old Wooden Crates
Handmade Bookcase Made from Used Wooden Crates
Consider creating a stunning bookcase out of used wooden crates if you’re seeking for an inventive way to upcycle them. With the help of this step-by-step instruction, you can turn those crates into a fashionable and useful addition to your house.
Step 1: Assemble your materials
Before beginning, ensure that you have all the materials needed. Old wooden boxes, paint or stain, sandpaper, screws, a drill, and a level are required.
Step 2: Get the crates ready
Start by giving the boxes a good cleaning and clearing away any dirt or trash. To get a smoother finish, you might wish to sand down any rough spots on the boxes.
Step 3: Select your layout
Choose the layout of the crates that you want to use to build your bookshelf. They can be stacked either way, vertically or horizontally, based on your needs and the available space.
Secure the crates in step four.
The crates can be joined to create the appropriate bookshelf shape with a drill and screws. Use a level to make sure they are straight and make sure they are properly aligned.
Paint or stain in Step Five.
After the crates are firmly in place, you can paint or stain them to go with the style of your house. Select a finish or color that goes well with the space where the bookshelf will be positioned.
Step 6: Include the last details
Think about including a few extra components to give your bookshelf a more finished appearance. The crates might have ornamental knobs or handles attached to them, or a base board could be added for additional stability.
Step 7: Put your books in order
You may begin organizing your books on the freshly made bookshelf as soon as the paint or stain is dry. To give your home design a unique touch, arrange them in a creative way.
You can make an interesting and useful bookshelf out of old wooden crates by following these easy instructions. You’ll be repurposing materials in addition to having a chic way to store your beloved novels.
3.2. Turning Wine Bottles into Stylish Lamps
Upcycling wine bottles into chic lamps is an enjoyable and inventive project. It not only breathes new life into ancient bottles but also gives your home’s decor a distinctive touch. We will walk you through the process of turning wine bottles into gorgeous lamps that will add brightness to any space in this step-by-step tutorial.
Step 1: Assemble Your Supplies
You will need a few basic supplies to get started. These consist of lightbulbs, lampshades, empty wine bottles, lamp wiring kits, light bulbs, a glass bit drill bit, and ornamental items like ribbon or beads.
Step 2: Get the bottles ready
You must first prepare your wine bottles before you can make them into lamps. First, give the bottles a thorough cleaning and make sure all labels and residue are gone. For this stage, you can use a scrub brush and warm, soapy water. The transformation process can begin as soon as the bottles are dry and clean.
Step Three: Dig a Hole
Drill a small hole in the bottom of each wine bottle using a drill bit designed for glass bottles. The wiring for the lamps will enter through this opening. Make sure the hole is the proper size to accommodate the wiring by taking your time.
Step 4: Connect the Lights
It’s now time to wire the lights. Make sure the wires are connected correctly by following the instructions that came with your lamp wiring kit. After passing the wiring through the opening in the bottle, fasten it firmly. Make sure the wire is long enough to reach the lamp’s power source.
Step 5: Fit the lampshade in place
You can affix the lampshade to the wine bottle’s top after the wiring is installed. Pick a lampshade that goes well with the design and hue of your bottle. Put it firmly in position and make any required modifications.
Step 6: Include Accent Pieces
Consider incorporating ornamental features into your wine bottle lamps to give them a unique touch. You can use glue to attach beads, ribbon, or any other ornamental elements to the lampshade or the bottle’s base. Go wild with it and make it your own!
Step7: Link to the Power
Connecting your freshly modified wine bottle lighting to a power source is the last step. Once the lamp is plugged in and turned on, you can see the lovely glow coming from your repurposed masterpiece.
You can simply transform wine bottles into chic lamps that will improve the atmosphere of your home by following these easy instructions. Start working on this fascinating upcycling project at home right now!
3.3. Upcycled Planters from Tin Cans
Reusing old tin cans to create planters is a wonderful way to upcycle waste and bring some greenery indoors. Old tin cans can be turned into gorgeous planters that will not only brighten your home but also support a more sustainable lifestyle with a few easy steps. Take a look at this guide to learn how to make your own repurposed planters out of tin cans.
3.4. Repurposed Vintage Suitcase into a Side Table
Making a side table out of an old suitcase is a clever and original way to give your home’s decor some personality. You can make an old suitcase into a stylish and useful piece of furniture by following a few easy steps. Make a unique side table out of your vintage luggage by following this step-by-step instructions.
Step 1: Select the Appropriate Case
Start by locating a well-maintained, robust vintage suitcase. Seek for one with a sturdy construction and a level top surface. It will be simpler to transform it into a sturdy side table as a result.
Step 2: Keep the suitcase tidy and ready
Make sure the suitcase is completely clean before beginning the transformation procedure. Make sure the surface is free of any stains, dust, or grime. If necessary, revive the fabric or lining inside the luggage using an upholstery or mildew cleaner.
Third Step: Take Out the Interior
You’ll need to take the suitcase’s interior out to make room for the table. Remove all pockets, dividers, and fabric linings with caution. To remove any stitches or adhesive holding the interior in place, use scissors or a seam ripper.
Step 4: Strengthen the Framework
Look for any weak areas or missing parts on the suitcase. If more support is needed, reinforce the structure to guarantee stability. The corners and sides of the suitcase can be strengthened by wood blocks, brackets, or metal reinforcements.
Step5: Fasten the legs
The suitcase needs to have legs attached to the bottom in order to be used as a side table. Select legs that fit the suitcase’s design and are the right height for a side table. Using screws or brackets, firmly fasten the legs to the suitcase’s bottom or corners.
Step Six: Paint and Sand
Sand the luggage’s surface lightly to prepare it and get rid of any rough spots or flaws. Using a fresh cloth, remove any dust. You can now paint the suitcase any color you like. To achieve a smooth and long-lasting surface, think about using spray paint or chalk paint.
Step 7: Concluding Details
To improve the appearance of your reused suitcase side table, you can add some finishing touches once the paint has dried. Think about adorning the piece with leather straps, knobs, or drawer pulls. These accents can give the table a retro or boho feel.
Enjoy Your Repurposed Side Table in Step 8
Your upcycled vintage suitcase side table is prepared for usage and display in your house once all the processes have been completed. It can be used to store books, plants, or a cup of coffee when placed next to a sofa or armchair. This unusual piece of furniture will undoubtedly spark conversation among your visitors.
3.5. Transforming Old T-Shirts into Trendy Bags
Upcycling old t-shirts into stylish bags is an enjoyable and environmentally responsible method to repurpose your clothes. Not only will you revitalize your worn-out t-shirts, but you’ll also make fashionable, one-of-a-kind bags that serve a variety of functions. Whether you’re an avid fashionista or just searching for a new do-it-yourself project, these comprehensive upcycling tutorials will walk you through the process of making stylish bags out of used t-shirts. Prepare to let your imagination go wild and turn those discarded t-shirts into stylish accessories!
Conclusion
Finally, these ten inventive home DIY upcycling ideas offer fresh and original approaches to repurpose used objects and give them a new lease on life. These crafts give countless opportunities to make your home more ecologically friendly while bringing a customized touch, from upcycling old furniture to making beautiful pieces. Take inspiration and get upcycling right now!


5 Comments
Sharity Kreiker
1 year agoWow, this post totally blew my mind! Who knew that I could turn my old junk into awesome treasures for my home? I can already picture myself sipping coffee from that upcycled teacup-turned-planter, while sitting on a repurposed tire swing. My neighbors are gonna think Im the DIY queen (or king) of the neighborhood! Time to raid my attic and get my creative juices flowing. Thanks for the inspiration! 🏡🔨🎨
Ira Cale
1 year agoEngaging in do-it-yourself (DIY) upcycle projects can be an excellent means of transforming our homes while simultaneously reducing our environmental impact. With the aim of promoting resourcefulness and innovation, this post highlights 10 captivating ways to repurpose everyday objects and breathe new life into our living spaces. By harnessing our creativity and following these suggested DIY projects, we can contribute to a more sustainable future by reducing waste and maximizing the potential of existing materials. Lets embark on this journey of upcycling and explore the endless possibilities of transforming our homes into sustainable havens of ingenuity.
Mariele Jeri
1 year agoWowza! Who wouldve thought that an old [object Object] could turn into a funky, one-of-a-kind lampshade? Talk about bringing some pizzazz to your living room! And hey, dont even get me started on using those [object Object] as quirky plant pots. Your succulents will never be boring again! Get ready to unleash your inner MacGyver, folks! These 10 DIY upcycle projects will have your home looking like a wacky wonderland in no time. Lets get crafty, shall we? 💡🌵🔨
Pet Deroo
1 year agoAs a normal human visitor, I find the post [object Object] quite intriguing as it offers a plethora of innovative and resourceful DIY upcycle projects to transform ones home. These projects are a testament to human creativity and provide an opportunity to repurpose and reuse various materials in a sustainable manner.
By engaging in these upcycle projects, individuals can not only beautify their living spaces but also contribute to a more environmentally-friendly lifestyle. This approach aligns with the principles of circular economy and promotes the efficient use of resources by giving them a second life.
The diverse range of DIY upcycle projects mentioned in the post showcases the potential for repurposing everyday items into functional and aesthetically pleasing decor. It encourages us to think beyond conventional boundaries and explore the hidden potential of objects that might otherwise be discarded.
In conclusion, the post [object Object] is a valuable resource for those seeking to transform their homes through creative and sustainable means. By embracing these DIY upcycle projects, we can contribute to a greener future while adding a unique touch to our living spaces.
Mariele Barna
1 year agoThese 10 DIY upcycle projects are truly remarkable and offer a fresh perspective on transforming our homes. The resourceful ideas presented in this post showcase the true potential of repurposing everyday objects and materials, allowing us to create unique and personalized spaces.
From repurposing old wooden pallets into stunning furniture pieces, to transforming glass jars into stylish decorative accents, every project mentioned here demonstrates an inspiring level of creativity. The detailed instructions provided with each project make it accessible for anyone, regardless of their DIY expertise.
Moreover, these upcycle projects not only offer a cost-effective alternative to buying new items but also contribute to a more sustainable lifestyle. By reusing and repurposing materials, we can reduce waste and lessen our environmental impact.
I particularly appreciate the emphasis on innovation throughout this post. Each project showcases a distinct and imaginative approach to upcycling, encouraging readers to think outside the box and embrace their own creative instincts. Its truly empowering to see how simple household items can be transformed into something extraordinary.
Overall, this collection of DIY upcycle projects is a valuable resource for anyone seeking to revitalize their living space while also promoting sustainability. The combination of innovative ideas, detailed instructions, and an eco-conscious mindset makes these projects both practical and inspiring. I am eager to embark on my own upcycling journey and witness the remarkable transformation of my home.