
Painting walls is a fun and creative way to add personality and style to your home. While a basic coat of paint can be beautiful, there are many techniques you can use to add depth, texture, and interest to your walls. In this article, we’ll explore 10 creative painting techniques that will help you transform your walls into works of art.
- 1. Introduction to Creative Painting Techniques for Walls
- 1.1. Why choose creative painting techniques for your walls?
- 1.2. Benefits of creative painting techniques
- 1.3. Tools and materials needed for creative painting techniques
- 1.4. Preparation before beginning the painting process
- 1.5. Tips for achieving the best results
- 2. Different Creative Painting Techniques for Walls
- 2.1. Sponge painting technique
- 2.2. Stenciling technique
- 2.3. Stripes painting technique
- 2.4. Faux painting technique
- 2.5. Texture painting technique
- 3. Step-by-Step Guide to Creative Painting Techniques for Walls
1. Introduction to Creative Painting Techniques for Walls
Painting walls is a great way to add personality and character to a space. While a simple coat of paint can do the trick, there are also many creative painting techniques that can elevate the look of your walls. From bold stripes to ombre effects, there are endless possibilities when it comes to creative wall painting. In this article, we’ll explore 10 different techniques that you can use to make your walls stand out and reflect your unique style.
1.1. Why choose creative painting techniques for your walls?
Creative painting techniques can add a unique and personalized touch to your walls. By choosing to use these techniques, you can transform your space into something truly special. Whether you want to create a bold statement or a subtle texture, there are many options available to you. In this article, we will explore why you might want to choose creative painting techniques for your walls and introduce you to some of the most popular options.
1.2. Benefits of creative painting techniques
Creative painting techniques for walls can transform any room into a work of art. Whether you’re looking to add some texture, depth, or dimension to a space, there are a variety of painting techniques that can help you achieve your desired look. In addition to being visually stunning, creative painting techniques offer a range of benefits, from hiding imperfections to adding personality and character to your home. In this article, we’ll explore 10 different creative painting techniques for walls and the benefits they offer.
1.3. Tools and materials needed for creative painting techniques
Before diving into the world of creative painting techniques for walls, it’s important to gather all the necessary tools and materials. Here are some essentials to get you started:
1. Paint brushes in varying sizes
2. Painting tape
3. Drop cloths or plastic sheeting
4. Paint rollers and trays
5. Sandpaper
6. Primer
7. Paint in your desired colors
8. Stencils or stamps for patterns
9. Sponges and rags for texture
10. Pencil and eraser for sketching out designs
Having these items on hand will make the process of exploring different painting techniques much smoother and enjoyable. Now let’s dive into the exciting world of creative painting!
1.4. Preparation before beginning the painting process
Before beginning the painting process, it is important to properly prepare the walls to ensure a smooth and even finish. Start by cleaning the surface of any dirt, grime or grease using a mild detergent solution. Next, fill in any cracks or holes with spackling paste and sand the area smooth once it has dried. If there are any glossy or shinny areas, sand them down to create a proper surface for the paint to adhere to. Finally, apply a coat of primer to the walls and let it dry completely before starting with your creative painting techniques.
1.5. Tips for achieving the best results
If you’re looking to add some personality and style to your walls, creative painting techniques can be a great way to achieve a unique look. From bold stripes to intricate patterns, there are countless options to choose from. However, achieving the best results requires some planning and preparation. Here are some tips to help you make the most of your painting project:
2. Different Creative Painting Techniques for Walls
Painting your walls can transform the look and feel of your space. But why settle for a basic coat of paint when there are so many creative techniques to try? Here are 10 unique painting techniques to add some personality and interest to your walls.
1. Ombré: This technique involves blending one color into another to create a gradient effect. Start with the lightest color at the top of the wall and gradually work your way down, blending as you go.
2. Stenciling: Stenciling allows you to create a pattern or design on your wall using a template. You can use a single stencil or layer multiple stencils for a more complex design.
3. Stripes: Stripes are a classic painting technique that can add both height and width to a room. Choose two or more complementary colors and paint alternating stripes on your wall.
4. Sponge painting: This technique involves using a sponge to create a textured effect on your wall. Dip the sponge in paint and dab it onto the wall in a random pattern.
5. Color blocking: Color blocking involves painting large blocks of color on your wall. You can choose two or more colors and create a geometric pattern or paint each block a different color.
6. Faux finish: Faux finishes are techniques that mimic the look of materials such as marble or wood. You can achieve these finishes using paint and a variety of tools and techniques.
7. Polka dots: Polka dots are a fun and playful painting technique that can add a pop of color to your walls. Use a stencil or a round sponge to create uniform dots on your wall.
8. Tapestry: This technique involves painting a pattern or design on your wall using small brushstrokes to create a woven effect. You can choose a simple or complex design depending on your skill level.
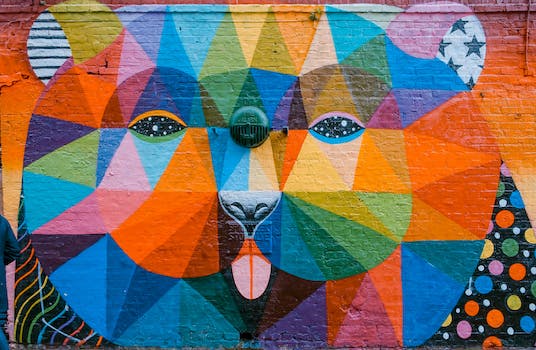
9. Murals: Murals are a painting technique that involves creating a large and detailed scene on your wall. You can hire a professional artist or create your own mural using stencils and paint.
10. Textured painting: Textured painting involves adding depth and dimension to your wall using a variety of tools and techniques. You can create a textured effect using paint brushes, sponges, or even crumpled paper.
2.1. Sponge painting technique
Sponge painting is a technique that involves using a natural or synthetic sponge to create a mottled or textured effect on walls. This technique works well with a variety of paint colors and can be used to create a subtle or bold statement depending on the colors and technique used. To achieve this effect, start by painting the base coat on the wall and allowing it to dry completely. Then, dip the sponge into the second paint color and dab it onto the wall in a random pattern. Repeat this process with additional colors or layers as desired, allowing each layer to dry before adding the next. For a more textured effect, use a rougher sponge or vary the pressure and angle of the sponge as you apply the paint. Sponge painting is a versatile technique that can add depth and interest to any wall in your home.
2.2. Stenciling technique
Stenciling is a fun and easy way to add some personality to your walls. This technique involves using a stencil to create a pattern or design on the surface of your wall. There are a variety of stencils available, from simple geometric shapes to intricate floral patterns. To create a stenciled wall, you’ll need some paint, a stencil, and some painter’s tape. Start by taping the stencil to the wall in the desired location, then use a small roller or stencil brush to apply paint to the stencil. Be sure to use a light touch and build up the color slowly to avoid bleeding under the stencil. Once you’ve finished painting, carefully remove the stencil and painter’s tape and allow the paint to dry completely. Voila! You now have a beautiful stenciled wall that is sure to impress.
2.3. Stripes painting technique
One of the most popular and versatile painting techniques is stripes. This technique is great for adding dimension and interest to a room. There are many different ways to approach stripes, from thin and subtle to thick and bold. Some people prefer to use painter’s tape to create clean and precise lines, while others prefer a more freehand approach. Whatever method you choose, stripes can be a fun and creative way to transform your walls.
2.4. Faux painting technique
Faux painting is a technique that involves applying layers of paint and glaze to create a textured or patterned effect on walls. This technique can be used to create a variety of finishes, such as marble, stone, wood, or even fabric. Faux painting is a great way to add depth and visual interest to a room, and it can be done in any color scheme to match your decor. It’s important to choose the right tools and materials for your faux painting project, and to practice your technique before starting on a large surface. With a little patience and creativity, you can achieve stunning results with faux painting.
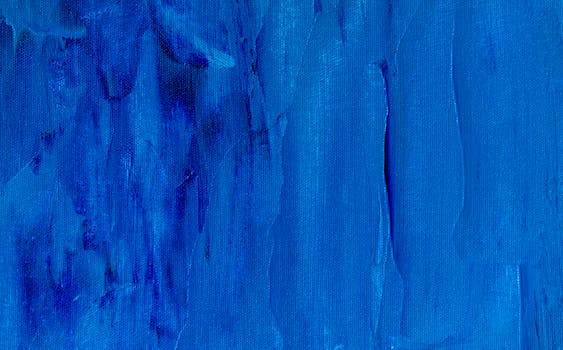
2.5. Texture painting technique
Texture painting is a technique that involves creating a textured surface on walls through the use of specialized tools and techniques. This technique can be used to create a variety of effects, from subtle texture to bold patterns and designs. Some common tools used for texture painting include sponges, rollers, and brushes, among others. By using these tools, painters can create a range of effects, including stippling, dragging, and stippling. Texture painting can be a great way to add visual interest and depth to a room, and it is often used in conjunction with other painting techniques to create a truly unique look.
3. Step-by-Step Guide to Creative Painting Techniques for Walls
Whether you’re looking to spruce up a tired room or add some personality to a new space, creative painting techniques for walls can make a big impact. Follow these step-by-step instructions to try out some unique and eye-catching painting techniques on your own walls:
1. Color Wash: Dilute your paint with water to create a translucent, watercolor-like effect. Use a wide brush to apply the mixture in a random pattern, blending the colors together as you go.
2. Ombre: Gradually blend one color into another, creating a fading effect. Start with the lighter color at the top of the wall, and gradually add more of the darker color as you move down.
3. Stenciling: Use a stencil to create a repeating pattern on your wall. Try using a metallic paint for an added pop of glamour.
4. Tapestry: Use painter’s tape to create a geometric or abstract pattern on your wall. Paint over the tape, and then remove it to reveal the design.
5. Sponging: Dip a natural sponge into your paint, and then dab it onto your wall in a pattern or texture of your choosing.
6. Stripes: Use painter’s tape to create even stripes on your wall. Paint over the tape, and then remove it to reveal the crisp lines.
7. Murals: Channel your inner artist by painting a mural on your wall. Whether it’s a scene from nature or a favorite quote, the possibilities are endless.
8. Faux Finishes: Use a specialty paint and technique to create a faux finish, such as marble, wood grain, or brick.
9. Stippling: Use a stippling brush or even a toothbrush to create a speckled or textured effect on your wall.
10. Polka Dots: Use a circular sponge or stencil to create playful polka dots on your wall. Try varying the size and color for added interest.
With these creative painting techniques, your walls will be a work of art in no time!
3.1. Selecting the right colors and tools
When it comes to painting walls, selecting the right colors and tools is crucial. The color you choose will set the tone for the entire room, so take some time to consider your options. Look at paint swatches in different lighting to get a better idea of how the color will look in your space. Additionally, make sure you have the right tools for the job. This includes brushes, rollers, and painters tape. A high-quality brush will help you achieve a smooth finish, while painters tape will ensure clean edges. With the right colors and tools in hand, you’ll be ready to tackle these step-by-step creative painting techniques for walls.
3.2. Preparing the wall surface
Before you start painting, it is important to properly prepare the surface of the wall. This will ensure that the paint adheres well and lasts longer. Follow these steps for a smooth and successful painting project:
1. Clean the wall surface. Use a damp cloth or sponge to wipe down the wall and remove any dirt, dust, or grease. For tougher stains, use a mild detergent and water.
2. Repair any cracks or holes. Fill in any cracks or holes with spackle or joint compound. Smooth out the surface with a putty knife and let it dry completely.
3. Sand the surface. Use sandpaper or a sanding block to smooth out any rough areas or uneven spots. Wipe down the wall with a tack cloth to remove any dust.
4. Prime the surface. Apply a coat of primer to the wall to improve adhesion and ensure a uniform finish. Let it dry completely before painting.
By properly preparing the wall surface, you will be able to achieve the best results with your creative painting techniques.
3.3. Choosing the right technique for your wall
When it comes to painting your walls, there are a variety of techniques you can choose from to create a unique and creative look. However, it’s important to consider the type of wall you are painting and the overall aesthetic you are trying to achieve. Here are some tips for choosing the right technique for your wall:
– If you have a textured wall, consider using a technique that will enhance the texture, such as sponging or rag rolling.
– For a modern, sleek look, try using a technique like color blocking or ombre.
– If you want to add some depth and dimension to your walls, consider using a technique like stenciling or stamping.
– If you have a large wall that needs some visual interest, try using a technique like mural painting or geometric patterns.
Remember to also consider the colors you are using and how they will complement the technique you choose. With a little bit of creativity and experimentation, you can create a truly stunning look for your walls!
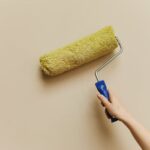
3.4. Applying the first coat of paint
Now that you have gathered all the necessary materials and prepared your wall, it’s time to apply the first coat of paint. Follow these steps for a smooth and successful painting process:
1. Pour your paint into a paint tray, making sure not to overfill it.
2. Dip your roller into the paint, making sure to cover it evenly.
3. Begin painting your wall in a W pattern, starting from the top corner and working your way down. This will ensure even coverage and prevent drips.
4. Work in sections, painting one section at a time and blending the edges as you go along.
5. Don’t forget to take breaks and let the paint dry before applying a second coat. Happy painting!
3.5. Applying the second coat of paint
After allowing the first coat of paint to dry completely, it is time to apply the second coat. This is where you can start to see the true color of the paint come through. When applying the second coat, make sure to use long, even strokes and avoid overloading the brush or roller. It is better to apply multiple thin coats rather than one thick coat to achieve a smooth and even finish. Allow the second coat to dry completely before moving on to any additional decorative techniques or finishes.
Conclusion
In conclusion, these 10 creative painting techniques for walls offer a wide range of options for homeowners and decorators to add a unique touch to any room. Whether you opt for bold stripes, textured designs, or stenciled patterns, there is a technique for every taste and style. With a little bit of patience and practice, you can easily transform your walls into works of art that reflect your personal flair and creativity.


These 10 innovative and imaginative DIY home decor ideas from [object Object] provide a refreshing approach to enhancing ones living…