

Creating a textured accent wall with stencils is a common approach to give a room more character and draw the eye’s attention. Without the need for costly wallpaper or complicated painting abilities, you can create a one-of-a-kind, personalized look using this method.
First, decide on a stencil design that fits nicely with the aesthetic of the area as a whole. There is a huge variety of stencils to choose from, including both man-made and natural designs.
Get out your roller or brush, your stencil brush, some painter’s tape, and the colors you want to use, and then you’re ready to start painting! Choose paints that will stick nicely to the wall and are of good quality.
You should clean the wall completely and then paint a neutral-colored base coat on it before you start painting. Your stencil design will have a sturdy foundation thanks to this.
When the first coat of paint has dried, tape the stencil to the wall. To begin, load the stencil brush with a little amount of paint and lightly dab off any excess. Carefully spread the paint over the stencil in a uniform layer without smudging the design.
You may achieve a more textured effect by trying out various painting techniques. To achieve a weathered look, stipple the paint with a sponge or dab at it with a dry brush. Don’t be scared to use a lot of various colors in a single design.
Carefully peel the stencil away from the wall while the paint is still wet after you have completed painting the entire stencil pattern. In this way, there won’t be any smearing or smudging.
It’s best to wait until the paint is totally dry before bringing in any new furnishings or decorations. Take a step back and take in your amazing textured accent wall, which is sure to be a topic of conversation.
If you want a textured accent wall that turns out great, remember to take your time, be patient, and test out your painting technique on a tiny section of wall first. If you put in the time and effort, any boring wall may be turned into a work of art.
- 1. Introduction
- 1.1. What is upcycling furniture?
- 1.2. Benefits of upcycling furniture
- 1.3. Popular materials for upcycling
- 2. 1. Upcycling Furniture Techniques
- 2.1. Painting and repainting
- 2.2. Decoupage and collage
- 2.3. Stenciling and stamping
- 2.4. Reupholstering and recovering
- 2.5. Distressing and antiquing
- 3. 2. Creative Upcycling Ideas
- 3.1. Transforming old doors into tables
- 3.2. Repurposing wooden crates as shelves
- 3.3. Upcycling vintage suitcases into chairs
- 3.4. Turning old windows into picture frames
- 3.5. Creating unique lighting fixtures from recycled materials
- 4. 3. Upcycling Tips and Tricks
1. Introduction
Repurposing old furniture is a great opportunity to exercise your imagination and give something new life. You can help the environment and give your house some personality by giving old things new uses. In this post, we will look at 10 unique ways to upcycle furniture that will encourage you to unleash your inner artist and personalize your home. These projects will highlight the wide range of options available when it comes to upcycling furniture, from using old doors as headboards to repurposing old luggage as chic storage options.
1.1. What is upcycling furniture?
Furniture upcycling refers to the practice of making fresh use of previously used pieces of furniture. Taking an item of furniture that has served its original purpose or is otherwise destined for the garbage dump and giving it a new one, either in function or form, is what this term refers to. Upcycling is the process of finding new uses for previously used items, such as furniture, rather than discarding them. By repurposing old furniture, we may not only save the environment and live more sustainably, but also make something truly special for our homes.
1.2. Benefits of upcycling furniture
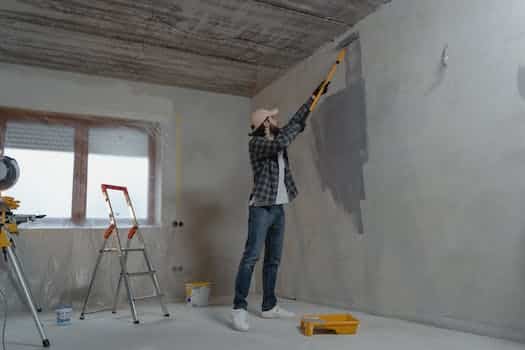
The results of successfully achieving textured walls can be breathtaking. Textured wall painting is an innovative and practical method of accomplishing any of these goals, as well as improving the aesthetics of a room as a whole. To help you create stunning textured walls, consider these suggestions.
One must first adequately prepare the surface before beginning any painting project. Remove all filth, grease, and peeling paint from the walls. Spackling compound and sanding will smooth up the surface, making it ready to be painted.
Pick the correct texture from a wide variety of subtle to striking possibilities. When deciding on a texture, keep the room’s design and function in mind. Whether you choose to use stucco, sponge painting, faux brick, or even just a textured roller, you have plenty of options.
Third, try with new color schemes; textured walls are perfect for showcasing your creativity. Create an eye-catching look by playing around with different tones, colors, and lighting. You have the option of going with a monochrome plan for a refined and understated aesthetic, or going all out with bright, eye-catching hues.
Fourth, apply the texture using the right methods; your approach will have a significant effect on the final product. Sponging, stippling, and rag rolling are just a few of the methods that may be used to make one-of-a-kind patterns and textures. Before applying the texture to a full wall, it is recommended to test it out on a smaller area or sample board.
Fifth, give thought to lighting: Proper lighting can do wonders for the appearance of wall texture. Try with various lighting setups to see what brings out the texture and what makes for the most captivating shadows. Lighting options such as wall sconces, recessed lighting, and spotlights can be used to highlight the texture of your walls.
If you’re intending on texturing numerous walls in the same space, it’s crucial to keep the textures and colors uniform. As a result, the area will feel more coherent and attractive to the eye.
Don’t be scared to try new things; textured wall painting offers a lot of room for personal expression. If you want to give your walls more depth and character, don’t be afraid to combine textures, try out new techniques, or put in unexpected materials like cloth, wood, or metal.
Keep in mind that beautiful textured walls are the result of hard work, practice, and attention to detail. Relax, think things over, and have fun with the design process. The completed room will be an expression of your individuality and ingenuity.
1.3. Popular materials for upcycling
In recent years, upcycling has gained popularity as individuals look for more eco-friendly and resourceful uses for discarded items. Upcycling not only aids in trash reduction but also gives people a platform from which to exhibit their creativity and give their homes a personal touch. In this post, we’ll look at ten unique approaches of upcycling furniture, all of which make use of commonly recycled materials. With a bit of creativity and do-it-yourself savvy, you can turn these materials into attractive and useful furniture.
2. 1. Upcycling Furniture Techniques
Reusing and repurposing old furniture is an excellent method to cut down on waste. You can add personality and style to your house by repurposing old or worn out furniture with a bit of imagination and hard work. If you’re looking for some DIY furniture upcycling inspiration, consider these 10 novel approaches:
1.Stenciling and Painting
Repurposing old furniture is as simple as painting it a new color. Pick a shade that goes well with the rest of your furnishings and paint the entire thing or just certain pieces for a more asymmetrical appearance. Stencils can be used to create one-of-a-kind patterns or motifs on the furniture.
Decoupage 2
The art of decoupage entails covering furniture with a protective coating after decorating it with paper or fabric cutouts. The process is excellent for giving dull or damaged surfaces some much-needed character. Make one-of-a-kind decoupage patterns out of everything from old maps to magazine clippings to fabric remnants.
3. Recover
You can save money by reupholstering an old or worn out sofa instead of buying a new one. Pick a fabric that complements your decor and take off the old upholstery with care. The new fabric is then applied and fastened in place using upholstery tacks or staples. This is an inexpensive way to update the look of your furniture.
4. Anxiety and Cleaning Up
Distressing furniture creates a worn, vintage aspect that works well with the rustic or shabby chic aesthetic. To speed up the natural aging process, remove some of the paint or finish with sandpaper or a wire brush. A whitewash treatment, applied after distressing, lightens the overall color while drawing attention to the worn spots.
5. Reuse and recycling
Use your imagination to make new furniture from used resources. Repurposed materials like old doors, wooden pallets, and vintage crates make for interesting table tops, coffee table bases, and shelving units, respectively. Visit recycling centers and thrift stores for materials you can use to create chic and useful furnishings.
Six, Upgrade Your Devices
In many cases, new hardware is all that’s needed to make an old piece of furniture appear like new again. Putting in new knobs, handles, or pulls is a quick and easy way to update the aesthetic of your home. There is a vast selection of styles and finishes from which to choose, allowing you to customize the furniture to your exact specifications.
7. Tiles and Mosaics
You can decorate the surface of your furniture with a mosaic or tile pattern if you’re in the creative mood. The tops of drawers and cabinets, as well as tables, are ideal for this. Create something one-of-a-kind and eye-catching out of bits of tile, shards of pottery, or even glass beads.
To Cover Walls With Fabric Or Wallpaper
Wallpapering or upholstering the inside of a piece of furniture is another option to make it more visually appealing. Select a design that works with the piece’s aesthetic and apply it with glue. This will inject some life and color into your furnishings.
9. Modify for Another Use
Try to envision something altogether different by repurposing an existing piece of furniture. A wooden ladder can be repurposed as a towel rack or plant stand, and an old suitcase can be made into a chic storage ottoman. A dresser, on the other hand, can serve as a kitchen island or a bookshelf.
Ten. Embellish with Artistic Touches
Last but not least, don’t be shy about dressing up your repurposed furniture. Anything from carved embellishments and ornate molding to hand-painted designs and patterns falls into this category. The sum of these particulars can greatly improve the piece’s visual appeal and render it truly one-of-a-kind and individualized.
2.1. Painting and repainting
Painting and refinishing furniture is a crucial step in upcycling initiatives. A new coat of paint may completely change the look of a piece of furniture that has seen better days, making it perfect for your personal decor. There are a few things to keep in mind whether you want to start from scratch or just give the paint a new coat of life.
To begin with, it’s crucial to get ready. It’s important to give the furniture a thorough cleaning before painting so that any grease or grime can be easily wiped away. Lightly sanding the surface prior to painting improves paint adhesion. Also, before putting a new coat of varnish or finish, the old one must be stripped off the furniture.
The paint you use is also crucial. Use paints that are made for furniture and are of a high quality. Think about if you’re going to be painting wood, metal, or plastic, and choose a paint accordingly. You may give your furniture more character and individuality by experimenting with paint and stain.
Take your time and use thin, even layers of paint while actually painting. Apply a primer to the surface first, and then apply many coats of paint on top of that. It’s important to wait for each coat to dry before moving on to the next. Doing so will guarantee a flawless, expert look by eliminating the possibility of streaks and drips.
Finally, remember to cover your freshly painted furniture. The paint can be protected and made to last longer if a clear sealer or varnish is applied over it. If you want your upcycled furniture to stand out even more, you might decorate it using stencils or decals.
In general, painting and refinishing furniture is a great method to give it fresh life. With the correct tools and some ingenuity, you can make your furniture into unique and eye-catching pieces that reflect your personality.
2.2. Decoupage and collage
Common methods of upcycling furniture include decoupage and collage. Furniture can be decorated using decoupage by adhering paper cutouts or images to the surface with an adhesive. Using this method, you can customize furniture with personalized patterns and coloring. Collage, on the other hand, is a method of creating a textured and visually appealing surface by affixing pieces of cloth, paper, and other objects together. There is no limit to what can be done using decoupage or collage on old or worn out furniture to make it look lovely and unique.
2.3. Stenciling and stamping
Common methods of upcycling furniture include the use of stencils and stamps. Using these methods, you may give your furniture a one-of-a-kind look with your own designs and patterns. Stenciling is the process of applying a pattern on an item of furniture using a stencil. You can use paint, stencil brushes, and adhesive stencils to do this. In contrast, furniture can be stamped with designs made using stamps or even found things. Because of the wide variety of materials that can be used, this method encourages exploration and innovation. The options for repurposing antique furniture through stenciling and stamping are practically limitless.
2.4. Reupholstering and recovering
Recovering and reupholstering old furniture is a common upcycling method. Changing up the upholstery and padding on some vintage chairs can give them a whole new lease on life. This procedure not only aids in extending the life of furniture, but it also gives it a chance to get a new look and feel. Chairs, couches, ottomans, and even headboards can all benefit from a new layer of upholstery. A sewing machine, thread, and some basic sewing knowledge are all you need to get started. You can make your old furniture look brand new with a little imagination and the will to do it yourself.
2.5. Distressing and antiquing
Common methods of upcycling furniture include distressing and antiquing. Using these techniques, you can give any piece of furniture an antique look and feel.
In order to achieve an aged appearance, furniture might be distressed by introducing deliberate flaws. Using sandpaper on the edges and corners, a hammer to make dents, or a key or wire brush to scrape the surface are all common methods of distressing.
On the other side, antiques are all about making things look old and worn. Typically, a glaze or stain is used to further deepen the wood and provide dimension when employing this method. Applying a crackle media or milk paint for an aged appearance is another option.
Wood, metal, and even plastic are just some of the many furniture materials that lend themselves to distressing and antiquing. Using these methods, you can give your upcycled furniture projects an infinite amount of personality and charm.
3. 2. Creative Upcycling Ideas
Repurposing outdated items is a great method to cut down on garbage. DIY ingenuity and imagination may turn old junk into something fresh and modern. Here are 10 ingenious ways to reuse old furniture:
Adding legs and a glass top to an old suitcase transforms it into a stylish nightstand that can be used for a variety of purposes. Any bedroom would benefit from the addition of this vintage-style furniture.
Make a coffee table out of an old wooden pallet by sanding it down and painting it. The coffee table is complete once wheels are added for mobility.
Make a bookshelf by attaching a spruced-up and repurposed wooden ladder to the wall. Put your books, plants, and other decorative things on display using the rungs as shelves.
4. Repurpose an old door into a beautiful headboard (the vintage door headboard). You can sand it down, paint it, and then mount it on the wall behind your bed.
Recycled bar seats made from wine barrels are an original and sustainable option. You may use the halves of the barrel as seats in your kitchen or bar if you cut them in half and cover them with cushions.
Use old drawers as planters to breathe new life into furniture. Plants of your choice can be arranged in them after being filled with soil and placed in the garden or on the patio.
Make a statement with a chandelier made from recycled bicycle wheels. Spray them with a metallic paint and use them as a chandelier’s pendant. This recycled chandelier is the perfect accessory to give any room a dash of urban cool.
Put some adhesive on the bottom of some old vinyl records and stack them to make a one-of-a-kind table. Add a glass or hardwood tabletop for a modern twist on a classic design.
Put together a utensil holder out of tin cans by cleaning them, painting them, and affixing them to a wooden board. This colorful upcycled utensil holder will look great hanging in your kitchen and will help you stay on top of your cooking utensils.
Ten. Wall-Mounted Suitcase bookcases Convert old luggage into chic bookcases. Arrange your books or decorative items on them by stacking them in varying heights and directions.
These ingenious upcycling projects demonstrate how simple it is to make something new out of something old. Motivated yet? Get to upcycling right away!
3.1. Transforming old doors into tables
Repurposing old doors into tables is a novel approach to recycling household items. Repurposing an old door into a chic and one-of-a-kind table just takes some ingenuity and do-it-yourself know-how. The elaborate decorations and unique embellishments on old doors are a great way to personalize your home. You may save money and help the environment by repurposing them into tables. Get some ideas for your personal “front door to dinner table” makeover here.
To make a rustic farmhouse table, first remove any sharp edges from the door, then paint it with a distressed finish. To finish the makeover, attach thick wooden legs or recycle some old table legs.
Use metal hairpin legs and the door’s original, weathered paint or texture to create an industrial coffee table, which is right on trend. The result is a coffee table unlike any other.
Choose a door with ornate carvings or patterns for a boho-chic dining table. You may either give it a splash of color with paint or a more rustic feel by leaving it uncoated. Create a quirky setting by adding mismatched seats.
Choose an old door with intricate carvings and make it into a console table with a vintage feel. To give your drawers a more refined look, use elegant knobs or handles.
5. Minimalist Workstation: If you want your desk to have a streamlined, contemporary appearance, paint the doors a neutral hue. Join together the metal legs to make a simple desk that can be used in any modern setting.
Before beginning the job, make sure the door is measured and cut to the correct dimensions. If you want your door-to-table makeover to stand out from the crowd, don’t be afraid to play around with different colors, styles, and finishes.
3.2. Repurposing wooden crates as shelves
Wooden crates are versatile and can be reused into a new form of shelving. These crates can be upcycled into a chic and environmentally-friendly furniture or container. Wooden crates may be repurposed in a number of ways to create eye-catching shelving units. Here are some innovative ways to repurpose old wooden crates into shelving:
Floating crate shelves can be made by fastening wooden crates to the wall with strong brackets or screws, transforming them into shelves for books, plants, or other wall displays.
To make a more eye-catching shelf, stack several crates on top of each other and secure them with nails or adhesive. Some crates can be left open while others are used with their bottoms facing out to create more space.
Use ropes or chains to suspend crates from the ceiling to make a one-of-a-kind shelf display. As a statement piece or in a room with high ceilings, this is ideal.
Lastly, we have the rustic and endearing ladder crate shelves, which are just stacked wooden crates leant against the wall in a ladder arrangement. This design is versatile and can bring a touch of rustic elegance to your home.
Fifth, install corner crate shelves by screwing or bracketing wooden crates together. Use this space-saving method to showcase your favorite houseplants, books, or trinkets.
Set up cubbies for open storage or a showcase for your prized possessions by stacking and arranging wooden boxes horizontally and vertically. The crates can be stained or painted to fit in with your existing design scheme.
Display 7: Crate Wall Mount wooden crates on a wall in an interesting arrangement to draw attention to your products. This is a wonderful method for displaying treasured works of art, collections, or books.
To make a bookcase, simply stack and secure a number of wooden crates side by side. Some of the crates can be left open for quick access to books, while others can be used with their bottoms facing out for more space.
You may use a wooden box as a chic and practical nightstand by setting it up next to your bed. You may make a flat surface to set your lamp, alarm clock, and other nightstand necessities on by placing a piece of wood or a tray on top of the box.
If you’re looking for a creative way to store your shoes, try stacking wooden crates vertically in your foyer or closet. You can mark or hang each shoe crate to make your shoe collection more manageable.
By giving old wooden crates a new use as shelves, you can both add a creative touch to your home and reduce trash. Get motivated, and start transforming those old wooden crates into chic new shelves right away!
3.3. Upcycling vintage suitcases into chairs
Repurposing old bags as seating is an ingenious approach to reusing otherwise discarded items. These old suitcases might be thrown away, but they can be used as unique and comfortable seating.
First, you’ll need to take off any handles or straps if you’re converting an old suitcase into a seat. A spotless and unblemished finish will result from this. The next step is to give the suitcase some legs or a base to make it more stable. Supports made of wood or metal can be fastened to the underside of the luggage to achieve this.
After the structure is stable, padding and upholstery can be added for comfort. To accomplish this, just attach foam cushioning to the inside of the suitcase and cover it with a suitable cloth. Fabrics can be chosen to complement preexisting furnishings, allowing for a high degree of customization and individual expression.
Finish the makeover by adorning the chair with whatever extras you see necessary to bring out its full potential. These may take the form of buttons, trim, or even the handles of previously used suitcases.
Repurposing old luggage as seating is a great way to reduce waste and help the environment. Making your own unique piece of furniture is a fun and creative DIY project that lets you show off your sense of design.
3.4. Turning old windows into picture frames
Repurposing old windows as picture frames is one example of resourceful recycling. Reusing old windows into picture frames is a great alternative to simply discarding them. This not only aids in recycling, but also provides a lovely, retro accent to your interior design.
The first step in transforming a window into a picture frame is to remove the remaining glass and clean the frame. Next, pick out some pictures or artwork that you really love to hang up. Cut them down to size, making sure they’re just a hair smaller all around than the window’s casing.
When you’re ready, use tape or glue to attach the photographs to the back of the window frame. Check that they are level and stable enough to support the load. If additional stability is required, a thin backing board can be added.
Once the photos are safely inside, the window frame may be displayed anywhere from the wall to a mantel to a shelf. The window frame’s classic style will make your photos stand out and give any room a unique feel.
Reusing old windows in this way is a clever way to display treasured photos or works of art while also giving them a second chance at life. It’s a creative way to improve your home’s aesthetic while also being good for the environment.
3.5. Creating unique lighting fixtures from recycled materials
Creating lighting fixtures out of recycled materials is one of the most creative methods to upcycle and give your interior design a one-of-a-kind twist. It’s a win-win: you get to show off your artistic skills while also doing your part to protect the environment. Using creative reuse techniques, you may turn otherwise ordinary household items into eye-catching lighting centerpieces.
The options for making lights from discarded materials are virtually limitless. You can use anything from wine barrels to antique teacups to graters and colanders to store your food in style. The trick is to think outside the box and recognize the value in commonplace objects that might otherwise be discarded.
First, you’ll want to clean and prepare the recycled material you plan to use to make your one-of-a-kind light fixture. Make sure it’s clean and free of any hazards before using it again. The next step is to choose on a source of illumination. LED lights are both long-lasting and environmentally friendly, while Edison bulbs lend a nostalgic and cozy vibe to the room.
Next, decide what aesthetic you hope to accomplish. You can choose to leave the recycled material as is and appreciate its natural beauty, or you can paint it to match the rest of your furnishings. If you want to make the fixture more eye-catching, you can decorate it with beads, ribbons, or other ornaments.
The completed light fixture requires the light source to be attached to the recycled material in a safe and reliable manner. Holes, hooks, brackets, or adhesive may need to be drilled, attached, or otherwise used, depending on the material. Verify the fixture’s integrity, functionality, and compliance with applicable safety regulations.
In conclusion, using recycled materials to make one-of-a-kind lighting fixtures is a great approach to give your home a little more character. You’ll be helping the environment while also owning a one-of-a-kind piece of furniture that everyone will want to talk about. Gather your ingenuity, for there is no end to the ways in which you can transform discarded objects into eye-catching lamps.
4. 3. Upcycling Tips and Tricks
Tricks & Tips for Upcycling
The first step in successfully upcycling furniture is to use high-quality materials. Try to get solid, well-maintained pieces that can be used in a variety of settings.
Second, get the furniture ready: Always clean and prep the furniture before beginning any upcycling job. In order to prepare a surface for painting or refinishing, you should get rid of any debris, dust, or outdated finishes.
Third, experiment with paint. Painting furniture is a quick and simple way to give it a new lease on life. Create something one-of-a-kind by trying out new hues, designs, and processes.
Fourth, find new uses for existing things; you’re not limited to just furniture. Keep an eye out for used materials that can be recycled into something new. An outdated ladder, for instance, can be repurposed into a chic bookshelf.
5. Embrace flaws; upcycling is all about making use of what you have; this includes the things that aren’t ideal. Don’t worry if your finished product has a few dings and scrapes.
You can also replace the old hardware with brand new when you upcycle furniture. Change up the old knobs, handles, or pulls for something new that better reflects your personal taste.
When doing an upcycling project, it is always preferable to use materials that won’t harm the environment. If you want to lessen your impact on the environment, look for paints and finishes that are safe and long-lasting.
Upcycling furniture is a detailed process that demands patience and time. Plan carefully, carry out each step methodically, and wrap up each project thoroughly for the finest possible outcome.
If you’re feeling stuck or uninspired, try looking for motivation in other places. You can get inspiration for your next upcycling project by looking through periodicals, surfing the online, or shopping at secondhand stores in your area.
When you’re done with your upcycling efforts, don’t be shy about showing them off to the world. Who knows who you might motivate to begin their own upcycling adventure after seeing your work.
4.1. Choosing the right furniture pieces for upcycling
Picking the proper pieces of furniture is essential when upcycling. It is crucial to know what to look for when considering upcycling furniture. Consider these guidelines when you shop for upcycled furniture:
1) Sturdy Build: Favor pieces constructed of either solid wood or metal. The upcycling technique does not weaken these materials.
Good Overall Condition: Pick Pieces of Furniture That Are in Good Shape. Larger damages may be difficult to cure, but smaller ones are easily fixedable.
Invest in classic pieces of furniture that won’t seem dated in a few years. In this approach, the upcycled item will still have the same modern aesthetic as before.
Fourth, think about how you’ll actually use the furnishings. Pick furniture that can do double duty as both seating and storage or as a focal point and conversation starter.
Think about the scale and proportion of the furniture in the room it will be placed in. Check the proportions, and don’t let it dominate or crowd the space.
Following these guidelines can help you choose the best pieces of furniture for your upcycling projects, leading to beautiful new creations.
4.2. Preparation and cleaning techniques
Methods of cleaning and sanitizing used furniture:
Remove any filth, dust, or grime from the piece of furniture first. Clean the furniture with a solution of mild soap and water, or another gentle cleaner approved for use on the material.
Second, before upcycling, any paint or finish must be removed from the piece of furniture. To completely remove the previous paint or finish, use a paint remover or sandpaper.
To prepare the wood for a new coat of paint or finish, sand it down until it is uniform in texture. Smooth down the rough spots and edges with some medium-grit sandpaper.
Putty or wood filler should be used to repair any holes, cracks, or dents. After it has dried fully, you can sand the filled areas to make them look like they belong.
5. Prime the furniture to improve paint or finish adhesion. Prime the furniture using a product suited to its material and wait the recommended amount of time.
Apply the paint or finish of your choice after the primer has dried. You can paint with a brush, roller, or spray can to get different looks. For a longer-lasting, higher-quality result, apply several thin layers.
Seven, wait for each layer of paint or finish to dry before utilizing the furniture or putting anything on it.
Follow these steps to clean and prepare your old furniture so that you can upcycle it into something new and beautiful.
4.3. Selecting the appropriate paint and finishes
To get the desired result when repurposing furniture, choosing the right paint and finishes is essential. A fresh coat of paint may turn a tired old piece into a showpiece worthy of being the centerpiece of your living room. When choosing paint and finishes for your upcycling projects, keep these pointers in mind:
First, select the best paint for the job; different kinds of paint will work better on different kinds of furniture. Spray paints are best for metal and plastic, while latex or oil-based paints work well for hardwood furniture.
The paint’s finish has a big impact on the upcycled furniture’s aesthetic, therefore it’s important to think about. The sleek and contemporary look of a matte finish is complemented by the added elegance and sheen of a glossy one. The satin finish is a versatile option because of its moderate luster.
Make sure the furniture is adequately prepared before painting it. Get rid of any paint or varnish that may already be there, then give the surface a good scrub. The smoother the surface is before painting, the better the paint will adhere.
It is recommended that the paint color be tested on a tiny, hidden part of the furniture before the entire piece is painted. To make sure you’re happy with the final result, you may check how the color looks in a variety of settings.
5. If necessary, use a primer to create a strong base for the paint and prevent any underlying colors from seeping through when painting over a dark or badly soiled surface.
Sixth, you may need to apply additional coats of paint to achieve the appropriate hue and coverage. It’s important to wait for each coat to dry before moving on to the next.
With these pointers in mind, you’ll be able to choose the best paint and finishes for your upcycling projects, guaranteeing that your furniture will be as beautiful as it is special.
4.4. Adding personal touches and customization
One of the best ways to improve the upcycling process and create one-of-a-kind furniture is to add personal touches and customisation. If you’re interested in upcycling furniture, here are some things to keep in mind:
Painting the furniture in a color that reflects your personality is a simple approach to give it a new look. You might go for a striking, attention-grabbing color scheme, or you can go for a more muted, classic palette.
Stenciling is another option for adding a personal touch to your recycled furniture. Intricate patterns or designs can be carved into the surface of the furniture to give it character.
The third method is called decoupage, and it entails using adhesive to attach pieces of paper or fabric to the surface of the furniture. This opens up the possibility of customizing the final product with your own individual touches, such as patterns, graphics, or even photographs.
Changing out the hardware, like the knobs and pulls, on a piece of furniture can completely alter its appearance. Pick hardware that reflects your sense of style, be it classic, contemporary, or something completely different.
To give a piece of fabric-covered furniture a new and unique look, consider reupholstering it as part of your upcycling project. You can make a subtle statement with solid colors or go all out with patterned textiles.
Upcycling, after all, is all about giving something new life by giving it your own spin. Use your imagination, and enjoy yourself while doing it!
4.5. Sustainable and eco-friendly practices
You can give your old furniture a new lease on life by upcycling it. It’s a win-win: you get to do your part to lessen trash and pollution, and your home gets a personalized makeover. If you want to become an expert in upcycling furniture, consider the following advice:
Before beginning an upcycling project, it is recommended that you first make a plan. Consider not only the piece’s intended use but also the aesthetic direction you’d like to take. You can use this as a blueprint for picking appropriate supplies, hues, and methods.
Look for well-maintained pieces made of solid wood, and make sure they are robust. Don’t try to upcycle anything that’s broken or damaged beyond repair. Think about how the furniture can be rearranged based on its dimensions and shape.
Third, get the furniture ready by cleaning and fixing any damage before you start the upcycling process. Use sandpaper or paint remover to get rid of the old finish. Tighten any dangling threads and fix any chips or scratches. This will provide for an easily painted or stained surface.
The fourth tip is to “get creative with paint,” as this is one of the simplest methods to upcycle furniture. Select paint colors that are both eco-friendly and low in volatile organic compounds (VOCs). Try your hand at various painting techniques including distressing, stenciling, and color blocking to achieve interesting results.
Fifth, if the piece of furniture has upholstered pieces or a wooden surface, think about having it reupholstered or refinished. Swap the dingy old cloth for something more eco-friendly and long-lasting. The beauty of wood can be brought out by sanding and refinishing.
Upcycling is all about putting your own spin on a piece of furniture and giving it a new lease on life. You could spruce things up with decoupage made from old book pages or maps, or adorn things with ancient knobs or repurposed hardware.
Don’t confine yourself to the expected purposes of furniture; instead, challenge the status quo. Think outside the box and use your imagination. Repurposing a wooden ladder into a chic bookshelf or an antique suitcase into a one-of-a-kind coffee table are just two examples.
Upcycling is an enjoyable and eco-friendly way to give old furniture a new lease on life. Reusing materials and employing some fundamental do-it-yourself techniques, you may give previously unwanted items new life as decorative and practical household staples.
Conclusion
In conclusion, you may use these 10 inventive upcycling furniture ideas to give your old furniture a new lease on life while also helping the environment. Anyone may help create a more sustainable society by giving used goods a second chance with some ingenuity and do-it-yourself skills.


These 10 innovative and imaginative DIY home decor ideas from [object Object] provide a refreshing approach to enhancing ones living…