

Chandeliers are a wonderful way to upgrade the look of a room, but they can be rather costly. A beautiful chandelier can be expensive to purchase, but it is possible to make one yourself. In this article, we’ll show you how to make 10 easy chandeliers from scratch. There’s something on this list for everyone, whether they want a more modern, traditional, or rustic aesthetic. Okay, so let’s begin!
- 1. Introduction
- 1.1. Why DIY chandeliers are great for beginners
- 1.2. Materials needed for DIY chandelier projects
- 1.3. Safety precautions to take before starting
- 2. 1. Beaded Chandelier
- 2.1. Choosing the right beads
- 2.2. Stringing the beads
- 2.3. Attaching the beads to the frame
- 2.4. Adding lighting fixtures
- 2.5. Decorating with hanging ornaments
- 3. 2. Mason Jar Chandelier
- 3.1. Selecting the right jars
- 3.2. Preparing the jars
- 3.3. Attaching the jars to the frame
- 3.4. Adding lighting fixtures
- 3.5. Decorating the jars with paint or accessories
- 4. 3. Branch Chandelier
1. Introduction
Installing a chandelier in your home is a simple way to make any space feel more luxurious. However, chandeliers can be quite pricey to purchase, and many people are daunted by the prospect of putting one up on their own. Chandelier-making projects for the do-it-yourselfer. A beautiful chandelier can be made with just a little ingenuity and some inexpensive materials. Here are 10 easy-to-follow instructions for making your own chandeliers. We have everything you need, whether you want a modern, shabby chic, or rustic style.
1.1. Why DIY chandeliers are great for beginners
Chandeliers that you manufacture yourself allow for a lot of artistic expression while also being simple to construct, making them ideal for novices. Anyone can make a one-of-a-kind chandelier that adds a touch of beauty to any room with just a few simple materials and some creativity. In addition, you can save money while still receiving a high-quality chandelier by making your own instead of buying one from a store. In this article, we’ll go over ten various DIY chandelier ideas that are simple enough for novices to tackle.
1.2. Materials needed for DIY chandelier projects
The first step in making your own chandelier is to collect all of the components you’ll need. The materials you use could be different from one design to the next. A light fixture, wire cutters, pliers, glue gun, spray paint, beads, crystals, and other ornamental elements are just some examples of the more common supplies you may require. Get a good feel for your design before you go out and buy supplies to avoid running short on anything. You may make a beautiful chandelier that will serve as the room’s focal point with just a few supplies and some imagination.
1.3. Safety precautions to take before starting
Safety measures should be taken before beginning any do-it-yourself chandelier project to prevent harm. Put on protective gear including goggles, gloves, and a face mask in case of dust. Make sure you have the right tools for the job and read the directions thoroughly. Maintain a clutter-free and orderly workspace and focus on the task at hand. Do not hesitate to consult an expert for guidance if you are uncertain about any part of the project. When doing a job on your own, remember to prioritize safety above all else.
2. 1. Beaded Chandelier
A beaded chandelier can make any space feel more refined and bohemian. You can make a gorgeous chandelier that will be the talk of your social circle with just a few inexpensive supplies and some time. You may make your chandelier unique by selecting beads in the perfect size, shape, and color for you. There is a wide variety of beads to choose from, including glass and wood. Make your own beaded chandelier with the help of our detailed instructions.
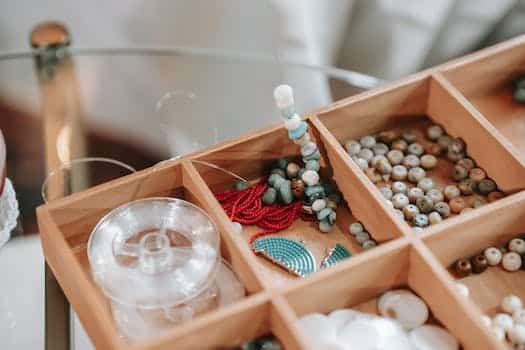
2.1. Choosing the right beads
Selecting the proper beads is crucial when making a beaded chandelier. Think about the feel and look you’re going for first. Do you want it to have a bohemian vibe with bright, mismatched beads, or a more modern vibe with simple, shiny metal beads? Next, consider the beads’ dimensions and form. The piece will make a stronger statement if the beads are larger, while a more delicate appearance will result from using smaller beads. You may create a more interesting and textured look by combining items of varying sizes and shapes. Finally, think about the beads’ construction. Crystal and glass beads are more formal, while beads made of wood or plastic might be more casual or fun. Picking the perfect beads can be a lot of fun and a real challenge.
2.2. Stringing the beads
To make a beaded chandelier, you must first string the beads. Putting in the time and effort is rewarded with a gorgeous finished product that will elevate any space. Get some string and beads together to get started. Glass, crystal, wood, or plastic beads can all be used successfully. Pick out some beads and some wire or cable in a color scheme that you think will look good in your space. Each bead should be fastened in place, either with a knot or a crimp bead. Add more beads until the necklace is the right length for you. Once you have enough beads strung, you may affix them to the chandelier frame and take in your handiwork.
2.3. Attaching the beads to the frame
After you’ve strung all of your beads, it’s time to secure them to the chandelier’s framework. Beads should be securely fastened to the frame using jewelry wire or fishing line, beginning at the top and working your way down. Put them where you want them, but make sure they’re evenly spaced. When you’ve finished stringing your chandelier, give it a light shake to check for loose beads.
2.4. Adding lighting fixtures
Any area may be instantly improved by installing new lighting fixtures. A beaded chandelier is a common do-it-yourself chandelier alternative. A chandelier like this can instantly elevate the look of any room. Anyone with sufficient imagination and the right tools can make their own beaded chandelier. In this post, we’ll look at 10 easy chandelier projects that even a beginner can complete, complete with diagrams, directions, and helpful hints.
2.5. Decorating with hanging ornaments
Ornaments hung from the ceiling are an easy way to give a place a unique feel. There are many ways to use hanging ornaments to enhance the aesthetic of your home, whether you’re starting with a blank canvas or already have a lot going on. The beaded chandelier is a favorite because it can be altered to match any decor. Even those without much experience in the arts can make a DIY chandelier so beautiful that their friends will be green with envy.
3. 2. Mason Jar Chandelier
Chandeliers made from mason jars are on-trend and a cheap way to give your home a country feel. You can create your own with a few inexpensive mason jars, a piece of wood, and some wire. To begin, drill holes into the wooden board in a configuration that will provide sufficient support for your mason jars. Follow this by installing a light fixture in one of the jars and suspending the board from the ceiling. The jars of your chandelier can be painted any color you desire, and you can also add ribbons and flowers for a personal touch.
3.1. Selecting the right jars
There are a number of elements to think about while choosing the jars for your do-it-yourself chandelier. Consider the jars’ sizes first. You want them to be noticeable without being too imposing on the room. Next, think about how the jars are shaped. Chandeliers made from mason jars are common due to their timeless appeal, but other types of jars could also be used if necessary. Finally, give some thought to the jars’ hue. If you want your chandelier to really shine, use clear jars, while if you want to add some color, use colored jars. In the end, the jars that work best for your project are the ones that suit your aesthetic preferences and goals.
3.2. Preparing the jars
Getting the jars ready is the first step in making a Mason jar chandelier. Remove any labels or sticky residue and give them a good cleaning. Any residue can be washed away with a mixture of dish soap, vinegar, and hot water. Before moving on to the following stage, make sure the jars are totally dry.
3.3. Attaching the jars to the frame
Use metal hose clamps with a diameter that matches the jar necks to secure the jars to the frame. Put the clamps around the necks and screw them on as tightly as possible. Check that the jars are hanging properly and that the clamps are appropriately positioned around the frame. Before fully tightening the clamps, make any necessary adjustments.
3.4. Adding lighting fixtures
Changing the lighting in a space can have a dramatic effect on its atmosphere. Making a chandelier is a simple and inexpensive option. An easy way to get started is with a mason jar chandelier. It’s not only easy to whip up, but it also gives any room a warm, homey vibe. Here’s what you need to do:
3.5. Decorating the jars with paint or accessories
Mason jars can be easily personalized through the process of decorating them. Jars can be easily decorated with paint. Acrylic and chalk paint are just two examples of the many paint options available to you. To further customize the design of your jars, you can use embellishments like ribbons, lace, or twine. You can also use stencils to make designs or patterns on your jars. When it comes to embellishing mason jars, the sky’s the limit!
4. 3. Branch Chandelier
If you’re going for a more primitive, natural vibe in your house, a branch chandelier is the way to go. Finding a sturdy branch and affixing lighting fixtures to it is all it takes to create one. You may make it more unique by decorating it with your own touches, such leaves and flowers. This chandelier will be the focal point of any room and a point of interest for guests.
4.1. Selecting the right branch
There are a few factors to bear in mind while choosing a branch for your do-it-yourself chandelier project. To begin, select a branch that is strong enough to hold all of the chandelier parts. Try to find branches that are sturdy and well-anchored. The chandelier’s overall feel and appearance will be influenced by the branch’s size and shape. A branch with many kinks and curves can provide dimension and visual intrigue to your design, while a straighter branch might give your work a more minimalist, contemporary feel. Finally, give some thought to the hue and sheen of your branch. A raw or minimally sanded branch could be the finest option if you’re striving for a more natural or rustic appearance. You may give your branch a more finished touch by painting or staining it to coordinate with the rest of your furnishings. You may make a beautiful and original branch chandelier with these guidelines in mind.
4.2. Preparing the branch
Make sure the branch is adequately prepared before beginning your chandelier project. To start, remove any dirt or debris using a soft cloth or brush. The next step is to look for cracks or other evidence of damage on the branch. For the sake of everyone in the room, pick a branch that is strong and healthy for your chandelier. Remove peeling bark and prune back overgrown branches as needed. Finally, sand the branch carefully to remove any remaining rough spots and prepare it for staining or painting.
4.3. Attaching the branch to the frame
You’ll need some robust wire and pliers to secure the chandelier’s branches to the frame. Separate the wire into manageable lengths, and then use the pliers to tightly wrap each piece around the branch and the frame to hold it in place. The branches should be equally spaced across the frame, and the angles should be tweaked as needed to make a pleasing composition.
4.4. Adding lighting fixtures
The Branch Chandelier is an elegant and one-of-a-kind lighting option for any space. The rustic elegance of this chandelier is enhanced by the fact that it is made from real branches. You’ll need a number of branches of varied lengths and thicknesses to make this chandelier. Fasten a light fixture to the center after wiring or tying the branches together. Use a strong hook to suspend the chandelier from the ceiling. If you’re a newbie and want to give your home a unique look, this is the project for you.
4.5. Decorating with hanging ornaments
Making a chandelier from of ornaments you already have will give your home a one-of-a-kind look. The branch chandelier is a common choice since it is adaptable to many different kinds of natural materials. This undertaking is great for novices because it calls for few materials and may be modified to suit individual tastes. Gather a number of branches in a range of sizes to use as the basis for your chandelier. Then, connect the branches together in a circle, making sure to leave some room between them, using wire or twine. To finish off the design, suspend some decorations or string up some fairy lights. You may bring a touch of nature to your house and surprise your guests by making a gorgeous statement piece with just a few simple tools and materials.
Conclusion
In conclusion, if you’re a beginner and want to add some class to your home without breaking the budget, try your hand at one of these 10 DIY chandelier projects. You can make a beautiful chandelier out of simple supplies that will astonish your guests and give any room a personal touch.


These 10 innovative and imaginative DIY home decor ideas from [object Object] provide a refreshing approach to enhancing ones living…