
Are you tired of clutter and looking for creative ways to organize your space? Look no further! In this article, we will explore 10 DIY decorative storage bin ideas that will not only help you declutter but also add a touch of style to your home. From repurposed materials to personalized designs, these storage solutions are both functional and visually appealing. Get ready to transform your space with these unique and practical storage bin ideas!
- 1. Introduction
- 1.1. What are DIY Decorative Storage Bins?
- 1.2. Benefits of Using DIY Decorative Storage Bins
- 1.3. Popular Materials for DIY Decorative Storage Bins
- 1.4. Tools and Materials Needed for DIY Decorative Storage Bins
- 1.5. Important Considerations before Starting DIY Decorative Storage Bins
- 2. Step-by-Step Guide to Making DIY Decorative Storage Bins
- 2.1. Choosing the Right Design for Your DIY Decorative Storage Bins
- 2.2. Gathering the Necessary Materials
- 2.3. Measuring and Cutting the Storage Bin Material
- 2.4. Assembling the DIY Decorative Storage Bins
- 2.5. Adding Finishing Touches to Your DIY Decorative Storage Bins
- 3. Creative Ideas for DIY Decorative Storage Bins
- 3.1. Painting and Decorating Techniques for DIY Decorative Storage Bins
- 3.2. Using Fabric and Patterns to Enhance DIY Decorative Storage Bins
- 3.3. Upcycling and Repurposing Ideas for DIY Decorative Storage Bins
- 3.4. Incorporating Labels and Tags for Organization
- 3.5. Mixing and Matching Different DIY Decorative Storage Bins
1. Introduction
Decorative storage bins are a great way to add style and organization to your home. Whether you need extra storage in your bedroom, living room, or office, DIY decorative storage bin ideas can help you create functional and beautiful storage solutions. In this article, we will explore 10 creative and budget-friendly DIY ideas for decorative storage bins that you can easily make at home. From repurposing old cardboard boxes to transforming plain baskets, these ideas will inspire you to get creative and personalize your storage bins to match your home decor. Let’s dive in and discover some amazing DIY decorative storage bin ideas!
1.1. What are DIY Decorative Storage Bins?
DIY decorative storage bins are a fantastic way to organize and add a touch of style to your home. These bins are typically made from various materials, such as cardboard, fabric, or even recycled materials, and can be customized to match your home decor. With a little creativity and some basic crafting skills, you can create unique and functional storage bins that not only serve their purpose but also enhance the aesthetic appeal of your space. Whether you need storage solutions for your living room, bedroom, or even your kitchen, DIY decorative storage bins offer endless possibilities for organizing and beautifying your home.
1.2. Benefits of Using DIY Decorative Storage Bins
Decorative storage bins are a fantastic solution for organizing and decluttering your space. Whether you are looking to spruce up your living room, bedroom, or office, these DIY decorative storage bins offer a myriad of benefits. Not only do they provide efficient storage options, but they also add a touch of style and personality to any room. From repurposing old containers to creating unique designs from scratch, there are countless ideas to explore. In this article, we will delve into the various benefits of using DIY decorative storage bins and provide you with some inspiring ideas to get started on your own projects.
1.3. Popular Materials for DIY Decorative Storage Bins
Decorative storage bins are a popular choice for organizing and decluttering your home. These bins not only serve the purpose of keeping your belongings in order but also add a touch of style to any room. If you are a fan of do-it-yourself projects, creating your own decorative storage bins can be a fun and rewarding endeavor. By using popular materials, you can customize the bins to match your personal taste and home decor. In this article, we will explore some popular materials for DIY decorative storage bins that you can easily incorporate into your next project.
1.4. Tools and Materials Needed for DIY Decorative Storage Bins
When it comes to DIY decorative storage bins, having the right tools and materials is essential. These items will not only make your project easier but also ensure a successful outcome. Here are some of the tools and materials you’ll need to get started:
1. Storage bins: Choose bins that are sturdy and in the size and shape you desire. They can be made of plastic, fabric, or even wood.
2. Measuring tape: Accurate measurements are crucial for creating storage bins that fit perfectly in your space. A measuring tape will help you measure the dimensions of the bins and the areas where you plan to place them.
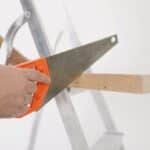
3. Cutting tools: Depending on the material of your storage bins, you may need cutting tools such as scissors, utility knives, or a saw.
4. Adhesive: To assemble and secure the decorative elements on your storage bins, you’ll need a strong adhesive. Look for one that is suitable for the materials you’re using.
5. Decorative elements: This can include items like fabric, wallpaper, contact paper, paint, stencils, or even decorative knobs. Get creative and choose elements that match your personal style and the overall theme of your space.
6. Brushes and rollers: If you plan to paint or apply any kind of finish to your storage bins, make sure you have brushes and rollers of different sizes to achieve the desired effect.
7. Protective gear: Safety should always come first. Depending on the tools and materials you’re using, you may need gloves, safety goggles, or a mask to protect yourself.
Having these tools and materials ready before you start your DIY decorative storage bin project will save you time and ensure a smoother crafting process.
1.5. Important Considerations before Starting DIY Decorative Storage Bins
Before starting your DIY decorative storage bins project, there are a few important considerations to keep in mind. These considerations will help ensure that your project turns out successful and meets your storage needs effectively.
Firstly, it is important to assess your storage requirements. Determine what items you plan to store in the bins and how much storage space you need. This will help you choose the right size and number of bins to create.
Secondly, consider the style or theme you want to achieve with your storage bins. Think about the overall aesthetic of the room or area where the bins will be placed. This will guide your choice of materials, colors, and patterns for the bins.
Next, think about the functionality of the bins. Consider how you want to access the stored items and whether you need any additional features like handles or labels. This will help you design the bins in a way that makes them convenient and easy to use.
Additionally, take into account your DIY skills and available resources. Assess your level of expertise and the tools you have access to. This will determine the complexity of the project and the materials you can work with.
Lastly, consider your budget for the project. DIY decorative storage bins can be made using a variety of materials, some of which can be more expensive than others. Determine how much you are willing to spend and choose materials accordingly.
By considering these important factors before starting your DIY decorative storage bins project, you can ensure that the end result is both functional and visually appealing.
2. Step-by-Step Guide to Making DIY Decorative Storage Bins
Here is a step-by-step guide to making your own DIY decorative storage bins. These bins are not only functional but also add a touch of style to any room. Let’s get started!
1. Gather Your Materials: Start by gathering all the materials you will need for this project. You will need a cardboard box, fabric of your choice, scissors, a ruler, a hot glue gun, and decorative embellishments like ribbons or buttons.
2. Measure and Cut: Measure the dimensions of your cardboard box and cut out pieces of fabric accordingly. Make sure to leave some extra fabric for folding and gluing.
3. Cover the Box: Use the hot glue gun to attach the fabric to the cardboard box. Start by gluing one side and then work your way around, pulling the fabric taut as you go. Secure any loose ends with additional glue.
4. Fold and Glue: Fold the excess fabric neatly and glue it down to create clean edges. This will give your storage bin a more polished look.
5. Add Decorative Embellishments: Get creative and personalize your storage bin by adding decorative embellishments. You can glue on ribbons, buttons, or even paint designs on the fabric.
6. Let it Dry: Allow your storage bin to dry completely before using it. This will ensure that the fabric and glue are securely attached.
7. Repeat the Process: If you want to make more storage bins, simply repeat the above steps with different fabric patterns and colors.
Now that you have your own DIY decorative storage bins, you can organize your belongings in style. These bins are perfect for storing items like toys, books, or even craft supplies. Get creative and enjoy the process of making your own unique storage solution!
2.1. Choosing the Right Design for Your DIY Decorative Storage Bins
Choosing the right design for your DIY decorative storage bins is essential to ensure they complement your home decor and meet your organizational needs. Here are some tips to help you make the right choice:
1. Consider the Purpose: Before selecting a design, think about how you plan to use the storage bins. Are they intended for storing toys, office supplies, or clothing? Understanding the purpose will help you determine the size and features you need.
2. Match Your Style: Take into account the overall aesthetic of your space. If your home has a modern and minimalist vibe, opt for sleek and simple designs. For a rustic or bohemian look, consider using natural materials like woven baskets or wooden crates.
3. Think About Accessibility: If you need to access the contents of the bins frequently, choose designs that provide easy access. Look for bins with handles, removable lids, or open-top designs.
4. Personalize It: DIY storage bins offer an opportunity to add a personal touch to your home decor. Consider adding decorative elements like fabric covers, painted patterns, or labels to make them unique.
5. Consider Durability: Depending on the items you plan to store, durability may be a crucial factor. If you’re storing heavy items, opt for bins made of sturdy materials like plastic or metal.
By considering these factors, you can choose the right design for your DIY decorative storage bins that not only serve their purpose but also enhance the overall look of your space.
2.2. Gathering the Necessary Materials
To start your DIY decorative storage bin project, you will first need to gather all the necessary materials. Having everything prepared before you begin will make the process smoother and more efficient. Here is a step-by-step guide to help you gather the required items:
1. Storage Bins: Choose the size and shape of storage bins that suit your needs. You can find various options at home improvement stores or online.
2. Fabric: Select fabric that matches your desired aesthetic. Consider the color, pattern, and texture that will complement your room decor.
3. Scissors: Make sure you have a sharp pair of scissors to cut the fabric and other materials.
4. Measuring Tape: Accurate measurements are crucial for ensuring the fabric fits the storage bins perfectly. A measuring tape will come in handy for this task.
5. Adhesive: Depending on the method you choose, you may need adhesive to secure the fabric to the storage bins. Options include fabric glue, adhesive spray, or double-sided tape.
6. Decorative Accessories: If you want to add extra embellishments to your storage bins, gather any decorative accessories you wish to use, such as ribbons, buttons, or bows.
7. Optional Tools: Depending on your preferred method, you may need additional tools like a sewing machine, needle, and thread.
By gathering all these materials beforehand, you will be well-prepared to embark on your DIY decorative storage bin project. Now that you have everything ready, it’s time to move on to the next steps.
2.3. Measuring and Cutting the Storage Bin Material
When making DIY decorative storage bins, one of the important steps is measuring and cutting the storage bin material. Proper measurements and precise cuts ensure that the bins will fit well and look professional. Here is a step-by-step guide to help you with this process:
1. Gather the necessary materials: You will need the storage bin material of your choice, a measuring tape, a pencil, and a cutting tool such as a utility knife or a pair of scissors.
2. Measure the dimensions: Decide on the size of the storage bin and measure the length, width, and height accordingly. Use the measuring tape to get accurate measurements and mark them with a pencil.
3. Mark the cutting lines: Using the measurements, mark the cutting lines on the storage bin material. Make sure the lines are straight and even, as this will affect the final appearance of the bin.
4. Cut the material: Carefully follow the marked cutting lines and use the cutting tool to cut the storage bin material. Take your time to ensure clean and precise cuts.
5. Check the fit: Once you have cut all the necessary pieces, assemble them together to check the fit. Make any adjustments if needed to ensure a snug fit.
By following these steps, you can confidently measure and cut the storage bin material for your DIY decorative storage bins. This will result in well-fitted and aesthetically pleasing storage solutions for your home.
2.4. Assembling the DIY Decorative Storage Bins
To assemble the DIY decorative storage bins, follow these step-by-step instructions:
1. Gather all the materials you will need for this project. This may include cardboard boxes, fabric, scissors, glue, measuring tape, and a pencil.
2. Start by measuring the dimensions of your cardboard box. Use a measuring tape to determine the length, width, and height.
3. Once you have the measurements, transfer them onto the fabric. Use a pencil to mark the dimensions on the fabric, leaving some extra fabric for folding and gluing.
4. Cut out the fabric pieces according to the marked dimensions. Make sure to cut straight and precise lines.
5. Apply glue to one side of the cardboard box. Place the corresponding fabric piece on top of the glued side, making sure it aligns with the edges of the box.
6. Repeat this process for the remaining sides of the box, gluing and attaching the fabric pieces one by one.
7. Once all the fabric pieces are attached, fold the excess fabric over the edges of the box and secure it with glue. This will give the storage bin a neat and finished look.
8. Allow the glue to dry completely before using the storage bin.
By following these simple steps, you can easily assemble your own DIY decorative storage bins. These bins are not only functional but also add a touch of style to your home decor.
2.5. Adding Finishing Touches to Your DIY Decorative Storage Bins
Adding finishing touches to your DIY decorative storage bins is a great way to personalize and enhance their appearance. Here are some simple steps to follow:
1. Choose your embellishments: Consider using items like ribbons, fabric scraps, buttons, or even stencils to add decorative elements to your storage bins.
2. Prepare your materials: Make sure you have all the necessary materials, such as glue, scissors, and any other tools required for your chosen embellishments.
3. Clean and prep the bins: Before adding any embellishments, ensure that your storage bins are clean and free from dust or debris. This will provide a smooth surface for the decorations.
4. Plan your design: Take some time to plan out the placement of your embellishments. Consider creating a pattern or arranging them in a way that is visually appealing and cohesive.
5. Attach the embellishments: Use your chosen adhesive to securely attach the embellishments to the bins. Make sure to follow the instructions on the adhesive packaging for the best results.
6. Allow drying time: Depending on the type of adhesive used, allow sufficient drying time for the embellishments to adhere properly to the bins.
7. Optional protective coating: If desired, you can apply a clear protective coating over the embellishments to ensure their longevity and durability.
By following these steps, you can transform your ordinary storage bins into unique and stylish decorative pieces that will add a personal touch to your home décor.
3. Creative Ideas for DIY Decorative Storage Bins
Are you tired of the clutter in your home? Do you find yourself constantly searching for a place to store your belongings? Look no further! In this article, we will explore 10 creative ideas for DIY decorative storage bins that will not only help you organize your space but also add a touch of style and personality to your home.
1. Upcycled Cardboard Boxes: Don’t throw away those cardboard boxes! With a little bit of creativity, you can turn them into beautiful storage bins. Simply cover them with fabric, paint them in vibrant colors, or decorate them with washi tape to match your home decor.
2. Fabric-Covered Bins: If you have old bins lying around, give them a new lease on life by covering them with fabric. Choose a fabric that complements your interior design and use a hot glue gun to secure it in place. This simple DIY project will instantly transform your plain storage bins into stylish organizers.
3. Rope Baskets: Create rustic and charming storage bins using rope. Start by coiling the rope into a circular shape and securing it with hot glue. Continue coiling the rope and gluing it together until you reach your desired size. These rope baskets are not only functional but also visually appealing.
4. Painted Wooden Crates: Wooden crates are versatile storage solutions. Give them a fresh look by painting them in bold colors or patterns. You can also distress the wood for a vintage feel. Stack these crates in your living room, bedroom, or office to store books, magazines, or even toys.
5. Personalized Canvas Bins: Express your creativity by designing your own canvas bins. Use fabric paints, stencils, or iron-on transfers to add personalized designs, quotes, or monograms. These custom-made bins will not only keep your belongings organized but also showcase your unique style.
6. Chalkboard Labels: Take your organization to the next level by adding chalkboard labels to your storage bins. Use chalk or chalk markers to write labels or notes on these labels. This way, you can easily change the labels whenever you need to reorganize or repurpose the bins.
7. Vintage Suitcase Storage: Repurpose vintage suitcases into stylish storage bins. Clean the suitcases thoroughly and add shelves or dividers inside to create separate compartments. These unique storage solutions will be a great addition to any room with a vintage or eclectic decor.
8. Woven Fabric Baskets: If you enjoy sewing, try making your own woven fabric baskets. Choose your favorite fabric patterns and sew them together to create beautiful and functional storage bins. These baskets are perfect for holding small items like craft supplies, toiletries, or accessories.
9. Mason Jar Storage: Repurpose mason jars into cute and practical storage containers. Attach the lids of the jars underneath a shelf or cabinet using screws or adhesive. Fill the jars with small items like buttons, paper clips, or spices, and screw them onto the lids. This way, you can easily see and access your stored items.
10. Denim Pocket Organizers: Give your old jeans a new purpose by turning them into pocket organizers. Cut out the pockets from old jeans and attach them to a piece of fabric or canvas. Hang this organizer on a wall or the back of a door to store small items like keys, pens, or sunglasses.
These DIY decorative storage bin ideas will not only help you declutter your home but also bring a personal touch to your organization. Get creative and start transforming your space today!
3.1. Painting and Decorating Techniques for DIY Decorative Storage Bins
Painting and Decorating Techniques for DIY Decorative Storage Bins
When it comes to DIY decorative storage bins, painting and decorating them can add a personal touch and make them truly unique. Here are some techniques you can try:
1. Color blocking: Create a modern look by using different colors to block off sections of the bin. You can use painter’s tape to create clean lines and paint each section a different color.
2. Stenciling: Add intricate patterns or designs to your bins using stencils. This can be done with acrylic paint and a stencil brush. Simply position the stencil on the bin and dab the paint over it to create a beautiful design.
3. Decoupage: Transform your storage bins with decoupage. Cut out images or patterns from magazines or wrapping paper and glue them onto the bin using a decoupage medium. Seal the surface with additional coats of the medium for a polished look.
4. Ombre effect: Create a gradient effect by using multiple shades of the same color. Start with the lightest shade at the top of the bin and gradually darken the color as you move towards the bottom. This can be achieved by blending the paints together using a sponge or brush.
5. Distressing: If you prefer a vintage or rustic look, distressing your bins can add character. Use sandpaper to gently rub off some of the paint, focusing on the edges and corners. This will give your bins a worn and weathered appearance.
These painting and decorating techniques are just a few ideas to get you started. Feel free to experiment with different colors, patterns, and textures to create storage bins that suit your personal style and home decor.
3.2. Using Fabric and Patterns to Enhance DIY Decorative Storage Bins
Using fabric and patterns can greatly enhance the look of DIY decorative storage bins. By choosing the right fabrics and patterns, you can add a personal touch and make your storage bins stand out. Here are some creative ideas to inspire your DIY projects:
1. Colorful Patchwork: Cut out small fabric squares in various vibrant colors and sew them together to create a patchwork design on the storage bin. This adds a playful and eclectic touch.
2. Floral Appliques: Choose a floral fabric and cut out small flower shapes. Attach these appliques onto the storage bin using fabric glue or by sewing them on. This creates a feminine and charming look.
3. Striped Elegance: Opt for a striped fabric and cover the entire storage bin with it. This simple yet classy design adds a touch of sophistication to any room.
4. Geometric Patterns: Use geometric patterned fabric to create a modern and stylish look. Consider patterns like chevron, herringbone, or triangles for a contemporary feel.
5. Personalized Monograms: Add a personalized touch by sewing or gluing on fabric letters or monograms onto the storage bin. This is a great way to label the contents or add initials for a customized look.
6. Nature-Inspired Prints: Choose fabrics with nature-inspired prints such as leaves, flowers, or animals. This brings a natural and organic feel to your storage bins.
7. Vintage Lace: Attach lace trim or doilies onto the storage bin for a vintage and romantic look. This works especially well for a shabby chic or cottage-style decor.
8. Bold Patterns: If you want to make a statement, go for bold and vibrant patterns like ikat, paisley, or tribal prints. These patterns can add a pop of color and personality to your storage bins.
9. Nautical Theme: Use fabrics with nautical motifs like anchors, sailboats, or seashells to create a coastal-themed storage bin. This is perfect for a beach house or a room with a maritime-inspired decor.
10. Ombre Effect: Choose a fabric in a gradient color scheme and create an ombre effect on the storage bin. This adds a trendy and artistic touch.
Remember, the possibilities are endless when it comes to using fabric and patterns to enhance your DIY decorative storage bins. Get creative, experiment with different materials, and have fun transforming ordinary bins into stylish and personalized storage solutions.
3.3. Upcycling and Repurposing Ideas for DIY Decorative Storage Bins
Upcycling and repurposing items for DIY decorative storage bins is a great way to add a personal touch to your home organization. Not only does it help reduce waste and promote sustainability, but it also allows you to create unique and stylish storage solutions. Here are some creative ideas to inspire you:
1. Vintage Suitcase Storage: Turn old vintage suitcases into decorative storage bins by adding shelves or dividers inside. You can stack them up or use them individually to store various items like books, magazines, or even shoes.
2. Mason Jar Organizers: Repurpose empty mason jars by attaching them to a wooden board or wall to create a practical storage solution for small items like office supplies, craft supplies, or bathroom essentials.
3. Wine Crate Shelving: Transform wine crates into decorative storage bins by attaching them to the wall and using them as shelves. These crates can hold anything from books and plants to kitchen utensils and spices.
4. Fabric Covered Cardboard Boxes: Take plain cardboard boxes and cover them with your favorite fabric using adhesive or glue. This simple DIY project turns ordinary boxes into stylish storage bins for clothing, accessories, or toys.
5. Painted Tin Cans: Give empty tin cans a fresh coat of paint and use them as decorative storage bins for pens, brushes, or even as small planters for succulents.
6. Rope Baskets: Create unique and rustic storage bins by coiling rope around a base, such as a cardboard box or a bucket, and securing it with glue. These baskets are perfect for storing blankets, towels, or toys.
7. Tote Bag Wall Organizer: Hang tote bags on a pegboard or wall hooks to create a functional and decorative storage solution. Use each bag to store different items, such as scarves, hats, or even gardening tools.
8. Wooden Crate Bookshelf: Stack wooden crates horizontally or vertically to create a custom bookshelf. These crates can also be used as storage bins for toys, shoes, or folded clothes.
9. Pallet Storage Bench: Repurpose a wooden pallet by adding storage compartments or baskets underneath. This DIY storage bench is perfect for entryways or living rooms, providing both seating and organization.
10. Upcycled Drawer Shelves: Take old drawers and mount them on the wall to create unique shelving units. These repurposed drawers can be used as storage bins for various items, such as books, plants, or decorative accessories.
With these creative upcycling and repurposing ideas, you can transform ordinary items into beautiful and functional storage bins for your home. Get inspired and start your DIY projects today!
3.5. Mixing and Matching Different DIY Decorative Storage Bins
Mixing and matching different DIY decorative storage bins can add a unique and personalized touch to your home organization. With a little creativity and some basic materials, you can transform plain storage bins into stylish and functional pieces. Here are some creative ideas to inspire your DIY decorative storage bin projects:
1. Paint and stencil: Give your storage bins a fresh look by painting them in vibrant colors. Use stencils to add patterns or designs for a more customized look.
2. Fabric wrapping: Wrap your storage bins with fabric of your choice to add texture and visual interest. This is a great way to repurpose old fabric scraps or give a new life to plain bins.
3. Rope or twine embellishments: Add a rustic touch to your storage bins by wrapping them with rope or twine. This can create a charming and natural look, perfect for a farmhouse or coastal-inspired decor.
4. Decoupage: Use decoupage technique to decorate your bins with images, patterns, or even maps. This can be a fun way to personalize your storage bins and make them truly one-of-a-kind.
5. Chalkboard labels: Paint your storage bins with chalkboard paint and label them with chalk. This allows you to easily change the labels whenever needed, making it ideal for organizing different items.
6. Washi tape accents: Add pops of color and patterns to your storage bins using washi tape. Simply apply the tape in different designs or create geometric shapes for a modern and playful look.
7. Vintage-inspired prints: Find vintage-inspired prints or wallpapers and use them to cover your storage bins. This can give your bins a nostalgic and charming vibe.
8. Leather or faux leather details: Attach leather or faux leather handles or accents to your storage bins for a touch of sophistication. This works well for a more refined and elegant look.
9. Mod Podge and glitter: Create a glamorous and sparkling effect on your storage bins by applying Mod Podge and glitter. This can be a fun project for a kid’s room or a chic addition to your vanity.
10. Upcycled materials: Get creative and use upcycled materials such as old book pages, newspaper, or even puzzle pieces to decorate your storage bins. This not only adds a unique look but also reduces waste.
Remember, the possibilities are endless when it comes to mixing and matching different DIY decorative storage bins. Let your imagination guide you and have fun transforming ordinary bins into extraordinary organizational tools!
Conclusion
In conclusion, these 10 DIY decorative storage bin ideas offer creative and practical solutions for organizing your home. Whether you’re looking to add a touch of style or maximize your storage space, these projects are sure to inspire. From repurposing materials to customizing designs, you can easily create unique and functional storage bins that reflect your personal style. Get ready to declutter and beautify your living spaces with these fantastic DIY ideas!


6 Comments
Walliw Adolfo
1 year agoAs a normal human visitor, I find the post intriguing and relevant to my needs. The concept of creating decorative storage bins for my home appeals to both my aesthetic and organizational interests. I believe that implementing these creative and easy ideas will not only transform my living space but also enhance its functionality. I look forward to exploring these stylish suggestions and experiencing the positive impact they will have on my home.
Annabela Kareem
1 year ago{
comment: These creative and easy methods for crafting decorative storage bins are a great way to enhance the organization and aesthetic appeal of your home. With these stylish and functional ideas, you can effectively transform your living space. By incorporating these DIY techniques, youll be able to create storage solutions that not only serve a practical purpose but also add a visually pleasing element to your decor. Get ready to elevate your home organization game!
}
Gabie Lipman
1 year agoThank you for sharing this informative post on creative and easy ways to make decorative storage bins for homes. Its fascinating to discover how simple yet stylish solutions can transform our living spaces into organized and visually appealing environments. These functional ideas not only optimize storage options but also add an aesthetic touch to our homes. Truly inspiring!
Audrey Siegler
1 year agoThank you for sharing this informative post! [object Object] provides an interesting perspective on creative and easy ways to make decorative storage bins for ones home. The ideas mentioned seem promising in terms of transforming living spaces into stylish and functional areas. I appreciate the authors efforts in presenting practical solutions for organizing and decluttering homes. Looking forward to exploring these ideas further!
Indira Lashond
1 year agoThese creative and easy ways to make decorative storage bins for your home are simply amazing! I have always struggled with finding stylish and functional storage solutions, but these ideas have truly transformed my space. I can now keep my belongings organized while adding a touch of personal style to my home decor. Thank you for sharing these fantastic ideas!
Bobbette Scotti
1 year agoThese creative and easy ways to make decorative storage bins for your home are truly inspiring. Its amazing how a simple DIY project can transform any space into something stylish and functional. I cant wait to try out some of these ideas and add a personal touch to my storage solutions. Thank you for sharing this valuable content!