

It is not necessary to spend a fortune to transform your property. You can refresh old furniture and give your area a new look with a little imagination and DIY attitude. These 10 furniture upgrades are simple and inexpensive, so get ready to remodel your home now!
- 1. DIY Furniture Updates
- 1.1. Introduction
- 1.2. Choosing the Right Furniture
- 1.3. Preparation
- 1.4. Painting Techniques
- 1.5. Finishing Touches
- 2. Introduction
- 3. Choosing the Right Furniture
- 3.1. Assessing Your Current Furniture
- 3.2. Finding Secondhand Furniture
- 3.3. Choosing the Right Materials
- 4. Preparation
- 4.1. Cleaning and Sanding
- 4.2. Filling Holes and Cracks
- 4.3. Priming and Taping
- 5. Painting Techniques
- 6. Finishing Touches
1. DIY Furniture Updates
Having a well-organized workstation is one of the most crucial things you can do to stay productive while working remotely on the road. This includes having a dedicated work area, organizing and conveniently available tools and equipment, and establishing a pleasant and distraction-free atmosphere. Here are some pointers for organizing your workspace:
– Select a calm area where you will not be interrupted.
– Invest in a supportive and comfortable chair.
– Arrange your computer and other equipment in an ergonomically optimal manner.
– Maintain a clutter-free and organized workspace.
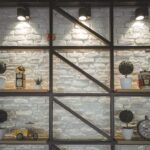
– To keep your supplies and documents organized, use storage options such as file cabinets, shelves, and drawers.
– Make sure you have enough lighting.
– Add plants, photographs, or other decorative items to your desk to make it more visually appealing.
– If required, use headphones or earplugs to block out noise.
– Keep snacks and drinks close by to save visits to the kitchen.
– Take breaks and stretch on a regular basis to minimize stiffness and weariness.
1.1. Introduction
Are you sick of your old, out-of-date furniture? Want to spruce up your home without breaking the bank? So look no further! In this post, we’ll show you 10 DIY furniture improvements that will completely change your house without breaking the bank. You can transform your old furniture into trendy and modern pieces that will surprise your guests and make you proud of your home with a little imagination and elbow grease.
1.2. Choosing the Right Furniture
When selecting furniture for your home, it is critical to consider both aesthetic and utility. Begin by evaluating your space and determining what parts are required to make it functional and comfortable. Take into account the room’s size, natural light, and any existing design features. Choose furniture that compliments your own taste while being within your budget. Remember that investing in high-quality items can save you money in the long term because they will last longer and require fewer replacements.
1.3. Preparation
When working remotely on the road, it is critical to maintain a healthy lifestyle. Here are some pointers to help you stay on track:
1. Make a meal plan and stick to it. Eating at regular intervals helps to control digestion and energy levels.
2. Bring healthy snacks with you, such as fruit or nuts, to avoid unhealthy vending machine selections.
3. Drink plenty of water throughout the day to stay hydrated. Bring a refillable water bottle with you.
4. Schedule time for exercise, even if it’s just a short stroll or stretching session. This will assist your body and mind stay energized.
5. Take breaks and remove yourself from your task. This can help you avoid burnout and boost your overall productivity.
6. Get plenty of rest. Aim for 7-8 hours of sleep per night to feel relaxed and ready to face the day.
7. Try not to work from your bed or couch. This can result in poor posture and lower productivity.
8. While traveling, look for healthy eating options. Look for healthy dinner options at local restaurants and grocery stores.
9. Take care of yourself. Spend some time doing things that make you happy and help you relax, such as reading a book or taking a bath.
10. Maintain contact with loved ones. Working from home can be isolating, so make time to socialize with friends and family.
1.4. Painting Techniques
Painting furniture is an excellent method to refresh and enhance the appearance of your home. Here are some painting techniques for achieving various effects:
1. Distressing: After painting your furniture, use sandpaper to distress the edges and corners to get a shabby chic or vintage aesthetic.
2. Ombré: This technique combines two or more colors to create a gradient appearance. Begin by painting the bottom of your furniture the darkest color, then gradually apply more of the lighter color as you work your way up.
3. Stenciling: Create elaborate motifs and patterns on your furniture with stencils. This is a terrific way to personalize your DIY projects.
4. Color blocking: Create geometric shapes with masking tape on your furniture, then paint each part a different color. This is an excellent method to achieve a bold and modern appearance.
1.5. Finishing Touches
After you’ve finished your DIY furniture modifications, it’s time to put the finishing touches on your pieces. Consider adding attractive hardware to drawers and cabinets, such as knobs or pulls. You may also dress up a newly upholstered chair or couch with some colorful throw cushions or a warm blanket. Don’t forget to add some greenery to your space with potted plants or fresh flowers to put some life into it. These minor details can have a significant impact on the overall appearance and feel of your newly upgraded furniture.
2. Introduction
Furniture is a crucial component of any home, but it can also be an expensive purchase. DIY furniture improvements are a terrific way to refresh your home’s decor without breaking the wallet. You may change old or outdated furniture into something new and lovely with a little ingenuity and basic tools. In this post, we’ll go over 10 DIY furniture improvements that can help you give your home a new lease on life.
2.1. Why Update Your Furniture?
Updating your furniture may give your home decor fresh vitality without breaking the wallet. Old, worn-out furniture can make your home feel dated and uninviting, but new, modern pieces can make your home feel more stylish and friendly. Furthermore, reusing or refinishing old furniture may be a fun and satisfying DIY project that allows you to show your creativity while also saving money. There are many of quick and economical DIY furniture changes to pick from, whether you want to update a single piece or overhaul your entire home.
2.2. Benefits of DIY Furniture Updates
There are various advantages to changing your furniture yourself. For starters, it allows you to save money because you won’t have to spend a fortune on new furniture. Second, you can modify your furniture to suit your preferences and style. Third, DIY furniture improvements are environmentally responsible since you may repurpose or upcycle old furniture rather than tossing it away. Fourth, it provides you a sense of accomplishment and satisfaction because you built something new with your own hands. Finally, DIY furniture upgrades can increase the value of your home by giving it a fresh and modern appeal.
2.3. Inspiration and Ideas
Are you sick of looking at the same old furniture in your house? Do you want to modernize your living area without breaking the bank? Look no farther than these 10 do-it-yourself furniture improvements to change your house. You can transform your old furniture into attractive and functional pieces that will make your home feel brand new with a little inspiration and effort.
3. Choosing the Right Furniture
When it comes to upgrading your home with DIY furniture, selecting the appropriate items to change your space is critical. Think about the style and function of each piece, as well as the overall aesthetic you want to achieve. If you have a limited amount of room, choose furniture that is multi-functional and can serve multiple functions. Consider the materials and durability of the furniture, especially if you have children or pets. You can create a coherent and elegant design for your home by carefully selecting your furnishings.
3.1. Assessing Your Current Furniture
Before you begin any DIY furniture renovations, you should evaluate your current furniture. Examine each piece’s condition, aesthetic, and functionality. Consider whether it complements your overall decor and whether it still serves its intended purpose. If a piece is irreparably broken or no longer matches your style, it’s time to replace it rather than update it. By assessing your existing furniture, you can make informed judgments about which pieces to update and which to replace.
3.2. Finding Secondhand Furniture
Secondhand furniture can be a terrific way to change your house on a budget. Look into thrift stores, garage sales, and internet marketplaces such as Craigslist and Facebook Marketplace. Don’t be afraid to haggle on pricing and thoroughly check the furniture before purchase. You can also inquire with friends and family to see if they have any furniture that they no longer use or want to get rid of. With a little imagination and DIY abilities, you can transform a secondhand item into a distinctive and elegant addition to your house.
3.3. Choosing the Right Materials
Choosing the correct materials for DIY furniture improvements is critical to a successful project. Consider variables such as durability, weight, and aesthetic appeal depending on the sort of furniture you’re upgrading. If you’re replacing a wooden chair, for example, you should use a wood stain or paint that complements the natural grain of the wood. If you’re refinishing a metal table, choose a paint that’s specifically developed for metal surfaces. By taking the time to select the appropriate materials for your DIY furniture project, you will be able to produce a piece that not only looks wonderful, but also lasts.
4. Preparation
It’s crucial to prepare yourself and your environment before plunging into the 10 DIY furniture upgrades. First, decide which pieces of furniture you want to update and evaluate their current state. Make a list of all the supplies and instruments you’ll need, such as sandpaper, paint, and brushes. It’s also crucial to evaluate your home’s style and color scheme to ensure the upgraded furniture fits in seamlessly. Finally, allow enough time to complete each job and remember to have fun!
4.1. Cleaning and Sanding
Before you begin any DIY furniture renovation, make sure to thoroughly clean and sand the piece. Clean the surface with a light soap and water, then let it to dry fully before sanding. Sand the entire object, taking great care of any rough or uneven spots. Make a smooth surface for your paint or stain to adhere to. For a polished finish, use fine-grit sandpaper. After sanding, wipe the object down with a moist cloth to eliminate any dust or dirt.
4.2. Filling Holes and Cracks
Before beginning any DIY furniture makeover, prepare the piece by patching up any holes and cracks. This will ensure a smooth painting or staining surface. Fill up any holes or gaps with wood filler and sand the surface once it’s dry. Use a wood putty or epoxy filler to fix wider fractures or gaps. Fill up the gap and sand it smooth with the surrounding wood. This procedure may appear time-consuming, but it is necessary for a professional-looking end product.
4.3. Priming and Taping
It is critical to carefully prepare your furniture items before beginning your DIY furniture update trip. Priming and taping are included. Priming your furniture will guarantee that the paint adheres well and lasts for a longer period of time. Taping off any parts that will not be painted will give your project a professional, polished appearance. To ensure a great conclusion, take the time to thoroughly prime and tape before commencing your furniture update.
5. Painting Techniques
When it comes to upgrading your furniture, painting is an excellent option to completely modify the appearance of your items. There are, however, a few tricks you may employ to take your DIY furniture renovations to the next level. Distressing is a method that involves sanding the edges and corners of your furniture to give it a worn, vintage appearance. Color blocking is another technique in which separate portions of furniture are painted in contrasting colors. You can also experiment with ombre painting, which involves blending two or more colors together to create a gradient effect. If you want to add some texture, consider a dry brush method to achieve a delicate, rustic look. You can quickly update your furniture and give your home a new look by using these painting techniques.
5.1. Choosing the Right Paint
Choosing the appropriate paint is critical when it comes to upgrading your furniture. You want a paint that will attach effectively to the surface and last for a long time. It is critical to examine the sort of furniture you are painting as well as the desired look. If you’re painting a piece of furniture that will be used frequently, for example, you’ll want to select a paint that is both durable and easy to clean. If you want an antique or distressed effect, though, you should consider using chalk paint or milk paint. Follow the manufacturer’s directions for the best results with whatever paint you pick.
5.2. Brushes vs. Rollers vs. Sprayers
When it comes to painting furniture, you have three options: brushes, rollers, and sprayers. Each has its own set of benefits and drawbacks. Brushes are fantastic for little areas and detail work, but if not used properly, they can leave brush strokes. Rollers are useful for covering big areas rapidly, but they can create a rough texture. Sprayers are the quickest option for a smooth, even finish, but they take more skill to handle and can be messy. When picking which tool to use, consider the size and shape of the furniture piece, as well as your own experience and comfort level with each instrument.
5.3. Color Techniques
When it comes to upgrading your furniture, the appropriate color may make or break the project. A monochromatic color scheme, which involves using varying shades of the same color, is a common technique. This produces a unified and relaxing appearance in any environment. Another method is to utilize opposing colors, such as a bright red and a deep navy blue. This makes a piece of furniture more interesting and exciting. Finally, don’t be scared to try out different patterns and textures. A striped or flowered fabric on a chair or sofa can lend a whimsical touch, while a faded finish on a dresser might give it a shabby chic vibe.
6. Finishing Touches
After you’ve finished your DIY furniture updates, it’s time to put the finishing touches on your home. Consider adding attractive hardware to your renovated items, such as new cabinet and drawer knobs or pulls. To really make your furniture shine, apply a fresh coat of paint or varnish. Don’t forget to tie everything together with complementary decor, such as toss pillows or a new area rug. Your DIY furniture upgrades will certainly boost your home with these finishing touches.
6.1. Adding Hardware and Detailing
Adding new hardware is one of the simplest ways to modernize your furniture. Hardware can instantly improve the look of a piece, whether it’s replacing outdated knobs with sleek metal ones or adding ornate pulls and handles. Consider mixing and matching hardware for a distinct, eclectic style, or stick to matching pieces for a more coherent look. To guarantee a correct fit, measure the distance between the screw holes before purchasing new hardware.
6.2. Stenciling and Decoupage
Stenciling and decoupage are excellent methods to personalize your furniture. Stenciling is the process of creating a pattern on your furniture using a template, whereas decoupage is the process of attaching paper or fabric to the surface of your furniture. Both techniques are simple to execute and need few materials. A stencil, paint, and a brush are required for stenciling. You’ll need paper or cloth, Mod Podge, and a brush for decoupage. Stenciling and decoupage are excellent methods for updating antique furniture or adding a splash of color to a room.
6.3. Sealing and Protecting
After finishing your DIY furniture upgrades, seal and protect the surface to ensure lifetime. There are various methods of sealing and protecting depending on the material utilized. A layer of polyurethane will protect the surface of wooden furniture from scratches and stains. Adding a rust inhibitor to metal furniture will prevent rust from forming. Leather furniture may be kept soft and supple by using a leather conditioner. You can ensure that your hard work lasts for years by taking the time to properly seal and protect your furniture.
Conclusion
Finally, changing your furniture with these 10 do-it-yourself projects can radically change the look and feel of your home. You can improve your home and make it truly your own with a little imagination and work.


These 10 innovative and imaginative DIY home decor ideas from [object Object] provide a refreshing approach to enhancing ones living…