
- 1. 1. Creative Wall Art Ideas
- 1.1. 1.1 Upcycled Wood Pallet Art
- 1.2. 1.2 Fabric Wall Hangings
- 1.3. 1.3 Paper Quilling Designs
- 1.4. 1.4 DIY Geometric Wall Decor
- 1.5. 1.5 Painted Canvas Art
- 2. 2. Affordable Furniture Makeovers
- 2.1. 2.1 Reupholstered Chair Cushions
- 2.2. 2.2 Chalk Painted Dresser
- 2.3. 2.3 Thrift Store Table Transformation
- 2.4. 2.4 DIY Bookshelf from Old Crates
- 2.5. 2.5 Painted Wooden Headboard
- 3. 3. Unique DIY Lighting Fixtures
1. 1. Creative Wall Art Ideas
Looking for some creative wall art ideas to transform your space? Look no further! In this article, we will explore 10 amazing DIY home decor ideas that you can easily create at home. These homemade DIY home decor ideas will not only add a personal touch to your space but also showcase your creativity. Let’s dive in and get inspired to create stunning wall art that will enhance the ambiance of your home.
1.1. 1.1 Upcycled Wood Pallet Art
One of the most popular trends in home decor is upcycled wood pallet art. This creative and eco-friendly approach involves repurposing old wooden pallets to create unique and stylish wall art. By using reclaimed materials, you can add a rustic and charming touch to your space while also reducing waste. There are countless ways to incorporate upcycled wood pallet art into your home decor, from simple and minimalist designs to more elaborate and intricate pieces. Whether you’re a DIY enthusiast or just looking for a budget-friendly way to enhance your space, upcycled wood pallet art is a fantastic option. With a little creativity and some basic tools, you can transform ordinary pallets into stunning works of art that will impress your guests and add personality to any room.
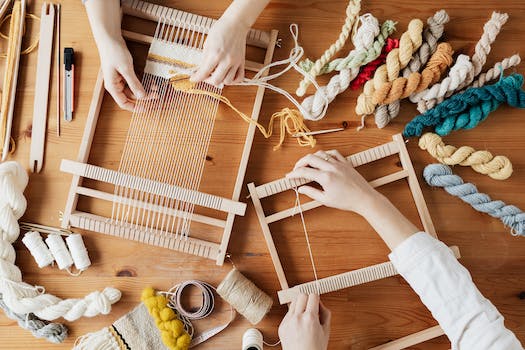
1.2. 1.2 Fabric Wall Hangings
Fabric wall hangings are a great way to add texture and color to your space. They can be easily made at home using various materials such as old curtains, bed sheets, or even scraps of fabric. To create a fabric wall hanging, start by selecting a piece of fabric that matches your desired color scheme or theme. Next, cut the fabric into a desired shape or size, such as a square or rectangle. Then, attach the fabric to a wooden dowel or a decorative rod using adhesive or by sewing it directly onto the rod. Finally, hang the fabric wall hanging on a wall using a nail or hook. This simple DIY home decor idea is a cost-effective way to personalize your space and add a touch of creativity.
1.3. 1.3 Paper Quilling Designs
Paper quilling designs are a fantastic way to add a unique touch to your home decor. This art form involves rolling and shaping strips of paper to create intricate designs. Whether you’re a beginner or an experienced quiller, there are endless possibilities when it comes to paper quilling designs for home decor.
One popular paper quilling design is the 3D flower. These delicate and beautiful flowers can be made in various sizes and colors, and they can be used to decorate walls, frames, or even gift boxes. Another popular design is the paper quilled butterfly. These whimsical creatures add a touch of elegance to any room.
If you’re looking for something more abstract, consider trying the paper quilled wall art. This technique involves creating various shapes and patterns with paper strips and arranging them on a canvas or wooden surface. The result is a stunning piece of art that can be displayed in your living room or bedroom.
Paper quilling designs for home decor are not only visually appealing but also a great way to relax and unwind. So, grab your quilling tools and start creating beautiful pieces that will transform your space into a work of art!
1.4. 1.4 DIY Geometric Wall Decor
One of the most popular trends in home decor is DIY geometric wall decor. This type of wall art adds a modern and unique touch to any space. The best part is that you can easily create your own geometric wall decor using simple materials and tools. Whether you’re a beginner or an experienced DIYer, these DIY geometric wall decor ideas are sure to inspire you.
1. Geometric Canvas Art: Start by choosing a canvas in your desired size. Use painter’s tape to create geometric shapes on the canvas. Then, paint each section with different colors to create a bold and eye-catching design.
2. Geometric Wall Shelves: Create your own geometric wall shelves using wooden boards and triangle brackets. Arrange the shelves in a unique pattern on your wall to display your favorite decor items.
3. Geometric Wall Decals: If you’re not confident in your painting skills, geometric wall decals are a great alternative. These decals come in various shapes and colors, allowing you to easily create a geometric design on your wall.
4. Geometric Wall Hangings: Use wooden dowels and yarn to create geometric wall hangings. You can experiment with different patterns and colors to match your existing decor.
5. Geometric Mirror: Add a touch of elegance to your space with a geometric mirror. Use mirror tiles or cut a large mirror into geometric shapes and arrange them on your wall.
6. Geometric Wall Clock: Create a unique statement piece with a geometric wall clock. Use wood or acrylic to cut out different shapes and attach clock hands and numbers.
7. Geometric Wall Stencils: If you want to add a geometric pattern to your wall without the commitment, use geometric wall stencils. Simply tape the stencil to your wall and paint over it to create a stylish design.
8. Geometric Wall Sculptures: Make a statement with geometric wall sculptures made from wire or metal. These sculptures can add dimension and texture to your wall.
9. Geometric Wall Planters: Bring nature indoors with geometric wall planters. Use geometric-shaped planters to create a vertical garden on your wall.
10. Geometric Wall Murals: If you’re feeling adventurous, try creating a geometric wall mural. Use painter’s tape to outline your design and paint each section with different colors for a stunning result.
These DIY geometric wall decor ideas are not only budget-friendly, but they also allow you to customize your space to reflect your personal style. Get creative and transform your space with these homemade DIY home decor ideas.
1.5. 1.5 Painted Canvas Art
1.5 Painted Canvas Art
Painted canvas art is a fantastic way to add a personal touch to your home decor. With a little bit of creativity and some basic painting skills, you can create stunning pieces of art that will transform your space. Here are a few ideas to get you started:
1. Abstract Masterpiece: Use bold and vibrant colors to create an abstract painting that will become the focal point of any room. Experiment with different brush strokes and textures to add depth and dimension to your artwork.
2. Nature-Inspired Art: Bring the beauty of the outdoors inside with nature-inspired canvas art. Paint landscapes, flowers, or animals to create a serene and calming atmosphere in your home.
3. Geometric Designs: Embrace the trend of geometric patterns by painting intricate shapes and lines on your canvas. Play with contrasting colors to make your artwork visually striking.
4. Inspirational Quotes: Add a touch of motivation and positivity to your space by painting inspirational quotes on canvas. Choose meaningful phrases that resonate with you and use different fonts and colors to make them stand out.
5. Pop Art: Get creative and channel your inner Andy Warhol by painting pop art-inspired pieces. Use bold colors, repetitive patterns, and iconic imagery to create a fun and eye-catching artwork.
These are just a few ideas to inspire your painted canvas art projects. Remember, the beauty of DIY home decor is that you can customize it to fit your personal style and preferences. So grab your paintbrushes, unleash your creativity, and transform your space with homemade DIY home decor ideas.
2. 2. Affordable Furniture Makeovers
Looking to transform your space on a budget? There’s no need to break the bank when it comes to home decor. With a little creativity and some DIY skills, you can give your furniture a fresh new look without spending a fortune. In this section, we will explore some affordable furniture makeovers that will revamp your home and add a personal touch to your space.
1. Repainting Old Furniture: One of the easiest and most cost-effective ways to update your furniture is by giving it a fresh coat of paint. Whether it’s an old wooden dresser or a metal chair, a new color can completely transform its appearance. Choose a color that complements your existing decor or go bold with a vibrant hue to make a statement.
2. Reupholstering Chairs and Sofas: If your chairs or sofas are looking worn out or outdated, consider reupholstering them instead of buying new ones. You can choose from a wide range of fabrics to match your style and give your furniture a whole new look. This DIY project may require some basic sewing skills, but the results are definitely worth it.
3. Adding New Hardware: Sometimes, all it takes to give your furniture a fresh new look is by changing the hardware. Replace old knobs, handles, or pulls with stylish and modern ones to instantly upgrade your furniture. This simple and affordable DIY project can make a big difference in the overall appearance of your space.
4. Stenciling or Decoupage: Another creative way to transform your furniture is by using stencils or decoupage techniques. You can add patterns, designs, or even images to give your furniture a unique and personalized touch. Whether it’s a table, a cabinet, or a plain wall, stenciling and decoupage can add visual interest and make a statement.
5. Upcycling and Repurposing: Instead of throwing away old furniture, consider upcycling or repurposing it to give it a new lease on life. For example, an old ladder can be turned into a stylish bookshelf, or an unused wooden door can be transformed into a rustic coffee table. Get creative and think outside the box to find new purposes for your old furniture.
By incorporating these affordable furniture makeovers into your home decor, you can achieve a stylish and personalized space without spending a fortune. With a little time and effort, you can create a home that reflects your unique style and personality.
2.1. 2.1 Reupholstered Chair Cushions
One of the most affordable ways to transform your space is by reupholstering your chair cushions. Reupholstering allows you to give your chairs a fresh new look without having to buy brand new furniture. It’s a great DIY home decor idea that can save you money and add a personal touch to your space. With just a few simple steps, you can create custom chair cushions that match your style and taste. Start by choosing a fabric that complements your existing decor or adds a pop of color. Measure and cut the fabric to fit your chair cushions, then secure it in place using a staple gun or fabric adhesive. Voila! You now have beautifully reupholstered chair cushions that will breathe new life into your space.
2.2. 2.2 Chalk Painted Dresser
2.2 Chalk Painted Dresser
One of the most affordable furniture makeovers you can do is to transform an old dresser with chalk paint. Chalk paint is a versatile and easy-to-use paint that requires little to no prep work. To start, gather your materials including a dresser, chalk paint in your desired color, a paintbrush, and sandpaper.
Begin by cleaning the dresser thoroughly and removing any hardware. If the dresser has a shiny finish, lightly sand it to create a rough surface for the paint to adhere to. Once the dresser is prepped, start painting. Apply the chalk paint in smooth, even strokes, and let it dry completely before applying a second coat if needed.
Once the paint is dry, you can add some extra flair to the dresser by distressing it with sandpaper. Gently rub the sandpaper along the edges and corners to create a worn, antique look. Finally, finish off the makeover by replacing the hardware or adding new knobs to complete the transformation.
A chalk-painted dresser is not only a cost-effective way to update your furniture, but it also adds a charming and unique touch to your home decor. With just a few supplies and a little creativity, you can turn an old dresser into a beautiful statement piece that will enhance any room in your house. So why not give chalk painting a try and see the amazing results it can bring to your DIY home decor ideas!
2.3. 2.3 Thrift Store Table Transformation
2.3 Thrift Store Table Transformation
One of the best ways to achieve affordable home decor is by transforming thrift store finds. In this section, we will focus on how to transform a thrift store table into a stylish and unique piece of furniture.
Thrift stores are a treasure trove of hidden gems that can be repurposed and given a new life. With a little creativity and some DIY skills, you can turn a plain and outdated table into a stunning centerpiece for your home.
To begin, start by thoroughly cleaning the table and sanding down any rough edges or imperfections. This will provide a smooth surface for painting or staining.
Next, consider the desired look for your table. If you prefer a rustic farmhouse style, you can opt for a distressed paint finish. Apply a base coat of paint in your desired color and let it dry. Then, using sandpaper or a sanding block, gently sand areas of the table to create a worn and weathered appearance.
For a more modern and sleek look, you can choose to stain the table instead of painting it. Apply a wood stain of your choice and let it dry completely. You can also add a clear coat of polyurethane for added protection.
To further enhance the transformation, consider adding new hardware or decorative elements. Swapping out the table’s existing knobs or handles with more stylish ones can make a significant difference. Additionally, you can attach decorative trim or molding to give the table a more sophisticated and elegant look.
Finally, don’t forget to consider the placement of your transformed thrift store table. Whether it becomes a chic entryway console or a functional side table in your living room, the possibilities are endless.
By utilizing your DIY skills and some creativity, you can easily transform a thrift store table into a beautiful and unique piece of furniture. This affordable furniture makeover idea is a great way to add style and personality to your home without breaking the bank.
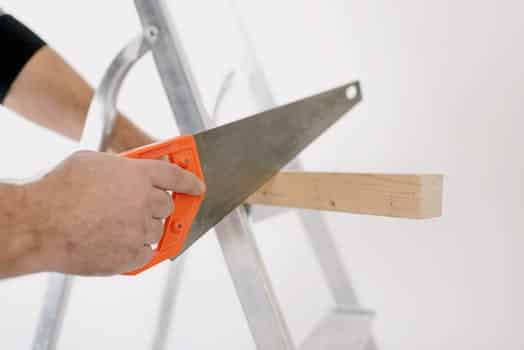
2.4. 2.4 DIY Bookshelf from Old Crates
One creative and affordable way to transform your space is by making a DIY bookshelf from old crates. This homemade DIY home decor idea not only adds a rustic touch to your room but also provides a functional storage solution for your books and other belongings. By upcycling old crates, you can create a unique and personalized bookshelf that perfectly fits your style and space. Here’s how you can do it:
1. Gather Materials: Start by collecting old wooden crates. You can find them at thrift stores, flea markets, or even ask local businesses if they have any to spare.
2. Clean and Sand the Crates: Before starting the assembly, make sure to clean the crates thoroughly to remove any dirt or debris. Sand them down to remove any rough edges and achieve a smooth surface.
3. Plan the Layout: Decide how you want your bookshelf to look. You can stack the crates vertically, horizontally, or arrange them in a unique pattern. Play around with different layouts until you find the one that suits your space.
4. Secure the Crates: Once you have your desired layout, use screws or nails to secure the crates together. Make sure they are tightly attached to prevent any wobbling or instability.
5. Optional: Paint or Stain: If you prefer a different color or finish, you can paint or stain the crates to match your room’s decor. This step is optional but can add an extra touch of personalization.
6. Add Shelves (Optional): If you want additional storage space, you can also add shelves inside the crates. Measure and cut pieces of wood to fit inside the crates and secure them in place.
7. Decorate and Organize: Once your DIY bookshelf is assembled, it’s time to decorate and organize your books and other items. Add decorative accents, such as plants or framed photos, to make it even more visually appealing.
Creating a DIY bookshelf from old crates is a budget-friendly and eco-friendly way to revamp your space. It allows you to unleash your creativity and showcase your personal style while also being functional. Give it a try and see how this homemade DIY home decor idea can transform your room!
2.5. 2.5 Painted Wooden Headboard
One of the affordable furniture makeovers that can transform your space is a DIY painted wooden headboard. This homemade DIY home decor idea adds a personal touch to your bedroom. By painting a wooden headboard, you can customize it to match your existing decor or create a focal point in the room. Choose a color that complements the overall color scheme of your bedroom. You can use stencils or freehand painting techniques to create unique patterns or designs on the headboard. This simple DIY project can instantly upgrade the look of your bedroom and give it a fresh, new feel.
3. 3. Unique DIY Lighting Fixtures
Are you looking to add a personal touch to your home decor? Look no further! In this section, we will explore some unique DIY lighting fixtures that will instantly transform your space. These homemade DIY home decor ideas will not only add charm and character to your home but also showcase your creativity. Let’s dive in and discover some fantastic lighting ideas that you can easily create yourself!
1. Mason Jar Chandelier
One of the most popular DIY lighting fixtures is a mason jar chandelier. This rustic and charming fixture adds a warm and cozy ambiance to any room. Simply gather a few mason jars, attach them to a wooden plank or metal frame, and add some fairy lights inside each jar. Hang it above your dining table or in your living room for a unique and eye-catching statement piece.
2. Wine Bottle Pendant Lights
If you have empty wine bottles lying around, don’t throw them away! Instead, repurpose them into stunning pendant lights. Clean the bottles thoroughly and remove any labels. Then, insert a pendant light kit into the bottle neck, and voila! You have a beautiful and eco-friendly lighting fixture. Cluster a few of these pendants together for a dramatic effect in your kitchen or bar area.
3. Vintage Teacup Sconces
Do you have a collection of vintage teacups gathering dust in your cupboard? Why not turn them into unique teacup sconces? Simply drill a small hole in the bottom of each cup and thread a light kit through it. Mount the cups onto a wooden board or directly onto the wall, and you’ll have a whimsical lighting display that will impress your guests.
These are just a few examples of the many homemade DIY home decor ideas you can explore. Get creative, repurpose everyday items, and let your imagination run wild. With a little effort and some basic tools, you can create personalized lighting fixtures that will add warmth and style to your home. Happy crafting!
3.1. 3.1 Mason Jar Chandelier
One unique DIY lighting fixture idea that can transform your space is a Mason Jar Chandelier. This homemade DIY home decor idea adds a rustic and charming touch to any room. Using Mason jars as the main element, you can create a stunning chandelier that illuminates your space beautifully.
To make a Mason Jar Chandelier, you will need several Mason jars, a chandelier base, electrical wiring, and light bulbs. Start by attaching the Mason jars to the chandelier base, ensuring that they are securely fastened. Next, carefully wire the jars to the electrical components, following safety guidelines and instructions.
Once the chandelier is assembled, you can hang it in any room you desire. It works particularly well in kitchens, dining areas, or even outdoor spaces such as patios or gardens. The soft glow emitted by the Mason jars creates a cozy and welcoming atmosphere.
Not only is the Mason Jar Chandelier a beautiful addition to your home decor, but it also allows you to repurpose old Mason jars, giving them a new life. This DIY project is a cost-effective way to create a unique lighting fixture that showcases your creativity and adds a personal touch to your space.
In conclusion, the Mason Jar Chandelier is a fantastic DIY home decor idea that can instantly transform your space. By repurposing Mason jars, you can create a charming and rustic lighting fixture that adds warmth and character to any room. Give this homemade DIY home decor idea a try and enjoy the beautiful ambiance it brings to your home.
3.2. 3.2 Wine Bottle Pendant Lights
3.2 Wine Bottle Pendant Lights
Wine bottle pendant lights are an innovative and stylish way to add a touch of elegance to your home decor. These DIY lighting fixtures transform ordinary wine bottles into stunning hanging lights that will become a focal point in any room.
To create wine bottle pendant lights, you will need a few materials such as empty wine bottles, pendant light kits, and some basic tools. Follow these simple steps to make your own:
1. Start by cleaning and removing any labels from the wine bottles. Make sure they are completely dry before proceeding.
2. Using a glass cutter or a scoring tool, carefully score a line around the bottle where you want to cut it. Make sure to apply consistent pressure to ensure a clean and even cut.
3. Once the bottle is scored, use boiling water and ice water alternately to create thermal shock. This will help to separate the bottle along the scored line.
4. After the bottle has separated, smooth the edges with sandpaper or a glass file to remove any sharp or rough edges.
5. Now, it’s time to assemble the pendant light kit. Follow the instructions provided with the kit to attach the wiring and socket to the top of the bottle.
6. Finally, hang your wine bottle pendant lights in desired locations and enjoy the beautiful and unique lighting they provide.
Wine bottle pendant lights are not only eco-friendly but also a cost-effective way to add a personalized touch to your home decor. By upcycling wine bottles, you can create one-of-a-kind lighting fixtures that reflect your style and creativity.
So, why not give this DIY home decor idea a try and transform your space with these charming wine bottle pendant lights?
3.3. 3.3 DIY Paper Lanterns
DIY Paper Lanterns are a fantastic way to add a touch of charm and warmth to your home decor. These homemade lighting fixtures can easily transform any space into a cozy and inviting atmosphere. Creating your own paper lanterns allows you to customize them to match your personal style and preferences. With a few simple materials and a little creativity, you can make stunning paper lanterns that will impress your guests and enhance the beauty of your living space. Whether you hang them from the ceiling or place them on tabletops, these DIY paper lanterns are sure to make a statement in your home.
3.4. 3.4 Industrial Pipe Sconces
3.4 Industrial Pipe Sconces
Industrial pipe sconces are a trendy and unique DIY lighting fixture that can add a touch of industrial chic to your space. These sconces are created using pipes and fittings typically used in plumbing, giving them a rugged and rustic look.
To make your own industrial pipe sconces, you will need a few supplies such as pipes, fittings, light sockets, and electrical wiring. You can easily find these materials at your local hardware store or online.
Start by deciding on the design and layout of your sconces. You can create a simple single sconce or a more elaborate multi-bulb fixture. Measure and mark the positions where you want to mount the sconces on your wall.
Next, assemble the pipes and fittings according to your design. Screw them tightly together to ensure stability. Attach the light sockets to the ends of the pipes using pipe straps or clamps.
Once the sconces are assembled, you will need to wire them for electricity. If you are not familiar with electrical wiring, it is recommended to seek professional help or do thorough research before attempting this step.
After wiring the sconces, mount them on the marked positions on your wall using screws or brackets. Make sure they are securely attached and level.
To complete the industrial look, you can leave the pipes in their natural metallic finish or paint them in a color that matches your decor. You can also add decorative elements such as Edison bulbs or wire cages for a vintage touch.
Industrial pipe sconces are not only functional lighting fixtures but also statement pieces that can enhance the overall aesthetic of your space. They are a great way to incorporate a unique DIY element into your home decor and transform your space into a stylish and trendy environment.
3.5. 3.5 Upcycled Vintage Lampshade
One of the unique DIY lighting fixtures that you can create for your home decor is a 3.5 Upcycled Vintage Lampshade. This project combines the charm of vintage aesthetics with the eco-friendly concept of upcycling. By giving an old lampshade a new life, you can add a touch of nostalgia to your space while reducing waste.
To create this DIY lighting fixture, start by finding a vintage lampshade that you no longer use or can find at a thrift store. Clean the lampshade thoroughly and remove any old wiring or hardware. Next, choose a fabric or wallpaper that complements your interior design style. Measure the dimensions of the lampshade and cut the fabric or wallpaper to fit.
Apply a thin layer of adhesive to the lampshade and carefully press the fabric or wallpaper onto it, smoothing out any wrinkles or bubbles. Allow it to dry completely before reassembling the lampshade with a new lighting fixture or bulb. You can also add embellishments like ribbons, trims, or beads for an extra decorative touch.
Once your upcycled vintage lampshade is complete, find the perfect spot in your home to showcase it. Whether it’s a bedside table, a reading nook, or a cozy corner, this unique DIY lighting fixture will instantly transform the ambiance of your space. The warm glow from the vintage lampshade will create a cozy and inviting atmosphere, making your home decor truly one-of-a-kind.
By incorporating homemade DIY home decor ideas like the 3.5 Upcycled Vintage Lampshade, you not only add a personal touch to your space but also contribute to sustainable living. Upcycling old items not only saves them from ending up in landfills but also gives them a new purpose and beauty. So, get creative and start transforming your space with these DIY home decor ideas!


These 10 innovative and imaginative DIY home decor ideas from [object Object] provide a refreshing approach to enhancing ones living…