
Are you trying to find some unique yet affordable decorating ideas for your house? Seek no more! This post will go over ten amazing do-it-yourself painting ideas for home decor that will completely revamp your living area. These ideas, which range from easy wall art designs to upcycling old furniture, will encourage you to let your creative side come out and give your house a brand-new appearance. Now that you have your paintbrushes, let’s get painting!
- 1. Introduction
- 1.1. Why DIY home decor paintings are popular
- 1.2. Benefits of creating your own home decor paintings
- 1.3. Getting started with DIY home decor paintings
- 1.4. Essential tools and materials for DIY home decor paintings
- 1.5. Tips for choosing the right painting techniques
- 2. Popular DIY Painting Ideas
- 2.1. Abstract canvas paintings
- 2.2. Watercolor landscapes
- 2.3. Stencil art on walls
- 2.4. Painted furniture
- 2.5. Canvas art with natural elements
- 3. Step-by-Step Guide to Creating DIY Home Decor Paintings
1. Introduction
Giving your house a new look can be done creatively and with enjoyment by decorating it. A new coat of paint is one of the simplest and most economical methods to enhance your area. These ten DIY home décor painting ideas will motivate you to be creative and makeover your environment, regardless of your level of experience. With ideas ranging from furniture makeovers to accent walls, this list has something for everyone. Now that you have your paintbrushes out, let’s begin these fun crafts!
1.1. Why DIY home decor paintings are popular
In recent years, DIY home décor paintings have become very popular. An increasing number of people are choosing to decorate their houses with original artwork. This style has been popular for a number of reasons, including as the need for affordable, customized décor and the fulfillment that comes from making something by hand. Paintings for DIY home décor provide people a chance to express their artistic side and let their imaginations run wild. It is a means of enriching one’s living environment with a unique personal touch. We’ll look at ten creative DIY home decor painting ideas in this post that will help you improve the look of your house.
1.2. Benefits of creating your own home decor paintings
Making your own artwork for your house may be a fulfilling and entertaining endeavor. It not only gives your living area a personalized touch, but it also lets you show off your creative side. Making your own artwork for your home’s decor has the following advantages:
1. Uniqueness: You may be certain that no one else will own an identical painting that you produce for your home decor. It gives you the chance to showcase your uniqueness and produce something genuinely unique.
2. Economical: Purchasing artwork for your house can be costly, particularly if you want high-end pieces. You can attain the required aesthetic while saving money on pricey artwork by painting your own paintings.
3. Healing and Calming: Painting is a soothing and stress-relieving hobby. It gives you a sensation of calm and relaxation by enabling you to concentrate and fully immerse yourself in the creative process.
4. Customization: You have total control over the style, color scheme, and design when you make your own artwork for your house. You can make something completely original and new, or you can customize the artwork to match your current interior style.
5. Personal Connection: Every painting you produce has a unique meaning and is a reflection of your feelings and experiences. It makes your living area feel more personal and intimate, allowing you to make it fully your own.
Ten do-it-yourself home décor painting ideas that you may readily undertake at home are covered in the parts that follow. These concepts will encourage you to let your imagination run wild and create a customized retreat in your home.
1.3. Getting started with DIY home decor paintings
Paint your own home decor is a great method to give your living area a unique touch. Making your own art may be a rewarding and enjoyable experience, regardless of your level of experience. In this post, we’ll look at ten do-it-yourself painting ideas for home décor that will help you create stunning pieces of art on your walls. There is something for everyone to try, ranging from abstract patterns to themes inspired by nature. Now let’s get started and experience the delight of painting gorgeous interior design!
1.4. Essential tools and materials for DIY home decor paintings
It is crucial to have the appropriate equipment and supplies while doing do-it-yourself home décor paints. Whether you’re an amateur or an expert artist, having the right tools may really help you get the results you want. For your upcoming painting endeavor, you should have the following necessary supplies and equipment on hand:
The first item to buy is paintbrushes: Get a range of paintbrushes in various sizes and styles. Having a variety of brushes is vital since the type you use can have a big impact on the final result of your painting.
2. Paints: Because of their adaptability and short drying times, acrylic paints are a popular option for do-it-yourself home décor paintings. Make sure your artwork has a variety of colors to give it depth and intrigue.
3. Palette: Colors can be combined and blended using a palette. It might be a paper- or plastic-based disposable palette, or it can be a classic wooden palette. It will be simpler to develop unique colours and try out various color combinations if you have a palette.
4. Paper or canvas: Pick a surface that complements your painting technique. Paper is less expensive and more accessible for novices, while canvas is more resilient and can provide a polished appearance.
5. An easel: An easel lets you work on a steady platform and changes the height and angle of your canvas. It can be a freestanding easel or a tabletop easel, based on your needs and workspace.
6. Masking tape: To produce neat edges and stop paint from seeping into unintended places, use masking tape. It comes in very handy when working on precise or geometric patterns.
7. Palette knife: This multipurpose instrument is great for applying texture, blending colours, and producing interesting effects. It’s a fantastic addition to your toolbox for giving your paintings more depth and perspective.
8. Water containers: For painting and brush cleaning, always have a few water containers on hand. Maintaining the quality of your brushes and avoiding color contamination requires regular cleaning.
9. Use drop cloths or old newspapers to protect your workspace: Painting can get messy, so it’s a good idea to use drop cloths or old newspapers. This will stop any unintentional spills or stains and facilitate cleanup.
10. Images of inspiration and reference: Lastly, compile images of inspiration and reference that correspond with the painting style you have in mind. Having visual references, be they digital images, magazine clippings, or photographs, might aid in directing your creative process.
Possessing these basic instruments and supplies will prepare you well for starting your do-it-yourself interior painting jobs. Let’s get started with some fascinating painting ideas that will stimulate your imagination!
1.5. Tips for choosing the right painting techniques
Your DIY home decor projects’ results can vary greatly depending on the painting techniques you use. Whether you are a novice or an expert painter, knowing the different approaches will help you get the desired effects. When selecting the appropriate painting techniques for your upcoming project, keep the following in mind:
1. Assess the surface: Take a look at the surface you’ll be painting before deciding on a painting style. Certain methods are more effective on particular surfaces—for example, walls, furniture, or canvases. Sponging, for instance, might be appropriate for walls, but stippling might be more effective for furniture.
2. Examine the fashion: Choose the aesthetic you hope to accomplish with your painting style. Which kind of effect—a textured, layered look or one that is uniformly smooth and uniform—do you prefer? Understanding the style will enable you to focus on the methods that will best help you get it.
3. Experiment on little samples: Before using a painting method on a bigger area, it’s always a good idea to practice and experiment with small samples. This will enable you to make any necessary tweaks and provide you with a clearer picture of how the technique will seem.
4. Research and gather inspiration: Invest some time in learning about various painting techniques and obtaining ideas from a range of online resources, including social media, websites, and periodicals. You can better understand how the strategies might function in your own space by seeing instances of them in use.
5. Take into account the time and work required: Different painting styles call for different amounts of time and effort. You should choose simpler techniques if you are short on time or would rather work on a project quickly. Conversely, if you like working on complicated, detailed projects, you can select more difficult procedures.
You will be more prepared to select the appropriate painting methods for your do-it-yourself home décor tasks if you take these pointers into account. As you use paint to modify your home, don’t forget to have fun and let your creativity run wild!
2. Popular DIY Painting Ideas
Painting is a fantastic method to give your home’s decor a unique flair. Paint projects, whether you are an experienced painter or a novice, can add creativity and excitement to any room you paint. Try these well-liked do-it-yourself painting ideas for your upcoming home décor project:
1. Accent Wall: Paint one wall in a room a striking color to draw attention to it. This may give your room instant dimension and visual appeal.
2. Ombre Effect: Blending two or more hues of the same color together will create a stylish ombre effect. Beginning with a darker shade near the bottom, work your way up to a lighter shade.
3. Geometric Patterns: You can make geometric patterns on your walls by using painter’s tape. Painting stripes or more complex patterns like chevrons or herringbones can be used for this.
4. Stenciling: Use stencils to draw themes or patterns on your walls to add a sense of sophistication. This method gives you the ability to personalize your design and is ideal for coming up with a distinctive style.
5. Chalkboard Wall: To create a useful and engaging area, paint one wall with chalkboard paint. This works well for creating artwork, writing notes, or leaving reminders in kitchens, offices, or children’s rooms.
6. Stained Wood Accent: Rather than painting, think about staining a mantel or bookshelf to add some natural beauty. This might give your home’s interior some coziness and rustic charm.
7. Color Blocking: Paint big, rectangular sections on your walls using two or more contrasting colors. This avant-garde and audacious method can produce a powerful visual impression.
8. Cabinet Refresh: Paint your bathroom or kitchen cabinets to give them a new appearance. This may instantly change the overall look and feel of your room and is a cost-effective method to improve it.
9. Painted Furniture: You might want to think about repainting your old furniture instead of purchasing new ones. This enables you to add a personal touch and create a unified design in your house.
10. false Finishes: Try out false finishes such as granite, marble, or faded looks. These methods can give your walls a distinctive texture and imitate pricey materials.
Do it yourself painting projects are an excellent way to showcase your artistic abilities and add personality to your interior design. Try experimenting with different methods and enjoy using colors!
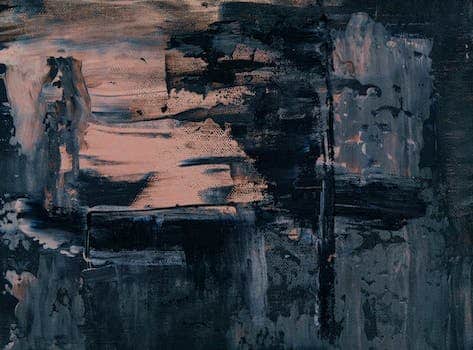
2.1. Abstract canvas paintings
Choosing abstract canvas paintings for do-it-yourself home décor projects is rather common. They let homeowners express their individuality and provide a distinctive, creative touch to any area. Abstract canvas painting ideas can accommodate a variety of tastes and ability levels because they offer a wide range of techniques and styles to explore. One can produce beautiful abstract artwork for their home with countless possibilities, regardless of skill level. We will look at a few well-liked do-it-yourself painting projects in this area, which may encourage you to start a creative project of your own.
2.2. Watercolor landscapes
Landscapes in watercolor are a popular choice for do-it-yourself painting projects. They may infuse any home design with a hint of serenity and nature thanks to their dreamy, velvety appearance. A satisfying and enjoyable project is painting your own watercolor landscape, regardless of your level of competence.
Collect your painting supplies, which should include a palette, watercolor paints, brushes, and watercolor paper, before you start. Select a reference image or drawing of a motivating landscape. It can be a tranquil rural setting, a sweeping mountain range, or a placid beach.
On the watercolor paper, begin by softly drawing the general shape of your landscape. This is going to be your painting guide. Next, use wet brushes to blend the colors you choose on the palette. Keep in mind that watercolor paints are translucent, so depth and dimension can be created by layering different colours.
When your palette is prepared, begin painting your scene with color washes. Start with softer hues and progressively increase the intensity. Try a variety of brush methods to give your painting movement and substance.
Don’t be scared to experiment and take artistic license with your scenery as you go. Embracing spontaneity and letting the colors bleed into one another are key components in watercolor painting. Enjoy yourself while using your imagination to lead you.
After you are happy with your painting, allow it to fully dry before framing or putting it on display. To increase its aesthetic effect, think of mounting it on a colourful background or adding a mat.
Landscapes rendered in watercolor may lend a lovely touch to any interior design. They can be used as gift tags or greeting cards, or they can be framed and mounted on walls or arranged on shelves. Watercolor landscapes will add a touch of creative refinement to your living area, whether you want to paint a serene forest picture or a vivid sunset.
2.3. Stencil art on walls
A common do-it-yourself painting project that can drastically change the appearance of any space is stencil art on the walls. You can make beautiful patterns and designs on your walls with just a few basic tools and supplies. Using stencils, which are pre-cut templates, painting complex shapes and designs on surfaces is a simple task. Stencil art is a flexible and imaginative approach to adorn your walls, helping you to create a whimsical mood in a child’s bedroom or a touch of elegance in your living room. The best part is that you may alter the patterns and colors to fit your own preferences and sense of style. So gather your stencils and prepare to let your creative side go!
2.4. Painted furniture
In home decor, painted furniture is a current trend. It enables you to make one-of-a-kind pieces that express your style and give your furniture a personal touch. Numerous painting ideas are available for you to consider, regardless of your level of skill with do-it-yourself projects. Here are a few well-liked do-it-yourself painting ideas for rooms:
1. Furniture Painted in Chalk: Chalk paint is a flexible choice that works well on a range of furniture surfaces. It is easy to work with and has a distressed, vintage effect.
2. Ombre appearance: Paint furniture in various tones of the same hue to create a gradient appearance. Any piece gains depth and visual intrigue using this technique.
3. Stenciled motifs: You may adorn your furniture with elaborate patterns and motifs by using stencils. This is an excellent method to give your pieces personality and distinction.
4. Two-Tone Furniture: To achieve a contemporary and striking appearance, paint contrasting colors on separate sections of a piece. Chairs, tables, and dressers are good candidates for this technique.
5. Decoupage: Use decoupage adhesive to attach beautiful paper or fabric to the surface of your furniture to transform it. You may make original, creative designs with this technique.
6. Distressed Finish: Use distressing paint to give your furniture an old and worn appearance. This method is especially effective on wooden furniture.
7. Ombre Drawer Fronts: Paint each drawer a different shade of the same hue to give them a splash of color. It looks lively and enjoyable as a result.
8. Metallic Accents: To give your furniture a dash of glitz and refinement, use metallic paints or leafing. This is particularly useful for ornamental elements like trim and knobs.
9. Painted Upholstery: Paint the fabric to breathe fresh life into worn-out upholstered furniture. This lets you change the piece’s appearance without having to reupholster it.
Polka Dot Patterns: Paint your furniture with polka dots to give it a colorful and fun appearance. This looks great as an accent on larger items or as a smaller component.
There are countless ways to personalize your home decor and change your furniture with these do-it-yourself painting ideas. Use your imagination and enjoy playing with various methods and hues!
2.5. Canvas art with natural elements
Art on canvas featuring natural elements: Painting on canvas using natural elements is a popular do-it-yourself painting project for interior design. This entails utilizing natural materials to produce distinctive and eye-catching artwork, such as leaves, flowers, or twigs. You might begin by gathering different natural ingredients from your surroundings in order to do this. After that, arrange them in the appropriate pattern or design on a canvas. After you are happy with how everything is arranged, use glue or transparent adhesive to attach the components to the canvas. Lastly, for a more rustic appearance, you may either leave the natural features alone or paint over them with vivid colors. This easy DIY painting project lets you express your creativity and bring the outside in while also adding a natural element to your interior design.
3. Step-by-Step Guide to Creating DIY Home Decor Paintings
Painting your own DIY home decor is an enjoyable and creative method to give your living area a unique touch. Regardless of your level of experience, this comprehensive tutorial will assist you in producing stunning paintings that will elevate the elegance of your house.
Step 1: Assemble Your Supplies
Assemble all the supplies you’ll need for your painting project before you start. Canvas or wooden panels, paintbrushes, oil or acrylic paints, palette knives, a color-mixing palette, and any additional equipment or materials you want to utilize can be included in this.
Step 2: Select a Style
Next, choose a painting’s theme or design. Inspiration can come from a variety of places, including nature, abstract art, and even your best quotations. Create a rough sketch of your idea on paper and then transfer it to your canvas using a stencil.
Step 3: Get Your Canvas Ready
Apply a base coat of paint to your canvas or wooden panel to prepare it. Your artwork will have an even and smooth surface as a result. You can play around with various textures and effects or stick with a solid hue.
Step 4: Combine the colors.
Using paintbrushes or palette knives, mix the colors you choose on a palette. Try a variety of color combinations to get the desired result. Keep in mind that you should begin with softer hues and add deeper tones gradually as needed.
Step 5: Get Your Paint On
It’s time to implement your design now. Begin by painting the canvas’s background or larger sections first. To provide depth and dimension, progressively add layers and features. Enjoy the painting process and take your time.
Step 6: Include the last details
After you’re happy with the painting, give it time to dry fully. Highlights, shadows, and other finishing touches can then be added. This will improve your artwork’s overall appearance.
Step 7: Show Off and Have Fun
Lastly, decide where in your house to put your homemade painting of home décor on display. Whether it’s placed in the foyer, living room, or bedroom, your artwork will quickly draw attention to itself and give your area character. Take a bow and enjoy what you’ve created!
Painting for your home on your own is a satisfying and gratifying hobby. You can use it to showcase your creativity and produce one-of-a-kind items that perfectly capture your individual flair. So, get your supplies, decide on a design, and start your creative journey by letting your imagination run wild!
3.1. Preparing the workspace
Before beginning the process of making DIY home decor paintings, setting up the workplace is crucial. Painting will be more fun if your workspace is tidy and free of clutter, and it will also keep you concentrated and productive. Here’s how to set up your workplace for a do-it-yourself home décor painting project:
1. Prepare the location: To begin, make sure the area where you’ll be painting is uncluttered. Eliminate any extraneous furniture or anything that could impede your movement or result in spillage by accident.
2. Cover the surface: To prevent paint spills and drips, cover your work surface with a plastic sheet or drop cloth. This will shield your flooring and furnishings from damage and make cleanup much simpler.
3. assemble your supplies: Ensure that you have everything you’ll need to paint within easy reach. This includes any additional instruments you would require for your particular painting approach, as well as brushes, paint trays, paint cans, and palette knives.
4. Sort and arrange your paints: Arrange your paints according to type and hue. This can help you avoid wasting time and becoming frustrated when trying to find the perfect paint color or consistency.
5. Set up the right lighting: Precise color perception and detail work require adequate illumination. To guarantee adequate illumination, place your desk close to a window or use bulbs that can be adjusted.
6. Ventilation: Make sure your workspace has enough ventilation if you’re using oil-based paints or any other chemicals that release strong fumes. In order to maintain air circulation, open windows or utilize fans.
7. Cozy seating: Painting can take a lot of time, so be sure you have a chair or stool that you can sit on. You’ll be able to concentrate on your artwork and avoid putting undue tension on your back by doing this.
You may easily and quickly produce DIY home decor paintings by following these instructions and setting up your workplace.
3.2. Choosing the right colors and themes
Creating a balanced meal plan requires including wholesome snacks. Snacks can help reduce cravings and supply extra nutrients in between meals. Snacking should be done with an eye toward what’s nourishing and filling. The following are some suggestions for adding wholesome snacks to your menu:
1. Fresh fruits: Choose a range of fruits, including citrus, berries, bananas, and apples. They are abundant in fiber, vitamins, and minerals.
2. Raw veggies: Eat raw celery, carrots, bell peppers, and cherry tomatoes as a snack. They provide lots of antioxidants and few calories.
3. Nuts and seeds: Snackle on some almonds, walnuts, sunflower, or pumpkin seeds. They are abundant in vital minerals, protein, and good fats.
4. Greek yogurt: For a creamy, high-protein snack, choose plain Greek yogurt and top it with your preferred fruits or a honey drizzle.
5. Hummus and whole-grain crackers: For a filling and high-fiber snack, dip whole-grain crackers into a bowl of hummus.
Keep in mind to portion your snacks wisely and pay attention to your body’s signals of hunger and fullness. You can guarantee that you are providing your body with nourishment throughout the day by incorporating nutritious snacks into your meal plan.
3.3. Sketching your design
Making an effective meal plan that promotes healthy eating requires careful planning and preparation of meals. You may save time and money while maintaining your healthy eating objectives by making the effort to prepare meals ahead of time. To get you started with meal prep and ahead of time planning, consider the following advice:
1. Allocate a certain time slot every week for food planning. You might choose any other day that works best for you, or even a Sunday afternoon. Make a thorough grocery list and choose the meals you will be cooking for the next week during this period.
2. Once your grocery list and meal plan are ready, go to the store and get everything you need. Keeping things prepared ahead of time will simplify dinner preparation and keep you from turning to less healthful options when you’re pressed for time.
3. As soon as you return home from the store, dedicate a few hours to cooking and meal prep for the coming week. This might include prepping full meals, marinating proteins, or slicing vegetables. To make it simple to grab-and-go, keep individual servings in containers or meal prep containers.
4. Don’t forget to include nutritious indulgences and snacks in your meal prep in addition to your main meals. Keeping pre-portioned snacks on hand, such as homemade energy bars, almonds, or fruits, might help stop thoughtless unhealthy munching during the day.
5. Lastly, label and arrange your cooked meals in the freezer or refrigerator. This will guarantee that nothing is wasted and make it simpler to find what you’re looking for. To monitor freshness, think about labeling with a date or utilizing translucent containers.
Make healthier choices throughout the week and regain control over your eating habits by incorporating meal prep and planning ahead into your daily routine. The advantages of having wholesome meals ready to go will much exceed the initial time and effort commitment.
3.4. Painting techniques and styles
Painting techniques and styles can greatly enhance the overall look and feel of your DIY home decor paintings. Whether you are a beginner or an experienced artist, exploring different techniques can add depth and uniqueness to your creations. In this step-by-step guide, we will walk you through the process of creating stunning DIY home decor paintings.
1. Choose your painting surface: Start by selecting the surface on which you want to create your masterpiece. Options include canvas, wood, paper, or even repurposed materials.
2. Gather your materials: Collect all the necessary materials, such as paintbrushes, acrylic or oil paints, palette, water container, and a protective cover for your workspace.
3. Plan your design: Before starting, have a clear idea of the design or concept you want to create. You can sketch it out or use reference images for inspiration.
4. Prepare your surface: If you are using a canvas or wood, make sure it is clean and free of any dust or debris. Apply a base coat of paint if desired.
5. Start with an underpainting: This technique involves laying down a base layer of paint to establish the overall composition and values. It helps bring depth and dimension to your artwork.
6. Layering and blending: Once the underpainting is dry, start adding layers of colors, gradually building up the details and textures. Experiment with different brush strokes and blending techniques to create interesting effects.
7. Adding highlights and shadows: Use lighter and darker shades of paint to add highlights and shadows, which will bring your painting to life. Pay attention to the light source and how it interacts with your subject.
8. Fine-tune the details: Take your time to refine the smaller details of your painting, such as adding fine lines, texture, or intricate patterns.
9. Let it dry and protect: Allow your painting to dry completely before applying any protective finishes. Once dry, consider applying a varnish or sealant to protect your artwork.
10. Display and enjoy: Finally, find the perfect spot to display your DIY home decor painting. Whether it’s hanging on a wall or placed on a shelf, let your creation bring beauty and personality to your space.
Remember, practice makes perfect, so don’t be afraid to experiment with different techniques and styles. Enjoy the process and let your creativity soar!
3.5. Adding finishing touches and details
It’s time to add the last accents and touches that will really make your DIY home decor painting stand out once you have finished the primary elements of the project. Your painting will appear polished and professional after these last processes. Here’s a step-by-step tutorial to assist you give your DIY home decor painting the ideal finishing touches:
1. Clean and prepare the surface: Make sure your painting’s surface is dust- and debris-free before applying any last touches. Make use of a gentle cloth or brush to wipe away any debris.
2. Correct any flaws: Examine your artwork for any flaws, such as smudges or uneven brushstrokes. Any spots that require repair can be touched up with a little brush or sponge.
3. Add texture: Stippling and dry brushing are two methods you might want to use to give your painting some substance. Your artwork may gain depth and dimension as a result.
4. Boost the colors: Examine your painting’s colors carefully to see if any parts could need a bit extra help. To increase contrast, apply highlights or darken specific sections with tiny brushes.
5. Detail work: Focus on the minute details of your artwork. This can entail using subtle accents, complex patterns, or thin lines to make your artwork come to life.
6. Seal and preserve: After you are happy with the way your painting looks, you should seal it to keep dust, moisture, and fading away. To add a polished and glossy finish to your artwork, use a transparent acrylic sealer or varnish.
You can elevate your do-it-yourself home décor painting by following these instructions. To truly make your artwork distinctive, don’t be scared to try new things and incorporate your own creative flare.
Conclusion
To sum up, these ten do-it-yourself home décor painting ideas provide imaginative and affordable solutions to update your living area. These ideas offer countless options, whether your goal is to update outdated furniture, add a splash of color, or make a statement piece. You may bring out your inner artist and add distinctive and fashionable designs to your home with a little time and work.


2 Comments
Brande Lonne
1 year agoThese DIY painting ideas for home decor are absolutely amazing! They provide a fantastic opportunity to unleash your creativity and personalize your living space. From bold geometric patterns to elegant ombre effects, theres something for every style and taste. I cant wait to try them out and transform my home into a stunning masterpiece. Thank you for sharing these inspiring ideas! 💫🎨
Dulciana Jollenta
1 year agoWow, these DIY painting ideas are simply brush-tastic! Who needs a Picasso when you can create your own masterpiece on the walls? Time to unleash my inner Van Gogh and turn my home into a gallery of colorful chaos. Watch out, world, Im about to become the next big thing in avant-garde interior design!