

Are you looking to spruce up your home with some unique and creative decor ideas? Look no further! In this article, we will explore 10 exciting DIY home decor painting ideas that will transform your living space. From accent walls to personalized artwork, these projects are perfect for unleashing your inner artist. Get ready to add a splash of color and personality to your home with these fun and affordable painting ideas!
- 1. Introduction
- 1.1. Benefits of DIY Home Decor Paintings
- 1.2. Choosing the Right Materials
- 1.3. Finding Inspiration for Your Paintings
- 1.4. Preparing Your Workspace
- 1.5. Understanding Basic Painting Techniques
- 2. Popular DIY Home Decor Painting Ideas
- 2.1. Abstract Canvas Art
- 2.2. Nature-Inspired Wall Murals
- 2.3. Stenciled Furniture
- 2.4. Hand-Painted Accent Walls
- 2.5. Vintage Sign Reproductions
- 3. Step-by-Step Guide to Creating DIY Home Decor Paintings
1. Introduction
When it comes to home decor, painting is one of the easiest and most affordable ways to transform the look and feel of any space. Whether you’re a seasoned DIY enthusiast or a beginner looking to try your hand at a new project, these 10 DIY home decor painting ideas will inspire you to get creative and add a personal touch to your living space. From accent walls to furniture makeovers, there’s something for everyone in this collection of ideas. So grab your paintbrushes and let’s get started!
1.1. Benefits of DIY Home Decor Paintings
DIY home decor paintings offer numerous benefits for those looking to add a personal touch to their living spaces. Whether you are an experienced artist or a beginner, creating your own paintings can be a fulfilling and rewarding experience. Not only does it allow you to express your creativity, but it also enables you to customize your home decor according to your style and preferences. Additionally, DIY home decor paintings can be a cost-effective alternative to purchasing expensive artwork. By using your own skills and imagination, you can create unique and one-of-a-kind pieces that perfectly complement your interior design. In this article, we will explore 10 DIY home decor painting ideas that will inspire you to unleash your artistic abilities and transform your living space.
1.2. Choosing the Right Materials
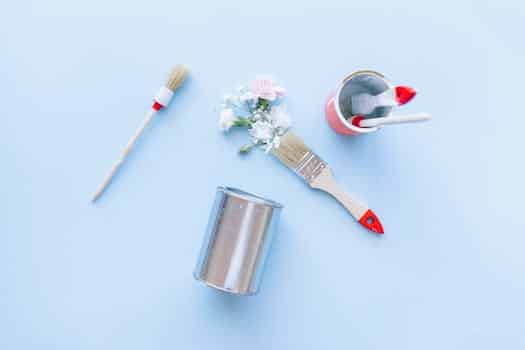
Choosing the right materials is essential when embarking on any DIY home decor painting project. The materials you choose can greatly impact the final outcome of your project, so it’s important to select them carefully. From paint brushes to primers, each material plays a crucial role in achieving the desired results.
Before diving into the world of painting ideas, it’s vital to gather all the necessary materials. The first step is to choose the type of paint that suits your needs. Whether it’s acrylic, latex, or oil-based paint, consider factors such as the surface you’ll be painting, the desired finish, and the level of durability required.
Next, selecting the right brushes and rollers is crucial. Different brushes are designed for specific purposes, such as cutting in edges or painting intricate details. Rollers, on the other hand, are ideal for covering larger areas quickly and efficiently. Ensure you have a variety of brush sizes and roller covers to accommodate different surfaces and techniques.
Priming is another important step in the painting process. Primers create a smooth and even surface for the paint to adhere to, resulting in a more professional-looking finish. Depending on the surface you’re working with, choose a primer that is compatible with both the paint type and the material of the surface.
Lastly, don’t forget about the necessary tools for preparation and clean-up. Drop cloths or plastic sheets will protect your floors and furniture from accidental spills or splatters. Painter’s tape is essential for creating clean lines and preventing paint bleed. Additionally, have rags, sponges, and buckets of water on hand for cleaning brushes and spills.
By carefully choosing the right materials for your DIY home decor painting project, you’ll set yourself up for success. Investing in quality materials and tools will not only enhance the final result but also make the entire process more enjoyable and efficient.
1.3. Finding Inspiration for Your Paintings
Finding inspiration for your paintings is an essential step in creating beautiful and unique pieces of art. Whether you are an experienced artist or just starting out, finding sources of inspiration can help you unleash your creativity and produce meaningful artwork. In this section, we will explore various ways to find inspiration for your paintings, providing you with ideas and techniques to ignite your artistic imagination.
1.4. Preparing Your Workspace
Preparing your workspace is an essential step before starting any DIY home decor painting project. By setting up a proper workspace, you can ensure a smooth and efficient painting process. This section will guide you through the necessary preparations to create the perfect environment for your painting ideas.
1.5. Understanding Basic Painting Techniques
Painting is a popular DIY home decor activity that allows you to add a personal touch to your living space. Whether you’re a beginner or an experienced artist, understanding basic painting techniques is essential to achieve desired results. By mastering these techniques, you can create beautiful and unique pieces of art that will enhance the aesthetic appeal of your home. In this article, we will explore some simple and effective painting ideas that you can easily implement in your DIY home decor projects.
2. Popular DIY Home Decor Painting Ideas
If you’re looking to give your home a fresh new look, DIY home decor painting ideas are a great way to achieve that without breaking the bank. Painting is a simple and affordable way to transform any room and add a personal touch to your living space. Whether you’re a beginner or an experienced painter, there are plenty of creative and popular painting ideas to choose from. Here are 10 DIY home decor painting ideas to inspire your next project:
1. Accent Wall: Create a focal point in a room by painting one wall with a bold and contrasting color. This can instantly add depth and visual interest to any space.
2. Ombre Effect: Achieve a beautiful gradient effect by blending multiple shades of the same color. This technique works well on walls, furniture, and even home accessories.
3. Stenciled Patterns: Use stencils to create intricate patterns or designs on walls or furniture. This is a great way to add a unique and artistic touch to your home decor.
4. Chalkboard Paint: Turn any surface into a functional chalkboard by applying chalkboard paint. This is perfect for creating a fun and interactive space in your kitchen, home office, or kids’ room.
5. Geometric Shapes: Get creative with geometric shapes and patterns. Use painter’s tape to create clean and precise lines, and experiment with different color combinations for a modern and stylish look.
6. Striped Walls: Add a touch of elegance to your walls by painting stripes. Horizontal or vertical, thick or thin, the possibilities are endless with striped walls.
7. Ombré Furniture: Give your old furniture a new lease on life by painting it with an ombré effect. This technique can instantly update and modernize any piece of furniture.
8. Painted Floors: If you’re feeling adventurous, consider painting your floors. This is a great option for adding a pop of color to a room or disguising old and worn-out flooring.
9. Stenciled Rug: Create a custom rug by stenciling a design onto a plain rug or even directly onto your floor. This is a cost-effective way to add a unique and personalized touch to your space.
10. Abstract Art: Let your creativity flow and create your own abstract art. This is a fun and expressive way to add a splash of color and personality to your walls.
These DIY home decor painting ideas are just the tip of the iceberg. With a little imagination and some paint, you can transform your home into a stylish and personalized haven.
2.1. Abstract Canvas Art
Abstract canvas art is a popular choice for DIY home decor painting ideas. With its vibrant colors and unique designs, abstract canvas art can add a touch of modern sophistication to any room. Whether you’re a beginner or an experienced painter, creating your own abstract canvas art can be a fun and rewarding project. There are endless possibilities when it comes to abstract art, allowing you to express your creativity and style. From bold brushstrokes to subtle textures, abstract canvas art offers a wide range of techniques and approaches. So, grab your paintbrushes and get ready to unleash your artistic side with these DIY home decor painting ideas!
2.2. Nature-Inspired Wall Murals
Nature-Inspired Wall Murals are a popular DIY home decor painting idea that brings the beauty of the outdoors into your living space. These wall murals are inspired by the natural world and can transform any room into a serene and peaceful retreat. Whether you’re a nature lover or simply looking to add a touch of tranquility to your home, nature-inspired wall murals are a great choice.
There are endless options when it comes to nature-inspired wall murals. You can choose to paint a mural of a lush forest, a serene beach scene, or a vibrant garden. The possibilities are truly endless. The key is to find a design that speaks to you and complements the overall aesthetic of your home.
Creating a nature-inspired wall mural is a DIY project that anyone can tackle. All you need is some paint, brushes, and a bit of creativity. Start by preparing the wall surface and sketching out your design. Once you have a rough outline, start painting in the base colors and slowly build up the details. Don’t be afraid to experiment with different shades and textures to bring your mural to life.
Not only do nature-inspired wall murals add a unique and artistic touch to your home, but they also have a calming effect on the mind and body. Studies have shown that being surrounded by nature can reduce stress levels and improve overall well-being. So why not bring a piece of the outdoors inside with a beautiful nature-inspired wall mural?
In conclusion, nature-inspired wall murals are a popular DIY home decor painting idea that allows you to bring the beauty of the natural world into your living space. With endless design options and the ability to create a calming and serene environment, these wall murals are a great choice for any homeowner looking to add a touch of nature to their home decor.
2.3. Stenciled Furniture
Stenciled Furniture
Stenciled furniture is a popular choice for DIY home decor painting. It offers a unique and personalized touch to any piece of furniture, transforming it into a work of art. With stencils, you can easily create intricate patterns or designs on tables, chairs, dressers, and more.
One of the advantages of stenciling furniture is the ability to customize it according to your taste and style. You can choose from a wide range of stencil designs available in the market or even create your own. Whether you prefer bold and geometric patterns or delicate floral motifs, stencils offer endless possibilities for creativity.
To stencil furniture, you will need a few basic supplies such as stencils, paint, painter’s tape, and a stencil brush. Start by cleaning and preparing the surface of the furniture. Then, secure the stencil in place using painter’s tape and apply the paint evenly with the stencil brush. Take your time and be careful not to smudge the design.
Stenciled furniture can be a great addition to any room in your home. It can add a pop of color, create visual interest, or even serve as a focal point. Whether you stencil a small accent table or give a complete makeover to a vintage dresser, the results can be stunning.
In conclusion, stenciled furniture is a popular DIY home decor painting idea that allows you to unleash your creativity and transform ordinary furniture into extraordinary pieces. Give it a try and see how stenciling can elevate the look of your home.
2.4. Hand-Painted Accent Walls
Hand-painted accent walls are a popular choice for DIY home decor painting ideas. Adding a hand-painted accent wall to a room can instantly transform the space and create a unique focal point. With a little creativity and the right tools, you can easily create a stunning hand-painted accent wall in your home. Whether you want to add a pop of color, a bold pattern, or a subtle texture, hand-painted accent walls offer endless possibilities for expressing your personal style. From geometric designs to floral patterns, the options are truly limitless. So grab your paintbrush and get ready to unleash your inner artist with these exciting hand-painted accent wall ideas!
2.5. Vintage Sign Reproductions
Vintage sign reproductions are a popular choice for DIY home decor painting projects. These charming replicas of vintage signs can add a touch of nostalgia and character to any space. Whether you want to create a vintage-inspired kitchen or a retro-themed living room, vintage sign reproductions are a versatile option.
One of the benefits of using vintage sign reproductions in your DIY home decor painting projects is the wide range of designs available. From classic Coca-Cola advertisements to rustic farm signs, there is a vintage sign reproduction to suit every style and taste.
Another advantage of incorporating vintage sign reproductions into your home decor is their ability to create a focal point. Placing a bold and eye-catching vintage sign reproduction on a blank wall can instantly transform the entire room. It adds visual interest and becomes a conversation starter for guests.
DIY enthusiasts can also enjoy the process of painting vintage sign reproductions. It allows for creative expression and personalization. Whether you prefer a distressed and weathered look or a vibrant and colorful finish, you can easily achieve it with a vintage sign reproduction.
In conclusion, vintage sign reproductions are a fantastic choice for DIY home decor painting ideas. They offer a wide range of designs, create a focal point, and allow for personalization. Consider incorporating vintage sign reproductions into your next home decor project to add a touch of nostalgia and charm.
3. Step-by-Step Guide to Creating DIY Home Decor Paintings
Creating DIY home decor paintings can be a fun and rewarding way to add a personal touch to your living space. Whether you consider yourself an artist or not, these step-by-step instructions will guide you through the process of creating beautiful paintings for your home.
1. Choose your canvas: Start by selecting the size and shape of canvas you want to work with. You can purchase pre-stretched canvases from an art supply store or use a piece of wood or cardboard as your base.
2. Gather your materials: Depending on the type of painting you want to create, you will need various materials such as acrylic or watercolor paints, brushes, palette knives, and a palette for mixing colors.
3. Prepare your workspace: Find a well-lit area with enough room for your supplies and easel. Cover your work surface with a plastic sheet or old newspaper to protect it from paint splatters.
4. Plan your design: Before you start painting, sketch out your design on the canvas using a pencil. This will serve as a guide for your painting and help you visualize the final result.
5. Start with the background: Begin by applying a base color to the entire canvas as the background. This will set the tone for your painting and provide a foundation for the other elements.
6. Add layers and details: Once the background is dry, start adding layers of paint to create depth and texture. Use different brush strokes and techniques to achieve the desired effect. Add details and highlights to make your painting come to life.
7. Let it dry and varnish: Allow your painting to dry completely before applying a varnish or sealant. This will protect the artwork and give it a professional finish.
8. Display your masterpiece: Once your painting is dry and varnished, it’s time to find the perfect spot to display it in your home. Consider the color scheme and style of your room to complement the painting.
With these step-by-step instructions, you can create your own unique DIY home decor paintings that will add a personal touch to your living space. Get creative, have fun, and enjoy the process of bringing your artistic vision to life!
3.1. Gathering Your Supplies
Before you start creating your own DIY home decor paintings, it’s important to gather all the necessary supplies. Having everything ready will ensure a smooth and enjoyable painting process. Here are the essential items you’ll need:
1. Canvas: Choose a size that suits your preference and the space where you plan to display your artwork.
2. Paintbrushes: Invest in a set of high-quality paintbrushes in various sizes to achieve different strokes and effects.
3. Acrylic Paints: Opt for a range of colors that complement your home decor theme. Consider getting the primary colors (red, blue, and yellow) along with white and black for mixing.
4. Palette: Use a palette to mix and blend your paint colors. You can choose a traditional wooden palette or a disposable one for easy cleanup.
5. Palette Knife: This tool is useful for creating texture and applying thick layers of paint.
6. Paint Palettes or Containers: If you prefer to keep your paint colors separated, use small paint palettes or containers to hold each color.
7. Easel or Painting Surface: Depending on your preference, you can work on an easel or a flat surface such as a table.
8. Water Container: Keep a container of water nearby to rinse your brushes and thin the paint if needed.
9. Paper Towels or Rags: These are handy for cleaning brushes, wiping excess paint, and correcting mistakes.
10. Pencil and Eraser: Sketch your design lightly on the canvas before painting. An eraser will help you make adjustments or remove any unwanted lines.
Once you have gathered all these supplies, you’ll be ready to embark on your DIY home decor painting journey.
3.2. Preparing the Canvas or Surface
Preparing the Canvas or Surface
Before diving into the exciting world of DIY home decor paintings, it is crucial to prepare the canvas or surface properly. This step ensures that your artwork will have a smooth and professional finish. Here is a step-by-step guide to help you get started:
1. Selecting the Canvas: Choose a canvas size that suits your desired painting. Consider the space where you plan to display it and the level of detail you want to incorporate.
2. Preparing the Canvas: If you are using a pre-stretched canvas, ensure that it is tightly stretched and free from any wrinkles. If using a canvas board or panel, make sure it is clean and smooth.
3. Priming the Surface: Apply a layer of gesso primer to the canvas or surface. Gesso helps create a smooth and stable surface for the paint to adhere to. Use a brush or roller to evenly coat the entire surface, including the sides.
4. Sanding the Surface: Once the primer is dry, lightly sand the surface with fine-grit sandpaper. This step helps remove any imperfections and creates an even texture for the paint.
5. Cleaning the Surface: Use a clean cloth or tack cloth to remove any dust or debris from the sanded surface. It is essential to have a clean surface before starting the painting process.
By following these steps, you will ensure that your canvas or surface is well-prepared for your DIY home decor painting project. This preparation stage sets the foundation for a successful and visually appealing artwork.
3.3. Sketching Your Design
Before you start painting your DIY home decor, it’s important to sketch out your design. This step-by-step guide will help you create beautiful paintings for your living space.
1. Gather your materials: Start by gathering all the necessary materials for your painting project. This may include canvas or paper, paintbrushes, paints, palette, water container, and any other tools you may need.
2. Choose your subject: Decide on the subject of your painting. It could be a landscape, still life, abstract design, or any other theme that inspires you.
3. Research and gather inspiration: Look for inspiration online, in art books, or even from nature. Collect images or sketches that will help guide your design.
4. Plan your composition: Start by sketching a rough outline of your composition. Consider the placement of objects, the balance of colors, and the overall arrangement of your design.
5. Add details and refine: Once you have the basic composition in place, start adding details to your sketch. Refine the shapes, textures, and elements of your design.
6. Experiment with color schemes: Use your sketch as a guide to explore different color schemes. Play around with different combinations to find the one that best suits your vision.
7. Practice your brushstrokes: Before diving into the final painting, practice different brushstrokes and techniques on a separate piece of paper. This will help you gain confidence and control over your brush.
8. Start painting: Now it’s time to transfer your sketch onto the canvas or paper. Begin by blocking in the main shapes and gradually build up the layers of paint.
9. Take breaks and step back: Throughout the painting process, take breaks and step back to evaluate your progress. This will help you identify any areas that need adjustments or additional work.
10. Finishing touches: Once you are satisfied with your painting, make any final adjustments and add any necessary finishing touches. Sign your artwork and let it dry before displaying it in your home.
Remember, the most important thing is to have fun and enjoy the process of creating your own DIY home decor paintings!
3.4. Applying Base Coats
Applying Base Coats
Before starting any DIY home decor painting project, it is essential to apply a base coat to create a smooth and consistent surface. The base coat not only helps the paint adhere better to the surface but also enhances the overall durability of the finished painting.
To apply the base coat, you will need a paintbrush or a roller, depending on the size of the surface you are painting. Start by cleaning the surface thoroughly to remove any dirt or dust. If there are any imperfections, such as cracks or holes, fill them in with spackle or putty and sand them down until smooth.
Next, choose a high-quality primer that is suitable for the type of surface you are working with. Apply the primer evenly using long, even strokes, following the natural grain of the surface. Allow the primer to dry completely before moving on to the next step.
Once the primer is dry, you can begin applying the base coat color of your choice. Use a clean brush or roller and apply the paint in thin, even layers. Allow each layer to dry before applying the next one, and make sure to cover the entire surface evenly.
After applying the base coat, you can proceed with adding decorative elements or additional layers of paint to create the desired design. Remember to let each layer dry completely before moving on to the next step. With a properly applied base coat, your DIY home decor painting will have a professional and polished look.
3.5. Adding Details and Highlights
Adding Details and Highlights
Once you have completed the base layer of your DIY home decor painting, it’s time to add some details and highlights to make it truly stand out. This step is where you can let your creativity shine and personalize your artwork.
Here are some tips to help you add those finishing touches:
1. Use a smaller brush: Switch to a smaller brush to paint intricate details or fine lines. This will allow you to have more control over the paint and create precise and intricate designs.
2. Choose contrasting colors: Select colors that will create a contrast with the base layer. This will help the details pop and add visual interest to your painting. For example, if your base layer is a light shade, opt for darker or vibrant colors for the details.
3. Focus on highlights: Identify the areas where light would naturally hit your painting. Use lighter shades of paint or even metallic paints to add highlights and create a sense of depth and dimension.
4. Experiment with different techniques: Don’t be afraid to try different techniques such as dry brushing, splattering, or even using stencils. These techniques can add texture and unique patterns to your artwork.
5. Pay attention to balance: As you add details, ensure that you maintain a sense of balance in your composition. Distribute the details evenly across the painting and avoid overcrowding one area.
Remember, adding details and highlights is all about enhancing the overall aesthetics of your DIY home decor painting. Take your time, enjoy the process, and let your imagination guide you!
Conclusion
In conclusion, these 10 DIY home decor painting ideas offer a fun and creative way to transform your living space. Whether you’re looking to add a pop of color or create a unique pattern, these projects can help you achieve a personalized and stylish look. With a little time and effort, you can create stunning wall art, accent pieces, and decorative objects that reflect your personal style and enhance the ambiance of your home.

9 Comments
Shell Adebayo
1 year agoAs a normal human visitor, I find this post intriguing and relevant to my current interest in home improvement. The excerpt highlights the potential of discovering creative and cost-effective painting ideas for enhancing the aesthetics of ones home through do-it-yourself (DIY) projects. By exploring these DIY techniques, individuals can embark on a journey to transform their living spaces while adhering to budget limitations. This post appears to provide valuable insights and inspiration for homeowners seeking to beautify their homes through affordable painting projects.
Ricca Calhoun
1 year agoThank you for sharing this informative post on [object Object]. The content provides valuable insights on creative and budget-friendly painting ideas for home improvement. The DIY projects mentioned here seem approachable and practical, making it easier for homeowners to enhance the aesthetic appeal of their living spaces. The inclusion of step-by-step instructions and cost-effective tips adds to the overall usefulness of this resource. Overall, this post offers a great starting point for anyone looking to beautify their home through painting projects.
Sandye Belanger
1 year agoThank you for sharing this informative post [object Object]. I truly appreciate the effort put into discovering and presenting these creative and budget-friendly painting ideas for beautifying our homes. The DIY projects mentioned here seem quite promising and I am eager to try them out. It is always a delightful experience to enhance the aesthetic appeal of our living spaces with our own hands.
Mari Hutchison
1 year agoAs a normal human visitor, I find the post [object Object] quite intriguing. The excerpt suggests that it offers a plethora of creative and budget-friendly painting ideas to enhance the aesthetic appeal of ones home through easy DIY projects. This topic is of particular interest to me, as I am always on the lookout for cost-effective ways to beautify my living space. I look forward to delving into the content and exploring the suggested painting techniques and ideas.
Francine Sollows
1 year agoWow, these painting ideas are just what I needed to spruce up my home on a budget! Cant wait to try out these DIY projects and add a personal touch to my walls. Thanks for sharing! 🎨✨
Marillin Goran
1 year agoThese creative and budget-friendly painting ideas are a must-try for anyone looking to beautify their home! With these easy DIY projects, you can transform your living space into a stunning masterpiece without breaking the bank. Dont miss out on the opportunity to add a touch of elegance and personality to your walls. Get inspired and get painting! 💼
Astrix Ives
1 year agoWho needs an expensive Picasso when you can create your own masterpieces with these DIY painting projects? Time to unleash my inner Bob Ross and turn my walls into a colorful canvas! 🎨💥
Kellina Emyle
1 year agoHaha, well isnt this just perfect timing! I was just about to embark on a mission to transform my humble abode into a masterpiece! Who knew I could channel my inner Picasso on a budget? These DIY painting ideas are like music to my thrifty ears. I can already envision myself with a paintbrush in one hand and a dollar bill in the other, creating magic on my walls. Time to unleash my inner Bob Ross and turn my home into a work of art!
Eugenia Langdon
1 year agoThese DIY painting projects are absolutely fantastic! Im always on the lookout for creative and budget-friendly ideas to spruce up my home, and this post has given me so much inspiration. I cant wait to try some of these easy DIY painting techniques to add a personal touch to my living space. Thank you for sharing these amazing ideas!