
Looking to spruce up your home decor? Get ready to unleash your creativity with these 10 DIY home decor painting ideas. Whether you’re a beginner or an experienced painter, these ideas will inspire you to add a personal touch to your living space. From unique wall art to custom furniture, let’s dive into the world of DIY painting and transform your home into a stylish haven.
- 1. Introduction
- 1.1. Why DIY Home Decor Paintings are Popular
- 1.2. Benefits of DIY Home Decor Paintings
- 1.3. Materials Needed for DIY Home Decor Paintings
- 1.4. Safety Precautions for DIY Home Decor Paintings
- 1.5. Inspiration for DIY Home Decor Paintings
- 2. Choosing the Right Painting Technique
- 2.1. Understanding Different Painting Techniques
- 2.2. Popular Painting Techniques for DIY Home Decor
- 2.3. Choosing the Right Technique for Your Skill Level
- 2.4. Experimenting with Mixed Media
- 2.5. Exploring Abstract Painting Techniques
- 3. Step-by-Step Guide to Creating a DIY Home Decor Painting
1. Introduction
DIY home decor painting is a popular and cost-effective way to transform the look and feel of your living space. Whether you’re a seasoned DIY enthusiast or just starting out, painting can be a fun and creative project that allows you to express your personal style. In this article, we will explore ten DIY home decor painting ideas that are easy to execute and will add a unique touch to your home. From accent walls to stenciled patterns, these ideas will inspire you to get your paintbrushes ready and embark on a creative journey.
1.1. Why DIY Home Decor Paintings are Popular
DIY home decor paintings have become increasingly popular in recent years. People are embracing the idea of creating their own unique pieces of art to decorate their homes. This trend has gained momentum due to several reasons. Firstly, DIY home decor paintings allow individuals to unleash their creativity and express themselves through art. It provides a sense of fulfillment and satisfaction when you can proudly display a painting that you have created with your own hands. Additionally, DIY home decor paintings offer a cost-effective way to decorate your living space. Instead of purchasing expensive artwork from galleries or stores, you can simply gather some basic painting supplies and create your own masterpieces. This not only saves money but also gives you the freedom to customize your artwork according to your personal taste and style. Another reason for the popularity of DIY home decor paintings is the therapeutic nature of the activity. Painting can be a relaxing and calming experience, allowing you to de-stress and unwind after a long day. It provides an escape from the daily routine and offers a creative outlet for self-expression. Moreover, DIY home decor paintings can be a great way to bond with family and friends. You can organize painting sessions or workshops where everyone can participate and create their own artwork. It fosters a sense of togetherness and creates lasting memories. In conclusion, DIY home decor paintings have gained popularity due to their ability to unleash creativity, cost-effectiveness, therapeutic benefits, and the opportunity to bond with loved ones.
1.2. Benefits of DIY Home Decor Paintings
DIY home decor paintings offer a multitude of benefits for those looking to add a personal touch to their living spaces. Not only do these handmade artworks allow individuals to unleash their creativity, but they also provide a cost-effective alternative to store-bought decor. By opting to create your own paintings, you can customize the design, colors, and style to perfectly match your aesthetic preferences. Additionally, engaging in DIY home decor painting can be a therapeutic and relaxing activity, allowing you to unwind and express yourself artistically. Furthermore, these unique paintings can serve as meaningful and heartfelt gifts for friends and family. Whether you are a seasoned artist or a beginner, exploring the world of DIY home decor paintings can be a fulfilling and rewarding experience.
1.3. Materials Needed for DIY Home Decor Paintings
When it comes to DIY home decor, painting is a versatile and cost-effective way to transform your living space. Whether you’re a beginner or an experienced artist, there are plenty of painting ideas that you can try out. To get started, you’ll need a few essential materials to ensure successful and enjoyable painting sessions. In this section, we will discuss the materials needed for DIY home decor paintings, so you can gather everything you need before diving into your creative projects.
1.4. Safety Precautions for DIY Home Decor Paintings
When it comes to DIY home decor painting, it is essential to prioritize safety precautions. Engaging in painting projects can be a fun and rewarding way to enhance the look of your living space. However, it is equally important to ensure your safety and the safety of others during the process. By following a few simple precautions, you can enjoy the creative process while minimizing any potential risks.
1.5. Inspiration for DIY Home Decor Paintings
Are you looking for some creative and budget-friendly ideas to spruce up your home decor? Look no further! In this article, we will explore 10 amazing DIY home decor painting ideas that will inspire you to unleash your inner artist. Whether you’re a seasoned painter or just starting out, these ideas are perfect for adding a personal touch to your living space. From abstract designs to nature-inspired motifs, there is something for everyone. So, grab your paintbrushes and let’s get started on transforming your home into a haven of artistic expression!
2. Choosing the Right Painting Technique
When it comes to DIY home decor painting, choosing the right painting technique can make all the difference. The technique you choose will not only determine the final look of your project but also affect the level of difficulty and the tools you’ll need. Here are 10 painting ideas for your home decor and the techniques that go along with them:
1. Brush Painting: This is the most common technique used in painting projects. It involves using a paintbrush to apply paint to the surface, resulting in a smooth and even finish.
2. Sponge Painting: If you want to add texture and depth to your walls, sponge painting is a great technique to try. It involves dipping a sponge into the paint and dabbing it onto the surface, creating a mottled effect.
3. Stenciling: Stenciling is a fun way to create patterns and designs on your walls or furniture. You can use pre-made stencils or create your own, and then apply paint over the stencil for a clean and precise design.
4. Rag Rolling: This technique involves rolling a rag or cloth into a cylindrical shape, dipping it into paint, and then rolling it onto the surface. It creates a textured and rustic look, perfect for adding character to your decor.
5. Ombre Painting: Ombre is a popular trend in home decor, and you can easily achieve this look with paint. Start with a light shade at the top and gradually blend it into a darker shade towards the bottom for a stunning gradient effect.
6. Strie Painting: Strie is a technique that creates a striped or streaked effect on the surface. It involves dragging a brush or dry brush across wet paint, creating subtle lines that add visual interest to your decor.
7. Color Washing: Color washing is a technique that involves applying a translucent layer of paint over a base coat. It creates a soft and washed-out look, perfect for achieving a vintage or aged effect.
8. Sponging Off: This technique is used to create a distressed or weathered look. After applying a base coat, you sponge off some of the wet paint using a damp sponge, revealing the base coat underneath.
9. Dry Brushing: Dry brushing is a technique that involves using a dry brush with minimal paint to create a textured and worn-out effect. It works best on surfaces with existing texture or when you want to highlight details.
10. Spray Painting: If you’re looking for a quick and efficient way to paint furniture or small decor items, spray painting is the way to go. It provides an even and smooth finish, but make sure to use it in a well-ventilated area.
Remember to consider the type of surface, the desired look, and your skill level when choosing a painting technique for your DIY home decor project. Each technique offers a unique result, so don’t be afraid to experiment and have fun!
2.1. Understanding Different Painting Techniques
Understanding Different Painting Techniques
When it comes to DIY home decor painting, it’s important to understand the different painting techniques available. Each technique offers a unique way to add texture, depth, and visual interest to your walls or furniture. Here are some common painting techniques you can explore:
1. Sponging: This technique involves using a sponge to create a soft and mottled effect on the surface. It’s perfect for adding a rustic or aged look to your walls.
2. Stenciling: Stenciling allows you to create intricate patterns or designs on your walls. You can use pre-made stencils or create your own to add a personal touch to your home decor.
3. Color Washing: This technique involves applying a translucent layer of paint over a base color. It creates a subtle, soft, and washed-out effect that adds depth and dimension to your walls.
4. Rag Rolling: By rolling a rag or cloth over a freshly painted surface, you can create a textured look with a slight sheen. It’s a great technique for adding a touch of elegance to your walls.
5. Strie: Strie is a technique that involves dragging a dry brush or comb through wet paint to create thin, vertical lines. It’s commonly used to mimic the look of wallpaper or fabric.
Choosing the Right Painting Technique
Now that you’re familiar with some popular painting techniques, it’s time to choose the right one for your DIY home decor project. Consider the following factors when making your decision:
1. Desired Style: Think about the overall style and theme of your home decor. Some techniques, like sponging or color washing, may lend themselves well to a rustic or vintage look, while stenciling or strie can add a more modern or artistic touch.
2. Surface Type: Different techniques work better on different surfaces. For example, rag rolling may work best on textured walls, while stenciling can be applied to almost any surface, including furniture.
3. Skill Level: Consider your skill level and the amount of time and effort you’re willing to invest. Some techniques, like sponging or color washing, are relatively easy for beginners, while others, like intricate stenciling, may require more practice.
4. Personal Preference: Ultimately, choose a painting technique that resonates with your personal style and preferences. It’s your home, so have fun experimenting with different techniques and creating a look that reflects your personality.
In conclusion, understanding different painting techniques and choosing the right one for your DIY home decor project is crucial. Whether you want to add texture, patterns, or a soft wash of color, there’s a technique out there that will help you achieve the desired effect. So get your paintbrushes ready and let your creativity shine!
2.2. Popular Painting Techniques for DIY Home Decor
When it comes to DIY home decor, painting can be a great way to transform your space and add a personal touch. But with so many painting techniques to choose from, it can be overwhelming to decide which one is right for you. In this article, we will explore some popular painting techniques that you can easily try at home.
1. Brush Painting: This is the most common and traditional painting technique. It involves using a brush to apply paint directly onto the surface, resulting in a smooth and even finish.
2. Stencil Painting: Stencils are a fun and easy way to create patterns and designs on your walls. Simply secure the stencil to the wall and use a brush or sponge to apply paint over it. This technique allows for precise and repeatable designs.
3. Sponge Painting: This technique involves using a sponge to dab or stipple paint onto the surface, creating a textured and multidimensional effect. It is great for adding depth and interest to walls or furniture.
4. Rag Rolling: To achieve a unique and textured look, try rag rolling. This technique involves rolling a rag or cloth in paint and then rolling it onto the surface, creating a subtle pattern and texture.
5. Dry Brushing: As the name suggests, this technique involves using a dry brush with very little paint on it to create a rough and uneven effect. It is perfect for adding a distressed or weathered look to furniture or accent pieces.
6. Ombre Painting: Ombre is a popular and trendy painting technique that involves blending two or more colors seamlessly. It creates a gradient effect that can be applied to walls, furniture, or even smaller decorative items.
7. Splatter Painting: For a fun and abstract look, try splatter painting. This technique involves flicking or splattering paint onto the surface using a brush, toothbrush, or even your fingers. It is a great way to add a playful touch to your decor.
Remember, the right painting technique for your DIY home decor project will depend on the look you want to achieve and the level of difficulty you are comfortable with. So, don’t be afraid to experiment and have fun with different techniques!
2.3. Choosing the Right Technique for Your Skill Level
Choosing the right technique for your skill level is crucial when it comes to painting. Whether you are a beginner or an experienced painter, the technique you choose will greatly impact the final result of your DIY home decor project. Here are some tips to help you select the right painting technique for your skill level:
1. Beginners: If you are new to painting, it is best to start with simple techniques that are easy to learn and master. One such technique is the basic brush strokes technique, which involves using different brush strokes to create patterns and textures on the canvas. This technique allows beginners to practice their brush control and get comfortable with handling the paint.
2. Intermediate: Once you have a good grasp of basic painting techniques, you can move on to more advanced techniques. One popular technique for intermediate painters is the blending technique, which involves smoothly blending different colors together to create a seamless transition. This technique requires a bit more skill and practice, but it can add depth and dimension to your paintings.
3. Advanced: If you are an experienced painter looking to challenge yourself, there are several advanced painting techniques to explore. One such technique is the impasto technique, which involves applying thick layers of paint to create texture and three-dimensional effects. This technique requires a strong understanding of color theory and brush control.
Remember, choosing the right painting technique for your skill level will not only enhance your DIY home decor project but also allow you to grow as an artist. Take the time to practice and experiment with different techniques to find the ones that suit you best.
2.4. Experimenting with Mixed Media
Experimenting with mixed media can add a unique and visually appealing touch to your home decor. By combining different materials and techniques, you can create stunning and one-of-a-kind pieces of art that will make a statement in any room. When it comes to choosing the right painting technique for your DIY home decor projects, there are several factors to consider.
Firstly, think about the overall style and theme of your home. Are you going for a modern and minimalist look, or do you prefer a more eclectic and bohemian vibe? The painting technique you choose should complement the existing aesthetic of your space.
Next, consider the type of surface you will be painting on. Different techniques work better on certain materials. For example, if you are painting on canvas, you can experiment with acrylic pouring or palette knife painting. On the other hand, if you are working with wood, you may want to try techniques like wood staining or decoupage.
Another important factor to consider is the level of difficulty and time commitment required for each painting technique. Some techniques, such as watercolor painting or spray painting, may be relatively easy and quick to learn. However, others like oil painting or intricate stenciling may require more practice and patience.
Lastly, don’t be afraid to mix and match different painting techniques to create a truly unique piece of art. For example, you can combine acrylic pouring with brushwork or incorporate collage elements into your paintings. The possibilities are endless, so let your creativity soar!
In conclusion, experimenting with mixed media and choosing the right painting technique can elevate your DIY home decor projects to the next level. Consider the style of your home, the surface you will be painting on, the level of difficulty, and don’t be afraid to mix and match techniques. With a little practice and exploration, you’ll be able to create beautiful and personalized pieces of art that reflect your unique style and taste.
2.5. Exploring Abstract Painting Techniques
Abstract painting techniques offer a wide range of possibilities to create unique and captivating home decor pieces. When it comes to choosing the right painting technique for your DIY project, there are several factors to consider. Here are some tips to help you explore and select the perfect abstract painting technique:
1. Brush Techniques: Experiment with various brush strokes and techniques to add texture and depth to your artwork. Use different brush sizes and shapes to achieve different effects.
2. Pouring Technique: This technique involves pouring the paint onto the canvas, allowing it to flow and blend naturally. It creates unpredictable patterns and textures, resulting in stunning abstract designs.
3. Palette Knife Technique: Using a palette knife instead of a brush can create bold and expressive strokes. This technique is great for adding texture and creating unique patterns.
4. Sgraffito Technique: Sgraffito involves scratching off layers of wet paint to reveal the layers beneath. It can create interesting textures and add depth to your artwork.
5. Drip Technique: The drip technique involves letting the paint drip or splatter onto the canvas. It can create dynamic and energetic abstract designs.
6. Stenciling Technique: Stenciling allows you to create precise and intricate patterns on your artwork. Use stencils to add shapes, letters, or any other desired design element.
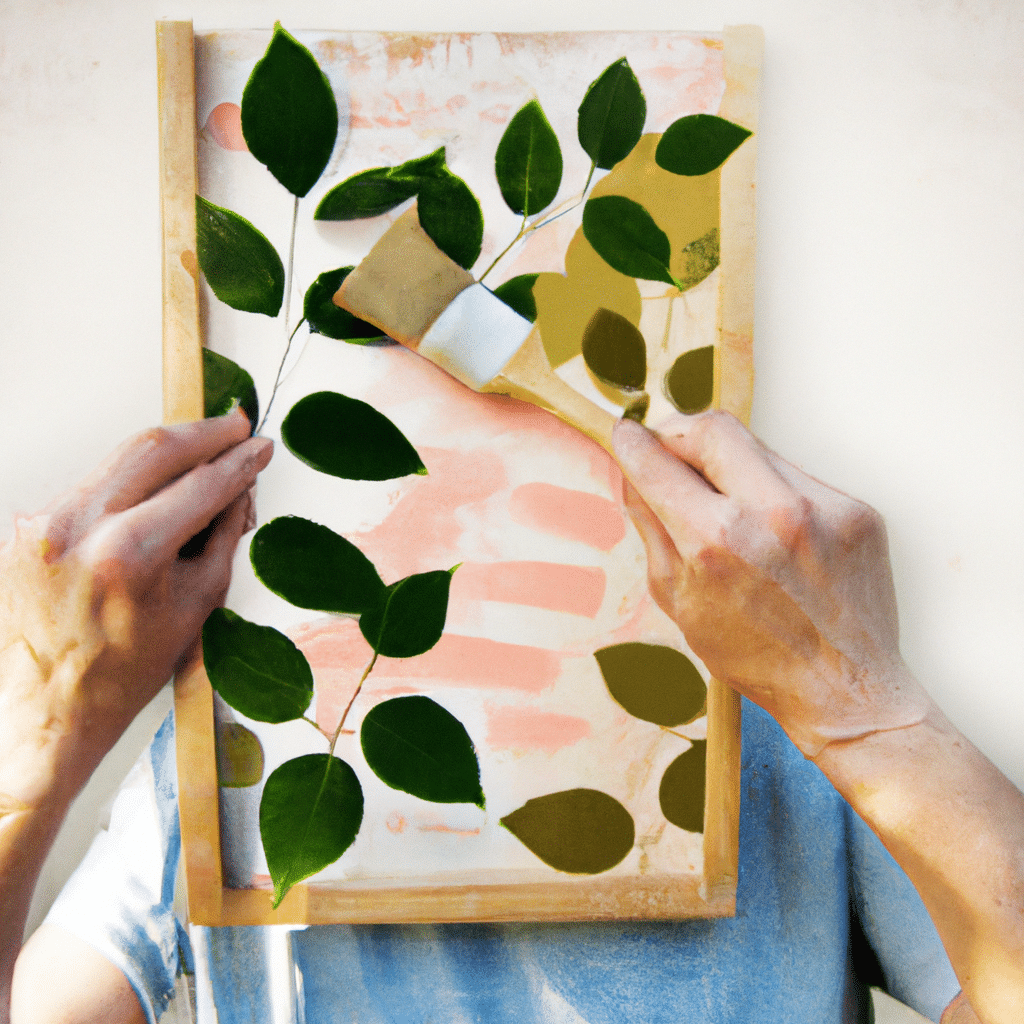
7. Textured Technique: Experiment with different materials and techniques to add texture to your paintings. Use items like sand, fabric, or even household objects to create interesting textures.
When choosing a painting technique, consider the style and mood you want to convey in your home decor. Also, remember to experiment and have fun with different techniques to discover your personal artistic style. Happy painting!
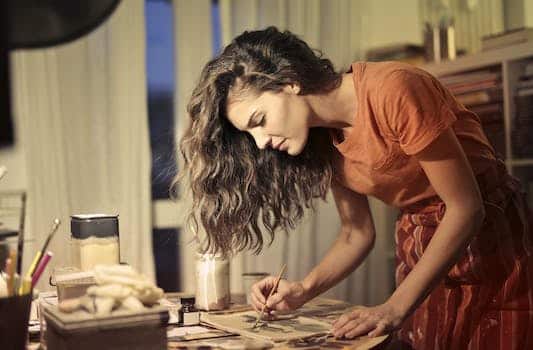
3. Step-by-Step Guide to Creating a DIY Home Decor Painting
Creating your own DIY home decor painting can be a fun and rewarding project. Not only does it allow you to express your creativity, but it also gives you the opportunity to personalize your living space. Whether you’re a seasoned artist or a beginner, this step-by-step guide will help you create a beautiful painting that will enhance the aesthetic of your home.
Step 1: Gather Your Materials
Before you begin, make sure you have all the necessary materials. This may include canvas or a painting surface, paintbrushes, acrylic or oil paints, palette, palette knife, and any other tools you prefer to use.
Step 2: Choose Your Design
Next, decide on the design or subject of your painting. You can browse through magazines, websites, or even take inspiration from nature or your favorite artwork. Once you have a clear idea in mind, sketch it lightly on the canvas using a pencil.
Step 3: Prepare Your Workspace
To ensure a smooth painting process, prepare your workspace. Lay down a plastic sheet or old newspapers to protect your surface from paint spills or stains. Make sure you have good lighting and ventilation in the area where you’ll be working.
Step 4: Mix Your Colors
Now it’s time to mix your paint colors. Use a palette to blend different shades and tones according to your design. Experiment with mixing and layering colors to achieve the desired effect. Remember to clean your brushes and palette knife between color changes to avoid muddying the colors.
Step 5: Start Painting
Once your colors are ready, start painting! Begin with the background or base layers and gradually work your way towards the finer details. Take your time and be patient with each brushstroke. If you make any mistakes, don’t worry – you can always paint over them or make adjustments later.
Step 6: Add Texture and Depth
To add texture and depth to your painting, consider using different techniques such as dry brushing, stippling, or palette knife strokes. These techniques can create interesting effects and make your artwork more visually appealing.
Step 7: Allow the Painting to Dry
After you have finished painting, allow your artwork to dry completely. This may take several hours or even days, depending on the type and thickness of the paint used. Be careful not to touch or smudge the painting while it’s drying.
Step 8: Protect and Display Your Painting
Once your painting is dry, protect it by applying a varnish or sealant. This will help preserve the colors and prevent any damage. Finally, choose a suitable frame or display method to showcase your DIY home decor painting in your living space.
Remember, creating a DIY home decor painting is all about enjoying the process and expressing yourself. Don’t be afraid to experiment, try new techniques, and let your creativity shine through!
3.1. Preparing Your Workspace
Creating a DIY home decor painting can be a fun and rewarding project. Before you start, it’s important to prepare your workspace properly. This will help ensure that you have everything you need and that your painting process goes smoothly. Here is a step-by-step guide to preparing your workspace for a DIY home decor painting:
1. Clear the area: Start by clearing your workspace of any clutter or unnecessary items. This will give you plenty of room to work and prevent any accidents or mishaps.
2. Protect your surfaces: Lay down a drop cloth or plastic sheeting to protect your surfaces from any paint spills or splatters. This will make cleaning up much easier and also prevent any damage to your furniture or flooring.
3. Gather your supplies: Make sure you have all the necessary supplies for your DIY home decor painting. This may include brushes, paint, a palette, water cups, paper towels, and any other materials specific to your project.
4. Set up your workspace: Arrange your supplies in an organized manner, making sure everything is easily accessible. Consider using containers or trays to keep your brushes and paint tubes organized and within reach.
5. Prepare your canvas: If you’re using a canvas for your home decor painting, make sure it’s clean and free of any dust or debris. You may also need to prime the canvas beforehand, depending on the type of paint you’re using.
6. Choose your painting area: Decide where you want to work on your DIY home decor painting. It’s important to choose a well-lit area with good ventilation to ensure that you can see your work clearly and that any fumes from the paint are properly dispersed.
By following these steps and preparing your workspace thoroughly, you’ll be ready to embark on your DIY home decor painting project with confidence and creativity.
3.2. Choosing the Right Canvas
Choosing the right canvas is an important aspect of creating a DIY home decor painting. The canvas serves as the foundation for your artwork and can greatly impact the overall result. Here is a step-by-step guide to help you choose the right canvas for your painting:
1. Consider the size: Determine the size of the painting you want to create. This will help you narrow down your options when it comes to choosing the canvas. Keep in mind the dimensions of the space where you plan to display the artwork.
2. Canvas material: There are various canvas materials available, such as cotton, linen, and synthetic fibers. Each material has its own characteristics and texture. Consider the desired look and feel of your painting when selecting the canvas material.
3. Stretched or unstretched: Decide whether you want a pre-stretched canvas or an unstretched one. Pre-stretched canvases are ready to use and often come with a wooden frame. Unstretched canvases require manual stretching and framing.
4. Primed or unprimed: Primed canvases have a layer of gesso, which provides a smooth surface for painting. Unprimed canvases offer more texture and absorbency. Choose based on your painting style and preferences.
5. Quality and price: Consider the quality and price range of the canvases available. Higher quality canvases may be more durable and have better archival properties, but they can also be more expensive. Assess your budget and artistic needs.
By following these steps, you can choose the right canvas for your DIY home decor painting and set a solid foundation for your creative project.
3.3. Selecting the Colors and Paints
When it comes to creating a DIY home decor painting, selecting the right colors and paints is crucial. The colors you choose will set the overall mood and style of your space, while the quality of the paints will determine the longevity and finish of your project.
To start off, consider the theme or ambiance you want to achieve in the room. Are you aiming for a cozy and warm atmosphere, or do you prefer a cool and modern feel? Once you have a clear vision in mind, you can begin selecting the colors that will help bring that vision to life.
Next, take into account the existing color scheme of your space. If you have furniture or decor pieces that you want to incorporate into your painting, consider their colors and how they will complement or contrast with the new colors you choose. It’s important to strike a balance between cohesion and visual interest.
After deciding on the colors, it’s time to choose the right paints. Opt for high-quality paints that offer good coverage and durability. Look for paints that are specifically designed for the surface you’ll be painting on, whether it’s walls, furniture, or canvas. Consider the finish as well, as it can greatly impact the overall look and feel of your project.
Lastly, don’t forget to test the colors and paints before committing to a full-scale project. Purchase small sample sizes of the paints you’re interested in and try them out on a small area. This will give you a better idea of how the colors will look in your space and allow you to make any necessary adjustments before diving into the full painting.
By following these step-by-step guidelines for selecting the colors and paints for your DIY home decor painting, you’ll be well on your way to creating a beautiful and personalized piece of art for your space.
3.4. Sketching and Planning Your Design
When it comes to creating a DIY home decor painting, sketching and planning your design is an essential first step. This process allows you to visualize your ideas and make any necessary adjustments before you start painting.
To begin, gather all the materials you will need for your project. This includes a sketchbook or a piece of paper, pencils or markers, and any reference images or inspiration you may have. Take the time to explore different design ideas and themes that align with your personal style and the overall aesthetic of your home.
Once you have gathered your materials, find a quiet and well-lit space where you can work comfortably. Start by sketching out your design concept on paper. This initial sketch doesn’t have to be perfect; it’s just a rough outline of your ideas.
Next, refine your sketch by adding more details and experimenting with different elements. Consider the color scheme, composition, and overall balance of your design. Make sure to take measurements and consider the size and placement of your painting in your home.
After finalizing your sketch, it’s time to plan your painting process. Determine the type of paint you want to use and gather the necessary supplies. Acrylic paints are a popular choice for DIY home decor projects due to their versatility and ease of use.
Before starting to paint, create a color palette by mixing your desired colors on a separate palette or on a piece of scrap paper. This will help ensure consistency in your color scheme throughout the painting.
Finally, take a moment to review your sketch and painting plan. Make any last-minute adjustments or additions before you start applying paint to your canvas or chosen surface.
By taking the time to sketch and plan your design, you will have a clear vision of your DIY home decor painting and avoid any potential mistakes or frustrations along the way. This preparation will ultimately result in a more successful and enjoyable painting experience.
3.5. Applying the First Layers of Paint
Applying the first layers of paint is an essential step in creating a DIY home decor painting. This process sets the foundation for your artwork and determines the overall look and feel of the final piece. Follow this step-by-step guide to ensure a successful and professional-looking result.
1. Prepare your canvas: Start by selecting a canvas of your desired size and shape. Make sure it is clean and free from any dust or debris. If needed, apply a primer to create a smooth and even surface for the paint.
2. Choose your colors: Select the colors you want to use for your painting. Consider the theme or mood you want to convey and choose a color scheme accordingly. Gather your paints and brushes, ensuring that they are in good condition and ready to use.
3. Plan your composition: Before starting to paint, plan out the composition of your artwork. Decide on the placement of various elements and visualize how the colors will interact with each other. You can sketch a rough outline on the canvas or use reference images for guidance.
4. Start with a base coat: Begin by applying a base coat of paint to the canvas. This can be a single color or a combination of colors that will form the background of your painting. Use broad strokes or a roller to cover the entire canvas evenly.
5. Build up layers: Once the base coat is dry, start building up layers of paint. Use different shades and tones to add depth and dimension to your artwork. Apply the paint using brushes, sponges, or any other preferred techniques, blending and layering as you go.
6. Allow time for drying: Let each layer of paint dry completely before adding the next one. This will prevent smudging or mixing of colors. Patience is key during this process, as it may take several hours or even days for the paint to fully dry.
7. Evaluate and make adjustments: Step back and evaluate your painting as you progress. Make any necessary adjustments or corrections to ensure the desired outcome. This could involve adding more layers, refining details, or making changes to the color palette.
8. Final touches: Once you are satisfied with the layers of paint and overall composition, add any final touches to complete your DIY home decor painting. This could include adding texture, highlights, or additional elements to enhance the visual appeal.
Remember, practice makes perfect when it comes to creating DIY home decor paintings. Don’t be afraid to experiment with different techniques and styles. With time and dedication, you can create beautiful and unique artworks that reflect your personal style and creativity.
Conclusion
In conclusion, these 10 DIY home decor painting ideas are a great way to add a personal touch to your living space. Whether you’re looking to create a statement wall or transform old furniture, these ideas are sure to inspire your inner artist. Get creative, have fun, and bring new life to your home with these easy and budget-friendly painting projects.


These 10 innovative and imaginative DIY home decor ideas from [object Object] provide a refreshing approach to enhancing ones living…