
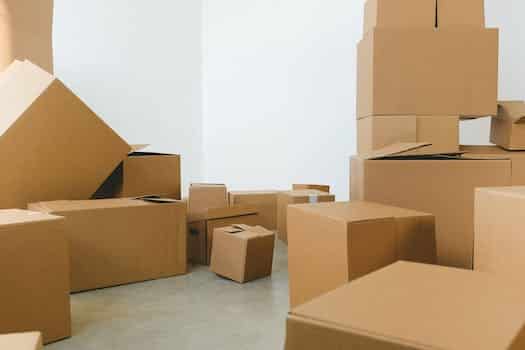
- 1. 1. Creative Storage Solutions for Small Spaces
- 1.1. Utilizing vertical space
- 1.2. Maximizing under-the-bed storage
- 1.3. Creating storage solutions in unused corners
- 1.4. Incorporating storage into furniture
- 1.5. Hanging items to save space
- 2. 2. Repurposing Everyday Items for Storage
- 2.1. Using shoe organizers for various storage needs
- 2.2. Transforming old drawers into stylish shelves
- 2.3. Turning mason jars into versatile storage containers
- 2.4. Utilizing tension rods for vertical organization
- 2.5. Repurposing wine crates for stylish storage
- 3. 3. DIY Storage Projects for a Personal Touch
1. 1. Creative Storage Solutions for Small Spaces
When it comes to living in small spaces, finding creative storage solutions is essential. Luckily, there are plenty of DIY home storage hacks that can help you create a clutter-free paradise. Whether you live in a tiny studio apartment or a cozy cottage, these clever ideas will maximize your space and keep your belongings organized. From using vertical storage to repurposing everyday items, these DIY hacks are both practical and stylish. So, roll up your sleeves and get ready to transform your small space with these amazing storage solutions!
1.1. Utilizing vertical space
When it comes to small living spaces, maximizing vertical space is essential. Utilizing the available vertical space in your home can greatly increase storage capacity and help create a clutter-free paradise. Here are some creative storage solutions for small spaces that you can easily DIY:
1. Floating Shelves: Installing floating shelves on your walls is a great way to utilize vertical space. These shelves can be used to store and display various items such as books, plants, or decorative pieces.
2. Over-the-Door Storage: The back of doors often goes unused, but it can be a valuable storage area. Hang over-the-door organizers or hooks to store items like shoes, accessories, or cleaning supplies.
3. Wall-Mounted Baskets: Install wall-mounted baskets or wire racks in your kitchen or bathroom to store items such as fruits, vegetables, toiletries, or towels. This helps free up counter or floor space.
4. Hanging Pot Racks: If you have limited cabinet space in your kitchen, consider installing a hanging pot rack. This not only provides storage for your pots and pans but also adds a decorative touch to your kitchen.
5. Under-Bed Storage: Utilize the space under your bed by using storage containers or bins. This is a perfect solution for storing items that are not frequently used, such as seasonal clothing or extra bedding.
6. Pegboards: Install a pegboard on a wall in your garage or workspace to hang tools, gardening equipment, or craft supplies. This keeps everything organized and easily accessible.
7. Corner Shelves: Utilize those unused corners in your home by installing corner shelves. These shelves can be used to display decorative items or store everyday essentials like keys, wallets, or sunglasses.
8. Magnetic Strips: Attach magnetic strips to the inside of cabinet doors or walls to store metal items such as knives, scissors, or small tools.
9. Hanging Shoe Organizers: Instead of using shoe racks that take up floor space, opt for hanging shoe organizers that can be hung on the back of a door or inside a closet. This frees up valuable floor space and keeps your shoes easily accessible.
10. Wall-Mounted Desks: If you’re short on space for a traditional desk, consider installing a wall-mounted desk. This provides a functional workspace without taking up valuable floor area.
By incorporating these DIY home storage hacks, you can efficiently utilize vertical space in your small living area and create a clutter-free paradise.
1.2. Maximizing under-the-bed storage
Maximizing under-the-bed storage is a great way to utilize space in small homes or bedrooms. This often overlooked area can provide ample storage for various items, helping you create a clutter-free paradise. With a few simple DIY home storage hacks, you can transform the space under your bed into a functional and organized storage solution.
One of the easiest ways to maximize under-the-bed storage is by using storage containers or bins. These can be easily slid in and out, allowing for easy access to your belongings. Opt for clear containers to easily see what’s inside or use labeled bins for better organization.
Another creative solution is to use bed risers. These simple tools elevate your bed, creating additional space underneath. This extra space can be used to store items such as shoes, seasonal clothing, or extra linens. Make sure to measure the height of your bed and choose bed risers accordingly.
If you prefer a more stylish approach, consider using decorative baskets or woven bins. These not only provide storage but also add a touch of visual appeal to your bedroom decor. You can use them to store books, magazines, or even accessories.
Additionally, utilizing vacuum-sealed storage bags can help save space under the bed. These bags compress your items, reducing their size and allowing you to store more. They are particularly useful for storing bulky items like comforters, pillows, or winter clothing.
By maximizing under-the-bed storage using these DIY home storage hacks, you can effectively declutter your space and create a more organized environment. Say goodbye to the mess and hello to a clutter-free paradise!
1.3. Creating storage solutions in unused corners
One of the biggest challenges in small spaces is finding enough storage. However, with a little creativity and some DIY skills, you can transform unused corners into effective storage solutions. Here are some ingenious DIY home storage hacks that will help you create a clutter-free paradise in your home.
1. Utilize vertical space: When floor space is limited, it’s important to make the most of vertical space. Install floating shelves or hanging organizers on the walls to store books, plants, or decorative items. You can also use vertical space inside cabinets or wardrobes by adding stackable storage bins or hanging organizers.
2. Transform corners into shelves: Corners are often overlooked, but they can be valuable storage areas. Install corner shelves or floating corner shelves to maximize the use of these otherwise wasted spaces. These shelves can be used to store small items like keys, sunglasses, or even display photo frames.
3. Use the space under the stairs: The space under the stairs is often unused, but it can be a great spot for storage. Install pull-out drawers or build custom cabinets to make the most of this area. You can store shoes, bags, or even create a mini pantry for extra kitchen storage.
4. Repurpose furniture for storage: Get creative with furniture to create storage solutions. For example, use an old ladder as a towel rack in the bathroom or as a bookshelf in the living room. You can also repurpose an old dresser by adding baskets or bins for organizing clothes, accessories, or other items.
5. Make use of behind-the-door space: The space behind doors is often wasted, but it can be utilized for storage. Install hooks or hanging organizers on the back of doors to hang coats, hats, or bags. You can also use over-the-door shoe organizers to store shoes, small toys, or craft supplies.
By implementing these DIY home storage hacks, you can effectively create storage solutions in unused corners and make the most of your small space. Say goodbye to clutter and hello to a clutter-free paradise!
1.4. Incorporating storage into furniture
Incorporating storage into furniture is a great way to maximize space and create a clutter-free environment in small living areas. With the increasing popularity of minimalist living and the need to optimize every inch of available space, creative storage solutions have become imperative. DIY home storage hacks offer innovative ideas to transform everyday furniture into functional storage units.
One of the most effective ways to incorporate storage into furniture is by utilizing hidden compartments. For example, a coffee table with a lift-top surface can reveal a spacious storage area underneath. This clever design allows you to store books, magazines, or even board games out of sight, maintaining a clean and organized living room.
Another ingenious storage solution is using ottomans or benches with built-in storage. These multifunctional pieces of furniture not only provide extra seating but also offer hidden storage space. You can store blankets, pillows, or other items inside while using the ottoman as a footrest or coffee table.
Shelving units are another essential element for incorporating storage into furniture. Floating shelves or wall-mounted shelves can be installed above desks, beds, or even in the bathroom to maximize vertical space. By utilizing these shelves, you can display decorative items while also storing books, toiletries, or other essentials.
In conclusion, DIY home storage hacks provide innovative and practical ways to incorporate storage into furniture. By utilizing hidden compartments, ottomans with built-in storage, and shelving units, you can transform your small living space into a clutter-free paradise. These creative solutions not only optimize space but also add functionality and style to your home.
1.5. Hanging items to save space
One of the best ways to save space in a small home is by hanging items. This simple yet effective storage solution can help declutter your space and make it more organized. There are numerous items that can be hung to free up valuable floor and counter space. For example, you can hang pots and pans in the kitchen, hang mugs on a wall-mounted rack, or hang towels in the bathroom. Additionally, you can use hooks or hanging organizers to hang bags, scarves, and hats in your closet. By utilizing vertical space, you can maximize storage in even the smallest of spaces. These DIY home storage hacks not only save space but also add a decorative touch to your living area.
2. 2. Repurposing Everyday Items for Storage
Repurposing Everyday Items for Storage
When it comes to creating a clutter-free paradise in your home, why not turn to everyday items for storage solutions? With a little creativity and a touch of DIY magic, you can repurpose items you already have to maximize your storage space. Not only will this save you money, but it will also add a unique and personal touch to your home decor. Here are 5 innovative DIY home storage hacks that will transform everyday items into functional storage solutions:
1. Mason Jars for Bathroom Organization: Empty mason jars can be used to store cotton balls, Q-tips, and other small bathroom essentials. Simply attach the lids to the underside of a shelf or cabinet and screw the jars onto the lids. This not only keeps your bathroom essentials within reach but also adds a rustic charm to your bathroom decor.
2. Shoe Organizer for Pantry Storage: If you have an over-the-door shoe organizer lying around, repurpose it for pantry storage. The clear pockets are perfect for storing small snacks, spices, or even cleaning supplies. Hang it on the inside of your pantry door for easy access and to free up valuable shelf space.
3. Magazine Holders for Kitchen Wrap Organization: Magazine holders are not just for magazines anymore! Use them to store your aluminum foil, plastic wrap, and parchment paper rolls. Attach them to the inside of a cabinet door and slide the rolls in for a neat and organized kitchen.
4. Tension Rods for Pot Lid Storage: Tired of searching for the right pot lid in your cluttered cabinet? Install a tension rod vertically inside the cabinet and place your pot lids in between the rods. This simple hack will keep your lids organized and easily accessible.
5. Ladder for Blanket Storage: Do you have an old wooden ladder lying around? Give it a new purpose by transforming it into a stylish blanket storage solution. Lean the ladder against a wall and drape your blankets over the rungs. Not only will this free up space in your closet, but it will also add a cozy and rustic touch to your living room.
By repurposing everyday items for storage, you can create a clutter-free paradise in your home without breaking the bank. These DIY home storage hacks are not only practical but also offer a creative way to showcase your personal style. So, roll up your sleeves, grab some everyday items, and get ready to transform your home into an organized and beautiful space.
2.1. Using shoe organizers for various storage needs
Shoe organizers are versatile storage solutions that can be used for a wide range of purposes. Not only are they great for keeping your shoes organized, but they can also be repurposed to store various other items in your home. With a little creativity, you can transform a shoe organizer into a clutter-free storage solution for different needs.
One way to utilize a shoe organizer is by using it to store accessories such as scarves, belts, and hats. The pockets of the organizer provide a convenient space to neatly hang and display these items, making it easy to find what you need without rummaging through drawers or bins.
Another creative use for a shoe organizer is as a pantry organizer. You can hang a shoe organizer on the back of your pantry door and use the pockets to store small items like spices, condiments, and snacks. This not only frees up valuable shelf space but also keeps everything easily accessible and visible.
A shoe organizer can also be repurposed as a bathroom storage solution. Hang it on the back of your bathroom door or inside a closet to store toiletries, makeup, and beauty products. The clear pockets make it simple to see and grab what you need, saving you time and keeping your bathroom essentials organized.
In the garage or workshop, a shoe organizer can be used to store tools, hardware, and other small items. Hang it on a wall or the back of a door to keep everything within reach and neatly sorted. This not only helps declutter your workspace but also ensures that you can easily find the tools you need when working on projects.
By repurposing a shoe organizer, you can create additional storage space in your home while keeping it organized and clutter-free. With its versatility and functionality, a shoe organizer is a DIY home storage hack that can be used in various creative ways.
2.2. Transforming old drawers into stylish shelves
Transforming old drawers into stylish shelves is a creative and practical way to repurpose everyday items for storage. With a little bit of DIY magic, you can turn unused drawers into unique and functional shelves that add a touch of style to your home. This DIY home storage hack not only helps you declutter your space but also gives a new life to old furniture.
To transform old drawers into stylish shelves, start by removing the drawers from their original furniture piece. Clean them thoroughly and sand down any rough edges or surfaces. Next, choose a paint color or finish that matches your home decor and apply it to the drawers. You can also add decorative elements like stencils or decals to personalize the shelves.
Once the paint is dry, it’s time to mount the drawers on the wall. Use sturdy brackets or screws to securely attach the drawers to the desired location. Make sure to find the studs in the wall for added stability. Arrange the shelves in a visually pleasing manner, considering both functionality and aesthetics.
These repurposed drawers can be used to store a variety of items, such as books, decorative objects, or even kitchen supplies. They provide a unique and eye-catching storage solution that adds character to any room. So, instead of throwing away old drawers, give them a new purpose and create stylish shelves that will impress your guests.
In conclusion, repurposing everyday items for storage is an excellent way to declutter your home and unleash your creativity. By transforming old drawers into stylish shelves, you can achieve a clutter-free paradise while adding a personal touch to your living space. Embrace the DIY spirit and enjoy the satisfaction of turning something old into something new and useful.
2.3. Turning mason jars into versatile storage containers
Mason jars, those classic glass containers typically used for canning, can actually be transformed into versatile storage solutions for various purposes. With a little creativity and DIY skills, you can repurpose these everyday items into functional organizers for a clutter-free home.
One of the easiest ways to use mason jars for storage is by creating a wall-mounted organizer. Simply attach the lids of several jars to a wooden board or directly to the wall using adhesive or screws. This allows you to store small items like craft supplies, office supplies, or even kitchen utensils. You can also label each jar for easy identification.
Another clever use for mason jars is turning them into bathroom storage. By attaching the jars to the underside of a shelf or cabinet, you can store cotton balls, cotton swabs, or even toothbrushes in a neat and organized manner. This not only saves space but also adds a touch of rustic charm to your bathroom decor.
In the kitchen, mason jars can be transformed into stylish and practical spice racks. Attach the lids of the jars to the underside of a shelf or cabinet and fill each jar with different spices. This not only keeps your spices easily accessible but also adds a decorative element to your kitchen.
Furthermore, mason jars make excellent pantry organizers. Fill them with dry goods like pasta, rice, or beans and label them accordingly. This allows you to see the contents at a glance and keeps your pantry shelves tidy and organized.
Lastly, mason jars can be used as portable storage containers for snacks or lunches. Fill them with fruits, salads, or other on-the-go meals and seal them with the lids. These jars are leak-proof and easy to transport, making them a convenient option for those who like to pack their own meals.
With a bit of creativity and resourcefulness, you can turn mason jars into versatile storage containers that not only help you declutter your home but also add a touch of charm to your decor. These DIY home storage hacks are simple, cost-effective, and a great way to repurpose everyday items.
2.4. Utilizing tension rods for vertical organization
Utilizing tension rods for vertical organization is a great DIY home storage hack to maximize space and keep your belongings in order. Tension rods are versatile and can be easily installed in various areas of your home. Here are some creative ways to repurpose tension rods for storage:
1. Closet organization: Place tension rods vertically between shelves or walls in your closet to create additional hanging space for clothes, scarves, or accessories. You can even hang multiple rods at different heights to accommodate items of different lengths.
2. Kitchen cabinet dividers: Use tension rods to divide your kitchen cabinets and keep plates, cutting boards, and baking sheets upright. This will not only prevent them from sliding around but also make it easier to access and organize these items.
3. Pantry storage: Install tension rods vertically in your pantry to create extra shelving for spices, canned goods, or small kitchen appliances. This will help maximize the available space and keep your pantry items neatly organized.
4. Bathroom organization: Hang tension rods inside your bathroom cabinets to create additional storage for cleaning supplies, toiletries, or hair tools. This will free up valuable counter space and keep everything within reach.
5. Window treatments: Use tension rods to hang curtains or blinds in unconventional spaces such as small windows or narrow doorways. This allows you to add privacy or block sunlight without the need for permanent fixtures.
By repurposing tension rods for vertical organization, you can easily create extra storage space in your home while keeping it clutter-free. These DIY home storage hacks are not only practical but also cost-effective, making them a great solution for any homeowner.
2.5. Repurposing wine crates for stylish storage
Repurposing wine crates for stylish storage is a great DIY home storage hack that can help you create a clutter-free paradise. Wine crates are not only functional but also add a touch of rustic charm to any room. Here are some creative ways to repurpose wine crates for storage.
1. Wall-mounted shelves: Attach wine crates to the wall to create unique and versatile shelves. You can arrange them in different configurations to fit your storage needs. These shelves are perfect for displaying books, plants, or decorative items.
2. Shoe rack: Transform a wine crate into a stylish shoe rack by adding some wooden dividers inside. This DIY storage solution helps keep your shoes organized and easily accessible.
3. Kitchen storage: Use wine crates as a storage solution in your kitchen. They can be turned into a rustic-looking pantry, where you can store canned goods, spices, or even fresh produce.
4. Bathroom organizer: Repurpose a wine crate as a bathroom organizer to keep towels, toiletries, and other essentials neatly stored. You can place it on a countertop or mount it on the wall.
5. Toy storage: Create a designated space for your kids’ toys by repurposing wine crates. Paint them in bright colors and stack them up to create a fun and functional storage solution.
6. Coffee table: Combine multiple wine crates to make a unique coffee table. Simply stack them together and secure them with screws or adhesive. This DIY coffee table not only provides storage but also adds a rustic and vintage touch to your living room.
7. Magazine holder: Turn a wine crate on its side and use it as a magazine holder. It’s a practical and stylish way to keep your magazines organized.
Repurposing wine crates for stylish storage is a budget-friendly and creative way to declutter your home. With a little imagination, you can transform these everyday items into functional and decorative storage solutions.
3. 3. DIY Storage Projects for a Personal Touch
Looking to add a personal touch to your home storage solutions? Look no further than these amazing DIY storage projects. Not only will they help you declutter your space, but they will also add a unique flair to your home decor. Get ready to unleash your creativity and transform your living space into a clutter-free paradise with these DIY home storage hacks.
3.1. Building custom floating shelves
Building custom floating shelves is a great DIY home storage hack that can add both functionality and style to any room. Whether you need extra storage space in your living room, bedroom, or even bathroom, custom floating shelves can be tailored to fit your specific needs and personal taste.
To start building your custom floating shelves, you will need the following materials: a piece of plywood or hardwood board, brackets, screws, a drill, a level, and a stud finder. Measure the desired length and width for your shelves and cut the board accordingly. Sand the edges to ensure a smooth finish.
Next, locate the studs on the wall where you want to install the shelves using a stud finder. Mark the positions of the studs and then attach the brackets to the wall using screws. Make sure the brackets are level and secure.
Once the brackets are installed, place the cut board on top of the brackets and secure it in place using screws. Make sure the board is level and centered on the brackets.
Finally, give your custom floating shelves a finishing touch by sanding any rough edges and applying a coat of paint or stain. This will not only protect the wood but also enhance its appearance.
Building custom floating shelves is an excellent DIY storage project that allows you to personalize your living space while maximizing storage potential. With a little time and effort, you can create stylish and functional storage solutions that will help keep your home clutter-free.
3.2. Creating a pegboard wall for versatile storage
One of the best DIY storage hacks for a clutter-free paradise is creating a pegboard wall for versatile storage. A pegboard wall is a simple and effective solution for organizing various items in your home. It can be used in any room, from the kitchen to the garage, and provides endless possibilities for customization.
To create a pegboard wall, you will need a pegboard, hooks, and some basic tools. Start by measuring the area where you want to install the pegboard and cut it to the desired size. Next, mount the pegboard onto the wall using screws or wall anchors.
Once the pegboard is securely attached, you can start arranging your storage items. The beauty of a pegboard wall is that you can easily move and rearrange the hooks to accommodate different items of varying sizes. Hang your pots and pans in the kitchen, tools in the garage, or craft supplies in your home office.
Furthermore, you can also add shelves, baskets, or other storage accessories to the pegboard wall for even more versatility. This allows you to create a customized storage solution that fits your specific needs and preferences.
In conclusion, creating a pegboard wall is a fantastic DIY storage hack that will add a personal touch to your home while keeping it clutter-free. It is an affordable and practical solution that allows you to maximize your storage space and easily find items when you need them. Give it a try and enjoy the benefits of a well-organized and tidy living space.
3.4. Making use of old wooden crates for unique storage solutions
One of the best ways to create unique storage solutions is by making use of old wooden crates. These crates can be easily found at flea markets, thrift stores, or even in your own garage. With a little creativity and some DIY skills, you can transform these crates into functional and stylish storage pieces for your home.
Here are 3 DIY storage projects that will add a personal touch to your space:
1. Crate Shelves: Turn old wooden crates into stylish shelves by simply mounting them on the wall. You can arrange the crates in various configurations to create a visually appealing display. These shelves can be used to store books, decorative items, or even kitchen essentials.
2. Crate Coffee Table: Create a unique coffee table by stacking and securing multiple wooden crates together. This DIY project not only provides ample storage space but also adds a rustic charm to your living room. You can paint or stain the crates to match your existing decor.
3. Crate Storage Bench: Transform a plain wooden crate into a functional storage bench by adding a cushion on top. This project is perfect for entryways or bedrooms where you need extra seating and storage. You can also attach wheels to the bottom of the crate for easy mobility.
By repurposing old wooden crates, you can not only declutter your home but also add a touch of personality to your space. These DIY storage projects are budget-friendly and allow you to showcase your creativity. So, grab some old crates and get started on creating your own unique storage solutions!
3.5. Crafting a DIY ladder shelf for decorative storage
One popular DIY storage project that adds a personal touch to your home is crafting a DIY ladder shelf. This decorative storage solution is not only functional but also stylish. With just a few materials and some basic tools, you can create a unique ladder shelf that will help declutter your space.
To start, gather the following materials: a wooden ladder, wooden planks, screws, a drill, sandpaper, and paint or stain. Choose a ladder that fits the size and style you want for your shelf. Measure the width of each step on the ladder and cut the wooden planks to fit.
Next, sand the ladder and planks to ensure a smooth surface. This step is important for achieving a polished final look. Once sanded, you can paint or stain the ladder and planks in the color of your choice. Consider matching the shelf to your existing decor or going for a contrasting color for a bold statement.
Once the paint or stain has dried, it’s time to assemble the ladder shelf. Position the wooden planks on each step of the ladder and secure them with screws. Make sure the shelves are level and securely attached. You can also add additional support by attaching brackets or braces underneath each shelf.
Finally, place your DIY ladder shelf in the desired location and start organizing your belongings. Use it to display decorative items, books, or even as a plant stand. The versatility of this storage solution allows you to personalize it to your specific needs.
By creating a DIY ladder shelf, you not only gain extra storage space but also add a touch of creativity to your home. This project is a great way to showcase your DIY skills while achieving a clutter-free paradise.


These 10 innovative and imaginative DIY home decor ideas from [object Object] provide a refreshing approach to enhancing ones living…