
Lampshades are an essential part of home decor. They not only add to the overall aesthetic appeal of a room, but also provide functional lighting. If you want to give your home a personal touch, DIY lampshades are a great way to do so. Here are 10 creative DIY lampshade ideas for your home decor.
- 1. Introduction
- 1.1. Why DIY lampshades are a great home decor idea
- 1.2. Benefits of making your own lampshades
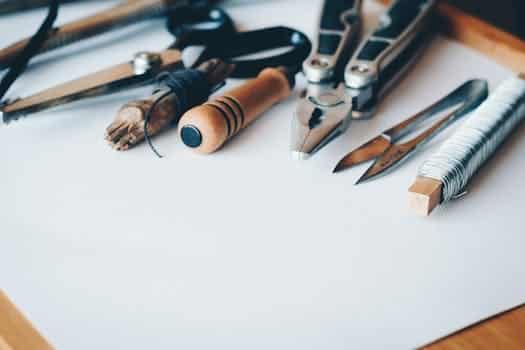
- 1.3. Tools and materials needed for DIY lampshades
- 2. DIY Lampshade Ideas
- 2.1. 1. Paper Lampshades
- 2.2. 2. Fabric Lampshades
- 2.3. 3. Mason Jar Lampshades
- 2.4. 4. Geometric Lampshades
- 2.5. 5. Upcycled Lampshades
- 3. Step-by-Step Guide to Making a DIY Lampshade
1. Introduction
Lampshades are an essential element of home decor. They add an elegant touch to your living space while providing the much-needed illumination. However, finding the perfect lampshade that complements your decor can be a daunting task. Fortunately, with a little creativity and some DIY skills, you can create your own lampshade that perfectly matches your style and decor. In this article, we will share with you 10 DIY lampshade ideas that you can try at home to add a personal touch to your living space.
1.1. Why DIY lampshades are a great home decor idea
DIY lampshades are a wonderful way to add a personal touch to your home decor. Not only are they a fun and creative project to take on, but they can also be cost-effective. You can easily customize a lampshade to fit your personal style and taste, and there are endless possibilities when it comes to materials and designs. In this article, we will explore 10 DIY lampshade ideas that will inspire you to get creative and add some unique flair to your home.
1.2. Benefits of making your own lampshades
Making your own lampshades can be a fun and creative way to add a personal touch to your home decor. Not only is it a cost-effective option compared to buying pre-made lampshades, but it also allows you to customize the design and style to fit your personal taste. Additionally, making your own lampshades can be a great way to upcycle old materials and give them new life. Whether you are a seasoned crafter or a beginner, there are plenty of DIY lampshade ideas that can be easily executed with a little creativity and patience.
1.3. Tools and materials needed for DIY lampshades
To get started on your DIY lampshade project, you’ll need a few key tools and materials. First and foremost, you’ll need a lampshade frame. These can be found at most craft stores or online retailers. Additionally, you’ll need fabric to cover the frame, as well as scissors, glue, and a paintbrush. Depending on the specific design you choose, you may also need embellishments like beads, ribbon, or tassels. Don’t forget a ruler or measuring tape to ensure accurate sizing, and a pencil to mark your fabric. With these tools and materials, you’ll be well on your way to creating a beautiful and unique lampshade for your home.
2. DIY Lampshade Ideas
Lampshades can be a great way to add a touch of personality and style to your home decor. Rather than buying a new lampshade, consider trying out one of these DIY ideas to create a unique and customized look for your space.
1. Paint a plain lampshade with your favorite design or pattern.
2. Use fabric glue to attach a decorative fabric to the surface of a plain lampshade.
3. Use ribbon or twine to create a wrapped lampshade.
4. Create a lampshade out of recycled materials, such as cardboard or paper.
5. Use stencils and spray paint to create a one-of-a-kind design on a plain lampshade.
6. Add a touch of nature by creating a lampshade out of dried leaves or flowers.
7. Create a lampshade out of a unique material, such as a vintage map or sheet music.
8. Use decorative washi tape to add a pop of color to a plain lampshade.
9. Paint a lampshade with chalkboard paint for a fun and functional option.
10. Create a lampshade out of a wire frame and string lights for a whimsical touch.
2.1. 1. Paper Lampshades
Paper lampshades are a great DIY project that can add a unique touch to any room. They are easy to make and can be customized to fit any decor style. To make a paper lampshade, you will need some basic supplies such as paper, glue, scissors, and a lampshade frame. There are many different types of paper you can use, including patterned paper, tissue paper, or even old book pages. Simply cut the paper to fit the lampshade frame and glue it in place. You can also add embellishments such as ribbon or beads for extra flair. Paper lampshades are a budget-friendly way to update your home decor and add a personal touch.
2.2. 2. Fabric Lampshades
Fabric lampshades are a great DIY project for those who want to add a personal touch to their home decor. With so many different fabrics available, the possibilities are endless. Whether you want a bold and colorful lampshade or something more subtle and understated, there is a fabric out there to suit your style. Plus, making your own lampshade is a fun and rewarding craft that will give you a sense of satisfaction every time you turn on the light.
2.3. 3. Mason Jar Lampshades
Mason jar lampshades are a trendy and budget-friendly option for DIY lampshade ideas. To create a mason jar lampshade, you will need a mason jar, a light bulb, and some basic tools. First, remove the lid from the mason jar and drill a hole in the center. Then, thread the light bulb through the hole and screw it into place. Finally, screw the lid back onto the jar and your mason jar lampshade is ready to use! To add some extra flair, you can paint or decorate the outside of the jar with your favorite colors or designs.
2.4. 4. Geometric Lampshades
Geometric shapes are a popular design trend that can add a modern touch to any space. Creating your own geometric lampshade is a great way to incorporate this trend into your home decor. You can use a variety of materials such as paper, fabric, or even wood to create a unique and stylish lampshade. There are many tutorials and templates available online to help guide you through the process of creating your own geometric lampshade. Some popular shapes to try include triangles, hexagons, and diamonds. Experiment with different colors and patterns to create a look that is all your own.
2.5. 5. Upcycled Lampshades
Upcycling is a great way to give old items a new lease on life, and lampshades are no exception. With a little bit of creativity and some basic crafting supplies, you can transform an old lampshade into a unique and eye-catching piece of home decor. Here are five upcycled lampshade ideas to inspire your next DIY project:
3. Step-by-Step Guide to Making a DIY Lampshade
Making your own lampshade is a great way to spruce up your home decor without breaking the bank. With just a few simple materials and some creativity, you can create a unique and personalized lampshade that perfectly matches your style and tastes. Follow these step-by-step instructions to make your own DIY lampshade:
1. Choose your fabric – Select a fabric that complements the color scheme of your room and is suitable for lampshades. Cotton, linen, and silk are good choices.
2. Measure your lampshade – Measure the height and circumference of your lampshade. This will help you determine how much fabric you need.
3. Cut your fabric – Cut your fabric to the appropriate size, leaving a little extra on the top and bottom edges.
4. Apply adhesive – Apply adhesive to the back of the fabric and wrap it around the lampshade, smoothing out any wrinkles or bubbles.
5. Trim the excess – Trim the excess fabric from the top and bottom edges of the lampshade.
6. Attach the trim – If desired, attach trim to the top and bottom edges of the lampshade to give it a finished look.
7. Attach the lampshade – Attach the lampshade to the lamp base and enjoy your new DIY creation!
3.1. 1. Choose your materials
When it comes to making a DIY lampshade, choosing the right materials is key. You can use a variety of materials to create unique and personalized lampshades, such as fabric, paper, and even natural materials like leaves or flowers. Consider the style and ambiance you want to create in your space, as well as the size and shape of your lamp base, when selecting your materials. Once you have your materials, you can begin the fun and creative process of making your own lampshade!
3.2. 2. Measure and cut your materials
Before you start making your DIY lampshade, you need to measure and cut your materials. Here is a step-by-step guide to help you:
1. Measure the circumference of your lampshade frame. This will give you the length of your fabric strip. Add an extra inch to the length for seam allowance.
2. Measure the height of your lampshade frame. This will give you the width of your fabric strip. Add an extra inch to the width for seam allowance.
3. Cut your fabric strip according to the measurements you just took.
4. Iron the fabric strip to remove any wrinkles or creases.
5. Fold over one edge of the fabric strip by ¼ inch and iron it flat. Then fold it over again by another ¼ inch and iron it flat again. This will create a hem.
6. Repeat step 5 on the opposite edge of the fabric strip.
7. Place the lampshade frame on top of the fabric strip and roll it until the fabric covers the frame completely.
8. Use clothespins to hold the fabric in place on the frame.
9. Cut off any excess fabric.
10. Use a hot glue gun to glue the ends of the fabric together where they meet on the frame.
3.3. 3. Create your lampshade base
Creating a lampshade base is an essential step in making a DIY lampshade. Here’s a step-by-step guide to creating your own lampshade base:
1. Gather your materials. You’ll need a lampshade ring set, which includes the ring, spider, and lamp harp. You’ll also need a lampshade paper or fabric, a ruler, scissors, pencil, and adhesive.
2. Measure and cut your lampshade paper or fabric to the desired size. Use the ruler to measure the height and circumference of your lampshade ring set, and add an extra inch to both measurements to allow for overlap and adhesive.
3. Apply adhesive to the inside of the lampshade ring set, and carefully wrap the lampshade paper or fabric around the ring, pressing firmly to secure.
4. Fold the excess paper or fabric over the top and bottom of the lampshade ring set, and apply adhesive to secure.
5. Attach the spider to the top of the lampshade, and the lamp harp to the spider, securing with screws.
Your lampshade base is now complete and ready for you to add your own personal touch with embellishments and decorations!
3.4. 4. Add your lampshade covering
To add your own lampshade covering, you will need to measure the circumference and height of your lampshade frame. Once you have these measurements, cut your fabric to size, leaving a little extra on each side for folding over the edges. Next, apply fabric glue to the edges of your fabric and carefully fold them over the frame, smoothing out any wrinkles or bubbles as you go. Finally, trim any excess fabric and allow the glue to dry completely before attaching the lampshade to your lamp base.
3.5. 5. Finish and attach your lampshade
To finish and attach your DIY lampshade, begin by trimming the excess fabric from the top and bottom edges of the shade. Fold over the raw edges towards the inside of the shade and secure them in place with fabric glue or double-sided tape. Next, use a hot glue gun to attach the shade to the lamp base, making sure to align it properly. Finally, add any additional embellishments or trims to the top and bottom edges of the shade to give it a finished look. With these simple steps, you can create a beautiful and unique lampshade that will add a personal touch to any room in your home.
Conclusion
In conclusion, these 10 DIY lampshade ideas are an easy and affordable way to add a personal touch to your home decor. From upcycling old materials to creating unique designs, these projects are sure to brighten up any room in your home.


These 10 innovative and imaginative DIY home decor ideas from [object Object] provide a refreshing approach to enhancing ones living…