

Mason jars are a versatile and inexpensive material that can be transformed into stunning lighting fixtures with a little creativity. DIY lighting projects using mason jars are a great way to add a unique touch to your home decor while also being cost-effective. From chic pendant lights to rustic chandeliers, there are endless possibilities when it comes to crafting with mason jars. In this article, we’ll take a look at 10 of the best DIY lighting projects using mason jars that you can easily create at home.
- 1. Introduction
- 1.1. What are mason jars?
- 1.2. Why use mason jars for lighting projects?
- 1.3. Benefits of DIY lighting projects using mason jars
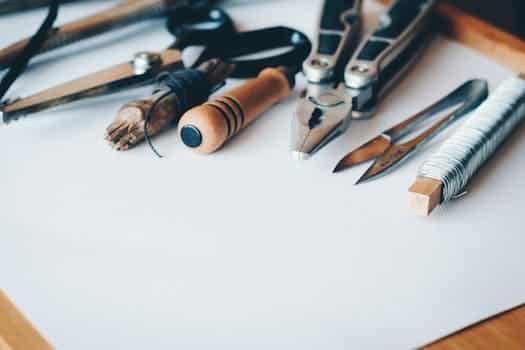
- 1.4. Materials needed for DIY lighting projects using mason jars
- 1.5. Safety precautions before starting DIY lighting projects using mason jars
- 2. DIY Lighting Ideas using Mason Jars
- 2.1. Mason jar pendant lights
- 2.2. Mason jar chandelier
- 2.3. Mason jar wall sconces
- 2.4. Mason jar table lamps
- 2.5. Mason jar fairy lights
- 3. Step-by-Step Guide for DIY Lighting Projects using Mason Jars
- 3.1. Preparing the mason jars
- 3.2. Drilling holes in the mason jars
- 3.3. Installing the light fixtures
- 3.4. Wiring the light fixtures
- 3.5. Assembling the DIY lighting project
- 4. Tips for Successful DIY Lighting Projects using Mason Jars
1. Introduction
Mason jars are versatile and can be used in a variety of ways. One of the most popular uses for Mason jars is as a lighting fixture. With a little creativity and some basic supplies, you can create your own DIY lighting projects using Mason jars. In this article, we will explore 10 different DIY lighting projects that you can create using Mason jars. Whether you are looking to add some rustic charm to your home or want to create a unique lighting fixture for a special occasion, these projects are sure to inspire you.
1.1. What are mason jars?
Mason jars are a type of glass jar that was originally used for canning and preserving food. They were invented by John Landis Mason in 1858 and have since become a popular household item due to their durability and versatility. Mason jars are often used for storing food, beverages, and other items, but they can also be used for crafts and DIY projects, including lighting projects. Mason jars come in a variety of sizes and shapes, and can be purchased at most hardware stores and craft stores.
1.2. Why use mason jars for lighting projects?
Mason jars have become a popular choice for DIY lighting projects. Not only are they affordable and easy to find, but they also add a charming and rustic touch to any space. In this article, we will explore 10 different lighting projects that you can create using mason jars. But first, let’s take a look at why mason jars are such a great choice for these types of projects.
1.3. Benefits of DIY lighting projects using mason jars
DIY lighting projects using mason jars are a great way to add a personal touch to your home décor. Not only are they affordable and easy to make, but they also provide a warm and cozy atmosphere. Mason jars are versatile and can be used in a variety of ways to create unique lighting fixtures that can transform any room. In this article, we will explore the benefits of DIY lighting projects using mason jars and provide you with 10 creative ideas to get you started.
1.4. Materials needed for DIY lighting projects using mason jars
Mason jars have become a popular choice for DIY lighting projects due to their unique shape and versatility. With a little creativity, you can turn these simple jars into stunning light fixtures that can add a rustic, chic touch to any room. Before you start your project, you will need to gather a few materials to ensure your DIY journey is a success.
1.5. Safety precautions before starting DIY lighting projects using mason jars
Before starting any DIY lighting project using mason jars, it is important to take some safety precautions to ensure a safe and enjoyable experience. Firstly, make sure to wear appropriate protective gear such as gloves and goggles to protect your hands and eyes from any potential hazards. Secondly, ensure that your work area is well-lit and properly ventilated to avoid any accidents. Additionally, make sure to read and follow all instructions carefully and use the right tools for the job. Lastly, keep children and pets away from your work area to avoid any accidents. By taking these safety precautions, you can enjoy your DIY lighting project using mason jars without any worries.
2. DIY Lighting Ideas using Mason Jars
Mason jars are versatile and can be used for a variety of DIY projects. One of the most popular uses for Mason jars is for lighting projects. In this section, we will explore some creative and easy DIY lighting ideas using Mason jars. These projects are perfect for adding a unique touch to any home decor or outdoor space. Let’s get started!
2.1. Mason jar pendant lights
Mason jar pendant lights are a popular trend in the world of DIY lighting. These charming and rustic light fixtures are easy to make and can add a touch of warmth and personality to any room. To create your own Mason jar pendant lights, you will need Mason jars (of course), pendant light kits, and some basic tools. Simply drill a hole in the lid of the Mason jar, thread the pendant light kit through the hole, and attach the light bulb. Hang the Mason jar pendant light from the ceiling with a sturdy chain or rope. You can also add decorative touches such as painting the Mason jar or wrapping it in twine or ribbon. Mason jar pendant lights are perfect for adding a cozy, country feel to a kitchen, dining room, or bedroom.
2.2. Mason jar chandelier
The Mason jar chandelier is a popular DIY lighting project for those who want to add a rustic touch to their home decor. This project involves using several Mason jars, preferably of the same size, and attaching them to a wooden board or plank. The jars can be attached to the board using metal clamps or wire. Once the jars are securely attached, the board can be hung from the ceiling using chains or ropes. To further enhance the rustic look, you can add Edison bulbs or other vintage-style light bulbs to the jars. The end result is a unique and stylish lighting fixture that is sure to impress your guests.
2.3. Mason jar wall sconces
Mason jar wall sconces are a great way to add a rustic touch to any room in your home. These sconces can be used to create a warm and cozy ambiance in your bedroom, living room, or even your dining room. To make your own Mason jar wall sconces, you will need a few basic supplies. First, you will need a Mason jar. You can use any size or shape of Mason jar that you like. Next, you will need a piece of wood that is the same width as your Mason jar. You can use any type of wood that you like, but a piece of reclaimed wood will give your sconces a more rustic feel. Finally, you will need a set of wall sconce brackets. These brackets will allow you to attach your Mason jar to the wall. Once you have gathered your supplies, you can begin to assemble your sconces. Start by attaching the wall sconce brackets to the piece of wood. Next, attach the Mason jar to the brackets. Finally, hang your sconces on the wall and enjoy the warm and cozy glow they provide.
2.4. Mason jar table lamps
Mason jars are a versatile and affordable material that can be used to create a variety of DIY lighting projects. One popular option is to turn them into table lamps. With just a few simple materials and some basic tools, you can create a beautiful and functional lamp that adds a cozy and rustic touch to any room. In this section, we’ll explore some creative ideas for making your own mason jar table lamps.
2.5. Mason jar fairy lights
Mason jar fairy lights are a great addition to any DIY lighting project using mason jars. These cute and whimsical lights add a touch of magic to any room or outdoor space. To create mason jar fairy lights, all you need are some mason jars, fairy lights, and a bit of creativity. Simply fill the jars with the fairy lights and you have an instant magical glow. You can use different colored fairy lights, or even add some twine or ribbon to the jars for a more rustic look.
3. Step-by-Step Guide for DIY Lighting Projects using Mason Jars
Mason jars are versatile items that can be used for a variety of DIY projects, including lighting. With a few supplies and some creativity, you can create unique lighting fixtures that will add a charming touch to your home decor. Here’s a step-by-step guide for DIY lighting projects using Mason jars.
3.1. Preparing the mason jars
Before starting any DIY lighting project with mason jars, it is important to prepare the jars properly. This will ensure that they are clean and safe to use. Here is a step-by-step guide to prepare your mason jars:
1. Clean the jars thoroughly with soap and water.
2. Rinse the jars with hot water to remove any soap residue.
3. Dry the jars completely with a clean towel.
4. Check for any cracks or chips in the jars. Discard any jars that are damaged.
5. Choose the appropriate size of bulbs and cords for your project.
By following these steps, you can be sure that your mason jars are ready for your DIY lighting project.
3.2. Drilling holes in the mason jars
To create a DIY lighting project using mason jars, you will need to drill holes in the jars to allow the light to shine through. Here is a step-by-step guide on how to do it:
1. Choose a drill bit size that matches the size of the lights you will be using.
2. Place a piece of tape on the jar where you want to drill the hole to prevent the glass from cracking.
3. Hold the jar securely and drill the hole at a slow speed, applying light pressure.
4. Once the hole is drilled, remove the tape and smooth any rough edges with sandpaper.
5. Repeat the process for each jar you will be using in your DIY lighting project.
3.3. Installing the light fixtures
To complete your DIY lighting project using Mason jars, you will need to install the light fixtures. This step-by-step guide will walk you through the process. First, gather the necessary materials: a Mason jar, a light fixture kit, a drill with a hole saw attachment, and a screwdriver.
Begin by drilling a hole in the lid of the Mason jar. Make sure to choose a hole saw attachment that is slightly larger than the base of the light fixture. Next, thread the light fixture through the hole in the lid and secure it in place with the provided hardware.
Finally, attach the lid to the Mason jar and screw in a light bulb. Your Mason jar light fixture is now ready to use. Repeat these steps for each Mason jar light fixture you are creating. Enjoy the cozy and unique ambiance they bring to any room in your home!
3.4. Wiring the light fixtures
When it comes to wiring the light fixtures for your DIY Mason jar lighting project, it’s important to take safety precautions and follow a step-by-step guide. Start by gathering all the necessary materials, including wire strippers, electrical tape, a screwdriver, and a lamp kit. Next, carefully remove the lid from the Mason jar and use the wire strippers to strip the ends of the wires on the lamp kit. Connect the wires to the light socket and secure them with electrical tape. Finally, screw the light socket into the Mason jar lid and attach the lid to the jar. Make sure to test the light before hanging or displaying it. With these simple steps, you can create a beautiful and functional Mason jar light fixture for your home.
3.5. Assembling the DIY lighting project
Assembling a DIY lighting project using mason jars is a fun and creative way to add some character to your home decor. With just a few simple steps, you can easily create a unique and personalized lighting fixture that will impress your guests. Here is a step-by-step guide to help you get started on your DIY lighting project using mason jars.
1. Gather the necessary materials: You will need mason jars, light fixtures, electrical wire, wire cutters, pliers, and a screwdriver.
2. Prepare the mason jars: Clean the jars thoroughly and remove any labels or stickers. You may also want to sand the surface of the jars to create a frosted effect.
3. Install the light fixtures: Follow the manufacturer’s instructions to install the light fixtures onto the mason jars. You may need to use the pliers and screwdriver to secure the fixtures in place.
4. Wire the lights: Use the electrical wire to connect the light fixtures together. Make sure to strip the ends of the wire and use the wire cutters to trim any excess.
5. Test the lights: Once you have wired the lights, plug them in to make sure they are working properly.
6. Hang the lights: Finally, hang your new DIY lighting fixture in the desired location. You can use hooks, chains, or rope to hang the lights, depending on your preference.
With these simple steps, you can create a beautiful and functional lighting fixture using mason jars. Experiment with different colors and styles to find the perfect look for your home.
4. Tips for Successful DIY Lighting Projects using Mason Jars
DIY lighting projects using mason jars are a popular choice for those looking to add a touch of rustic charm to their homes. If you’re interested in trying your hand at creating your own mason jar lighting fixtures, there are a few tips to keep in mind to ensure your project is a success.
1. Choose the right type of mason jar. Not all mason jars are created equal, and some may be better suited for lighting projects than others. Look for jars with smooth sides, as these will be easier to clean and decorate.
2. Use the right tools. Creating mason jar lighting fixtures will require some basic tools, such as a drill and wire cutters. Make sure you have everything you need before getting started.
3. Plan your design in advance. Before you start drilling holes or attaching wires, take some time to sketch out your design. This will help you visualize the final product and make any necessary adjustments before you start.
4. Experiment with different light sources. Mason jar lighting fixtures can be used with a variety of light sources, including candles, fairy lights, and LED bulbs. Try out different options to see what works best for your project.
5. Don’t be afraid to ask for help. If you’re new to DIY projects or aren’t sure how to tackle a particular step, don’t hesitate to ask for help. There are plenty of online resources and communities that can offer guidance and support.
4.1. Choose appropriate size and type of mason jars
One of the most important aspects of a successful DIY lighting project using mason jars is choosing the appropriate size and type of jars. A general rule of thumb is to use quart-sized jars for larger lighting fixtures and pint-sized jars for smaller ones. Additionally, consider the shape of the jar – regular mouth jars are easier to work with for most projects, but wide mouth jars can be used for more unique designs. Finally, make sure to select jars made of thick glass to prevent cracking or shattering during the installation process.
4.2. Use high-quality light fixtures and wires
When it comes to DIY lighting projects using mason jars, the quality of the light fixtures and wires you use can make a big difference in the overall outcome. Using high-quality fixtures and wires will not only ensure that your project looks good, but it will also make it safer and more durable. Look for fixtures and wires that are rated for the wattage you plan to use and that are designed for use with mason jars. This will help ensure that your project is a success and that you can enjoy your new lighting for years to come.
4.3. Ensure proper ventilation and air flow
Proper ventilation and air flow are important factors to consider when working on DIY lighting projects using Mason jars. This is particularly true if you are using materials like paint, glue, or any other chemical products that may release fumes or odors. Make sure you are working in a well-ventilated area, either outdoors or in a room with windows that can be opened. This will help to avoid any potential health hazards and ensure a safer working environment.
Additionally, having good air flow can also help with the drying process of any paint or glue you may be using. If the air is stagnant, it can take longer for materials to dry, which can be frustrating and time-consuming. Consider using a fan or opening a door or window to create a draft and promote air flow. By taking these precautions, you can ensure that your DIY lighting projects using Mason jars are not only beautiful, but also safe and efficient.
4.4. Experiment with different designs and styles
Experimenting with different designs and styles is one of the best ways to create unique and successful DIY lighting projects using Mason jars. From rustic and vintage to modern and chic, there are countless design possibilities when it comes to Mason jar lighting.
To ensure the success of your DIY lighting project, here are some helpful tips:
1. Choose the right type of Mason jar – different sizes and shapes can create different lighting effects
2. Use the right type of light bulb – LED bulbs are energy-efficient and safe for Mason jar lighting projects
3. Consider adding decorative elements like twine, ribbon, or beads to enhance the design
4. Experiment with different placement and hanging options to find the perfect spot for your Mason jar lighting
By following these tips and exploring different designs, you can create a one-of-a-kind lighting fixture that adds charm and character to any space.
4.5. Ask for help if needed
When it comes to DIY lighting projects using Mason jars, it’s important to remember that there’s no shame in asking for help. Whether you need advice on wiring or ideas for how to hang your finished project, don’t hesitate to reach out to friends, family, or online communities for support. Working on a project with others can also make the experience more enjoyable and help you learn new skills. Additionally, don’t be afraid to consult online tutorials or instructional videos to help guide you through the process. With a little help, you’ll be able to create stunning DIY lighting projects using Mason jars that will light up your home in no time.
Conclusion
In conclusion, Mason jars offer a versatile and affordable option for creating unique lighting fixtures that can add a cozy and rustic charm to any space. With these 10 DIY projects, you can easily transform your home with a personalized touch while also saving money in the process.


These 10 innovative and imaginative DIY home decor ideas from [object Object] provide a refreshing approach to enhancing ones living…