
Are you looking to give your home a fresh and budget-friendly makeover? Look no further! In this article, we will explore 10 fantastic DIY paint decor ideas that will transform your space without breaking the bank. Whether you’re a seasoned DIY enthusiast or just starting out, these creative and easy-to-follow projects will inspire you to add a personal touch to your home. Get ready to unleash your inner artist and revamp your living space with these budget-friendly paint decor ideas!
- 1. Introduction
- 1.1. Benefits of DIY paint decor
- 1.2. Tools and materials needed
- 1.3. Preparation steps
- 1.4. Safety precautions
- 1.5. Choosing the right paint
- 2. Techniques for DIY Paint Decor
- 2.1. Color blocking
- 2.2. Stenciling
- 2.3. Sponging
- 2.4. Distressing
- 2.5. Ombre effect
- 3. Popular DIY Paint Decor Ideas
- 3.1. Upcycled furniture
- 3.2. Accent walls
- 3.3. Canvas art
- 3.4. Mason jar crafts
- 3.5. Painted plant pots
1. Introduction
Giving your home a fresh new look doesn’t have to break the bank. With a little creativity and some do-it-yourself spirit, you can transform your living space into a stylish haven. In this article, we will explore 10 budget-friendly paint decor ideas that you can easily implement to give your home a stunning makeover. Whether you’re a seasoned DIY enthusiast or just starting out, these ideas are sure to inspire you and help you create a beautiful home without spending a fortune. So grab your paintbrushes and let’s get started!
1.1. Benefits of DIY paint decor
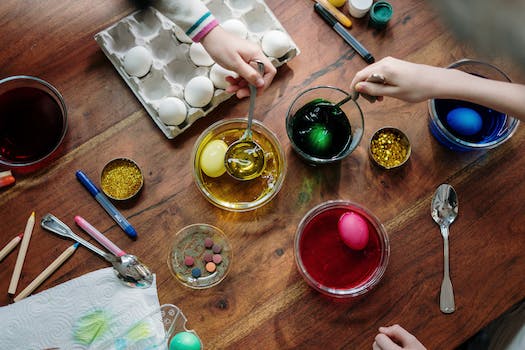
DIY paint decor is a fantastic way to transform your home without breaking the bank. Whether you’re looking to update a single room or give your entire house a makeover, these budget-friendly ideas will help you achieve a fresh and stylish look. By taking matters into your own hands, you not only save money on hiring professionals but also get to unleash your creativity and personalize your living space. With a little bit of effort and some basic painting skills, you can completely revamp your home’s aesthetic and make it truly your own. In this article, we will explore ten DIY paint decor ideas that are sure to inspire you and get your creative juices flowing.
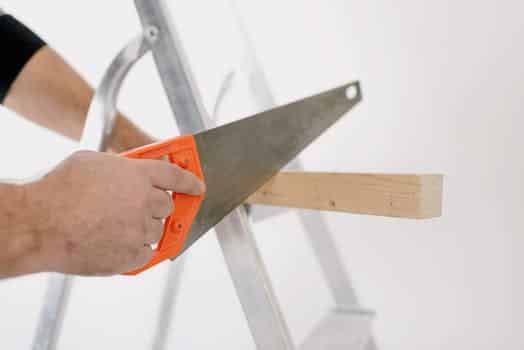
1.2. Tools and materials needed
When it comes to giving your home a fresh look on a budget, DIY paint decor ideas can be a great solution. With a little creativity and some basic tools and materials, you can transform your living space into a stylish and inviting place. Before you start your home makeover project, it’s important to gather the necessary tools and materials. Here are some essentials you’ll need for your DIY paint decor ideas:
1. Paintbrushes: Different sizes and shapes of paintbrushes will help you achieve various textures and effects.
2. Paint rollers: Rollers are perfect for covering large areas quickly and evenly.
3. Paint trays: These shallow containers hold the paint and make it easy to dip your brush or roller.
4. Painter’s tape: Use painter’s tape to protect areas you don’t want to be painted, such as trim and edges.
5. Drop cloths: Cover your floors and furniture with drop cloths to protect them from paint splatters.
6. Sandpaper: Sandpaper is essential for smoothing surfaces and preparing them for painting.
7. Primer: Applying primer before painting helps the paint adhere better and provides a more even finish.
8. Paint: Choose your desired colors and types of paint for your DIY projects. Consider using low VOC or eco-friendly options for a healthier home environment.
9. Stencils: Stencils are a fun way to add patterns and designs to your painted surfaces.
10. Sealant: Finish off your paint decor projects with a sealant to protect the surface and enhance durability.
Having these tools and materials ready will ensure a smoother and more successful DIY paint decor project for your budget-friendly home makeover.
1.3. Preparation steps
Before starting any DIY paint decor project, it is important to properly prepare and plan ahead. Taking the time to prepare will ensure a successful and budget-friendly home makeover. Here are some essential steps to follow before diving into your paint decor ideas:
1. Evaluate the space: Take a close look at the room or area you want to makeover. Consider its current condition, size, and any existing furniture or decor that may need to be taken into account.
2. Set a budget: Determine how much you are willing to spend on your home makeover project. This will help you prioritize your ideas and make informed decisions about materials and supplies.
3. Gather inspiration: Look for inspiration in magazines, online platforms, and home decor blogs. Create a mood board or save images of paint decor ideas that resonate with your personal style.
4. Choose a color scheme: Select a color palette that suits the mood and ambiance you want to create in your space. Consider the existing colors in the room and how they will complement or contrast with the new paint colors.
5. Plan your paint techniques: Decide on the painting techniques you want to use for each area or furniture piece. This could include techniques like color blocking, stenciling, or ombre effects.
6. Prepare the surfaces: Clean and prepare the surfaces you will be painting. Remove any dirt, dust, or previous paint that may affect the final result. Sanding and priming may be necessary for certain surfaces.
7. Gather your materials: Make a list of all the materials and supplies you will need for your paint decor project. This may include paint, brushes, rollers, painter’s tape, drop cloths, and any additional tools required.
8. Protect your surroundings: Before you start painting, take measures to protect your floors, furniture, and other belongings. Use drop cloths and plastic sheets to cover surfaces and remove or cover any items that could be damaged.
Following these preparation steps will set you up for a successful DIY paint decor project. Once you have completed these preparations, you can move on to the introduction of your article.
1.4. Safety precautions
When it comes to giving your home a makeover on a budget, do-it-yourself (DIY) paint decor ideas can be a great solution. Not only do they allow you to unleash your creativity, but they also save you money by avoiding the need to hire professional painters. However, before you embark on your DIY paint decor project, it’s important to take some safety precautions to ensure a smooth and hazard-free experience. By following these safety measures, you can protect yourself and your surroundings while achieving the desired transformation for your home.
1.5. Choosing the right paint
Choosing the right paint is crucial when embarking on a DIY paint decor project for a budget-friendly home makeover. The color and type of paint you choose can greatly impact the overall look and feel of your space. Whether you’re looking to create a cozy atmosphere or make a bold statement, selecting the perfect paint can help you achieve your desired result.
When choosing paint, consider factors such as the room’s purpose, lighting conditions, and existing furniture and decor. Lighter shades can make a small room appear larger, while darker hues can add depth and drama to a larger space. Additionally, certain colors evoke specific moods and emotions, so think about the ambiance you want to create.
In terms of paint types, there are various options available, including latex, oil-based, and specialty finishes. Latex paint is popular for its ease of use, quick drying time, and low odor. It’s suitable for most interior surfaces and is easy to clean. Oil-based paint, on the other hand, provides a durable and smooth finish, making it ideal for high-traffic areas like trim and doors. Specialty finishes like matte, satin, or gloss can add texture and visual interest to your walls.
Remember to test the paint colors and finishes on a small area before committing to a large-scale project. This will give you a better idea of how the paint will look in different lighting conditions and how it complements your existing decor. Take into account the natural light that enters the room at different times of the day as it can affect the appearance of the paint.
In conclusion, choosing the right paint is essential for a successful DIY paint decor project. Consider the room’s purpose, lighting conditions, and existing decor to select the perfect color and type of paint. Don’t forget to test the paint on a small area before proceeding with your makeover. With the right paint, you can transform your home on a budget and create a space that reflects your personal style.
2. Techniques for DIY Paint Decor
Painting is one of the easiest and most cost-effective ways to give your home a fresh new look. With a little creativity and some DIY skills, you can transform any room in your house into a stylish and inviting space. Here are some techniques for DIY paint decor that will help you achieve a budget-friendly home makeover.
1. Accent Walls: Create a focal point in a room by painting one wall with a bold color or a unique pattern. This simple technique can instantly add depth and character to your space.
2. Stenciling: Use stencils to create beautiful patterns and designs on your walls, furniture, or even floors. This technique allows you to personalize your space and make it truly unique.
3. Ombre Effect: Add a touch of elegance to your walls by creating an ombre effect. Start with a lighter shade at the top and gradually transition to a darker shade at the bottom for a stunning visual impact.
4. Stripes: Give your walls a classic and timeless look by painting stripes. Whether vertical or horizontal, stripes can make a room appear taller, wider, or simply add a touch of sophistication.
5. Chalkboard Paint: Turn any wall or surface into a functional and fun space by applying chalkboard paint. This allows you to write, draw, and erase on the surface, making it perfect for kitchens, kids’ rooms, or home offices.
6. Geometric Designs: Create a modern and contemporary look by painting geometric designs on your walls. From triangles to hexagons, the possibilities are endless and can add a touch of visual interest to any room.
7. Faux Finishes: Achieve the look of expensive materials such as marble or wood with faux finishes. There are various techniques available, such as sponging or ragging, that can give your walls a luxurious and textured appearance.
8. Color Blocking: Make a bold statement by using contrasting colors to create color blocks on your walls. This technique can add drama and visual interest to any space.
9. Stenciled Furniture: Give your old furniture a fresh new look by stenciling patterns or designs on them. This is a great way to update your furniture without spending a fortune.
10. Painted Floors: If you’re feeling adventurous, consider painting your floors. This can instantly transform the look of any room and give it a unique and customized touch.
With these DIY paint decor techniques, you can give your home a budget-friendly makeover while expressing your creativity and personal style. So grab a paintbrush and get ready to transform your space!
2.1. Color blocking
Color blocking is a popular technique for DIY paint decor that can instantly transform a room. It involves using contrasting colors to create visually striking geometric shapes on walls, furniture, or other surfaces. This technique adds a modern and bold touch to any space, making it an ideal choice for a budget-friendly home makeover.
To achieve color blocking, start by selecting two or more colors that complement each other. You can go for a bold combination like black and white or experiment with vibrant shades like teal and mustard yellow. Once you have your color palette, decide on the areas you want to highlight with color blocking. It could be a feature wall, a piece of furniture, or even a small accent like a door or window frame.
Next, prepare the surfaces by cleaning and priming them. This step ensures that the paint adheres well and provides a smooth finish. Use painter’s tape to mark the boundaries of your color blocks. This will help you achieve clean and crisp lines. Apply the base color first and let it dry completely before moving on to the next step.
Once the base color is dry, it’s time to create the color blocks. Measure and mark the desired shapes on the surface using a ruler or stencil. Then, carefully paint inside the marked areas using a brush or roller. Make sure to apply multiple coats for an even and opaque finish. Remove the painter’s tape while the paint is still wet to avoid any peeling or smudging.
Finally, let the paint dry completely before adding any additional decor or furniture to the space. Color blocking can make a bold statement on its own, so it’s best to keep the surrounding elements minimal and let the painted areas take center stage.
In conclusion, color blocking is a technique that can add a pop of personality to your home without breaking the bank. With a little creativity and some basic painting skills, you can achieve a stunning DIY paint decor that will transform your space into a stylish haven.
2.2. Stenciling
Stenciling is a popular technique for DIY paint decor that can instantly transform the look of any room. Whether you want to add a touch of elegance or create a playful pattern, stenciling allows you to customize your walls, furniture, or accessories with endless design possibilities.
To get started with stenciling, you’ll need a stencil, paint, painter’s tape, a stencil brush or roller, and some patience. Here are a few techniques to help you achieve professional-looking results:
1. Prepping the surface: Before stenciling, make sure the surface is clean, smooth, and dry. Remove any dust, dirt, or imperfections that could affect the outcome.
2. Securing the stencil: Use painter’s tape or adhesive spray to secure the stencil firmly in place. This will prevent it from moving or shifting during the painting process.
3. Choosing the right paint: Opt for acrylic or latex paint that is suitable for the surface you’re stenciling. Consider the color scheme of your room and select paint colors that complement the overall aesthetic.
4. Loading the brush: Dip the stencil brush or roller into the paint and remove any excess by dabbing it on a paper towel. The brush should be lightly loaded to avoid smudging or bleeding.
5. Applying the paint: Using a dabbing or swirling motion, apply the paint evenly over the stencil openings. Start from the edges and work your way towards the center to prevent paint from seeping underneath.
6. Building layers: If you want a more opaque or vibrant design, let the first layer of paint dry completely before adding additional layers. This will create a more dimensional and professional finish.
7. Removing the stencil: Once you’re satisfied with the coverage, carefully remove the stencil while the paint is still wet. Peel it off slowly and at a 45-degree angle to avoid smudging.
With these stenciling techniques, you can easily elevate the style of your home without breaking the bank. Experiment with different patterns, colors, and placements to add a personal touch to your space. Happy stenciling!
2.3. Sponging
Sponging is a popular technique used in DIY paint decor that can add texture and depth to your walls. This technique involves applying paint with a sponge instead of a brush or roller, creating a soft and mottled effect. Sponging can be done in various ways to achieve different looks, such as a subtle wash of color or a more dramatic stippled effect.
To sponge paint your walls, you will need a natural sea sponge, paint in your desired colors, a paint tray, and a drop cloth to protect your floors. Start by preparing the walls by cleaning them and applying a base coat if needed.
Once the walls are ready, pour the desired paint colors into separate compartments of the paint tray. Dip the sponge into one of the paint colors, ensuring that it is evenly coated but not saturated. Gently press the sponge onto the wall in a dabbing or swirling motion, starting from the top and working your way down. Rotate the sponge as you go to create an even distribution of color.
For a more textured look, you can use multiple sponge sizes or tear the sponge into smaller pieces. Experiment with different techniques, such as layering colors or blending them together, to achieve the desired effect.
Sponging is a versatile technique that can be used in various rooms of your home, including bedrooms, living rooms, and even bathrooms. It can give a unique and personalized touch to your walls, making them stand out and adding visual interest to your space. With some practice and creativity, you can easily master the art of sponging and transform your home with beautiful DIY paint decor.
2.4. Distressing
Distressing is a popular technique in DIY paint decor that adds character and charm to furniture and home accessories. It involves intentionally creating a worn, aged look by distressing the surface of the object. Distressing can be achieved using various methods, such as sanding, scraping, or using special distressing tools.
One technique for distressing furniture is sanding. Start by sanding the surface lightly with fine-grit sandpaper to create a smooth base. Then, focus on areas that would naturally experience wear and tear, such as edges, corners, and raised surfaces. Sand these areas more aggressively to expose the underlying wood or previous layers of paint, giving the piece a distressed appearance.
Another technique is scraping. Using a putty knife or a scraper, gently scrape along the edges and corners of the furniture. This will remove small bits of paint and create a worn effect. Be careful not to scrape too hard, as you don’t want to damage the surface.
Special distressing tools, like distressing brushes or sanding blocks, can also be used to achieve a distressed look. These tools have different textures and shapes that can mimic natural wear patterns. Experiment with different tools to create unique distressed finishes.
Before distressing, it’s important to prepare the surface by cleaning it thoroughly and removing any existing finishes or coatings. This will ensure that the paint adheres properly and the distressing techniques work effectively.
Distressing is a versatile technique that can be applied to various types of furniture and home decor items. It adds a touch of vintage or rustic charm to any space and is a budget-friendly way to achieve a stylish home makeover.
2.5. Ombre effect
The ombre effect is a popular technique used in DIY paint decor projects. It involves creating a gradient or fading effect by blending two or more colors together. This effect can be achieved on various surfaces such as walls, furniture, or even accessories. The ombre effect adds a touch of visual interest and depth to any space, making it an excellent choice for a budget-friendly home makeover. With a little bit of creativity and some basic painting supplies, you can easily incorporate the ombre effect into your DIY paint decor projects. Whether you want to create a subtle ombre effect or go for a bold and vibrant look, this technique offers endless possibilities for adding a stylish touch to your home. Experiment with different color combinations and gradients to find the perfect ombre effect that suits your personal style and complements your existing decor. So, if you’re looking for a simple yet impactful way to transform your home, consider giving the ombre effect a try in your next DIY paint decor project.
3. Popular DIY Paint Decor Ideas
DIY paint decor ideas are a great way to transform your home on a budget. With a little creativity and some basic painting skills, you can give your space a fresh new look without breaking the bank. Whether you’re looking to update a single room or give your entire home a makeover, these DIY paint decor ideas are sure to inspire you.
1. Accent walls: One of the easiest ways to add a pop of color to your space is by painting an accent wall. Choose a bold, vibrant color that complements your existing decor and use it to create a focal point in the room.
2. Stenciled furniture: Give your old furniture a modern makeover by using stencils and paint. You can create intricate patterns or simple designs to add visual interest to your pieces.
3. Ombre walls: Create a stunning gradient effect by painting your walls in an ombre style. Start with a dark shade at the bottom and gradually lighten the color as you move up the wall.
4. Chalkboard paint: Turn any surface into a functional and stylish chalkboard by using chalkboard paint. This is a great option for a kitchen, home office, or kids’ playroom.
5. Painted rugs: If you’re looking to update your floors without the cost of new carpets or rugs, consider painting a design directly onto your existing floor. Use stencils or create your own pattern for a unique and personalized look.
6. Colorful cabinets: Give your kitchen or bathroom cabinets a fresh new look by painting them in a bold color. This is a simple and affordable way to update your space.
7. Geometric patterns: Create a modern and trendy look by painting geometric patterns on your walls. Use painter’s tape to create clean lines and experiment with different shapes and colors.
8. Painted ceiling: Don’t forget about the fifth wall – the ceiling! Add a touch of color or a fun design to your ceiling to make a statement in any room.
9. Two-tone doors: Give your doors a makeover by painting them in a two-tone color scheme. This is a simple yet effective way to add visual interest to any room.
10. Upcycled accessories: Instead of buying new accessories, consider upcycling old items with a fresh coat of paint. From vases to picture frames, there are endless possibilities to give new life to old decor.
These DIY paint decor ideas are just the beginning. Get creative and let your imagination run wild to create a home that reflects your personal style, all while staying within your budget.
3.1. Upcycled furniture
Upcycled furniture is a popular trend in home decor that allows you to give old or unused pieces a new lease on life. By repurposing and transforming furniture, you can create unique and personalized pieces that add character to your home. Not only is upcycling furniture a sustainable choice, but it is also a budget-friendly option for those looking to makeover their homes without breaking the bank. In this section, we will explore some popular DIY paint decor ideas for upcycled furniture that can help you achieve a stylish and affordable home makeover.
3.2. Accent walls
Accent walls are a popular trend in home decor that can instantly transform the look and feel of a room. By painting just one wall in a bold color or with a unique design, you can create a focal point and add visual interest to your space. Accent walls can be used in any room, from the living room to the bedroom, and are a budget-friendly way to give your home a fresh and stylish makeover. Whether you prefer a vibrant pop of color or a subtle pattern, there are endless possibilities for creating an accent wall that reflects your personal style. In this section, we will explore some popular DIY paint decor ideas for accent walls that are sure to inspire your next home project.
3.3. Canvas art
Canvas art is a popular choice for DIY paint decor ideas as it allows for endless creativity and personalization. Whether you are an experienced artist or just starting out, creating your own canvas art can be a fun and budget-friendly way to give your home a makeover. With a wide range of techniques and styles to choose from, you can easily find inspiration for your next project. From abstract designs to nature-inspired scenes, the possibilities are endless. So grab your paintbrushes and get ready to transform your walls with stunning canvas art!
3.4. Mason jar crafts
Mason jar crafts have become incredibly popular in recent years, and for good reason. These versatile glass jars can be transformed into stunning home decor pieces with just a few simple materials and a little creativity. Whether you’re looking to add a touch of rustic charm or a pop of color to your space, mason jar crafts are the perfect solution.
One popular DIY paint decor idea using mason jars is to create a distressed look. This can be achieved by painting the jars with a base color, such as white or light blue, and then lightly sanding the surface once the paint has dried. This technique gives the jars a weathered and vintage appearance, perfect for shabby chic or farmhouse-style interiors.
Another fun and trendy paint decor idea for mason jars is to create an ombre effect. This involves painting the jars in different shades of the same color, starting with a dark hue at the bottom and gradually getting lighter towards the top. The result is a stunning gradient effect that adds visual interest to any room.
If you’re feeling more adventurous, you can try your hand at creating hand-painted designs on mason jars. From simple polka dots and stripes to intricate floral patterns, the possibilities are endless. Just grab some acrylic paints and a fine-tipped brush, and let your imagination run wild.
For those who prefer a more minimalist look, consider painting mason jars with a solid color and adding a metallic touch. Gold, silver, or copper paint can be used to create elegant and glamorous accents that instantly elevate the jars’ aesthetic.
Lastly, don’t forget about the power of chalk paint. This versatile paint can transform mason jars into stylish and functional chalkboard labels. Simply paint a section of the jar with chalkboard paint, allow it to dry, and then use chalk to write labels or messages on the surface. This is a great way to organize your pantry or add a personal touch to gifts.
In conclusion, mason jar crafts offer endless possibilities for DIY paint decor ideas. Whether you prefer a rustic, trendy, or minimalist look, these glass jars can be easily transformed into beautiful home decor pieces on a budget. So, grab your paintbrushes and get creative!
3.5. Painted plant pots
Painted plant pots are a fantastic way to add a pop of color and personality to your indoor or outdoor space. Whether you have a green thumb or just want to add some visual interest to your plants, painting your plant pots can instantly transform them into unique pieces of art. With a wide variety of paint colors and techniques available, you can create endless designs and patterns to suit your style and taste. From simple solid colors to intricate designs, the possibilities are endless when it comes to painting plant pots. So grab your paintbrushes and let your creativity soar as you embark on this fun and budget-friendly DIY project!
Conclusion
In conclusion, these 10 DIY paint decor ideas are perfect for giving your home a budget-friendly makeover. With a little creativity and some paint, you can transform your space and add a personal touch to every room. Whether you’re looking to update your furniture, walls, or accessories, these ideas will inspire you to get started and create a beautiful, customized home that reflects your style and personality.

These 10 innovative and imaginative DIY home decor ideas from [object Object] provide a refreshing approach to enhancing ones living…