
Do you want to make some exciting changes to your house? Stop right there! Here are ten great do-it-yourself paint decor ideas that will completely alter the feel of your home in a short amount of time. Whether you’re a seasoned DIYer or just getting your feet wet, you’ll find something here to spark your creative juices. Prepare to inject some life and character into your home with these unique paint decor suggestions.
- 1. Introduction
- 1.1. What is DIY paint decor?
- 1.2. Benefits of DIY paint decor
- 1.3. Tools and materials needed for DIY paint decor
- 1.4. Safety precautions for DIY paint decor
- 1.5. Choosing the right paint for your DIY project
- 2. Step-by-Step Guide for DIY Paint Decor
- 2.1. Preparing the surface
- 2.2. Choosing the color scheme
- 2.3. Applying the base coat
- 2.4. Creating patterns and designs
- 2.5. Adding finishing touches
- 3. DIY Paint Decor Ideas for Different Rooms
- 3.1. Living room
- 3.2. Bedroom
- 3.3. Kitchen
- 3.4. Bathroom
- 3.5. Kids’ room
1. Introduction
Do you want to give your house a new look and feel? Stop right there! In this article, we will go over 10 incredible home painting projects that will help you make your house a home. These projects are perfect for anyone, from the most experienced DIYer to the novice trying to find their creative side. There’s something here for everyone, from framed prints to custom furnishings. Let’s get our hands dirty, take our paintbrushes, and explore the world of do-it-yourself painted furnishings!
1.1. What is DIY paint decor?
Do-it-yourself paint décor is the process of improving the visual appeal of various household products and surfaces with paint. Do-it-yourselfers take on painting jobs to make one-of-a-kind, custom-designed accents for their homes. DIY paint décor is a fun and easy way to give your home a new, artistic look, whether you’re refinishing furniture, painting walls, or updating accessories. You can easily produce a fashionable and cost-effective home remodel that reflects your particular taste and style by experimenting with colors, textures, and designs.
1.2. Benefits of DIY paint decor
Painting your own decorative items is a great way to give your home a personal and distinctive touch. You can express your individuality and taste through the customization of your home. DIY paint decor projects have several advantages, including low costs, freedom of creativity, and the pride that comes from a job well done. These 10 paint décor ideas can help you, whether you’re a DIY rookie or a seasoned pro, turn your house into a beautiful work of art.
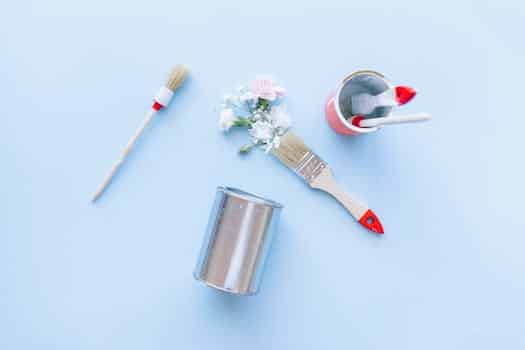
1.3. Tools and materials needed for DIY paint decor
DIY paint decorating requires a few key items before you can get started. Having these things on hand will guarantee that you have all you need to make a beautiful change to your home. The following items should always be on hand:
Brushes of varying sizes and shapes can be used to apply paint in unique patterns and colors to a wide range of surfaces.
When painting a border or edge, using painter’s tape will help you get crisp, even lines.
Protect your flooring and furnishings from paint splatters and drips using drop cloths.
Sandpaper is fourth on the list because it can be used to smooth out rough spots before painting.
Priming the surface prior to painting improves adherence and yields a more polished appearance.
Paint rollers are the most efficient and effective way to cover huge areas.
Seventh, paint trays, to hold and blend paint as you work.
Paint: Opt for the DIY paint decor colors and finishes you like best.
Stencils are an excellent tool for creating elaborate painted motifs and patterns.
Ten. sealer: After you’re done painting, apply a sealer to keep the paint from chipping.
Having these supplies on hand will allow you to successfully complete any do-it-yourself paint decor job and give your home a fresh new look.
1.4. Safety precautions for DIY paint decor
DIY paint decor projects are fun, but safety should always come first. If you take care, your trip won’t only be enjoyable, but also safe. Following these safety precautions will allow you to enjoy your creative home improvement while staying safe, regardless of whether you are an experienced DIY enthusiast or just starting out.
First, make sure the room is well-ventilated before you start painting. Paint fumes are dangerous to breathe in, so make sure to ventilate the area by opening windows and doors or running fans.
Second, make sure you’re protected against paint splatters, dust, and fumes by donning a mask, goggles, and gloves. This will reduce the risk of respiratory and skin discomfort.
Third, get the surface you’ll be painting ready to go. Scrub them clean, scrape off any flaking paint, and fix any chips or cracks you find. This will result in a more secure bond and a sleeker overall appearance.
Invest in high-quality paint that has been developed for the surface you’ll be painting. This will not only guarantee endurance and lifespan but also provide superior coverage.
Read and observe the paint container labels carefully; they contain important information. Instructions on how to use the product, how long it will take to dry, and any necessary warnings should be included here.
Make sure the place you’ll be working has enough light to see what you’re doing. If you want to see clearly and avoid making any mistakes or having any accidents, you need good illumination.
Keep kids and pets out of the painting area to reduce the risk of injury or illness from paint or other chemicals. Don’t let them have easy access to paints and tools.
After you’ve finished your paint decorating project, make sure to put away your tools and clean up the area. Any residual paint or hazardous materials must be disposed of in accordance with state and federal laws.
By remembering these guidelines, you can enjoy the fun of DIY painting projects without endangering yourself or your family.
1.5. Choosing the right paint for your DIY project
DIY success relies heavily on picking the correct paint for the job. The right paint may completely transform the look of a room or a piece of furniture that has seen better days. There are a lot of variables to think about when choosing a paint, including the surface you’ll be painting, the desired finish, and the desired aesthetic. If you keep these things in mind, your DIY paint decor ideas will turn out flawlessly and without a hitch.
2. Step-by-Step Guide for DIY Paint Decor
Painting is a great method to refresh the look of your home in a unique way. DIY paint décor ideas are a great way to give a room a new lease on life or inject some much-needed color into an otherwise monochromatic setting. If you’re itching to get your hands dirty and exercise your imagination, this detailed tutorial will lead you to beautiful results when decorating with paint.
The First Step: Making a Strategy
It’s important to plan and prepare thoroughly before beginning a painting project. The first step in painting is deciding which areas will be painted and what colors will be used. Make sure the area you’ll be working in has adequate ventilation, that you have taken the appropriate measurements, and that you have all the tools and materials you’ll need.
Part 2: Prep Work
Remove any debris, dust, or grease from the areas you plan to paint. The paint will go on evenly and smoothly if you do this. Priming may be required prior to painting on surfaces like raw wood or walls that have lost their original color. Priming something requires application and then waiting for it to dry before moving on.
Third, tape and shield from harm.
Use painter’s tape to mask off parts you don’t want painted to get crisp, clear lines. Baseboards, window casings, and trim are all examples. Drop cloths or plastic sheets should be used to protect furniture, floors, and fixtures from paint drips and spills.
4th Step: Get to Painting
Start by using a small brush or an angled paintbrush to fill in the edges. This will guarantee a polished appearance around the edges, corners, and trim. After the perimeter is painted, move on to covering bigger sections using a roller or paint sprayer. To achieve a uniform and long-lasting finish, numerous thin coats are preferable to one thick one. Don’t apply a new coat until the previous one has dried fully.
Step 5: Personalize It
The fun part of painting comes after the basic coats have dried. Think about using painter’s tape, sponging, or stencils to make patterns and designs. Try out several color palettes and material finishes to inject character into your abode. Don’t rush the drying process; let each decorative piece its due time to dry.
The Final Touches (6th Stage)
Carefully peel off the painter’s tape if you’re happy with the way your wall looks. Remove any blemishes and rework any trouble spots. Clear the area, take down any barriers, and let
2.1. Preparing the surface
In order to get the best results from your do-it-yourself paint decorating tasks, surface preparation is crucial. You may get a sleek and polished effect by preparing the surface first. If you want a professional result from your painting or decorating endeavor, follow these instructions.
First, get rid of all dirt and dust from the surface you intend to paint. Get rid of grime, dust, and grease using a little dish soap and hot water. Be sure to give it a thorough rinsing and air dry it before using again.
Examine the surface for flaws like cracks, holes, or dents, and fix them if you find them. Fill or spackle the holes or cracks as needed. After the hole is filled, a light sanding will create a uniform surface.
If the surface has already been painted, sand it lightly before proceeding. This will improve the adhesion of the fresh paint. Sand the surface in a circular motion with fine-grit sandpaper until it feels somewhat rough.
The fourth step is to clean up the dust and debris left behind by the sanding process. To prepare a surface for painting, wipe it down with a tack cloth or a moist cloth.
Fifth, prime the surface (if needed): a primer may be required, depending on the surface and the paint. Priming ensures a smooth surface upon which the paint will adhere more strongly. Apply the primer in accordance with the manufacturer’s directions.
If you follow these instructions, your do-it-yourself paint decoration project will get off to a great start. Spending effort on surface preparation is essential for achieving a high-quality, long-lasting outcome.
2.2. Choosing the color scheme
DIY paint decor for a unique makeover of your home requires careful consideration of color scheme. It’s crucial to select colors carefully because they have a profound effect on the ambiance of a space. If you’re having trouble deciding on a color scheme for your do-it-yourself paint decorating project, consider the following steps:
First, establish the function of the space: Take into account the intended use of the space. Is it more like a bedroom to unwind in or a living room to socialize in? Knowing the room’s function is essential for selecting the right color palette.
Look for ideas everywhere you go; periodicals, the web, nature, etc. Focus on hues that grab your attention and make you feel a certain way.
Determine whether you lean toward warm or cold hues, or if you have any other color preferences. This will assist you in streamlining your options and developing a unified style.
Think on the lighting: both the natural and artificial light in the room. Colors may look very different depending on the lighting. To make sure you’re making the right decision, try viewing paint swatches in a variety of lighting conditions.
After you’ve thought about your tastes and the lighting in your space, as well as obtained inspiration, the fifth step is to design a color palette. Select one dominant hue, two or three adjacent hues, and a third hue to use as an accent.
You should try out a few paint samples on the walls or other surfaces you wish to paint before settling on a final color choice. By doing so, you may observe how the hues blend with the surrounding environment.
7: Take a step back and take stock of the ambiance your color palette has generated. Does it fit in with the mood you want to create in the space? If required, make corrections.
Once you’ve settled on a color scheme you like, you can finish your paint and supply selections and get to work on your do-it-yourself paint décor.
By carefully following these instructions, you will be able to select the ideal color scheme for your do-it-yourself paint decor project and produce a stunning result.
2.3. Applying the base coat
The success of a dramatic film relies heavily on the depth of its characters. The viewer becomes immersed in the story on an emotional level due to the growth and change of the characters. Creating multidimensional characters who readers may identify with helps readers feel more invested in the story’s outcomes.
Characters in a drama film go on an adventure of discovery and development. Their values, principles, and connections to others are put to the test by the difficulties they face. The plot develops and the characters grow as they confront their problems and triumph over adversity.
Not only does the main character, but also secondary ones, need to grow as people. Each character’s storyline is significant and adds something to the story as a whole. The tale is driven by the characters and their decisions, goals, and responses.
Writers need to make characters who are complicated and multifaceted in order to achieve fascinating character development. Characters need to be believable and human by having attributes like strengths, faults, foibles, and wants. Their problems and conflicts, as well as their growth and evolution, should be on display for the audience.
Additionally, the film’s topic and tone should be reflected in the characters’ growth. The story’s message and ultimate goal should be reflected in the path taken by the protagonist and antagonist. Whether the story is about second chances, love, loss, or finding oneself, these themes should permeate the characters and be explored by them.
In conclusion, a drama film relies heavily on the growth of its characters. It gives the narrative energy and helps readers identify with the characters. Writers can capture the attention of their audiences and lead them on a path of self-discovery and development if the characters they present are complex yet believable.
2.4. Creating patterns and designs
Creating patterns and designs for DIY paint decor is a fun and creative way to give your home a unique and personalized makeover. Whether you’re an experienced artist or just starting out, there are plenty of techniques and ideas to explore. Follow this step-by-step guide to unleash your creativity and transform your living space.
1. Gather Inspiration: Start by browsing through magazines, websites, and social media platforms for design inspiration. Look for patterns, color combinations, and styles that resonate with you.
2. Sketch Your Ideas: Once you have some inspiration, grab a sketchbook and start doodling your ideas. Experiment with different shapes, lines, and textures. Don’t worry about perfection at this stage; it’s all about brainstorming.
3. Choose Your Base Color: Select a base color that will serve as the background for your design. This color will set the tone for the entire decor. Consider the mood you want to create in the room.
4. Prep the Surface: Clean and prepare the surface you’ll be painting on. This could be a wall, furniture, or even a canvas. Make sure it’s smooth and free of any dirt or imperfections.
5. Create a Grid: Use a measuring tape and a level to create a grid on the surface. This will help you maintain symmetry and proportion in your design. Lightly pencil in the grid lines.
6. Start Painting: Begin by painting the base color onto the surface. Use a roller or brush, depending on the size of the area. Apply even coats and let each layer dry completely before moving on.
7. Add Patterns and Designs: Once the base color is dry, it’s time to add your patterns and designs. Use stencils, brushes, or even your own freehand skills to create shapes, lines, and textures. Experiment with different techniques and tools.
8. Layering and Details: Don’t be afraid to layer different patterns and designs to create depth and visual interest. Add details and highlights to make your decor truly unique.
9. Finishing Touches: Once you’re satisfied with your design, let the paint dry completely. Then, apply a clear coat or varnish to protect the surface and give it a polished look.
10. Enjoy Your DIY Paint Decor: Once everything is dry and cured, it’s time to display your masterpiece. Hang it on the wall, place it on a shelf, or incorporate it into your home decor in any way you like. Step back and admire your creative home makeover!
Remember, the key to successful DIY paint decor is to have fun and let your imagination run wild. Don’t be afraid to take risks and try new techniques. Happy painting!
2.5. Adding finishing touches
Putting the finishing touches on any DIY paint décor project is crucial. The final touches of your creative home makeover can make a world of a difference. To assist you in putting the finishing touches on your paper, here is a step-by-step guide:
Before adding any final touches, ensure sure the painted surfaces are thoroughly cleaned and prepared. Get rid of any debris and wait for the paint to dry before touching it up.
Select accents that fit in with the overall design of the area, both in terms of color and style. Decorative wallpaper, stencils, decals, and other wall embellishments fall within this category.
If you want to give your walls a little more pizzazz, consider installing decorative trimmings. The margins of the walls can be lined with them, or they can be used to make patterns or borders.
You may easily make elaborate designs and patterns on your walls using stencils and decals. Different sizes and shapes make it possible to adapt them to any space’s aesthetic needs.
5 Try out several wallpaper designs; the right wallpaper can make any area feel special. Try to find one-of-a-kind prints or textures that complement the style of your room.
If you want your walls to look aged or rustic, imitation finishes like distressing and antiquing are options to consider. Try out a variety of approaches until you find one that produces the desired result.
Crown molding and chair rails are only two examples of decorative moldings that can be added to a space to make it look more elegant and finished. They are decorative and functional additions to any building.
The final step in making your freshly painted walls feel more like home is to hang artwork, photographs, or mirrors. These features can be focal points and enhance the room’s appeal.
With this comprehensive how-to, you’ll be able to put the finishing touches on any DIY paint décor project and give your home a makeover that’s as unique as you are.
3. DIY Paint Decor Ideas for Different Rooms
Painting is a simple and inexpensive way to update the look of your house. You can make every area in your house more chic and unique with just a little bit of imagination and some do-it-yourself abilities. If you’re looking for some color and design inspiration, check out these 10 do-it-yourself paint decor ideas.
One way to inject some much-needed color into a room is to paint an accent wall a striking color. This will immediately become the focus of attention and a point of interest in the room.
You may paint a wall with a beautiful ombre effect by using progressively darker and lighter hues of the same color. This method makes any space feel more three-dimensional.
Make your walls stand out with stenciled patterns that are both one-of-a-kind and detailed. The options are virtually limitless, ranging from geometric patterns to floral motifs.
4. Chalkboard Wall: Use chalkboard paint to transform a wall into a practical and entertaining chalkboard. The kitchen, the office, or the playroom could all use something like this.
Vertical or horizontal stripes painted on the walls can give a place a sophisticated look. This technique can be used to make a room appear larger or to raise the ceiling.
Sixth, two-tone walls can be created by painting the lower part of a wall a different color than the upper half. This is perfect for living areas, bedrooms, and dining rooms.
You may give your old furniture a new look by stenciling designs or patterns onto it. Any object can be given more character and flair by using this technique.
Make a bold statement by painting your door a bright, eye-catching hue. The visual appeal of your house could be greatly improved in an instant.
Don’t forget to decorate the ceiling! You can make it the focal point of any room by painting it a contrasting color or accessorizing it with something unexpected.
Floor Painting If you’re up for some risk, you might want to try painting your flooring. This is a quick and easy way to update any room with a clean and contemporary aesthetic.
DIY paint decorating ideas like these are only the beginning. Create a space that is uniquely you by having fun trying out new color palettes, wallpaper patterns, and other DIY projects.
3.1. Living room
The living room is the focal point of many households, where members of the household and their guests congregate for leisure and conversation. DIY paint decor ideas are a great way to give the room a personal touch and set the mood you want to achieve. You may completely change the vibe of your living space by simply painting the walls or some new furnishings. There are a lot of different ways to use paint as decoration, whether you want bright and vivid hues or more subdued tones. Let your imagination run wild as you give your living room a facelift, complete with painted accent walls and repurposed furniture.
3.2. Bedroom
The bedroom is a haven of refuge and rejuvenation for many people. DIY paint décor ideas can give your bedroom a whole new feel and style. With only a few coats of paint and some imagination, you can give your bedroom a whole new look and feel while spending very little money.
Painting an accent wall is one option. Pick a vivid hue that will stand out while still blending in with the rest of your bedroom’s design. This is a quick way to make a space feel more complete. Ceiling paint is another option to consider. When combined with low lighting, a painted ceiling may make a room feel warm and inviting.
You can also experiment with stencils if you like. You can decorate your bedroom walls with stencils to make patterns or designs. Using your imagination in this way can be a great deal of joy. Sponge painting and fake finishes are just two examples of how you may play around with texture.
Bedroom sets are often overlooked. Give your old furniture a new coat of paint before you go shopping for replacements. You might choose a hue that complements the rest of your bedroom, or you can go with a bold contrast.
Finally, remember the importance of accessorizing. Frames, mirrors, and other tiny decorative pieces can be painted to create a consistent theme. Using this method, you may inject your bedroom with some much-needed color and character.
Make your bedroom more comfortable and inviting with these simple paint décor ideas. Have some fun with the painting process and see how your bedroom transforms into an expression of your unique taste.
3.3. Kitchen
It’s common to refer to the kitchen as “the heart” of the house because it’s where family and friends congregate to share meals and stories. Painting may do wonders for updating the look of your kitchen. You can make your kitchen more presentable and comfortable with some imagination and do-it-yourself abilities. Several sections of the kitchen can benefit from a fresh coat of paint; here are some suggestions:
First, give your cabinets a new coat of paint to make your kitchen feel more modern. Pick a shade that harmonizes with the rest of your kitchen, and think about investing in high-quality, long-lasting paint.
A kitchen with a colorful backsplash is a kitchen with character and style. You can paint the backsplash a striking color or add a stenciled design. This easy do-it-yourself activity can have a significant effect.
You may make your kitchen island stand out by painting it a different color if you have one. Pick a shade that both draws attention and harmonizes with the current kitchen scheme.
Painting the pantry door will give your kitchen an extra splash of color. This is a creative approach to adding a splash of color to the room.
Fifth, the roof: Don’t overlook the roof! Changing the color of the ceiling or adding a pattern can make the room feel more alive and offer visual interest.
If your kitchen includes a dining area, try using a warm, inviting color on the walls. A warm and welcoming environment can be created, perfect for enjoying a meal.
If your kitchen features open shelving, consider adding a pop of color by painting the back wall of the shelves a different color. This can give your plates and other decorative items a more striking appearance.
Make your kitchen windows seem new again by painting the window frames. Pick something that goes well with the kitchen’s current color scheme.
Kitchen floors made of wood or concrete should be painted with a high-quality floor paint to protect them from wear and tear. Your kitchen can get a fresh new look with this.
Tenth, don’t neglect the little details when decorating your kitchen. For a finished effect, think about painting the cabinet pulls and the window and door casings to match.
Make your kitchen seem brand new without spending a fortune by using these do it yourself paint decor ideas. Prepare to feel at home in a newly decorated room that exudes your unique sense of style.
3.4. Bathroom
It’s always a good idea to give the bathroom a new coat of paint every so often. In addition to updating the bathroom’s aesthetic, a fresh coat of paint can help set the mood for a soothing and comforting experience. DIY paint décor ideas abound, and can make even the most boring bathroom look chic and modern. Some suggestions are as follows:
First, add some color to the bathroom by painting an accent wall a bright hue. Use painter’s tape to make crisp lines and select a color that will go well with the existing furnishings.
Painting the upper part of the walls in a lighter hue and the lower half in a darker shade creates a contemporary and elegant effect. This might make the bathroom seem taller and more open.
You may give your bathroom a unique look and feel by stenciling designs on the walls. If you want to stand out from the crowd, try using a stencil with a geometric pattern or a floral design.
4.Ombre Effect: Paint the walls in a gradation of colors to get a beautiful ombre effect. It’s best to begin at the bottom with a darker color and work your way up to a lighter one. The result might be aesthetically pleasing and soothing.
Fifth, for a more playful and participatory bathroom, paint one wall with chalkboard paint. Use it as a blank canvas on which to jot down motivational sayings, important dates, or whatever else strikes your fancy.
Walls with stripes are a sophisticated touch that can be added to any room. Use painter’s tape to make straight lines and select two colors that complement one another. The bathroom’s aesthetic might be greatly improved by doing this.
Renovate your cabinets by painting them a different color for a brand new look. This is a simple way to make the bathroom seem and feel more modern right away. If you want your cabinets to look great for a long time, you might want to choose paint that is made especially for that purpose.
8. Refresh the vanity by painting it a bright color to make it stand out in the bathroom. This is a great way to put a unique spin on an otherwise boring bathroom. You may add a touch of class by replacing the hardware.
Don’t forget to decorate the ceiling! Make your bathroom stand out with a ceiling that features a bold color or creative pattern. As a result, the space may have a
3.5. Kids’ room
When it comes to decorating a kids’ room, painting can be a fun and creative way to transform the space. Whether you have a toddler or a teenager, there are plenty of DIY paint decor ideas that can add personality and style to their room. From vibrant colors to whimsical designs, here are some creative paint ideas for different areas of a kids’ room:
1. Accent Wall: Create a focal point in the room by painting one wall in a bold and vibrant color. This can instantly liven up the space and make it more visually appealing. Consider using colors like bright blue, sunny yellow, or playful pink.
2. Chalkboard Wall: Turn a section of the room into a chalkboard wall where kids can unleash their creativity. Use chalkboard paint to create a surface that can be written on and erased easily. This is not only a great way to add a unique element to the room but also encourages artistic expression.
3. Stenciled Patterns: Use stencils to create patterns on the walls, such as stars, polka dots, or geometric shapes. This adds visual interest and can be a fun DIY project to do with your child. You can choose contrasting colors to make the patterns stand out or opt for a more subtle look with monochromatic hues.
4. Wall Murals: Transform a plain wall into a captivating masterpiece by painting a mural. Whether it’s a nature scene, a favorite cartoon character, or a fantasy world, a wall mural can bring imagination to life. Consider hiring a professional artist or try your hand at painting it yourself.
5. Ombre Effect: Create a beautiful gradient effect on the walls using different shades of the same color. This technique adds depth and dimension to the room and gives it a trendy and modern look. You can start with a lighter shade at the top and gradually transition to a darker shade at the bottom.
6. Striped Walls: Add a touch of elegance and playfulness by painting stripes on the walls. Vertical stripes can make the ceiling appear higher, while horizontal stripes can make the room look wider. Choose colors that complement each other and alternate between light and dark shades.
7. Glow-in-the-Dark Paint: Create a magical atmosphere in the room by using glow-in-the-dark paint. Paint stars, planets, or other celestial objects on the ceiling or walls, and watch them glow at night. This can be a fun and soothing feature for kids who may be afraid of the dark.
8. Personalized Name Wall: Paint your child’s name on the wall using stencils or freehand. You can choose their favorite colors or incorporate a theme that reflects their interests, such as sports or animals. This adds a personal touch and makes the room feel truly their own.
9. Colorful Furniture: Instead of painting the walls, consider painting the furniture in vibrant colors. This can instantly brighten up the room and make it more playful. From bookshelves to dressers, adding a pop of color to the furniture can make a statement.
10. Ceiling Accents: Don’t forget about the ceiling! Paint the ceiling in a fun color or add accents like clouds, stars, or even a mural. This can create an interesting visual element when kids lie down and look up, adding a sense of wonder to the room.
These DIY paint decor ideas for a kids’ room are sure to inspire creativity and make the space truly unique. Get ready to transform their room into a colorful and imaginative haven!
Conclusion
Last but not least, here are ten unique ways to use paint as decoration that can completely transform your home. There are countless ways to use these concepts to change the look and feel of a space, whether you want to highlight an existing feature or introduce a new one. Prepare to let your imagination run wild while reaping the rewards of a job well done with these low-cost, low-stress DIY projects.


These 10 innovative and imaginative DIY home decor ideas from [object Object] provide a refreshing approach to enhancing ones living…