
Looking to spruce up your home with a fresh new look? Look no further! In this article, we will explore 10 amazing DIY paint decor ideas that will help you transform your home into a stylish and inviting space. Whether you’re a seasoned DIY enthusiast or just starting out, these ideas are sure to inspire your creativity and add a personal touch to your living space. From accent walls to furniture makeovers, get ready to unleash your inner artist and give your home a stunning makeover with these easy and affordable paint decor ideas.
- 1. Introduction
- 1.1. Benefits of DIY Paint Decor
- 1.2. Choosing the Right Paint
- 1.3. Preparing the Surface
- 1.4. Equipment and Tools Needed
- 1.5. Safety Precautions
- 2. Step-by-Step Guide
- 2.1. Selecting the Paint Colors
- 2.2. Preparing the Paint
- 2.3. Applying the Base Coat
- 2.4. Creating Patterns or Designs
- 2.5. Adding Finishing Touches
- 3. Tips and Tricks
1. Introduction
Are you looking to give your home a fresh new look without breaking the bank? Look no further! In this article, we will explore 10 DIY paint decor ideas that will transform your home into a stylish and personalized space. Whether you’re a beginner or a seasoned DIY enthusiast, these ideas are easy to follow and will help you create a stunning and unique look for any room in your house. So, grab your paintbrushes and let’s get started on your home transformation journey!
1.1. Benefits of DIY Paint Decor
DIY paint decor is a fantastic way to add a personal touch to your home while saving money. By taking on these projects yourself, you have the freedom to choose the colors, patterns, and techniques that best suit your style and preferences. Not only does DIY paint decor allow you to unleash your creativity, but it also provides numerous benefits for transforming your living space. In this article, we will explore the various advantages of DIY paint decor and how it can breathe new life into your home.
1.2. Choosing the Right Paint
Choosing the right paint for your DIY paint decor projects is crucial in achieving the desired transformation for your home. The color and type of paint you choose can significantly impact the overall look and feel of a room. With so many options available in the market, it can be overwhelming to make the right decision. This section will guide you through the important factors to consider when selecting paint for your DIY projects. By the end, you will have a better understanding of how to choose the perfect paint that will bring new life to your home.
1.3. Preparing the Surface
Before you start any paint decor project, it’s crucial to properly prepare the surface you’ll be working on. This step is often overlooked, but it plays a significant role in achieving a professional and long-lasting finish. Preparing the surface ensures that the paint adheres well, hides imperfections, and creates a smooth and even surface to work on.
To prepare the surface, you will need to clean it thoroughly by removing any dirt, dust, or grease. Use a mild detergent and water solution to wash the surface, and then rinse it off with clean water. If there are any stains or marks, you may need to use a stain remover or sandpaper to smooth out the surface.
Once the surface is clean and dry, inspect it for any cracks, holes, or uneven areas. Fill in any gaps or cracks with a suitable filler or putty and use sandpaper to level the surface. This step ensures that the final result will be flawless and free from any visible imperfections.
After filling and sanding, it’s important to prime the surface before applying the paint. Primer helps to create a uniform base and improves the paint’s adhesion. Choose a primer that is suitable for the type of surface you’re working on, whether it’s wood, drywall, or metal.
By taking the time to properly prepare the surface, you’ll ensure that your DIY paint decor project turns out beautifully and lasts for years to come. So, don’t skip this important step and enjoy the transformation of your home with these creative and budget-friendly ideas!
1.4. Equipment and Tools Needed
When it comes to DIY paint decor ideas, having the right equipment and tools is essential. Whether you are a beginner or an experienced DIY enthusiast, having the necessary tools will help you achieve professional results. In this section, we will discuss the equipment and tools that are needed for transforming your home with paint decor.
1. Paint Brushes: A good set of paint brushes in various sizes is a must-have. Make sure to have both synthetic and natural bristle brushes for different types of paints and finishes.
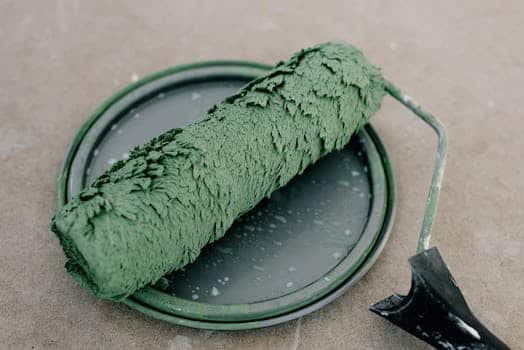
2. Paint Rollers: Rollers are great for covering large surfaces quickly and evenly. Look for rollers with different nap lengths to achieve different textures.
3. Paint Trays: These shallow containers are used to hold the paint while you work. Make sure to choose sturdy trays that are easy to clean.
4. Drop Cloths: Protect your floors, furniture, and other surfaces with drop cloths. They will catch any paint drips or spills and make cleanup much easier.
5. Painter’s Tape: Use painter’s tape to create clean and crisp lines. It is perfect for masking off areas that you don’t want to paint.
6. Sandpaper: Prepare your surfaces by sanding them before painting. Sandpaper helps to smooth out any imperfections and creates a better surface for paint adhesion.
7. Putty Knife: A putty knife is useful for filling in holes, cracks, and other surface imperfections. It is also used for scraping off old paint.
8. Paint Scraper: If you have old paint that needs to be removed, a paint scraper is essential. It helps to strip off old layers of paint easily.
9. Paint Sprayer: If you have a large area to cover or want a smooth and even finish, a paint sprayer can be a time-saving tool.
10. Cleaning Supplies: Don’t forget to have cleaning supplies on hand. You will need them to clean your brushes, rollers, trays, and other equipment after each use.
Having these essential equipment and tools will make your DIY paint decor projects much easier and enjoyable. Now that you know what you need, let’s move on to the next section where we will explore some exciting paint decor ideas for transforming your home.
1.5. Safety Precautions
When it comes to transforming your home with DIY paint decor ideas, it’s important to prioritize safety precautions. Painting can involve hazardous materials and techniques that require careful handling to ensure the well-being of both yourself and your home. This section will provide you with essential safety precautions to follow before, during, and after your paint decor projects. By taking these precautions, you can enjoy a successful and safe experience while beautifying your living space.
2. Step-by-Step Guide
Are you tired of looking at the same old walls in your home? Do you want to give your living space a fresh new look without breaking the bank? Look no further! In this step-by-step guide, we will explore 10 DIY paint decor ideas that will transform your home into a stylish and inviting space. Whether you’re a seasoned DIY enthusiast or a beginner, these ideas are easy to follow and will unleash your inner creativity. So, grab your paintbrushes and let’s get started!
2.1. Selecting the Paint Colors
When it comes to transforming your home with a fresh coat of paint, selecting the right colors is crucial. The paint colors you choose can greatly impact the overall look and feel of your space. To help you make the best decision, we have put together a step-by-step guide on selecting the perfect paint colors for your home.
Step 1: Assess the Space
Start by assessing the space you plan to paint. Consider the size of the room, the amount of natural light it receives, and the existing furniture and decor. This will give you a better understanding of the color palette that will work well in the room.
Step 2: Determine the Mood
Think about the mood you want to create in the room. Are you looking for a calm and serene atmosphere or a vibrant and energetic one? Different colors evoke different emotions, so choose accordingly. For example, blues and greens create a sense of tranquility, while yellows and oranges bring in warmth and energy.
Step 3: Consider the Lighting
Lighting plays a crucial role in how colors appear on the walls. Natural light can make colors look different compared to artificial light. Take into account the direction of the windows and the type of lighting fixtures in the room. It’s a good idea to test paint swatches on the walls and observe them at different times of the day to see how they look under various lighting conditions.
Step 4: Create a Color Scheme
Once you have assessed the space, determined the mood, and considered the lighting, it’s time to create a color scheme. Choose a primary color that will be the main focus and then select complementary or contrasting colors to add depth and interest. You can use a color wheel or consult with a professional to ensure your color scheme is visually appealing.
Step 5: Test Paint Samples
Before committing to a specific color, it’s essential to test paint samples. Purchase small cans of the colors you are considering and apply them to a small section of the wall. Leave the samples for a few days and observe how they look in different lighting conditions. This will help you make an informed decision.
Step 6: Seek Professional Advice
If you’re unsure about your color choices or need expert guidance, don’t hesitate to seek professional advice. Interior designers or color consultants can provide valuable insights and help you narrow down your options.
By following this step-by-step guide, you can confidently select the perfect paint colors for your home and transform it into a space that reflects your style and personality.
2.2. Preparing the Paint
Preparing the Paint
Before you embark on your DIY paint decor project, it is essential to properly prepare the paint. By following these step-by-step instructions, you can ensure a smooth and successful painting experience.
1. Gather your materials: Start by gathering all the necessary materials such as paintbrushes, rollers, paint trays, drop cloths, painter’s tape, sandpaper, and primer.
2. Clean the surfaces: Thoroughly clean the surfaces you intend to paint. Remove any dirt, dust, or grease using a mild detergent and water. Allow the surfaces to dry completely.
3. Repair any damages: Inspect the surfaces for any damages or imperfections. Fill in cracks, holes, or dents using a suitable filler or spackling compound. Smooth out the repaired areas with sandpaper.
4. Sand the surfaces: Lightly sand the surfaces to create a better bonding surface for the paint. This step helps remove any existing paint flakes or rough spots.
5. Apply primer: Apply a coat of primer to the surfaces. Primer helps the paint adhere better and provides a uniform base for the topcoat. Allow the primer to dry as per the manufacturer’s instructions.
Once you have completed these steps, you are ready to move on to the fun part – transforming your home with beautiful DIY paint decor ideas. Remember to follow the specific instructions for each paint project and enjoy the process of creating a fresh new look for your living space.
2.3. Applying the Base Coat
Applying the Base Coat:
When it comes to painting, applying a base coat is an essential step in achieving a professional-looking finish. This coat serves as the foundation for the topcoat and helps to ensure better adhesion and durability. Here is a step-by-step guide to help you apply the base coat for your DIY paint decor ideas:
1. Prepare the surface: Before applying the base coat, make sure the surface is clean, dry, and free from any dust or debris. Use a mild detergent and water to clean the surface, and let it dry completely.
2. Repair imperfections: Take a close look at the surface and repair any cracks, holes, or other imperfections using spackle or filler. Sand the repaired areas until they are smooth and level with the rest of the surface.
3. Prime the surface: If the surface is bare or has been previously painted with a different color, it’s advisable to apply a primer before the base coat. Primer helps to seal the surface and provides a better surface for the base coat to adhere to.
4. Choose the right base coat: Select a base coat color that complements your overall paint decor idea. Consider the mood and ambiance you want to create in the room. It’s recommended to test the color on a small area or a sample board to ensure it looks as expected.
5. Gather the necessary tools: To apply the base coat, you’ll need a paint roller, a paintbrush, a roller tray, and painter’s tape. Make sure you have all the tools ready and easily accessible.
6. Start with the edges: Begin by cutting in the edges of the surface using a paintbrush. Apply a thin and even coat of the base color along the edges, taking care not to overlap onto adjacent surfaces.
7. Roll the base coat: Pour the base coat paint into the roller tray and load the paint roller evenly. Start rolling the base coat onto the surface, working in small sections. Use long, smooth strokes to ensure an even application.
8. Maintain a wet edge: To avoid visible lines or streaks, always work from a wet edge. This means overlapping each new section with the previous one while the paint is still wet. Continue rolling until the entire surface is covered with the base coat.
9. Allow drying time: Follow the recommended drying time mentioned on the paint can. It’s crucial to allow the base coat to dry completely before applying the topcoat or any additional decorative techniques.
By following these step-by-step instructions, you can successfully apply the base coat for your DIY paint decor ideas. This will create a solid foundation for your paint project and ensure a professional and long-lasting finish.
2.4. Creating Patterns or Designs
Creating Patterns or Designs:
Step 1: Prepare the surface by cleaning it thoroughly and ensuring it is dry.
Step 2: Choose the pattern or design you want to create. It can be geometric shapes, floral motifs, or even abstract patterns.
Step 3: Gather the necessary tools and materials. This may include stencils, painter’s tape, brushes, sponges, and different colors of paint.
Step 4: If using stencils, secure them onto the surface using painter’s tape. Make sure they are aligned properly.
Step 5: Apply the base coat of paint evenly on the surface. This will serve as the background for your pattern.
Step 6: Once the base coat is dry, start adding your chosen pattern or design using stencils, painter’s tape, or freehand techniques.
Step 7: Take your time and be precise while creating the pattern. Use different colors of paint to add depth and dimension.
Step 8: Allow the paint to dry completely before removing any stencils or painter’s tape.
Step 9: If desired, apply a clear coat of varnish or sealant to protect the painted surface.
Step 10: Step back and admire your beautifully transformed home with unique patterns and designs!
2.5. Adding Finishing Touches
Once you have completed the main steps of your DIY paint decor project, it’s time to add the finishing touches. This is the stage where you can really personalize and enhance the overall look and feel of your home. Here are some tips to help you add those final details:
1. Accentuate with decorative trim: Consider adding decorative trim or molding to highlight certain areas of the room. This can create a more polished and sophisticated look.
2. Incorporate wall art: Hang some artwork or create a gallery wall to bring life to your painted walls. Choose pieces that complement the color scheme and style of the room.
3. Install stylish light fixtures: Upgrade your lighting fixtures to add a touch of elegance and functionality to the space. Whether it’s a chandelier, pendant lights, or wall sconces, make sure they align with the overall theme.
4. Introduce decorative accessories: Place decorative accessories such as vases, candles, or sculptures on shelves, mantels, or tables. These small details can make a big difference in the overall aesthetic.
5. Consider window treatments: Dress up your windows with curtains, blinds, or shades that coordinate with the room’s color palette. This not only adds a finishing touch but also provides privacy and controls natural light.
6. Arrange furniture strategically: Position your furniture in a way that maximizes space and creates a comfortable and inviting atmosphere. Take into account the flow of the room and ensure that the furniture arrangement complements your newly painted walls.
Remember, the finishing touches can truly transform your DIY paint decor project into a stunning and cohesive home design. Take your time to select the right elements and arrange them thoughtfully to achieve the desired effect.
3. Tips and Tricks
1. Start with a clean canvas: Before embarking on any paint decor project, make sure to clean the surfaces thoroughly. This will ensure a smooth and even application of paint.
2. Use painter’s tape: To create clean lines and avoid any accidental paint smudges, use painter’s tape to mask off areas that you don’t want to be painted.
3. Experiment with different painting techniques: Don’t be afraid to try out various painting techniques like sponge painting, stenciling, or even using a rag to create unique textures and patterns.
4. Choose the right colors: Consider the overall theme and style of your home when selecting paint colors. Opt for colors that complement your existing furniture and decor.
5. Create an accent wall: If you want to add a pop of color or create a focal point in a room, painting one wall in a bold shade can be a great idea.
6. Invest in quality brushes and rollers: Good quality painting tools can make a huge difference in the final result. Invest in high-quality brushes and rollers for a smooth and professional-looking finish.
7. Don’t forget about primer: Using a primer before painting can help improve adhesion and ensure that the paint color appears true to its shade.
8. Take your time and be patient: Painting can be a time-consuming process, so it’s important to be patient. Take breaks when needed and allow each coat of paint to dry completely before applying the next.
9. Protect your floors and furniture: Place drop cloths or old sheets to protect your floors and furniture from any paint splatters.
10. Have fun and get creative: Remember that DIY paint decor is all about expressing your creativity and personal style. Don’t be afraid to think outside the box and have fun with your projects!
3.1. Experiment with Different Techniques
Experiment with Different Techniques
When it comes to DIY paint decor ideas, don’t be afraid to experiment with different techniques. There are several ways you can transform your home using paint, and trying out various techniques can help you find the perfect style for your space. Here are some tips and tricks to get you started:
1. Color Blocking: Create bold and modern statement walls by painting different sections of a wall in contrasting colors. This technique adds depth and visual interest to any room.
2. Ombre Effect: Gradually blending one color into another, the ombre effect can create a stunning and subtle transition on walls or furniture. This technique works great for creating a calming ambiance in bedrooms or living areas.
3. Stenciling: Use stencils to add intricate patterns or designs to your walls, furniture, or accessories. Stenciling is a simple yet effective way to add a touch of uniqueness to your decor.
4. Distressing: Give your furniture or cabinets a vintage or rustic look by distressing them. This technique involves sanding or scraping off some of the paint to reveal the underlying layers, creating a weathered and worn appearance.
5. Faux Finishes: Experiment with faux finishes like marble, woodgrain, or metallic to create a high-end look without the hefty price tag. These finishes can be achieved through various techniques such as sponging, ragging, or glazing.
6. Textured Walls: Add depth and dimension to your walls by using textured paints or techniques like sponge painting, combing, or stippling. Textured walls can give a unique and artistic touch to any room.
Remember, the key to successful DIY paint decor is to have fun and be creative. Don’t be afraid to try new techniques and embrace your own personal style. With a little bit of practice and experimentation, you can transform your home into a beautiful and personalized space.
3.2. Using Stencils or Templates
Using stencils or templates is a great way to add a touch of creativity and personalization to your DIY paint decor projects. Whether you are a seasoned DIY enthusiast or just starting out, stencils and templates can help you achieve professional-looking results. Here are some tips and tricks to make the most out of using stencils or templates:
1. Choose the right stencil or template for your project. There are many different designs and patterns available, so pick one that complements your home decor style.
2. Prepare your surface before using the stencil or template. Make sure it is clean, smooth, and free from any dust or debris.
3. Secure the stencil or template in place using painter’s tape or adhesive spray. This will prevent it from moving or shifting while you are painting.
4. Use a stencil brush or sponge to apply the paint. Dip it lightly into the paint and then dab off any excess before applying it to the stencil or template.
5. Apply the paint evenly and with a gentle tapping motion. This will help prevent any bleeding or smudging of the design.
6. If you are using a multi-layered stencil or template, let each layer dry completely before moving on to the next one.
7. Clean the stencil or template immediately after use to prevent the paint from drying and clogging the design.
8. Experiment with different color combinations and techniques to create unique and eye-catching designs.
Using stencils or templates can be a fun and creative way to transform your home with paint decor. So grab your brushes, stencils, and templates, and let your imagination run wild!
3.3. Mixing and Matching Colors
Mixing and matching colors is a great way to add personality and style to your home decor. By combining different hues and tones, you can create a visually stunning and cohesive look that reflects your unique taste. Here are some tips and tricks for successfully mixing and matching colors in your DIY paint decor projects:
1. Start with a color palette: Before diving into your project, choose a color palette that includes a few main colors and some complementary shades. This will help guide your color choices and ensure a harmonious result.
2. Play with contrast: Experiment with contrasting colors to create visual interest. Pairing warm and cool tones or using complementary colors like blue and orange can make a bold statement.
3. Use the 60-30-10 rule: This rule suggests using a dominant color for 60% of the space, a secondary color for 30%, and an accent color for 10%. This balance will create a well-balanced and visually pleasing composition.
4. Consider the mood: Different colors evoke different moods and emotions. Take into account the atmosphere you want to create in each room. For example, cool colors like blues and greens can promote relaxation, while warm colors like reds and yellows can create a cozy and energetic vibe.
5. Test before committing: Before painting an entire wall or room, test your chosen colors on a small area or create a mood board. This will give you a better idea of how the colors will look together and allow for adjustments if needed.
6. Use color wheel guidance: The color wheel can be a valuable tool when choosing complementary or analogous colors. Complementary colors are opposite each other on the wheel and create a vibrant contrast, while analogous colors are next to each other and offer a more harmonious blend.
7. Consider the lighting: Keep in mind that lighting plays a significant role in how colors appear. Natural light can enhance certain hues, while artificial light can alter the perception of colors. Take this into account when making your color choices.
By following these tips and tricks, you can confidently mix and match colors to transform your home with DIY paint decor ideas. Get creative and have fun with your color combinations to create a space that truly reflects your personal style.
3.4. Adding Texture or Dimension
Adding texture or dimension to your home decor can greatly enhance its visual appeal and create a more interesting and dynamic space. Here are some tips and tricks to help you achieve this effect:
1. Use textured paint: Consider using textured paint in different shades or patterns to create a unique and visually appealing wall or furniture finish. This can add depth and dimension to your living space.
2. Incorporate textured fabrics: Choose fabrics with interesting textures, such as velvet, linen, or faux fur, for your throw pillows, curtains, or upholstery. These textures can add richness and tactile interest to your home decor.
3. Install textured wallpapers: Opt for wallpapers with embossed patterns or textured surfaces to create a focal point on one or more walls. This can instantly transform the look and feel of a room.
4. Experiment with wall panels: Install decorative wall panels made of materials like wood, stone, or metal to add texture and architectural interest to your walls.
5. Create a gallery wall: Mix and match different types of artwork, photographs, and wall hangings to create a visually appealing gallery wall. Vary the sizes, frames, and textures of the pieces to add depth and dimension.
6. Add textured accessories: Incorporate accessories like woven baskets, textured vases, or ceramic sculptures to introduce different textures into your home decor. These can be placed on shelves, coffee tables, or countertops.
7. Utilize 3D wall art: Hang three-dimensional wall art pieces, such as metal sculptures or geometric wall panels, to create a visually striking focal point.
8. Experiment with paint techniques: Try using techniques like sponging, stenciling, or rag rolling to create textured effects on your walls. These techniques can add depth and interest to your painted surfaces.
9. Use decorative mirrors: Hang mirrors with textured frames or intricate designs to not only add dimension but also to reflect light and make your space appear larger.
10. Mix different materials: Combine materials like wood, glass, metal, and fabric in your furniture and decor choices. This combination of textures can create a visually appealing and eclectic look.
By incorporating these tips and tricks, you can easily add texture and dimension to your home decor, transforming it into a unique and visually captivating space.
3.5. Incorporating Metallic or Glitter Accents
Incorporating Metallic or Glitter Accents:
Adding metallic or glitter accents can instantly transform the look and feel of any room in your home. Whether you prefer a touch of glamour or a more subtle shimmer, these accents can enhance the overall aesthetic and create a visually stunning space. Here are some tips and tricks for incorporating metallic or glitter accents into your paint decor projects:
1. Choose the right paint: Look for metallic or glitter-infused paint options that are specifically designed for interior use. These paints contain reflective particles that catch the light and create a dazzling effect.
2. Start small: If you’re new to using metallic or glitter accents, start by incorporating them in small areas or accessories. Consider painting a single accent wall, adding metallic stripes to an existing piece of furniture, or using glitter-infused paint on a decorative item.
3. Mix and match: Experiment with different metallic shades and textures to create a unique and personalized look. Combine gold and silver accents for a chic and sophisticated vibe, or mix metallic paints with matte finishes for a more subdued yet stylish effect.
4. Use stencils or tape: To achieve precise lines and patterns, use stencils or painter’s tape when applying metallic or glitter accents. This will help you create clean and professional-looking designs.
5. Consider the lighting: Keep in mind that metallic and glitter accents tend to reflect light, so consider the natural and artificial lighting in your space. Test how the accents look under different lighting conditions to ensure you achieve the desired effect.
6. Don’t overdo it: While metallic and glitter accents can add a touch of luxury, it’s important not to overdo it. Use these accents sparingly to create focal points and visual interest without overwhelming the overall design.
Incorporating metallic or glitter accents into your paint decor projects can elevate the style and ambiance of your home. From subtle shimmer to bold statement pieces, these accents offer endless possibilities for transforming your space into a dazzling haven.
Conclusion
In conclusion, these 10 DIY paint decor ideas are sure to transform your home into a stylish and personalized space. Whether you’re looking to add a pop of color or create a calming atmosphere, these easy and creative projects will help you achieve the desired look. So grab your paintbrushes and get ready to unleash your inner artist!


5 Comments
Orelie Adelaida
1 year agoWow, I am absolutely blown away by these amazing DIY paint decor ideas! Its incredible how a simple touch of paint can completely transform a living space and give it a stylish and personalized vibe. These ideas are pure genius and I cant wait to try them out in my own home. From ombre walls to geometric patterns and even mural paintings, the possibilities are endless. I can already envision the stunning results and the envy of all my friends and family. Thank you for sharing these inspiring ideas, they have truly ignited my creativity and sparked a desire to upgrade my living space. Time to grab a paintbrush and let the artistic adventure begin!
Kit Enrichetta
1 year agoThese DIY paint decor ideas are absolutely fantastic! They offer such a great opportunity to upgrade our living spaces and make them truly unique. I love the idea of adding a stylish and personalized touch to my home. Thank you for sharing these amazing ideas!
Avis Rosene
1 year agoWow, these DIY paint decor ideas are seriously cool! I never thought that a simple paint job could make such a big difference in my living space. Its great to have some creative and personalized touches that reflect my style. Cant wait to try these out and give my home a stylish upgrade! 💁🎨
Rozanne Tsai
1 year agoThese DIY paint decor ideas are truly remarkable and offer an excellent opportunity to upgrade your living space with a touch of style and personalization. The suggestions provided in this post are not only creative but also practical, allowing homeowners to transform their homes into stunning showcases of their individuality. By implementing these ideas, you can effortlessly add a unique and personalized touch to your living space, making it truly your own. Whether you are looking to create a statement wall or add subtle accents throughout the room, these DIY paint decor ideas are sure to inspire and elevate the aesthetic appeal of your home. Dont miss out on this opportunity to enhance your living space and make it a reflection of your personal style.
Desirae Ibbetson
1 year agoWow, these DIY paint decor ideas are absolutely fantastic! I love how they can instantly upgrade my living space and add a stylish and personalized touch. Its amazing how a simple coat of paint can completely transform a room. I cant wait to try out some of these ideas and make my home feel even more special. Thank you for sharing these wonderful suggestions!