

Are you looking to give your home a stunning makeover? Look no further! In this article, we will explore 10 exciting DIY projects that will transform your living space into a gorgeous haven. From simple decor upgrades to creative furniture makeovers, we’ve got you covered. Get ready to unleash your creativity and add a personal touch to every corner of your home. Let’s dive into these inspiring projects and turn your house into a stylish sanctuary!
- 1. Introduction
- 1.1. What is DIY?
- 1.2. Benefits of DIY
- 1.3. Why choose DIY?
- 1.4. DIY vs. Hiring Professionals
- 1.5. Safety precautions for DIY projects
- 2. Getting Started with DIY Projects
- 2.1. Choosing the right DIY project
- 2.2. Gathering necessary tools and materials
- 2.3. Setting a realistic budget
- 2.4. Creating a timeline
- 2.5. Researching and planning the project
- 3. Step-by-Step Guide to DIY Success
1. Introduction
Are you tired of your home’s outdated look? Do you want to give it a fresh and stylish makeover without breaking the bank? Look no further! In this article, we will present you with 10 amazing DIY projects that will completely transform your home and make it look absolutely stunning. From simple decor ideas to furniture makeovers, these projects are perfect for anyone who wants to add a touch of beauty and elegance to their living space. So, roll up your sleeves and get ready to unleash your creativity! Let’s dive into the world of DIY home makeovers and turn your house into a gorgeous haven.
1.1. What is DIY?
DIY stands for ‘Do It Yourself.’ It refers to the practice of completing tasks or projects by oneself, without the need for professional assistance. DIY projects are popular among homeowners as they provide a sense of accomplishment and allow for personalization and creativity. In recent years, the popularity of DIY has soared, thanks to the accessibility of online tutorials, blogs, and social media platforms sharing ideas and inspiration. DIY projects can range from simple home repairs and renovations to more complex crafts and home decor projects. By undertaking DIY projects, homeowners can save money, learn new skills, and transform their living spaces into personalized havens.
1.2. Benefits of DIY
DIY, or Do-It-Yourself, projects offer numerous benefits for homeowners looking to give their homes a gorgeous makeover. By taking on these projects themselves, homeowners can save money, unleash their creativity, and customize their living spaces according to their own preferences. DIY projects also provide a sense of accomplishment and satisfaction as homeowners witness the transformation of their homes firsthand. Additionally, engaging in DIY projects allows individuals to learn new skills and gain valuable experience in various areas of home improvement. From simple decor upgrades to complex renovations, DIY projects offer endless possibilities for creating a beautiful and personalized home.
1.3. Why choose DIY?
DIY, or Do-It-Yourself, projects have gained immense popularity in recent years. More and more homeowners are opting to take on projects themselves instead of hiring professionals. But why choose DIY? There are several compelling reasons to embark on a DIY home makeover.
Firstly, DIY projects offer a sense of satisfaction and accomplishment. Taking on a project from start to finish allows homeowners to showcase their creativity and skills. It provides a unique opportunity to personalize their living space and make it truly their own.
Secondly, DIY projects can be cost-effective. By doing the work yourself, you can potentially save a significant amount of money on labor costs. Additionally, you have control over the materials and can choose more affordable options without compromising on quality.
Furthermore, DIY projects allow for flexibility and customization. You have the freedom to tailor the project to your specific preferences and needs. Whether it’s painting a room, building a piece of furniture, or installing new fixtures, DIY gives you the power to create exactly what you envision.
Lastly, engaging in DIY projects promotes learning and skill development. You can acquire new knowledge and techniques by researching and experimenting. The more DIY projects you complete, the more confident and proficient you become in various aspects of home improvement.
In conclusion, choosing to embark on a DIY home makeover can be a rewarding and fulfilling experience. It offers a sense of satisfaction, cost-effectiveness, flexibility, and opportunities for learning and skill development. So why not unleash your creativity and transform your home with DIY projects?
1.4. DIY vs. Hiring Professionals
When it comes to home makeovers, many homeowners find themselves at a crossroads – should they take on the challenge themselves or hire professionals to do the job? This decision can be a tough one, as there are pros and cons to both options. DIY projects offer the satisfaction of doing it yourself and the potential to save money, while hiring professionals ensures expertise and a polished result. In this article, we will explore the benefits and drawbacks of both DIY and hiring professionals for home makeover projects, helping you make an informed decision that suits your needs and preferences.
1.5. Safety precautions for DIY projects
When it comes to embarking on DIY projects for a gorgeous home makeover, ensuring safety precautions is paramount. Whether you are a seasoned DIY enthusiast or just starting out, following safety guidelines can help prevent accidents and injuries. Before diving into any project, it is important to equip yourself with the necessary knowledge and tools to stay safe throughout the process. This section will provide essential safety precautions to keep in mind before starting any DIY project, ensuring a successful and injury-free experience.
2. Getting Started with DIY Projects
Embarking on DIY projects can be a fun and rewarding way to give your home a stunning makeover. Whether you’re a seasoned DIY enthusiast or just starting out, there are plenty of projects that can transform your living space into a gorgeous haven. Here are 10 DIY projects that will breathe new life into your home and enhance its beauty.
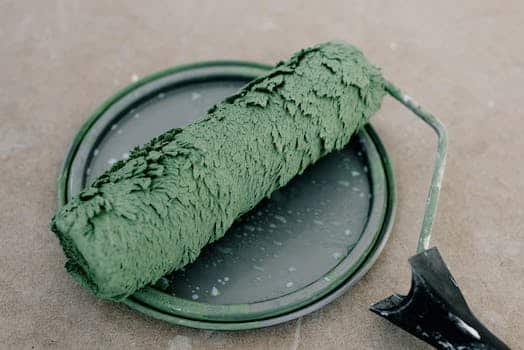
1. Paint the Walls: One of the simplest and most effective ways to freshen up your home is by giving the walls a fresh coat of paint. Choose colors that complement your existing décor and create a welcoming ambiance.
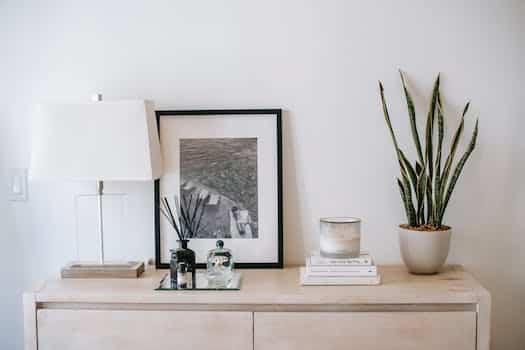
2. Create a Gallery Wall: Displaying a collection of artwork or photographs on a gallery wall can add character and personality to any room. Experiment with different frame styles and layouts to create a unique focal point.
3. Install a Backsplash: A stylish backsplash can instantly elevate the look of your kitchen or bathroom. Consider using mosaic tiles or patterned wallpaper to create a striking visual impact.
4. Refurbish Old Furniture: Instead of buying new furniture, why not breathe new life into old pieces? Sanding, painting, and reupholstering can transform outdated furniture into statement pieces that reflect your personal style.
5. Upgrade Lighting Fixtures: Swapping out old light fixtures with modern, statement-making ones can instantly update the look of any room. Opt for fixtures that provide both functionality and visual appeal.
6. Build a Bookshelf: If you’re in need of additional storage space, building a bookshelf can be a practical and stylish solution. Customize the design to fit your space and showcase your book collection or decorative items.
7. Create an Outdoor Oasis: Extend your living space by creating an inviting outdoor area. Build a deck or patio, add comfortable seating, and incorporate greenery to create a tranquil retreat.
8. Revamp the Entryway: The entryway sets the tone for the rest of your home. Add a fresh coat of paint to the front door, install a stylish doormat, and incorporate functional storage solutions to create an organized and welcoming space.
9. Design a Statement Wall: Make a bold statement by creating a feature wall in one of your rooms. Use wallpaper, stencils, or a unique paint technique to add drama and personality.
10. Add Crown Molding: Crown molding can add a touch of elegance and sophistication to any room. Install crown molding along the ceiling or above doors and windows to create a polished and finished look.
These DIY projects are just a starting point to transform your home into a stunning sanctuary. With a little creativity, patience, and dedication, you can achieve a gorgeous home makeover that reflects your personal style and enhances your living space.
2.1. Choosing the right DIY project
When it comes to embarking on a DIY project, choosing the right one is crucial. With so many options available, it’s important to select a project that aligns with your skills, interests, and desired outcome. Whether you’re a seasoned DIY enthusiast or a beginner looking to dive into the world of DIY, there are a few factors to consider when choosing the right project.
Firstly, assess your skill level and experience. If you’re new to DIY, it’s best to start with simpler projects that require basic tools and techniques. This will help you build confidence and develop your skills gradually. On the other hand, if you have some experience under your belt, you can take on more complex projects that challenge your abilities.
Secondly, consider your interests and passions. Do you enjoy working with wood, painting, or crafting? By choosing a DIY project that aligns with your hobbies, you’ll not only have fun during the process but also create something that reflects your personal style.
Furthermore, take into account the resources and time you have available. Some DIY projects require a significant time commitment and access to specific tools or materials. Make sure you have the necessary resources and are able to dedicate the time needed to complete the project successfully.
Lastly, think about the desired outcome of your DIY project. Are you looking to enhance the functionality of your home, add decorative elements, or simply update the aesthetics? Understanding your goals will help you narrow down the options and choose a project that will bring the desired transformation to your living space.
In conclusion, selecting the right DIY project is essential for a successful home makeover. By considering your skill level, interests, available resources, and desired outcome, you can make an informed decision and embark on a project that will not only improve your home but also provide a fulfilling DIY experience.
2.2. Gathering necessary tools and materials
Before starting any DIY project, it’s important to gather all the necessary tools and materials. Having the right supplies on hand will make the process much smoother and more efficient. Here are some essential items you’ll need to get started.
1. Basic Hand Tools: A set of screwdrivers, pliers, hammer, tape measure, and utility knife are must-haves for any DIY enthusiast.
2. Power Tools: Depending on the specific projects you have in mind, you may need power tools such as a drill, circular saw, or jigsaw. These tools can make tasks like cutting, drilling, and shaping materials much easier.
3. Safety Equipment: Protecting yourself is crucial when working on DIY projects. Make sure to have safety goggles, gloves, ear protection, and a dust mask to keep yourself safe from any potential hazards.
4. Painting Supplies: If you’re planning on giving your home a fresh coat of paint, you’ll need paintbrushes, rollers, painter’s tape, drop cloths, and paint trays.
5. Adhesives and Fasteners: Whether you’re hanging shelves, installing cabinets, or fixing broken furniture, having a supply of adhesives (such as wood glue) and fasteners (like screws and nails) is essential.
6. Sanding and Finishing Tools: To achieve a smooth and polished look, you’ll need sandpaper, sanding blocks, and wood finish products.
By gathering these tools and materials before you begin your DIY projects, you’ll be well-prepared to tackle any task and achieve a gorgeous home makeover.
2.3. Setting a realistic budget
Setting a realistic budget is an essential step when embarking on DIY projects for a gorgeous home makeover. Without a clear budget in mind, it is easy to overspend or run out of funds midway through the project. To set a realistic budget, start by assessing your financial situation and determining how much you can comfortably allocate towards the makeover. Consider the scope of the projects you have in mind and research the average costs associated with them. This will give you an idea of what to expect and help you prioritize your projects based on affordability. Don’t forget to factor in any additional expenses such as tools, materials, and professional help if needed. It’s important to be realistic about what you can accomplish with your budget and be prepared to make adjustments along the way. By setting a realistic budget, you can ensure that your DIY projects for a gorgeous home makeover are both enjoyable and financially feasible.
2.4. Creating a timeline
Creating a timeline for getting started with DIY projects is crucial to ensure a smooth and successful home makeover. By setting a timeline, you can prioritize tasks, allocate resources, and stay organized throughout the entire process.
To begin, determine the scope of your home makeover project. Are you planning to revamp a single room or tackle multiple areas? Understanding the extent of the project will help you allocate the necessary time and effort.
Next, break down the project into smaller tasks. This will make it easier to manage and track progress. For example, if you’re renovating a bedroom, you might have tasks such as painting the walls, installing new flooring, and updating the lighting fixtures.
Once you have a list of tasks, assign a realistic timeframe to each one. Consider factors such as your availability, skill level, and the complexity of the task. Be sure to allow extra time for unexpected delays or challenges that may arise.
Additionally, it’s important to prioritize the tasks based on their dependencies. Some tasks may need to be completed before others can begin. For instance, you’ll need to paint the walls before installing new flooring.
Finally, create a visual timeline or schedule to keep yourself on track. This can be done using a calendar, spreadsheet, or project management tool. Break down the tasks into specific dates or timeframes, and regularly review and update the timeline as needed.
By creating a timeline for your DIY projects, you’ll ensure that everything is completed in a timely manner and avoid any unnecessary stress or delays. Proper planning and organization are key to achieving a gorgeous home makeover.
2.5. Researching and planning the project
Researching and planning the project is an essential step when getting started with DIY projects for a gorgeous home makeover. Before diving into any project, it is important to conduct thorough research to gather ideas, inspiration, and instructions. This will help ensure that the project is executed properly and achieves the desired outcome.
To begin, start by identifying the specific areas or aspects of your home that you want to makeover. This could include anything from updating the living room decor to revamping the kitchen cabinets. Once you have a clear vision of what you want to accomplish, start researching different DIY techniques, materials, and tools that may be required for the project.
In addition to online resources such as blogs, websites, and social media platforms, consider visiting local home improvement stores or attending workshops to gather more information. These resources can provide valuable insights, tips, and advice from experts in the field.
After conducting thorough research, it is time to plan the project. Create a detailed plan that outlines the steps involved, estimated timelines, and budget considerations. This will help you stay organized and ensure that you have all the necessary resources and materials before beginning the project.
Remember, proper research and planning are crucial for the success of any DIY project. By investing time in this initial phase, you will be better prepared and equipped to tackle the home makeover with confidence and achieve stunning results.
3. Step-by-Step Guide to DIY Success
Are you looking to give your home a stunning makeover without breaking the bank? Look no further! With these 10 DIY projects, you can transform your living space into a gorgeous haven. Follow this step-by-step guide to achieve DIY success and create a home you’ll love.
1. Plan and Gather Materials: Start by deciding on the projects you want to tackle. Make a list of materials needed for each project and gather them before you begin.
2. Set a Budget: Determine how much you are willing to spend on your home makeover. This will help you prioritize projects and make smart purchasing decisions.
3. Research and Learn: Before diving into any project, take the time to research and learn the necessary techniques and skills. Watch tutorial videos, read articles, and gather inspiration.
4. Start with Small Projects: If you’re new to DIY, start with smaller projects that are easier to handle. This will build your confidence and skills before tackling larger, more complex projects.
5. Take Safety Precautions: Always prioritize safety when working on DIY projects. Wear protective gear, use tools correctly, and follow safety guidelines.
6. Measure Twice, Cut Once: Accurate measurements are crucial for successful DIY projects. Double-check your measurements before making any cuts or installations.
7. Take Breaks and Stay Organized: DIY projects can be time-consuming and overwhelming. Take regular breaks to avoid burnout and keep your workspace organized for efficiency.
8. Ask for Help if Needed: Don’t hesitate to ask for help or advice from friends, family, or professionals. They can provide guidance and assistance when faced with challenges.
9. Embrace Mistakes and Learn: Mistakes happen, especially when you’re DIYing. Embrace them as learning opportunities and find creative solutions to fix or modify any errors.
10. Enjoy the Process and Celebrate Achievements: Remember to have fun throughout your DIY journey. Celebrate each project completion and enjoy the satisfaction of transforming your home into a beautiful, personalized space.
By following this step-by-step guide, you’ll be well on your way to a successful DIY home makeover. Get ready to unleash your creativity and turn your house into the home of your dreams!
3.1. Preparing the workspace
Before you embark on any DIY project, it’s essential to prepare your workspace properly. A well-prepared workspace can make all the difference in the success of your project and ensure a smooth and efficient process. Here is a step-by-step guide to help you set up your workspace for DIY success.
1. Clear the area: Start by clearing the area where you will be working. Remove any furniture, decorations, or other items that might get in your way. This will give you ample space to move around and work comfortably.
2. Gather your tools: Make sure you have all the necessary tools and equipment for the project. Check your inventory and make a list of any missing items that you will need to purchase or borrow. Having all the right tools will save you time and frustration in the long run.
3. Set up a workbench: If your project requires a designated work area, consider setting up a workbench. This will provide you with a stable surface to work on and keep your tools organized. You can use a sturdy table or even create a makeshift workbench using sawhorses and a plywood top.
4. Organize your materials: Sort and organize all the materials and supplies you will need for the project. Arrange them in a way that makes them easily accessible during the DIY process. This will help you stay organized and prevent unnecessary delays or confusion.
5. Ensure proper lighting: Good lighting is crucial for any DIY project. Make sure your workspace is well-lit, either with natural light or artificial lighting. Consider using task lights or portable lamps to illuminate specific areas as needed.
6. Protect your surroundings: Depending on the nature of your project, take measures to protect your surrounding surfaces and furniture. Use drop cloths, plastic sheets, or newspaper to cover and shield any areas that may be at risk of damage.
7. Safety first: Before you begin working, prioritize your safety. Wear appropriate protective gear such as safety goggles, gloves, and a dust mask if necessary. Familiarize yourself with the safety instructions and precautions for the tools and materials you will be using.
By following these steps and preparing your workspace diligently, you are setting yourself up for DIY success. Taking the time to create an organized and safe environment will make your home makeover projects much more enjoyable and rewarding.
3.2. Following instructions and tutorials
Following instructions and tutorials is crucial when it comes to successfully completing DIY projects. Whether you are a beginner or an experienced DIY enthusiast, it is important to have a step-by-step guide to ensure a successful outcome. In this section, we will provide you with a comprehensive step-by-step guide to help you achieve DIY success and transform your home.
1. Plan and gather materials: Before starting any DIY project, it is essential to plan and gather all the necessary materials. Make a list of what you will need and ensure you have everything before you begin.
2. Research and learn: Take the time to research and learn about the project you are undertaking. Read tutorials, watch videos, and gather as much information as possible. This will help you understand the process and avoid any mistakes.
3. Prepare your workspace: Clear the area where you will be working and make sure you have enough space to move around. Gather all the tools you will need and organize them for easy access.
4. Follow safety guidelines: Safety should always be a priority. Make sure you are wearing appropriate protective gear such as goggles, gloves, and masks if necessary. Follow safety instructions provided by the manufacturer.
5. Start with small projects: If you are new to DIY, it is advisable to start with small projects. This will help you gain confidence and develop your skills before tackling larger and more complex projects.
6. Take it one step at a time: Break down the project into smaller steps and focus on completing each step before moving on to the next. This will help you stay organized and prevent feeling overwhelmed.
7. Measure and double-check: Accuracy is key in DIY projects. Take accurate measurements and double-check your work to ensure everything fits properly and is aligned correctly.
8. Ask for help if needed: Don’t hesitate to ask for help if you encounter difficulties or feel unsure about certain steps. Seek advice from experienced DIYers or consult online forums for guidance.
9. Take breaks and stay patient: DIY projects can be time-consuming and require patience. Take regular breaks to rest and recharge. Remember, the end result will be worth the effort.
10. Enjoy the process and be proud of your work: DIY projects are not only about the end result but also the satisfaction of completing something with your own hands. Enjoy the process, learn from your experiences, and be proud of your accomplishments.
3.3. Taking accurate measurements
Accurate measurements are crucial when embarking on any DIY project. Whether you’re building a piece of furniture or installing new shelves, precise measurements ensure that everything fits together perfectly. Here is a step-by-step guide to taking accurate measurements for your DIY success.
1. Gather the necessary tools: Start by gathering a measuring tape, a level, a pencil, and a notepad. These tools will help you accurately measure and record your dimensions.
2. Measure twice: It’s always a good idea to double-check your measurements. Measure the length, width, and height of the area or object you’re working on. Take note of any irregularities or obstacles that may affect your project.
3. Use a level: For items that need to be straight, such as shelves or picture frames, use a level to ensure accuracy. This will help you avoid crooked or uneven installations.
4. Record your measurements: Write down your measurements in a clear and organized manner. Include all the necessary dimensions and any additional notes or special instructions.
5. Consider allowances: Depending on the project, you may need to account for allowances. For example, if you’re installing a countertop, you’ll need to add extra space for overhang and appliances.
6. Review and adjust: Before proceeding with your DIY project, review your measurements and make any necessary adjustments. This will help you catch any errors or oversights before it’s too late.
By following these steps, you’ll be able to take accurate measurements for your DIY projects, setting yourself up for a successful home makeover.
3.4. Using proper techniques and tools
To achieve a successful DIY home makeover, it is crucial to use proper techniques and tools. By following a step-by-step guide, you can ensure that your projects turn out beautifully. Here are some key tips to consider:
1. Plan and research: Before starting any DIY project, take the time to plan and research. This includes understanding the scope of the project, gathering inspiration, and studying the necessary techniques and materials.
2. Safety first: Always prioritize safety when working on DIY projects. Use protective gear such as gloves, goggles, and masks when necessary. Additionally, make sure to follow safety guidelines for specific tools and materials.
3. Choose the right tools: Having the correct tools for each task is essential. Invest in quality tools that are suitable for the specific project. This will ensure easier execution and better results.
4. Measure twice, cut once: Accurate measurements are key to achieving a professional-looking outcome. Take your time to measure precisely before making any cuts or installations.
5. Practice proper technique: Familiarize yourself with the correct techniques for each project. This may involve watching tutorials, reading guides, or seeking advice from experienced DIYers. Following proper technique will lead to better results and minimize mistakes.
6. Take breaks and stay organized: DIY projects can be time-consuming and overwhelming. Remember to take breaks to avoid fatigue and maintain focus. Keep your workspace organized, with tools and materials easily accessible.
7. Learn from mistakes: Don’t be discouraged by mistakes; instead, view them as learning opportunities. If something doesn’t turn out as expected, take the time to analyze what went wrong and how to improve for future projects.
By utilizing these techniques and tools, you can embark on your DIY home makeover with confidence and achieve stunning results.
3.5. Troubleshooting common DIY problems
Troubleshooting common DIY problems
When embarking on any DIY project, it’s common to encounter certain issues along the way. Here are some common problems that DIY enthusiasts may face and how to troubleshoot them:
1. Uneven paint application: If you notice uneven paint coverage on your walls or furniture, it could be due to improper technique or low-quality brushes. To fix this, sand down the surface and apply a primer before reapplying the paint with smooth, even strokes.
2. Loose or squeaky furniture: Over time, furniture can become loose or develop squeaks. To fix loose joints, use wood glue and clamps to secure them back together. For squeaky hinges, apply lubricant or tighten the screws.
3. Cracked tiles: Cracked tiles can be unsightly and pose a tripping hazard. To replace a cracked tile, carefully remove the broken piece using a chisel and hammer. Clean the area, apply adhesive, and install the new tile, ensuring it is level and aligned with the surrounding tiles.
4. Plumbing leaks: Leaky faucets or pipes can waste water and cause damage to your home. To fix a leaky faucet, turn off the water supply, disassemble the faucet, replace any worn-out parts, and reassemble it tightly. For pipe leaks, use a pipe repair clamp or wrap the area with plumber’s tape.
5. Electrical issues: Dealing with electrical problems can be dangerous, so exercise caution. If you’re experiencing frequent power outages, check the circuit breaker and reset any tripped switches. For faulty outlets, turn off the power, remove the cover plate, and tighten any loose wires or replace the outlet.
By being aware of these common DIY problems and knowing how to troubleshoot them, you can tackle any project with confidence and ensure a successful outcome.
Conclusion
In conclusion, these 10 DIY projects are the perfect way to give your home a stunning makeover. With their easy-to-follow instructions and budget-friendly materials, you can transform your space into a gorgeous haven. Whether you’re looking to update your decor, add some stylish storage solutions, or enhance your outdoor living area, these projects offer something for everyone. So grab your tools and get ready to create a beautiful home that reflects your personal style and creativity!


4 Comments
Lisha Grounds
1 year agoRevamping ones living space can be an exhilarating endeavor, as it allows individuals to transform their homes into personalized sanctuaries. The article titled Revamp your living space with these 10 stunning DIY projects to create a beautiful home presents a curated selection of captivating do-it-yourself projects that promise to breathe new life into any abode. These projects not only offer an opportunity for self-expression but also hold the potential to enhance aesthetic appeal and create a harmonious atmosphere within the living environment.
The author begins by acknowledging the inherent desire to revitalize our living spaces, emphasizing the transformative power of DIY projects. By undertaking these projects, individuals can manifest their creativity, ingenuity, and personal style, ultimately crafting a home that is a true reflection of their identity and taste. This notion resonates with the readers, as it taps into the intrinsic human need for self-expression and the desire to create a space that nurtures both physical and emotional well-being.
Furthermore, the article proceeds to outline ten remarkable DIY projects that are poised to captivate and inspire. Ranging from repurposing antique furniture to creating stunning wall art, each project offers a unique opportunity to infuse character and charm into ones living space. The author provides concise yet comprehensive instructions for each project, ensuring that readers can embark on these endeavors with confidence and achieve desirable outcomes.
What sets this article apart is its commitment to showcasing a diverse array of projects that cater to various tastes and preferences. Whether one is inclined towards rustic farmhouse aesthetics or contemporary minimalism, there is a project that will undoubtedly resonate with their desired style. This inclusivity fosters a sense of inclusiveness and empowers readers to embark on their own creative journey, regardless of their personal design preferences.
In conclusion, Revamp your living space with these 10 stunning DIY projects to create a beautiful home serves as a valuable resource for those seeking to transform their living spaces into havens of beauty and personal expression. By presenting a curated selection of diverse projects, the article empowers readers to embark on their own creative endeavors and breathe new life into their homes. Whether one is a seasoned DIY enthusiast or a novice seeking inspiration, this article offers a wealth of ideas to help bring forth a beautiful and harmonious living environment.
Kessiah Zulema
1 year ago[object Object] is a fascinating post that showcases 10 exceptional DIY projects aimed at transforming your living space into a breathtaking haven. The projects presented within this collection provide an opportunity to revamp and enhance your home, elevating its aesthetic appeal and overall beauty. By following the detailed instructions and utilizing the suggested materials, anyone can embark on these creative endeavors and achieve astonishing results. Whether it involves crafting unique furniture pieces, incorporating innovative storage solutions, or adding artistic touches to your walls, these projects offer a plethora of ideas to personalize and beautify your living environment. Get ready to embark on an exciting journey of DIY home improvement and witness the stunning transformation of your living space unfold.
Dareen Irma
1 year agoWow, these 10 DIY projects are absolutely amazing! They seem like the perfect way to revamp my living space and turn it into a beautiful home. I cant wait to give them a try and add my personal touch to each project. Thanks for sharing this incredible inspiration!
Merola Beesley
1 year agoWow, these DIY projects look amazing! I cant wait to revamp my living space with these ideas. Thanks for sharing! 😍🏡