
Looking to spruce up your walls with some unique and creative art? Look no further! In this article, we will explore 10 DIY wall art ideas using paper mache. Paper mache is a versatile and affordable material that allows you to unleash your artistic side. Whether you’re a seasoned crafter or a beginner looking for a fun project, these ideas will surely inspire you to create stunning wall decor. Let’s dive in and discover the endless possibilities of paper mache!
- 1. Introduction
- 1.1. What is paper mache?
- 1.2. Why choose paper mache for DIY wall art?
- 1.3. Basic materials needed for paper mache projects
- 1.4. Tips for successful paper mache creations
- 1.5. Safety precautions
- 2. Simple Paper Mache Wall Art Ideas
- 2.1. Paper mache flower wall decor
- 2.2. Paper mache animal silhouette art
- 2.3. Paper mache geometric shapes
- 2.4. Paper mache quote art
- 2.5. Paper mache textured wall panels
- 3. Advanced Paper Mache Techniques for Wall Art
1. Introduction
Paper mache is an incredibly versatile and affordable material that can be used to create stunning wall art. Whether you are a seasoned crafter or a beginner looking to try out a new DIY project, paper mache offers endless possibilities. In this article, we will explore 10 creative and unique ideas for making wall art using paper mache. From simple sculptures to intricate designs, these projects will inspire you to unleash your creativity and transform your walls into works of art. So, grab your paper mache supplies and let’s get started!
1.1. What is paper mache?
Paper mache, also known as papier-mâché, is a popular craft technique that involves creating objects or sculptures using a mixture of paper and adhesive. The term ‘papier-mâché’ is derived from the French words ‘papier’ meaning paper and ‘mâché’ meaning mashed or mixed. This art form dates back to ancient Egypt and has been used in various cultures throughout history.
To create paper mache, strips or pieces of paper are dipped or soaked in a paste made from a mixture of water and an adhesive substance, such as glue or flour. These paper strips are then layered, molded, or shaped over a form or armature to create the desired shape or structure.
Paper mache is a versatile and affordable medium that allows artists and crafters to create three-dimensional objects, masks, sculptures, and even decorative items. It is a popular choice for DIY projects due to its accessibility and ease of use.
In addition to its affordability and ease of use, paper mache offers endless creative possibilities. The finished paper mache objects can be painted, decorated, or embellished with various materials like beads, ribbons, or fabric to add texture and visual interest. The lightweight nature of paper mache also makes it suitable for wall art projects.
In this article, we will explore ten DIY wall art ideas using paper mache. These projects will inspire you to unleash your creativity and transform your walls into unique and personalized works of art.
1.2. Why choose paper mache for DIY wall art?
Paper mache is a versatile and affordable material that can be used to create stunning DIY wall art. Whether you are a seasoned crafter or a beginner, paper mache offers endless possibilities for unleashing your creativity. This technique involves using a mixture of paper and adhesive to build up layers, resulting in a lightweight yet sturdy final product. The beauty of paper mache is that it can be easily molded into any shape or form, allowing you to bring your artistic vision to life. In this article, we will explore why paper mache is an excellent choice for DIY wall art projects and how you can use it to create unique and personalized pieces for your home.
1.3. Basic materials needed for paper mache projects
Paper mache is a versatile and cost-effective art technique that allows you to create beautiful and unique wall art pieces. Whether you are a beginner or an experienced artist, paper mache offers endless possibilities for creative expression. Before diving into your DIY wall art project using paper mache, it is important to gather the basic materials needed. These materials will ensure a smooth and successful crafting process. In this section, we will discuss the essential supplies required for paper mache projects.
1.4. Tips for successful paper mache creations
Paper mache is a versatile and affordable craft technique that allows you to create stunning wall art pieces. Whether you are a beginner or an experienced artist, these tips will help you achieve successful paper mache creations. By following these guidelines, you can enhance your skills and create unique and eye-catching DIY wall art using paper mache.
1.5. Safety precautions
When it comes to creating DIY wall art using paper mache, it is important to prioritize safety precautions. Working with paper mache can involve various materials and techniques that may pose potential risks. By following some simple safety measures, you can ensure a safe and enjoyable crafting experience. This section will outline important safety precautions to keep in mind before you embark on your paper mache art projects.
2. Simple Paper Mache Wall Art Ideas
Paper mache is a versatile and affordable material that can be used to create stunning wall art pieces. Whether you are a seasoned DIY enthusiast or just starting out, paper mache wall art ideas are a great way to add a unique touch to your home decor. Here are 10 simple and creative DIY wall art ideas using paper mache:
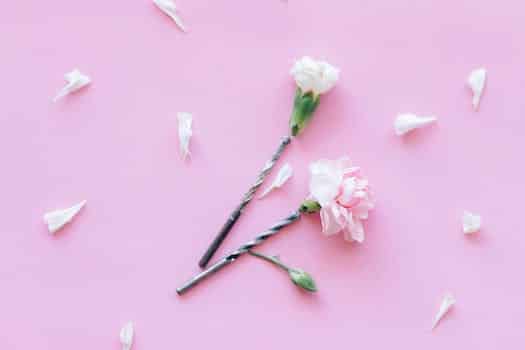
1. Paper Mache Flower Wall Decor: Create a beautiful floral display on your wall by making paper mache flowers. Use different colors and shapes to create a vibrant and eye-catching arrangement.
2. Geometric Paper Mache Wall Art: Cut out geometric shapes from cardboard and cover them with layers of paper mache. Paint them in bold colors or leave them plain for a minimalist look.
3. Paper Mache Animal Head Mounts: Instead of using real animal heads for wall mounts, create your own using paper mache. This cruelty-free alternative can be customized to match your decor style.
4. Paper Mache Wall Clock: Make a unique wall clock using paper mache. Mold the numbers and clock hands with paper mache and paint them in a color that complements your room.
5. Abstract Paper Mache Wall Sculpture: Let your creativity flow by making abstract sculptures using paper mache. Use different shapes and textures to create a visually intriguing piece of art.
6. Paper Mache Dream Catcher Wall Hanging: Add a bohemian touch to your space by making a paper mache dream catcher. Decorate it with feathers, beads, and ribbons for an enchanting look.
7. Paper Mache Wall Letters: Spell out meaningful words or names using paper mache letters. Paint them in a color that matches your room’s color scheme for a personalized touch.
8. Paper Mache Butterfly Wall Art: Create a whimsical display by making paper mache butterflies. Hang them on your wall in a pattern or let them appear as if they are flying.
9. Paper Mache Collage Wall Art: Use paper mache to create a collage of different shapes and sizes. Add layers of paint and textured elements to make it visually interesting.
10. Paper Mache Wall Masks: Experiment with different facial expressions and create unique wall masks using paper mache. Paint them in vibrant colors or leave them plain for a dramatic effect.
These are just a few ideas to inspire you to get started with paper mache wall art. The possibilities are endless, and with a little bit of creativity, you can create stunning and personalized pieces that will make a statement in your home.
2.1. Paper mache flower wall decor
Paper mache flower wall decor is a delightful way to add a touch of whimsy and elegance to any space. Whether you want to spruce up your living room, bedroom, or even a nursery, paper mache flower wall decor offers a unique and budget-friendly option.
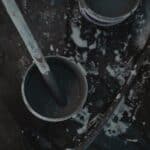
Creating paper mache flowers is a fun and easy craft project that anyone can enjoy. All you need is some newspaper, flour, water, and a few basic art supplies. Start by tearing the newspaper into small strips and mixing flour and water to create a paste-like consistency.
Next, dip the newspaper strips into the paste and layer them onto a balloon or a wire frame shaped like a flower petal. Allow the paper mache to dry completely before painting it with vibrant colors of your choice.
Once the flowers are dry and painted, you can attach them to a wooden board or directly to the wall using glue or nails. Arrange the flowers in a pattern or create a beautiful bouquet-like arrangement.
The result is a stunning piece of wall art that adds a pop of color and texture to your space. Paper mache flower wall decor is versatile and can be customized to fit any color scheme or theme. It is also a great way to express your creativity and showcase your DIY skills.
So, why not give paper mache flower wall decor a try? It’s a simple and enjoyable project that will transform your walls and bring a smile to your face every time you see it.
2.2. Paper mache animal silhouette art
Paper mache animal silhouette art is a unique and creative way to add a touch of whimsy to your home decor. This type of wall art involves creating animal shapes using paper mache techniques. By using simple materials like newspaper, flour, and water, you can easily create stunning animal silhouettes that will make a statement on your walls.
To create paper mache animal silhouette art, start by sketching the desired animal shape on a piece of cardboard. Cut out the silhouette and use it as a stencil to trace the shape onto a stack of newspaper sheets. Cut out the newspaper shapes and crumple them up to give them texture.
Next, create a paper mache paste by mixing flour and water in a bowl until it forms a smooth consistency. Dip the newspaper shapes into the paste, making sure they are fully coated. Lay the coated shapes onto the cardboard silhouette, layering them to create dimension.
Allow the paper mache to dry completely. Once dry, you can paint the animal silhouette in any color you desire. You can also add additional details like eyes, ears, or patterns using paint or other craft materials.
When you’re satisfied with the paint job, hang your paper mache animal silhouette art on the wall using adhesive strips or hooks. This type of wall art is versatile and can be customized to fit any room’s decor style. Whether you choose to create a majestic lion or a playful cat, paper mache animal silhouette art is sure to add a touch of creativity and charm to your space.
2.3. Paper mache geometric shapes
Paper mache geometric shapes are a versatile and creative way to add dimension and interest to your walls. Whether you’re looking to make a statement or simply want to add a touch of whimsy to your space, these simple paper mache wall art ideas are sure to inspire you.
Creating paper mache geometric shapes is a fun and easy project that anyone can do. All you need is some newspaper, flour, water, and a bit of creativity. Start by tearing the newspaper into strips and mixing flour and water to create a paste. Then, dip the strips into the paste and layer them onto a balloon or other object to create the desired shape. Once dry, you can paint the shapes in any color or pattern you like.
One idea for using paper mache geometric shapes is to create a focal point on a blank wall. You can make a large, eye-catching shape, such as a triangle or hexagon, and hang it in the center of the wall. This will instantly draw attention and add visual interest to the space.
Another idea is to create a gallery wall using a variety of different geometric shapes. You can make circles, squares, diamonds, and more, and arrange them in a visually pleasing pattern on the wall. This is a great way to showcase your creativity and add a unique touch to your home decor.
Paper mache geometric shapes can also be used to create functional wall art. For example, you can make a paper mache shelf by creating a rectangular shape and adding a flat surface on top. This can be used to display small plants, candles, or other decorative items.
In conclusion, paper mache geometric shapes offer endless possibilities for creating unique and visually appealing wall art. Whether you’re a beginner or an experienced crafter, these simple ideas are a great place to start. So grab some newspaper and get creative!
2.4. Paper mache quote art
Paper mache quote art is a unique and creative way to add personality and inspiration to your home decor. This type of wall art involves using paper mache techniques to create a three-dimensional quote or saying that can be displayed on a wall.
To create paper mache quote art, you will need some basic materials such as newspaper strips, white glue, water, and a balloon or cardboard cutout in the shape of the quote or saying you want to create. Start by inflating the balloon or cutting out the desired shape from cardboard.
Next, mix equal parts of white glue and water in a bowl to create a paste. Dip the newspaper strips into the paste, making sure they are fully coated, and then place them onto the balloon or cardboard cutout. Continue layering the strips until the entire surface is covered, smoothing out any wrinkles or bubbles as you go.
Allow the paper mache to dry completely, which may take a day or two depending on the thickness of the layers. Once dry, you can paint the quote art with acrylic paints in your desired colors. You can also add additional embellishments such as glitter, sequins, or small trinkets to make it even more unique.
To hang the paper mache quote art on the wall, you can attach a picture hanger or adhesive hooks to the back of the piece. Alternatively, you can use double-sided adhesive tape or mounting putty to secure it directly onto the wall.
Paper mache quote art is a fun and affordable way to create personalized wall decor. Whether you choose to display a motivational quote, a favorite song lyric, or a meaningful saying, this DIY project is sure to add a touch of creativity and charm to any room in your home.
2.5. Paper mache textured wall panels
If you’re looking for a creative way to add texture to your walls, paper mache textured wall panels are a fantastic option. Not only are they easy to make, but they also provide a unique and artistic touch to any space. With just a few simple materials, you can create stunning wall art that is sure to impress.
To begin, gather your supplies. You will need newspaper, water, flour, a mixing bowl, a paintbrush, and a wall panel of your choice. Start by tearing the newspaper into strips, about 1 inch wide. In the mixing bowl, combine equal parts flour and water to create a paste-like consistency.
Next, dip a strip of newspaper into the paste, making sure it is fully coated. Remove any excess paste by running the strip between your fingers. Then, place the strip onto the wall panel, smoothing it down with your paintbrush. Repeat this process until the entire panel is covered in newspaper strips.
Allow the panel to dry completely, which usually takes about 24 hours. Once dry, you can begin adding texture to your wall art. Use your paintbrush to apply additional layers of paste to certain areas of the panel, creating raised textures or patterns. You can also experiment with different techniques, such as crumpling the newspaper before applying it to the panel, to achieve unique textures.
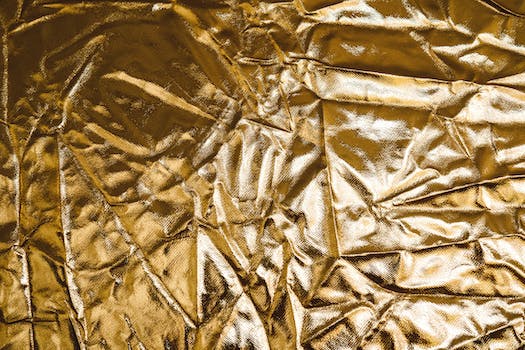
Once you are satisfied with the texture of your wall art, allow it to dry again. Once fully dried, you can paint your panel in any color or design of your choice. Consider using metallic paints or adding a glaze for a more sophisticated look.
Finally, hang your paper mache textured wall panel on your desired wall using appropriate hardware. You can create a stunning focal point by hanging multiple panels together or mix and match different sizes and shapes. The possibilities are endless when it comes to paper mache wall art, so let your creativity run wild!
3. Advanced Paper Mache Techniques for Wall Art
Paper mache is a versatile and affordable craft that can be used to create stunning wall art pieces. By mastering advanced paper mache techniques, you can elevate your DIY wall art projects to a whole new level. Here are some techniques to take your paper mache skills to the next level:
1. Layering: Experiment with layering multiple sheets of paper to add depth and texture to your wall art. This technique allows you to create intricate designs and realistic details.
2. Armature sculpting: Instead of using a pre-made mold or form, try sculpting your own armature using wire, foil, or other materials. This gives you more control over the shape and form of your wall art.
3. Paper pulp sculpting: Instead of using strips of paper, create a pulp by shredding paper and soaking it in water. This pulp can be molded into any shape or form, allowing you to create unique and organic wall art pieces.
4. Mixed media: Combine paper mache with other materials like fabric, paint, or found objects to create mixed media wall art. This adds visual interest and allows you to experiment with different textures and materials.
5. Texturing: Experiment with different texturing techniques to add dimension to your paper mache wall art. You can use tools like brushes, sponges, or even everyday objects to create interesting patterns and textures.
By incorporating these advanced paper mache techniques into your DIY wall art projects, you can create one-of-a-kind pieces that will impress everyone who sees them.
3.1. Creating intricate paper mache sculptures
Creating intricate paper mache sculptures is a fascinating and rewarding craft that can add a unique touch to your wall art. By mastering advanced paper mache techniques, you can elevate your creations to a whole new level. Whether you’re a seasoned artist or a beginner, these techniques will allow you to explore your creativity and create stunning wall art pieces using paper mache.
One of the first advanced techniques to consider is adding texture to your paper mache sculptures. You can achieve this by using various materials such as crumpled tissue paper, fabric, or even natural elements like leaves or twigs. Applying these materials to your sculpture’s surface before layering with paper strips will create a visually interesting and textured effect.
Another technique to experiment with is incorporating mixed media into your paper mache sculptures. This involves combining different materials, such as paint, beads, sequins, or even recycled objects, with your paper mache base. By doing so, you can add depth, dimension, and a touch of uniqueness to your wall art.
Additionally, exploring the use of armature can take your paper mache sculptures to the next level. Armature refers to a supportive framework or skeleton that provides structure to your sculpture. By using materials like wire, cardboard, or even foam, you can create intricate shapes and forms that would otherwise be challenging to achieve with just paper mache.
Lastly, consider experimenting with advanced painting and finishing techniques to enhance the overall look of your paper mache sculptures. This can involve using techniques such as dry brushing, layering colors, or adding metallic accents. These techniques will help bring out the details and give your wall art a professional and polished appearance.
In conclusion, by exploring advanced paper mache techniques, you can create intricate and visually captivating sculptures for your wall art. From adding texture and incorporating mixed media to utilizing armature and applying advanced painting techniques, the possibilities are endless. Let your creativity soar and transform ordinary paper mache into extraordinary wall art pieces that will impress and inspire.
3.2. Layering techniques for a 3D effect
Layering techniques for a 3D effect:
To create a visually stunning 3D effect in your paper mache wall art, consider using layering techniques. Layering adds depth and dimension to your artwork, making it more visually appealing. Here are a few techniques you can try:
1. Torn Paper Layering: Tear small pieces of colored paper and layer them on top of each other using adhesive. Gradually build up the layers to create a textured effect.
2. Crumpled Paper Layering: Crumple small pieces of paper and glue them onto the surface of your paper mache. The crumpled texture will add an interesting dimension to your artwork.
3. Cut-Out Layering: Cut out different shapes or patterns from colored paper and layer them onto your paper mache. This technique can create a unique layered effect.
4. Painted Layering: Apply multiple layers of paint on your paper mache, allowing each layer to dry before adding the next one. This technique can create a beautiful blended effect.
Experiment with these layering techniques to add depth and dimension to your paper mache wall art. The 3D effect will make your artwork stand out and captivate viewers.
3.3. Adding color and patterns to paper mache art
Adding color and patterns to paper mache art can elevate its visual appeal and make it stand out as a unique piece of wall art. By incorporating advanced paper mache techniques, you can create stunning designs that will enhance any space. Here are some ideas to inspire your creativity:
1. Painted Paper Mache: Apply acrylic or watercolor paints to your paper mache sculpture, using various techniques such as brush strokes, splattering, or sponging. Experiment with different color combinations and shading to achieve the desired effect.
2. Decoupage: Decorate your paper mache art with cut-out images or decorative paper using decoupage techniques. Apply a layer of decoupage glue to the surface of your sculpture, carefully place the paper designs, and seal with additional layers of glue. This adds texture and intricate patterns to your artwork.
3. Stenciling: Use stencils to create intricate designs on your paper mache art. Secure the stencil onto the surface and apply paint or ink using a brush or sponge. This technique allows you to achieve precise and detailed patterns effortlessly.
4. Texture Paste: Add dimension to your paper mache art by using texture paste. Apply the paste using a palette knife or a brush to create raised patterns or textures. Once dry, you can paint or color the texture paste to complement your desired design.
5. Collage: Combine various materials such as fabric, ribbons, buttons, or beads with your paper mache art to create a unique collage effect. Use adhesive or decoupage glue to attach these materials, layering them for added depth and visual interest.
By incorporating these advanced paper mache techniques, you can transform ordinary paper mache art into extraordinary wall art pieces that reflect your personal style and creativity.
3.4. Incorporating mixed media elements
Incorporating mixed media elements can take your paper mache wall art to the next level. By combining various materials and techniques, you can create unique and visually stunning pieces that will surely grab attention. Advanced paper mache techniques offer endless possibilities for adding depth, texture, and interest to your artwork. Here are some ideas to inspire you:
1. Embellish with fabric: Cut out fabric pieces in different shapes and sizes, and use a decoupage glue to adhere them onto your paper mache sculpture. This will add a tactile element and create a beautiful contrast of textures.
2. Incorporate found objects: Look for interesting objects like seashells, buttons, or small trinkets that can be attached to your paper mache artwork. These elements will add a three-dimensional aspect and make your piece more interactive.
3. Experiment with paint techniques: Instead of using traditional painting methods, try techniques like splattering, marbling, or stenciling to add visual interest to your paper mache wall art. Play with different colors and textures to achieve the desired effect.
4. Add metallic accents: Use metallic paints or foils to create shiny accents on your paper mache sculpture. This will give it a glamorous touch and make it stand out.
5. Incorporate natural elements: Consider incorporating elements from nature, such as dried leaves, flowers, or twigs, into your paper mache artwork. This will add an organic and rustic feel to your piece.
By incorporating mixed media elements and using advanced paper mache techniques, you can create truly unique and eye-catching wall art. Let your creativity flow and experiment with different materials and techniques to make your paper mache creations truly one-of-a-kind.
3.5. Using paper mache to make wall art installations
Paper mache is a versatile and affordable material that can be used to create stunning wall art installations. With its lightweight and durable nature, paper mache allows artists to experiment with various advanced techniques to achieve unique and intricate designs. In this section, we will explore some advanced paper mache techniques specifically tailored for wall art.
One technique that can be employed is the layering method. By layering multiple sheets of newspaper or tissue paper soaked in a mixture of glue and water, artists can create a sculptural effect on their wall art. This technique adds depth and texture to the piece, making it visually captivating.
Another advanced technique is the incorporation of armature. By constructing a framework using wire or other sturdy materials, artists can give their paper mache wall art a solid structure. This not only enhances the durability of the installation but also allows for more complex and intricate designs.
Additionally, artists can experiment with different painting and finishing techniques to elevate their paper mache wall art. From using metallic paints to create a metallic effect to applying varnish or sealant for a glossy finish, these techniques add a professional touch to the final piece.
Overall, using paper mache for creating wall art installations opens up a world of possibilities for artists. With advanced techniques like layering, armature incorporation, and creative finishing methods, artists can create visually stunning and unique pieces that will surely make a statement on any wall.
Conclusion
In conclusion, these 10 DIY wall art ideas using paper mache offer a creative and affordable way to decorate your home. From colorful abstract designs to intricate sculptures, there is something for every taste and style. Get your hands on some paper mache and let your imagination run wild to transform your walls into unique works of art.

These 10 innovative and imaginative DIY home decor ideas from [object Object] provide a refreshing approach to enhancing ones living…