
Are you looking for a creative way to spruce up your walls without breaking the bank? Look no further than these 10 DIY wall art ideas using paint chips. With just a few simple supplies and a little bit of creativity, you can transform your space with unique and colorful pieces that are sure to impress. So, grab some paint chips and let’s get started!
- 1. DIY Wall Art with Paint Chips
- 1.1. Introduction
- 1.2. Materials Needed
- 1.3. Choosing Your Color Scheme
- 1.4. Design Ideas
- 1.5. Step-by-Step Instructions
- 2. Introduction
- 2.1. What are Paint Chips?
- 2.2. Why Use Paint Chips for Wall Art?
- 2.3. Benefits of DIY Wall Art
- 2.4. Inspiration for Your Project
- 2.5. Tips for Success
- 3. Materials Needed
- 3.1. Paint Chips
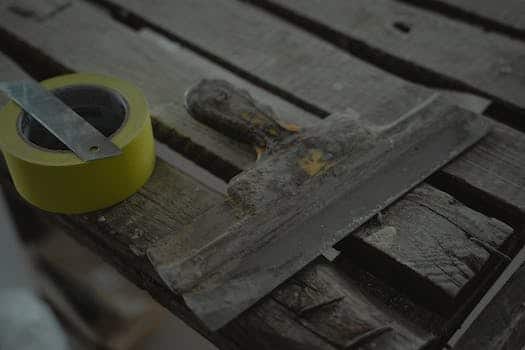
- 3.2. Scissors
- 3.3. Glue or Double-Sided Tape
- 3.4. Cardstock or Canvas
- 3.5. Optional: Frame
- 4. Choosing Your Color Scheme
- 4.1. Consider Your Room’s Color Palette
- 4.2. Create a Mood with Colors
- 4.3. Mix and Match Colors and Patterns
- 4.4. Use Color Theory for Balance
- 4.5. Experiment with Different Shades and Tints
- 5. Design Ideas
- 5.1. Geometric Shapes
- 5.2. Ombre Effect
- 5.3. Stripes and Chevrons
- 5.4. Typography and Quotes
- 5.5. Abstract Art
- 6. Step-by-Step Instructions
1. DIY Wall Art with Paint Chips
One of the easiest and most affordable ways to create DIY wall art is with paint chips. These colorful swatches can be found at any home improvement store and come in a wide range of hues. Here are some ideas for using paint chips to make your own unique wall art:
1. Geometric designs: Cut paint chips into triangles, squares, or other shapes and arrange them in a geometric pattern on your wall. You can create a random design or use a stencil for a more uniform look.
2. Ombre art: Choose a color palette and arrange paint chips from light to dark to create a beautiful ombre effect. Frame the finished product for a polished look.
3. Color block art: Cut paint chips into strips and glue them onto a canvas or cardboard in a color block pattern. This is a great way to incorporate multiple colors into your decor.
4. Mosaic art: Cut paint chips into small squares and arrange them in a mosaic pattern on a piece of cardboard or canvas. This is a great way to use up leftover paint chips and create a unique piece of wall art.
5. Pixel art: Cut paint chips into small squares and arrange them in a pixelated design on a canvas or cardboard. This is a fun and modern way to create wall art.
With just a few supplies and some creativity, you can use paint chips to create beautiful and unique wall art that will add color and personality to any room in your home.
1.1. Introduction
Are you tired of looking at blank walls but don’t want to spend a fortune on art? Look no further than your local paint store! Paint chips are colorful, free, and can be used to create unique and personalized wall art. In this section, we will explore 10 DIY wall art ideas using paint chips. Whether you’re a seasoned crafter or new to the DIY world, these projects are easy to make and will add a pop of color to any room in your home.
1.2. Materials Needed
To create DIY wall art with paint chips, you will need a few materials. These include a variety of paint chips in different shades and colors, a blank canvas or sturdy cardboard, a pair of scissors, a ruler or straight edge, and some glue or double-sided tape. Depending on the design you choose, you may also need additional materials such as a stencil or masking tape. With these materials on hand, you can create unique and colorful wall art for any room in your home.
1.3. Choosing Your Color Scheme
Choosing the right color scheme for your DIY wall art project is crucial to achieve the desired look and feel in your room. Take time to consider the mood you want to create, the existing color palette of the space, and the size and placement of the art piece. Paint chips are a great resource for color inspiration, as they provide a wide range of shades and hues from a single color family. You can choose complementary colors, monochromatic schemes, or bold contrasting combinations. Remember to test the colors on a small area first and let them dry completely before committing to a final decision. With the right colors, your paint chip wall art will be a stunning addition to any room.
1.4. Design Ideas
If you’re looking for a fun and easy way to spruce up your walls, consider making DIY wall art with paint chips. These colorful little squares can be found at any hardware or paint store and come in a wide variety of hues. Here are some design ideas to get you started:
1.5. Step-by-Step Instructions
1. Gather paint chips in various colors and shades. You can either collect them from a hardware store or use ones that you have leftover from a previous painting project.
2. Cut the paint chips into geometric shapes of your choice. You can use scissors or a paper cutter to get clean lines.
3. Arrange the paint chips on a piece of white or colored cardstock until you find a design that you like.
4. Glue the paint chips onto the cardstock using a glue stick or double-sided tape.
5. Once the glue has dried, frame the art or hang it up using clips or washi tape.
2. Introduction
Are you looking to spruce up your walls with some unique and creative art pieces? Look no further than your local paint store! Paint chips, those colorful cards of paint samples, can be transformed into stunning wall art with just a little bit of creativity and DIY know-how. In this article, we will explore 10 DIY wall art ideas using paint chips that are sure to add a pop of color and personality to any room in your home. So grab some paint chips and let’s get crafty!
2.1. What are Paint Chips?
Paint chips are small pieces of colored paper or cardstock that are used by paint manufacturers to showcase their different color options. These chips are often available for free at home improvement stores or paint shops, and can be a great resource for DIY projects like wall art. By using paint chips as a starting point, you can create unique and colorful pieces that are sure to add personality to any room.
2.2. Why Use Paint Chips for Wall Art?
Paint chips are a versatile and inexpensive material that can be used to create unique and eye-catching wall art. With a wide variety of colors and shades available, paint chips can be used to create abstract designs, geometric patterns, or even landscapes and cityscapes. Additionally, using paint chips for wall art is a sustainable and eco-friendly option, as it repurposes a material that would otherwise be discarded. In this article, we will explore 10 DIY wall art ideas with paint chips that will inspire you to get creative and add a personal touch to your home decor.
2.3. Benefits of DIY Wall Art
DIY wall art has become increasingly popular in recent years, as people look for unique and affordable ways to decorate their homes. One of the best materials to use for DIY wall art is paint chips, which can be found for free at most home improvement stores. Using paint chips, you can create a wide variety of stunning and colorful wall art pieces that will add personality and style to any room. In this article, we will explore 10 DIY wall art ideas using paint chips, and discuss the many benefits of creating your own wall art.
2.4. Inspiration for Your Project
Are you looking for some inspiration for your next home decor project? Look no further than your local hardware store! Paint chips are not just for choosing a color, they can also be used to create beautiful and unique wall art. Here are 10 DIY ideas to get you started.
2.5. Tips for Success
Creating DIY wall art is a fun and affordable way to add a personal touch to your home decor. With a little creativity and some paint chips, you can create beautiful and unique pieces that will make a statement on any wall. However, before you begin your project, it’s important to keep a few tips in mind to ensure success. From selecting the right colors to choosing the best materials, these tips will help you achieve stunning results with your DIY wall art projects.
3. Materials Needed
To create these 10 DIY wall art ideas with paint chips, you will need the following materials:
– Paint chips in various colors
– Scissors
– Glue
– Tape
– Ruler
– Pencil
– Canvas or poster board
– Picture frames
– Mod Podge
– Paintbrushes
With these materials, you can create unique and colorful wall art that will brighten up any room in your home.
3.1. Paint Chips
Paint chips are a versatile and inexpensive material that can be used to create beautiful wall art. They come in a variety of colors and can be easily cut into different shapes and sizes. Here are some ideas for using paint chips in your DIY wall art projects:
3.2. Scissors
Scissors are a crucial tool when it comes to creating DIY wall art with paint chips. They allow for precise cutting and shaping of the chips, which is essential for achieving the desired design. Make sure to use sharp scissors to avoid any tearing or jagged edges on the paint chips. Additionally, having a variety of scissor sizes can be helpful for cutting different shapes and sizes of paint chips.
3.3. Glue or Double-Sided Tape
When it comes to creating DIY wall art with paint chips, you will need a reliable adhesive to ensure that your artwork stays in place. Glue and double-sided tape are both great options, depending on your preference and the size of your project.
Glue is a good choice for larger pieces of wall art, as it provides a strong hold. However, be sure to use a glue that is safe for walls and won’t damage the paint or wallpaper.
Double-sided tape is a good option for smaller pieces of wall art or for creating a collage of paint chip samples. It is easy to use and won’t damage the walls when removed. However, it may not provide as strong a hold as glue, so keep that in mind when deciding which option to use for your project.
3.4. Cardstock or Canvas
When it comes to creating your own wall art, the material you choose can make a big difference in the final product. Two popular options are cardstock and canvas. Cardstock is a thicker paper material that comes in a variety of colors and designs. It’s great for creating smaller pieces of wall art or for layering to add dimension. Canvas, on the other hand, is a heavier and more durable material that can be stretched and framed. It’s ideal for larger pieces of wall art or for creating a more polished look. Consider the size and style of your project before deciding which material to use.
3.5. Optional: Frame
To create these 10 DIY wall art ideas with paint chips, you will need the following materials:
– Paint chips in various colors
– Scissors
– Glue
– Paintbrushes
– Canvas or poster board
– Tape
– Picture frames (optional)
– Stencils (optional)
– Paint (optional)
– Mod Podge (optional)
4. Choosing Your Color Scheme
When it comes to creating DIY wall art with paint chips, choosing the right color scheme is crucial. Take some time to think about the mood you want to create in the room. Do you want it to feel calm and relaxing, or bright and energetic? Once you have a general idea, start gathering paint chips in colors that fit your desired scheme. You can also use a color wheel to help you choose complementary colors that will work well together. Remember, there are no hard and fast rules when it comes to color, so feel free to experiment and have fun!
4.1. Consider Your Room’s Color Palette
When it comes to creating DIY wall art using paint chips, one of the first things you’ll want to consider is your room’s existing color palette. This will help you choose a color scheme that complements your decor and creates a cohesive look throughout the space. Take a look at the colors in your furniture, curtains, and other decorative accents to get an idea of what shades will work well together. You can also use a color wheel to identify complementary or contrasting colors that will add visual interest to your wall art project. By taking the time to consider your room’s color palette, you’ll be able to create DIY wall art that looks professional and polished.
4.2. Create a Mood with Colors
Colors play a vital role in setting the mood of a room. They have the power to evoke emotions and create a sense of calmness or excitement. When choosing a color scheme for your DIY wall art project, consider the mood you want to create. Do you want a vibrant and energetic space or a relaxed and peaceful atmosphere? Different colors can achieve different effects, so take some time to experiment and find the perfect palette for your project.
4.3. Mix and Match Colors and Patterns
Mixing and matching colors and patterns can be a great way to add visual interest to your DIY wall art projects. When choosing your color scheme, consider using complementary colors, which are opposite each other on the color wheel. For example, blue and orange are complementary colors. You can also use analogous colors, which are adjacent to each other on the color wheel. For example, blue and green are analogous colors. When choosing patterns, try to vary the scale and type of pattern. For example, pair a large floral print with a small polka dot print. Mixing stripes and plaid can also be an interesting combination. Experiment with different color and pattern combinations to find the perfect look for your DIY wall art.
4.4. Use Color Theory for Balance
When choosing your color scheme for your DIY wall art project, it’s important to consider color theory for balance. This theory states that colors opposite each other on the color wheel create balance and harmony. For example, pairing a warm color like orange with a cool color like blue can create a visually striking contrast. Additionally, using tints and shades of a single color can add depth and interest to your artwork. Experiment with different combinations until you find the perfect balance for your space.
4.5. Experiment with Different Shades and Tints
Experimenting with different shades and tints can take your DIY wall art to the next level. Instead of sticking to one color, try using various shades and tints of that color to create depth and dimension in your artwork. For example, if you choose blue as your primary color, you could use a lighter shade of blue for the background and a darker shade of blue for the foreground, or you could use a tint of blue for the background and a shade of blue for the foreground. The possibilities are endless when it comes to experimenting with color, so don’t be afraid to try different combinations until you find the perfect one for your DIY wall art.
5. Design Ideas
DIY wall art is a great way to add a personal touch to your home decor without breaking the bank. One unique and affordable material to use in your DIY wall art projects is paint chips. These colorful little squares, often available for free at hardware stores, can be transformed into stunning pieces of art with a little creativity and effort. Here are 10 DIY wall art ideas with paint chips to inspire your next project:
5.1. Geometric Shapes
Geometric shapes are a popular choice for DIY wall art projects. They add a modern and stylish touch to any room. There are endless possibilities when it comes to using geometric shapes in your design. You can create a bold statement piece or a subtle accent. Some popular shapes include triangles, circles, hexagons, and diamonds. Experiment with different sizes and colors to find the perfect combination for your space.
5.2. Ombre Effect
The ombre effect is a popular design trend that involves blending two or more colors together seamlessly. It can be achieved with paint chips by selecting a range of shades within the same color family. To create the ombre effect, start with the lightest shade at the top and gradually darken the color as you move down the wall. This technique can be used to create a stunning focal point in any room.
5.3. Stripes and Chevrons
One easy way to add some visual interest to your DIY wall art is by incorporating stripes and chevrons. These patterns are easy to create with paint chips, and can be customized to fit any color scheme. For stripes, simply cut strips of paint chips in varying widths and glue them in a horizontal or vertical pattern. For chevrons, cut the chips into triangles and arrange them in a zigzag pattern. Experiment with different color combinations and patterns to create a unique and eye-catching piece of wall art.
5.4. Typography and Quotes
Typography and quotes are a great way to add personality and meaning to your DIY wall art projects. You can use stencils or freehand your favorite quotes, lyrics, or sayings onto your painted chip canvases. You can also experiment with different fonts and typography styles to create a unique and eye-catching design. Consider using contrasting colors for your text to make it stand out even more. Whether you choose to go for a motivational quote or a witty pun, typography and quotes are sure to make your DIY wall art project one-of-a-kind.
5.5. Abstract Art
Abstract art is a style of art that uses shapes, colors, and forms to create a visual representation of an idea or emotion. It often does not attempt to accurately depict real life, but instead focuses on the creative expression of the artist. Abstract art can be a great addition to any home decor, as it can add a pop of color and visual interest to a room. This section will explore some design ideas for incorporating abstract art into your DIY wall art projects.
6. Step-by-Step Instructions
1. Choose your paint chips: Select a variety of paint chips in different shades and colors that you like. Make sure to choose enough chips to cover the size of the wall art you want to create.
2. Cut the chips: Cut the paint chips into various shapes and sizes using scissors or a paper cutter.
3. Arrange the chips: Experiment with different arrangements of the paint chips until you find a design that you like.
4. Glue the chips: Once you have finalized your design, glue the chips onto a piece of cardstock or canvas using a glue stick or craft glue.
5. Frame the art: Once the glue has dried, frame your new DIY wall art and hang it up for all to see!
6.1. Cut Paint Chips into Shapes
To create unique and personalized wall art, try cutting paint chips into different shapes. This is a simple and inexpensive way to add some color and texture to your walls. Here’s how to do it:
1. Gather a variety of paint chips in different colors and shades.
2. Decide on the shapes you want to create. You can use a stencil or freehand your designs.
3. Cut out your shapes using scissors or a craft knife.
4. Arrange your shapes on a piece of paper or cardstock until you find a design you like.
5. Glue your shapes onto the paper or cardstock.
6. Frame your finished artwork and hang it on the wall.
6.2. Arrange Shapes on Cardstock or Canvas
To create a unique and colorful piece of wall art, arranging shapes on cardstock or canvas using paint chips is a great option. Follow these simple step-by-step instructions to make your own DIY wall art:
1. Start by collecting a variety of paint chips in your desired colors.
2. Choose a shape for your art, such as triangles, circles, or squares.
3. Use a stencil or freehand draw your chosen shape onto cardstock or canvas.
4. Cut out the shape using scissors or a craft knife.
5. Arrange the shapes onto your cardstock or canvas in your desired pattern.
6. Once you have the desired layout, use glue or double-sided tape to adhere the shapes in place.
7. Let the glue dry completely before hanging your new DIY wall art.
6.3. Glue or Tape Shapes in Place
To create a unique and colorful wall art piece, consider using glue or tape to hold paint chip shapes in place. Start by selecting a variety of paint chips in different colors and shades. Then, cut the chips into various shapes such as circles, triangles, or squares. Arrange the shapes on a blank canvas or poster board until you find a design you like. Once you have your design, use glue or tape to secure the shapes in place. This simple DIY project is an easy way to add a pop of color to any room.
6.4. Add Additional Details (Optional)
If you want to add more details to your DIY wall art project, there are several ways to do so. You can incorporate other materials such as fabric, wood, or even recycled items like bottle caps or cardboard. You can also experiment with different paint finishes and textures to add dimension and interest to your piece. Additionally, you can try adding decorative elements such as stencils, decals, or glitter to make your art truly unique. Remember, the only limit is your imagination, so don’t be afraid to get creative and have fun with your DIY wall art project!
6.5. Frame Your Artwork (Optional)
If you want to add an extra touch of sophistication to your DIY wall art, consider framing your artwork. Not only does it protect your creation, but it also adds a polished look to your decor. You can purchase frames at many home decor stores or find affordable options at thrift stores and garage sales. Make sure to measure your artwork before selecting a frame to ensure a proper fit. Once you have your frame, remove the glass and backing before placing your artwork inside. Use the backing and hangers provided with the frame to secure your artwork in place. Hang your framed artwork on the wall using a level to ensure it is straight.
Conclusion
In conclusion, creating wall art with paint chips is a fun and easy way to add a pop of color and personality to your home. With these 10 DIY ideas, you can transform your space into a unique and creative haven that reflects your personal style.


These 10 innovative and imaginative DIY home decor ideas from [object Object] provide a refreshing approach to enhancing ones living…