
Are you looking to give your home a fresh new look? Consider DIY wall painting! With just a little bit of creativity and some paint, you can transform any room in your house. Here are 10 DIY wall painting ideas to get you started.
- 1. DIY Wall Painting Ideas
- 1.1. Introduction
- 1.2. Materials Needed
- 1.3. Preparation
- 1.4. Techniques
- 1.5. Tips and Tricks
- 2. Introduction
- 2.1. Why Paint Your Walls?
- 2.2. Benefits of DIY Painting
- 2.3. Choosing the Right Colors
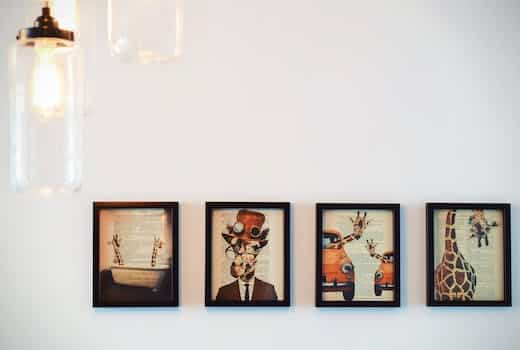
- 2.4. Design Inspiration
- 2.5. Budget Considerations
- 3. Materials Needed
- 3.1. Paint Brushes and Rollers
- 3.2. Paint Trays and Liners
- 3.3. Painter’s Tape
- 3.4. Drop Cloths
- 3.5. Paint
- 4. Preparation
- 4.1. Cleaning the Walls
- 4.2. Filling in Holes and Cracks
- 4.3. Sanding and Priming
- 4.4. Masking Off Areas
- 4.5. Setting Up Your Workspace
- 5. Techniques
- 5.1. Stripes and Patterns
- 5.2. Ombre and Gradient
- 5.3. Stenciling and Decals
- 5.4. Sponge Painting
- 5.5. Texture Painting
- 6. Tips and Tricks
1. DIY Wall Painting Ideas
Painting your walls is a great way to transform your home without breaking the bank. If you’re looking for some DIY wall painting ideas, we’ve got you covered. From bold stripes to geometric patterns, there are endless possibilities. Here are 10 ideas to get you started:
1. Ombre Walls: Blend two or three shades of the same color for a stunning gradient effect.
2. Striped Walls: Use painter’s tape to create vertical or horizontal stripes in various widths.
3. Stenciled Walls: Create a repeating pattern with stencils and paint.
4. Polka Dot Walls: Use a round sponge or stencil to create a playful polka dot design.
5. Chalkboard Walls: Paint a section of your wall with chalkboard paint for a functional and fun design element.
6. Ombré Stripes: Combine ombre and stripes for a unique look.
7. Chevron Walls: Use painter’s tape to create a chevron pattern in one or more colors.
8. Geometric Walls: Create a geometric pattern with painter’s tape and paint.
9. Accent Walls: Paint one wall in a bold color for a statement piece.
10. Faux Wallpaper: Use a stencil or freehand a design to create the look of wallpaper without the cost.
1.1. Introduction
Are you tired of staring at plain, boring walls in your home? Luckily, there are plenty of DIY wall painting ideas that can help transform your space into a stylish and personalized oasis. Whether you’re looking to create a bold accent wall or add a subtle touch of color to your room, these 10 DIY wall painting ideas are sure to inspire your creativity.
1.2. Materials Needed
Before we dive into these 10 DIY wall painting ideas, let’s make sure you have all the necessary materials. You will need: painter’s tape, drop cloths or old sheets to protect your floors and furniture, a variety of paint brushes in different sizes, rollers and roller covers, paint trays, stir sticks, paint primer, and your chosen paint colors. Additionally, if you plan on creating any intricate designs or patterns, you may want to invest in stencils or a projector to help guide your hand.
1.3. Preparation
Before diving into the fun part of painting, it’s important to properly prepare your walls. This involves cleaning the surface, filling in any cracks or holes, and applying a primer if necessary. Taking the time to prepare your walls will ensure that your DIY painting project turns out beautifully and lasts for years to come.
1.4. Techniques
DIY wall painting ideas can transform any room in your home without breaking the bank. With a little creativity and some basic supplies, you can create a beautiful and unique look that reflects your personal style. Here are 10 DIY wall painting ideas to get you started on your next home makeover project:
1. Ombre Walls: This painting technique involves blending two or more colors together to create a gradient effect. It’s a great way to add a pop of color to a neutral room.
2. Geometric Patterns: Use painter’s tape to create geometric shapes on your walls. You can choose to paint the shapes in different colors or leave them white for a subtle look.
3. Stenciled Walls: Stenciling is an easy way to create intricate designs on your walls without having to freehand them. You can find stencils in a variety of patterns and designs online or at your local craft store.
4. Striped Walls: Painting stripes on your walls is a classic technique that can give any room a timeless look. You can choose to paint horizontal or vertical stripes, and you can play around with different widths and colors.
5. Polka Dot Walls: Use a round sponge or stencil to create playful polka dots on your walls. You can choose to paint them in a uniform pattern or scatter them randomly.
6. Chalkboard Walls: Turn your walls into a canvas by painting them with chalkboard paint. You can use chalk to create a temporary design or message that can be easily wiped away.
7. Ombre Stripes: Combine the ombre and striped wall painting techniques by blending two or more colors in a gradient pattern.
8. Metallic Accents: Add a touch of glamour to your walls by painting them with metallic paint. You can choose to paint a small accent wall or create a metallic pattern on your entire wall.
9. Textured Walls: Use a textured roller or sponge to create a unique texture on your walls. You can choose from a variety of textures, such as brick, stone, or even clouds.
10. Mural Walls: If you’re feeling extra creative, you can paint a mural on your walls. This could be anything from a landscape scene to a favorite quote or phrase.
1.5. Tips and Tricks
If you’re looking for a way to spruce up your home without breaking the bank, then DIY wall painting ideas are a great place to start. Not only can you save money by doing it yourself, but you can also add your own personal touch to your home decor. Here are 10 DIY wall painting ideas that will transform any room in your home:
2. Introduction
Are you looking to transform your home without breaking the bank? One of the easiest and most cost-effective ways to do so is by giving your walls a fresh coat of paint. Not only can a new paint color completely change the look and feel of a room, but it can also be a fun DIY project to take on. In this article, we’ll share 10 DIY wall painting ideas that will inspire you to get creative and give your home a fresh new look.
2.1. Why Paint Your Walls?
Painting your walls can completely transform the look and feel of your home. Not only can it add a pop of color or a trendy accent wall, but it can also make a small room feel larger or a large room feel cozier. Additionally, painting your walls is a relatively simple and affordable DIY project that can be done in a weekend. So why not give your home a fresh new look with a fresh coat of paint?
2.2. Benefits of DIY Painting
Painting your walls can be a great DIY project that can transform the look of your home. Not only does it add a personal touch to your living space, but it also allows you to save money on labor costs. DIY painting also gives you the freedom to choose the colors and patterns that suit your preference and style. Additionally, it can be a fun and rewarding activity that you can do with your family and friends. In this article, we will provide you with some DIY wall painting ideas that you can try at home.
2.3. Choosing the Right Colors
Choosing the right colors is crucial when it comes to transforming your home with DIY wall painting ideas. The colors you choose can set the mood, create a sense of space, and even affect your emotions. Whether you want to create a cozy atmosphere in your living room or a calming oasis in your bedroom, the right color palette can make all the difference. In this section, we’ll explore some tips for choosing the perfect colors for your DIY wall painting project.
2.4. Design Inspiration
Are you feeling bored with the walls of your home? Do you want to add a touch of creativity to your living space? DIY wall painting is a great way to transform your home into a beautiful and inspiring space. With a little bit of imagination and some basic painting skills, you can create stunning wall designs that will make your home look like a work of art. In this article, we will explore 10 DIY wall painting ideas that will inspire you to unleash your inner artist and transform your home into a masterpiece.
2.5. Budget Considerations
Before embarking on any DIY project, it’s important to consider your budget. Painting your walls can be an affordable way to transform your home, but the cost can add up quickly if you’re not careful. Take some time to research the cost of paint, brushes, rollers, and any other necessary materials before starting your project. Consider buying in bulk or waiting for sales to save money. Additionally, think about the size of the room you’ll be painting and how much paint you’ll need. Overestimating can lead to wasted materials and unnecessary expenses. By planning ahead and being mindful of your budget, you can create a beautiful new look for your home without breaking the bank.
3. Materials Needed
Before you begin any DIY wall painting project, it is important to make sure you have all the necessary materials. Here are the materials you will need for these 10 DIY wall painting ideas:
– Paint (in desired colors)
– Paint brushes (various sizes)
– Painter’s tape
– Drop cloths or old sheets
– Sandpaper
– Primer (if needed)
– Paint roller and tray
– Stencils or stamps (if using)
– Level
– Pencil and eraser
Make sure to gather all of these materials before starting your project to ensure a smooth and successful painting process.
3.1. Paint Brushes and Rollers
When it comes to DIY wall painting, having the right tools is essential. Paint brushes and rollers are two of the most important materials you’ll need. Brushes come in various sizes and shapes, and can be used for cutting in and painting edges. Rollers are great for covering larger areas quickly and evenly. Make sure to choose the right type of brush or roller for the type of paint you’re using and the surface you’re painting on. Investing in high-quality brushes and rollers will make your DIY wall painting project much easier and give you a more professional-looking finish.
3.2. Paint Trays and Liners
When it comes to painting walls, having the right materials is essential. One of the most important tools in your painting arsenal is a paint tray. These come in a variety of sizes and materials, but generally consist of a shallow plastic or metal tray with ridges on one end to help distribute the paint evenly on your roller. Another helpful tool is a paint liner, which can be placed inside the tray to make clean-up a breeze. Simply remove the liner and discard the paint mess when you’re finished painting. Investing in quality paint trays and liners can save you time and hassle in the long run, making your DIY painting projects more enjoyable.
3.3. Painter’s Tape
Painter’s tape is an essential tool for any DIY wall painting project. It helps to create crisp, clean lines and prevents paint from bleeding onto adjacent surfaces. Make sure to choose a high-quality painter’s tape that is easy to apply and remove without damaging your walls.
3.4. Drop Cloths
One of the most important materials needed for any DIY wall painting project is a drop cloth. This will help protect your floors and furniture from any paint drips or spills. You can use a plastic drop cloth or a canvas one, depending on your preference. The canvas drop cloths are more durable and can be reused many times, while the plastic ones are cheaper and can be disposed of after use. Make sure to cover all the areas around the walls that you will be painting, and secure the drop cloth with tape to prevent any movement during the painting process.
3.5. Paint
Paint is the main material you’ll need for any wall painting project. Choose a paint that is suitable for the surface you’ll be painting on, and consider the finish you want as well. Matte finishes are great for hiding imperfections, while glossy finishes add a sleek and modern look. Don’t forget to also pick up paint brushes, rollers, and painter’s tape to ensure a clean and precise job.
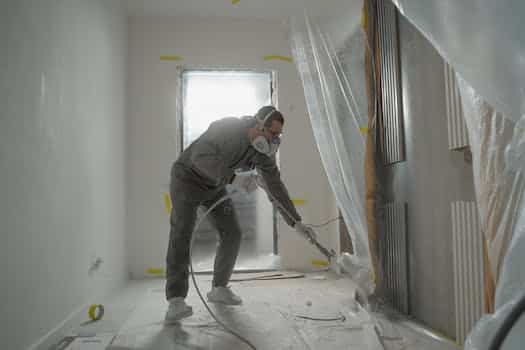
4. Preparation
Before you start any DIY wall painting project, it’s important to properly prepare the area and gather all necessary materials. This includes cleaning the walls, covering any furniture or flooring with drop cloths, and having all paint and tools ready. Additionally, consider the color scheme and design you want to achieve and do some research for inspiration and ideas. By taking these steps, you can ensure a successful and stress-free painting experience.
4.1. Cleaning the Walls
Before you start painting your walls, it’s important to make sure they are clean. Use a damp cloth or sponge to wipe down the surface and remove any dirt, dust, or grime. For tougher stains or marks, you may need to use a cleaning solution or mild detergent. Allow the walls to dry completely before you begin painting. This will ensure that the paint adheres properly and gives you a smooth, even finish. Taking the time to properly prepare your walls will make a big difference in the final result of your DIY painting project.
4.2. Filling in Holes and Cracks
Before starting your DIY wall painting project, it is important to prepare your walls. This includes filling in any holes or cracks with spackling paste or putty. Allow the paste to dry completely before sanding it down to create a smooth surface. This will ensure that your paint goes on evenly and looks flawless once it dries.
4.3. Sanding and Priming
Before beginning to paint your walls, it’s important to properly prepare the surface. This includes sanding and priming. Sanding helps to smooth out any imperfections or rough areas on the wall, creating a more even surface for the paint to adhere to. Priming is important because it creates a layer between the wall and the paint, helping the paint to stick better and providing a more even finish. Make sure to use a high-quality primer and sandpaper for best results.
4.4. Masking Off Areas
Before you start painting your walls, it is important to prepare the areas that you do not want to paint. This can include baseboards, trim, and ceilings. You can use painter’s tape to mask off these areas and create sharp, clean lines. Make sure to press the tape down firmly to prevent any paint from seeping through. Additionally, you may want to cover any furniture or flooring with plastic sheets to protect them from accidental splatters or drips.
4.5. Setting Up Your Workspace
Before starting any DIY project, it’s important to set up your workspace properly. For wall painting projects, you’ll need a cleared and cleaned space with good lighting. Make sure to cover any furniture or floors with drop cloths or plastic sheeting to protect them from paint splatters. Gather all of your painting supplies, including brushes, rollers, paint trays, and masking tape, and organize them in a way that makes sense to you. This will help you stay efficient and focused throughout the project.
5. Techniques
Transforming your home with a fresh coat of paint is an ideal way to spruce up your living space without breaking the bank. If you’re looking to add a personal touch to your home design, try these 10 DIY wall painting ideas. With a few simple techniques, you can turn your walls into beautiful, eye-catching masterpieces. From geometric patterns to ombre effects, there’s something for everyone in this list. So grab your paint brushes and get ready to unleash your inner artist!
5.1. Stripes and Patterns
One easy and effective technique for transforming the look of your walls is by using stripes and patterns. Stripes can add depth and interest to a room, while patterns can create a unique and personalized touch. There are endless options when it comes to incorporating stripes and patterns into your wall painting, including using painter’s tape to create clean lines, stenciling a repeating pattern, or even free-handing a design. Consider using a neutral base color and then adding pops of color with stripes or patterns, or use different shades of the same color to create a subtle and sophisticated look. Whatever your style, incorporating stripes and patterns into your wall painting can elevate the design of your home.
5.2. Ombre and Gradient
Ombre and gradient are two popular techniques that can transform your walls from plain to stunning. Ombre involves blending two or more colors together to create a gradual fade, while gradient involves creating a smooth transition of one color to another. Both techniques can be applied to walls using paint, and can be customized to fit any color scheme or design aesthetic. With a little practice and patience, you can use ombre and gradient to create a truly unique and eye-catching wall design.
5.3. Stenciling and Decals
Stenciling and decals are great techniques for adding intricate designs and patterns to your walls without having to freehand paint them. Stencils can be purchased at most craft stores or online, and come in a variety of designs and sizes. Simply tape the stencil onto the wall and use a stencil brush or sponge to carefully apply paint within the stencil openings. Decals are another option for adding designs to your walls, and can be easily applied and removed without damaging the wall surface. Both stenciling and decals are great options for those who want to add a personal touch to their walls but may not have the artistic ability or time to freehand paint.
5.4. Sponge Painting
Sponge painting is a great technique for creating a textured and unique look on your walls. To get started, you will need a sea sponge, paint, and a tray or plate for mixing the paint. Dip the sponge into the paint and then dab it onto the wall in a random pattern. You can use one or multiple colors to create the desired effect. Allow the first layer of paint to dry completely before adding additional layers. For a more subtle look, lightly sponge the paint onto the wall. For a bolder look, apply the paint more heavily. Experiment with different colors and patterns to create a one-of-a-kind design.
5.5. Texture Painting
Texture painting is an excellent way to add depth and dimension to your walls. It involves using different techniques to create a tactile surface that can be both visually appealing and interesting to touch. There are many different ways to achieve a textured effect, including using a stippling brush, a sponge, or even crumpled up paper. With the right tools and a bit of practice, you can create a unique and beautiful look that will make your walls stand out.
6. Tips and Tricks
Transforming your home can be a fun and creative process, especially when it comes to painting your walls. Whether you’re looking to add a pop of color, create a statement wall, or just refresh your space, there are plenty of DIY wall painting ideas that can help you achieve your desired look. Here are 10 tips and tricks to get you started:
6.1. Working with Different Surfaces
When it comes to painting your walls, the type of surface you are working on can greatly affect the outcome of your project. Different surfaces require different techniques and tools to achieve the best results. Here are some tips and tricks for working with different surfaces:
1. Drywall: Use a primer before painting to ensure an even finish. Sand any rough spots before applying paint.
2. Wood: Sand the surface before painting and use a wood filler to fill in any cracks or holes.
3. Brick or Concrete: Use a masonry primer before painting. Apply paint in thin layers to avoid drips and ensure even coverage.
4. Metal: Use a metal primer before painting and apply paint in thin layers to avoid drips and ensure even coverage.
By following these tips and tricks, you can achieve a professional-looking paint job on any surface in your home.
6.2. Mixing Paints for Custom Colors
Mixing paints to create custom colors can be a fun and cost-effective way to personalize your home. Start with a base color and experiment with adding small amounts of other colors until you achieve the desired shade. Remember to mix enough paint to cover the entire area you plan to paint, as it can be difficult to reproduce the exact same shade again. Always test your color on a small area before committing to painting the entire wall. Happy mixing!
6.3. Avoiding Drips and Splatters
When painting your walls, drips and splatters can be a frustrating and messy problem. To avoid this issue, make sure to use painter’s tape to mask off areas you don’t want to paint. Additionally, use a roller with a high-quality cover to avoid excess paint buildup and drips. Finally, take your time and use a steady hand when painting along edges and corners to prevent splatters. By following these simple tips, you can achieve a clean and professional-looking paint job without any drips or splatters.
6.4. Using Natural Light to Your Advantage
One of the easiest and most effective ways to transform your home’s appearance is by painting your walls. However, before you start painting, it’s important to consider how natural light can affect the color and overall look of your walls. Natural light can enhance or detract from the colors you choose, so it’s important to use it to your advantage. Here are some tips for using natural light to enhance your wall painting:
– Consider the direction your room faces. North-facing rooms tend to have cooler light, while south-facing rooms have warmer light. East-facing rooms get morning light, while west-facing rooms get afternoon light. Keep these factors in mind when choosing your paint colors.
– Test your paint colors in natural light. Paint small sections of your wall and observe how they look at different times of the day. This will give you a better idea of how the color will look in your room.
– Use natural light to accentuate architectural features. If you have interesting architectural features, such as arches or columns, use natural light to highlight them.
– Use window treatments to control natural light. If you have a lot of natural light coming into your room, consider using window treatments to control the amount of light and the direction it comes from.
By using natural light to your advantage, you can create a beautiful and cohesive look in your home.
6.5. Finishing Touches and Clean Up
Once you have finished painting your walls, it is important to clean up any drips or mistakes as soon as possible. Use a damp cloth to wipe away any excess paint, being careful not to smear it onto the surrounding areas. You can also use a small paintbrush to touch up any spots that need a little extra attention. Additionally, don’t forget to remove any painter’s tape or protective coverings before the paint fully dries. This will help prevent any peeling or chipping of the paint once it is fully set. Finally, take a step back and admire your handiwork! With a little time and effort, you have transformed your home with a fresh coat of paint.
Conclusion
Incorporating these 10 DIY wall painting ideas can help transform your home into a personalized and cozy space that reflects your unique style and personality.

These 10 innovative and imaginative DIY home decor ideas from [object Object] provide a refreshing approach to enhancing ones living…