
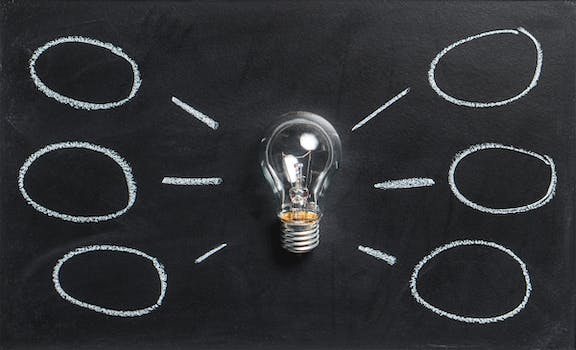
Are you looking to brighten up your space without breaking the bank? Look no further! In this article, we will explore 10 easy and affordable DIY lighting ideas that will transform any room into a well-lit haven. From unique pendant lights to charming string lights, you’ll find plenty of inspiration to add a touch of warmth and style to your home. Get ready to unleash your creativity and let there be light!
- 1. Introduction
- 1.1. Why DIY lighting?
- 1.2. Benefits of DIY lighting
- 1.3. Importance of affordable options
- 1.4. Materials needed for DIY lighting
- 1.5. Safety precautions
- 2. 1. Repurposing Household Items
- 2.1. Using mason jars as pendant lights
- 2.2. Creating a lamp from a wine bottle
- 2.3. Turning a colander into a unique lampshade
- 2.4. Using old CDs to create a disco ball light fixture
- 2.5. Transforming a ladder into a rustic chandelier
- 3. 2. Paper and Cardboard Crafts
- 3.1. Making origami lanterns
- 3.2. Creating a paper cup pendant light
- 3.3. Crafting a cardboard tube chandelier
- 3.4. Designing a paper globe light
- 3.5. Building a geometric paper lampshade
- 4. 3. Upcycling and Recycling
1. Introduction
Lighting plays a crucial role in creating the right ambiance and enhancing the overall look of a space. However, buying fancy lighting fixtures can be expensive. Fortunately, there are several easy and affordable DIY lighting ideas that you can try. Whether you want to add a touch of elegance to your living room or create a cozy atmosphere in your bedroom, these DIY lighting ideas will help you achieve the desired effect without breaking the bank. From repurposing everyday items to creating your own unique designs, let’s explore 10 easy and affordable DIY lighting ideas that will transform your space.
1.1. Why DIY lighting?
DIY lighting has become increasingly popular among homeowners and interior design enthusiasts. There are several reasons why people are opting for DIY lighting projects instead of buying pre-made fixtures. Firstly, DIY lighting allows individuals to unleash their creativity and personalize their living spaces. By creating their own lighting fixtures, people can showcase their unique style and add a personal touch to their homes. Additionally, DIY lighting is often more affordable compared to store-bought options. With a little creativity and resourcefulness, one can create stunning lighting fixtures using inexpensive materials. Moreover, DIY lighting projects provide a sense of accomplishment and satisfaction. The process of designing and building your own lighting fixtures can be rewarding and fulfilling. It allows individuals to learn new skills, explore their artistic side, and take pride in their handmade creations. Lastly, DIY lighting offers flexibility and customization. Unlike mass-produced lighting fixtures, DIY projects allow homeowners to tailor the design, size, and functionality of the lighting to perfectly suit their needs and preferences. Overall, DIY lighting is a fantastic way to enhance the ambiance of any space while expressing one’s creativity and saving money.
1.2. Benefits of DIY lighting
DIY lighting, also known as Do-It-Yourself lighting, offers numerous benefits for those who are looking to add a personal touch to their home decor. By creating your own lighting fixtures, you have the opportunity to showcase your creativity and style while saving money at the same time. DIY lighting projects are not only affordable but also provide a sense of satisfaction and accomplishment. Additionally, DIY lighting allows you to customize your lighting fixtures according to your specific needs and preferences. Whether you want to create a cozy ambiance or a statement piece, DIY lighting offers endless possibilities. In this article, we will explore ten easy and affordable DIY lighting ideas that you can try at home.
1.3. Importance of affordable options
Affordable options play a crucial role when it comes to DIY lighting ideas. Not everyone has a large budget to spend on expensive lighting fixtures, yet everyone deserves a well-lit and aesthetically pleasing space. This is where affordable options come to the rescue, offering creative and budget-friendly solutions for DIY enthusiasts. By exploring easy and affordable DIY lighting ideas, individuals can transform their homes with unique and personalized lighting arrangements without breaking the bank. In this article, we will delve into ten such ideas that are not only easy to implement but also light on the wallet.
1.4. Materials needed for DIY lighting
When it comes to DIY lighting, having the right materials is essential. Whether you’re looking to add some ambiance to your living space or want to showcase your creative side, having the necessary materials will make the process much smoother. Here are some of the materials you’ll need for your DIY lighting projects:
1. Light Bulbs: Depending on the type of lighting you want to create, you’ll need various types of light bulbs. Consider the wattage, color temperature, and energy efficiency when choosing the right bulbs for your project.
2. Lamp Sockets: Lamp sockets are the holders that secure the light bulbs in place. Make sure to choose sockets that are compatible with the type of bulbs you’re using.
3. Lamp Cord: The lamp cord is what connects the lamp socket to the power source. Opt for a cord that is durable and long enough to reach the nearest outlet.
4. Switches: If you want to have control over turning the lights on and off, you’ll need switches. There are various types of switches available, including toggle switches, push-button switches, and dimmer switches.
5. Wires and Connectors: To ensure proper electrical connections, you’ll need wires and connectors. These will help you connect the lamp socket, cord, and switches together.
6. Lamp Shades: Lamp shades not only add style to your lighting but also help diffuse the light and create a pleasant ambiance. Choose shades that complement your overall design theme.
7. Decorative Materials: Depending on your creativity and preferences, you may want to incorporate decorative materials such as beads, ribbons, or fabric to enhance the visual appeal of your DIY lighting.
8. Tools: Don’t forget to gather the necessary tools such as wire cutters, pliers, screwdrivers, and a hot glue gun. These tools will come in handy during the assembly process.
Remember, safety should always be a priority when working with electricity. Make sure to follow proper wiring techniques and consult an electrician if you’re unsure. Now that you have an idea of the materials needed, let’s explore some easy and affordable DIY lighting ideas!
1.5. Safety precautions
When it comes to DIY lighting projects, safety should always be a top priority. Whether you are a seasoned DIY enthusiast or just starting out, taking the necessary precautions can prevent accidents and ensure a successful project. This section will outline some important safety measures to keep in mind before diving into the world of DIY lighting.
1. Familiarize yourself with electrical safety: Before attempting any DIY lighting project, it is crucial to have a basic understanding of electrical safety. Make sure you know how to properly handle electrical connections, use tools safely, and understand the potential risks involved.
2. Turn off the power: Whenever you are working with electrical components or making changes to existing lighting fixtures, always turn off the power at the circuit breaker. This will help prevent electric shocks and reduce the risk of fire.
3. Use appropriate safety gear: Wear protective gear such as safety goggles, gloves, and non-slip shoes when working with tools and electrical equipment. This will protect you from potential injuries and enhance your overall safety.
4. Choose the right materials: Opt for high-quality materials that are suitable for the specific DIY lighting project you are undertaking. Using substandard or incompatible materials can compromise safety and lead to faulty installations.
5. Follow instructions and guidelines: Whether you are following a DIY tutorial or using a lighting kit, always read and follow the instructions carefully. Pay attention to any specific safety guidelines provided by the manufacturer.
6. Avoid overloading circuits: Be mindful of the electrical load on your circuits. Overloading can cause overheating, which may lead to electrical malfunctions or even a fire. If you are unsure about the load capacity, consult a professional electrician.
7. Secure wiring properly: When installing or replacing wiring, make sure it is securely fastened and properly insulated. Loose or exposed wires can pose a safety hazard and increase the risk of electrical accidents.
8. Test before finalizing: Before completing your DIY lighting project, test all the connections, switches, and fixtures. This will help identify any potential issues or faults that need to be addressed before the project is considered finished.
9. Keep flammable materials away: When working with lighting fixtures or installing new lights, ensure that flammable materials such as curtains, paper, or fabrics are kept at a safe distance. This will minimize the risk of accidental fires.
10. Seek professional help if needed: If you are unsure about any aspect of your DIY lighting project or encounter difficulties, do not hesitate to seek professional assistance. It is better to be safe than sorry, and professionals can provide valuable guidance and expertise.
By following these safety precautions, you can embark on your DIY lighting journey with confidence and peace of mind.
2. 1. Repurposing Household Items
Repurposing household items can be a fun and creative way to add unique lighting to your home. Not only is it affordable, but it also allows you to showcase your DIY skills. Here are 10 easy and affordable DIY lighting ideas using repurposed household items:
1. Mason Jar Pendant Lights: Turn those old mason jars into stunning pendant lights by adding a simple light fixture and hanging them from the ceiling. It adds a rustic charm to any room.
2. Wine Bottle Chandelier: Empty wine bottles can be transformed into a beautiful chandelier. Simply attach them to a wooden plank or metal frame, add some fairy lights, and hang it up for an elegant lighting fixture.
3. Vintage Teacup Sconces: If you have vintage teacups lying around, why not turn them into unique sconces? Attach them to the wall, wire them up with small lights, and enjoy the soft and cozy ambiance they create.
4. Colander Pendant Lights: Give your kitchen a quirky touch by repurposing a colander into a pendant light. Drill a hole in the bottom, insert a light bulb, and suspend it from the ceiling for a playful lighting fixture.
5. Tin Can Lanterns: Create charming lanterns by recycling tin cans. Punch holes in the cans to form patterns or designs, place a small candle or LED light inside, and hang them outdoors for a magical glow.
6. Cheese Grater Light Fixture: Add an industrial touch to your space by repurposing a cheese grater into a unique light fixture. Attach it to a wooden base, wire it up with a light bulb, and display it on a table or mount it on the wall.
7. Book Lampshade: Give new life to old books by turning them into lampshades. Carefully hollow out the pages, insert a light bulb, and watch as the words and stories come to life through the warm glow.
8. Bicycle Wheel Chandelier: If you have an old bicycle wheel gathering dust, why not turn it into a statement chandelier? Attach light bulbs or fairy lights to the spokes, hang it from the ceiling, and create a stunning focal point in any room.
9. Vintage Fan Light Fixture: Repurpose an antique fan into a unique light fixture that adds a touch of nostalgia to your home. Remove the blades, wire it up with lights, and hang it from the ceiling for a vintage-inspired look.
10. Mason Jar Solar Lights: Create eco-friendly outdoor lighting by transforming mason jars into solar lights. Insert solar-powered LED lights into the jars, place them in sunny spots during the day, and enjoy the magical glow they emit at night.
These DIY lighting ideas not only save money but also allow you to put your creative skills to good use. So, gather those unused household items and start illuminating your home with style!
2.1. Using mason jars as pendant lights
Using mason jars as pendant lights can be a brilliant way to repurpose household items and create unique lighting fixtures. Mason jars are versatile and readily available, making them an affordable option for DIY lighting projects. With a few simple steps, you can transform ordinary mason jars into stylish pendant lights that add a charming touch to any space.
To start, gather the necessary materials: mason jars of your desired size, pendant light kits, light bulbs, and any additional decorative elements you may want to incorporate. Begin by cleaning the mason jars thoroughly and ensuring they are free from any dirt or residue.
Next, carefully drill a small hole in the center of the jar’s metal lid to accommodate the pendant light kit. Make sure to choose a drill bit size that matches the diameter of the kit’s cord. Insert the cord through the hole, following the manufacturer’s instructions for securing it in place.
Once the cord is securely attached, screw the metal lid back onto the mason jar, ensuring it is tightly sealed. Now, you can attach the pendant light kit’s socket to the top of the jar, making sure it is centered and secure. Finally, insert a light bulb of your choice into the socket.
To enhance the visual appeal of your mason jar pendant lights, consider adding decorative elements such as ribbons, beads, or even painting the jars in vibrant colors. These personal touches can help customize the lights to match your interior design style.
When installing the pendant lights, ensure that they are hung securely and at an appropriate height for the space. Mason jar pendant lights work well in various settings, including kitchens, dining areas, and even outdoor spaces.
By repurposing mason jars as pendant lights, you not only create unique and eye-catching lighting fixtures but also contribute to sustainable living by giving new life to household items. So, why not get creative and embark on this fun and affordable DIY lighting project today!
2.2. Creating a lamp from a wine bottle
Creating a lamp from a wine bottle is a simple and creative way to repurpose a household item. With just a few materials and some basic tools, you can transform an empty wine bottle into a unique and stylish lighting fixture. This DIY project is not only affordable but also allows you to showcase your creativity and add a personal touch to your home decor.
To start, gather the necessary materials: an empty wine bottle, a lamp kit (including a socket, cord, and plug), a lampshade, a drill with a glass-cutting bit, sandpaper, and a lightbulb.
First, ensure that the wine bottle is thoroughly cleaned and dried. Remove any labels or adhesive residue using warm soapy water and a scrub brush. Once the bottle is clean, use the drill with a glass-cutting bit to create a hole near the bottom of the bottle. This hole will serve as the entry point for the lamp cord.
Next, insert the lamp cord through the hole in the wine bottle, leaving enough length to reach the top of the bottle. Follow the instructions provided with the lamp kit to securely attach the socket to the cord inside the bottle. Once the socket is in place, attach the plug to the other end of the cord.
After assembling the lamp kit, it’s time to add the finishing touches. Choose a lampshade that complements the style and size of the wine bottle. Attach the lampshade to the socket, ensuring a secure fit.
Finally, insert a lightbulb of your choice into the socket and plug in your newly created wine bottle lamp. Adjust the position of the cord and lampshade as needed, and enjoy the warm and inviting glow of your DIY lighting fixture.
Creating a lamp from a wine bottle not only repurposes a household item but also adds a touch of elegance and uniqueness to your space. This DIY project is both fun and rewarding, allowing you to showcase your creativity while saving money on expensive lighting fixtures. So why not give it a try and transform your empty wine bottles into beautiful and functional lamps?
2.3. Turning a colander into a unique lampshade
One creative and affordable way to add unique lighting to your home is by repurposing household items. For instance, you can turn a colander into a one-of-a-kind lampshade. This DIY project is not only fun but also allows you to showcase your creativity. By using a colander, you can create a lampshade with interesting patterns and designs. Simply remove the handle and any unnecessary parts, and attach a light bulb fixture to the top. The holes in the colander will create beautiful light patterns when the lamp is turned on. This repurposed colander lampshade will surely become a conversation starter in any room.
2.4. Using old CDs to create a disco ball light fixture
One creative way to repurpose old CDs is by using them to create a disco ball light fixture. This DIY project is a fun and affordable way to add some sparkle and excitement to your home decor. To make the disco ball, you will need a collection of old CDs, a foam ball or a Styrofoam sphere, a hot glue gun, and a string or wire for hanging.
Start by cutting the CDs into small pieces using a pair of scissors or a sharp craft knife. Be careful when handling the CDs, as they can be sharp. Once you have a pile of CD pieces, begin attaching them to the foam ball or Styrofoam sphere using a hot glue gun. Start at the top and work your way down, covering the entire surface of the ball.
Once all the CD pieces are attached, allow the glue to dry completely. Once dry, attach a string or wire to the top of the ball for hanging. Find a suitable spot in your home to hang the disco ball light fixture and enjoy the mesmerizing light patterns it creates when hit by a light source.
This DIY project not only breathes new life into old CDs but also provides a unique and eye-catching lighting solution for any room. It’s a great way to reduce waste and get creative with household items!
2.5. Transforming a ladder into a rustic chandelier
Transforming a ladder into a rustic chandelier is a creative and unique way to repurpose household items. By giving new life to an old ladder, you can create a stunning lighting fixture that adds a touch of rustic charm to any space. This DIY project is not only affordable but also allows you to showcase your creativity and resourcefulness.
To start, you will need an old wooden ladder that is sturdy and in good condition. Make sure to clean and sand the ladder thoroughly before beginning the transformation process. You may choose to paint or stain the ladder to match your desired aesthetic.
Next, gather the necessary lighting components. This can include pendant lights, light bulbs, and electrical wiring. You can find these items at your local hardware store or online. Ensure that the lighting components are compatible with the ladder’s design and weight capacity.
Once you have all the materials, it’s time to assemble the rustic chandelier. Carefully attach the pendant lights to the ladder’s rungs, evenly spacing them out. Secure the wiring along the ladder’s frame, making sure to keep it hidden for a cleaner look. Seek professional help if you are unsure about electrical connections.
After assembling the chandelier, hang it from the ceiling using sturdy hooks or chains. Make sure to test the lights and adjust them as needed. The rustic chandelier will create a warm and inviting atmosphere, casting a beautiful glow in the room.
Repurposing a ladder into a rustic chandelier not only adds character to your home but also contributes to sustainable living by giving a new purpose to an old item. This DIY lighting idea is a perfect way to showcase your creativity and transform everyday objects into stunning decor pieces.
3. 2. Paper and Cardboard Crafts
Paper and cardboard crafts are a fantastic way to create unique and affordable DIY lighting solutions. With just a few simple materials, you can transform ordinary paper and cardboard into stunning light fixtures that will add a touch of style to any room. Whether you’re looking for a statement piece or a subtle accent, these easy DIY lighting ideas are sure to brighten up your space.
One of the simplest paper crafts for lighting is creating a pendant lampshade. Using a sturdy cardboard base, cut out your desired shape and size. Then, cover the cardboard with decorative paper or fabric of your choice. You can get creative with patterns, colors, and textures to match your personal style. Once the covering is secure, attach a pendant light kit to the top, and voila! You have a custom-made pendant lampshade.
Another fun and affordable idea is to make paper lanterns. Cut out strips of paper in various lengths and widths. Connect the ends of each strip to form a loop, and secure them together in the center with a brad or paperclip. Gently fan out the strips to create a lantern shape. You can experiment with different colors and patterns to create a whimsical effect. Hang these lanterns in clusters or individually for a charming and soft lighting option.
If you want to add a touch of elegance to your space, try making paper chandeliers. Start by cutting out multiple identical shapes from cardstock or thick paper. This could be circles, stars, or any other design you prefer. Fold each shape in half and glue them together back-to-back, leaving a small opening at the top. Thread a string or wire through the openings of each shape and attach it to a circular frame or hoop. Hang your finished chandelier from the ceiling, and watch as it casts beautiful shadows and patterns in the room.
To create a cozy and warm atmosphere, consider making paper candle holders. Cut out strips of paper and form them into cylindrical shapes, securing the ends with glue or tape. You can decorate these holders with cut-out patterns or simply leave them plain. Place a small tea light or votive candle inside each holder, and enjoy the soft and flickering glow it creates.
These are just a few examples of the countless paper and cardboard crafts you can create to enhance your lighting. The best part is that they are not only affordable but also customizable, allowing you to showcase your creativity. So, gather your materials and get ready to illuminate your space with these easy and budget-friendly DIY lighting ideas.
3.1. Making origami lanterns
Origami lanterns are a beautiful and affordable way to add a touch of charm to any space. With just a few simple materials and some basic folding techniques, you can create stunning lanterns that will illuminate your surroundings in a soft and inviting glow. Whether you’re hosting a party, decorating your home, or simply looking for a fun craft project, making origami lanterns is a creative and enjoyable activity.
To get started, all you need is some colorful paper or lightweight cardboard. You can choose different colors or patterns to match your personal style or the theme of your event. Additionally, you’ll need a ruler, scissors, a pencil, and some glue or tape.
Begin by cutting the paper or cardboard into a square shape. The size of the square will determine the final size of your lantern, so choose accordingly. Next, use the ruler and pencil to mark the center point of the square on each side. These marks will serve as a guide for your folding.
Now it’s time to start folding! Begin by folding each corner of the square towards the center, creating a smaller square shape. Then, fold each side of the smaller square towards the center, overlapping the edges slightly. This will create a diamond shape with flaps on each side.
Take one flap and fold it upwards, aligning it with the top corner of the diamond shape. Repeat this step with the remaining flaps, folding them upwards and overlapping them slightly. Secure the flaps with glue or tape to hold them in place.
Once all the flaps are secured, gently open up your lantern to reveal its beautiful shape. You can add a tea light or LED candle inside to create a magical glow. To hang your lantern, simply attach a piece of string or ribbon to the top.
With just a few simple steps, you can create stunning origami lanterns that will enhance any space. Get creative with different colors and sizes to add a unique touch to your decor. Whether you’re hosting a special occasion or simply want to add some ambiance to your home, these DIY lanterns are the perfect choice.
3.2. Creating a paper cup pendant light
Creating a paper cup pendant light is a fun and affordable way to add a unique touch to your home decor. This DIY project allows you to repurpose simple paper cups into a stylish and eye-catching lighting fixture. With just a few materials and some creativity, you can create a stunning pendant light that will impress your guests.
To begin, gather the following materials:
1. Paper cups (preferably in different sizes)
2. Craft knife
3. Hole punch
4. Pendant light cord
5. Light bulb
6. Decorative trim (optional)
Start by carefully cutting out the bottom of the paper cups using a craft knife. This will serve as the opening for the pendant light. Make sure to vary the sizes of the cups to add visual interest.
Next, use a hole punch to create a small hole near the rim of each cup. This will be used to thread the pendant light cord through.
Once you have prepared all your cups, thread the pendant light cord through the holes, starting with the largest cup at the bottom and gradually working your way up to the smallest cup at the top. Make sure to secure each cup in place by tying a knot at the end of the cord.
Finally, attach a light bulb to the pendant light cord and hang your creation from the ceiling. You can also add decorative trim around the rim of each cup for an extra touch of style.
This paper cup pendant light is not only budget-friendly and easy to make, but it also creates a soft and cozy ambiance in any room. Experiment with different cup sizes and patterns to customize your pendant light to match your decor. Get creative and enjoy the process of transforming simple paper cups into a stunning lighting statement piece!
3.3. Crafting a cardboard tube chandelier
Crafting a cardboard tube chandelier is a fun and creative project that can add a unique touch to your home decor. This DIY lighting idea is not only affordable but also eco-friendly, as it involves repurposing cardboard tubes. To make a cardboard tube chandelier, you will need a collection of cardboard tubes in various sizes, a string of LED lights, a hot glue gun, and some basic crafting supplies.
Start by cutting the cardboard tubes into different lengths, creating a variety of tube sizes. Arrange the tubes in a circular shape, with the larger tubes in the center and the smaller ones on the outer edges. Use the hot glue gun to secure the tubes together, ensuring they are evenly spaced.
Next, take the string of LED lights and carefully thread them through the tubes, making sure each tube has a light inside. You can choose to leave the lights hanging down at different lengths or trim them to be more uniform.
Once all the lights are in place, you can add some extra embellishments to your cardboard tube chandelier. You can paint the tubes in different colors, add glitter or sequins, or even wrap them in decorative paper or fabric. Get creative and personalize your chandelier to match your style and taste.
Finally, hang your cardboard tube chandelier in a desired location. You can use a ceiling hook or a sturdy piece of string to suspend it from the ceiling. Make sure to secure it properly to prevent accidents.
With just a few simple materials and some creativity, you can create a stunning cardboard tube chandelier that will impress your friends and family. This DIY lighting idea is not only budget-friendly but also a great way to upcycle materials and reduce waste. Give it a try and enjoy the unique ambiance it brings to your living space.
3.4. Designing a paper globe light
Designing a paper globe light can be a fun and creative project for anyone interested in paper and cardboard crafts. Whether you are looking to add a unique lighting element to your home or simply want to explore your artistic side, making a paper globe light is a great choice.
To begin, gather the necessary materials. You will need a round paper lantern or a balloon, cardboard, craft glue, scissors, and decorative paper or tissue paper of your choice. Start by inflating the balloon to the desired size if you are using one.
Next, cut the cardboard into strips or shapes that will serve as the framework for your globe light. These pieces should be sturdy enough to hold the shape of the light but flexible enough to be bent or curved. Glue the cardboard pieces onto the surface of the lantern or balloon, making sure to evenly distribute them around the entire shape.
Once the glue has dried, it’s time to add the decorative paper. Cut the paper into small strips or shapes, and glue them onto the cardboard framework. You can choose a single color or create a pattern using different colors or designs. Be creative and experiment with different textures and patterns to achieve the desired look.
After all the paper has been glued on and the glue has dried, carefully deflate the balloon if you used one. Your paper globe light is now ready to be hung or placed in a desired location. You can use a battery-operated LED light or a corded light bulb to illuminate the inside of the globe.
Designing and creating your own paper globe light is not only a budget-friendly option but also allows you to personalize your lighting fixture. Whether you prefer a minimalist design or a vibrant and colorful look, there are endless possibilities to explore. So, gather your materials, let your imagination run wild, and enjoy the process of making your very own paper globe light!
3.5. Building a geometric paper lampshade
To add a touch of modern and chic style to your home decor, consider building a geometric paper lampshade. This DIY project is not only affordable but also a fun way to unleash your creativity. With just a few simple materials such as paper and cardboard, you can create a unique and eye-catching lampshade that will enhance the ambiance of any room.
To start, gather the following materials: colored or patterned paper, cardboard, ruler, pencil, scissors, glue, and a lamp base.
Begin by measuring and cutting the cardboard into a desired shape for the lampshade. Geometric shapes such as triangles, hexagons, or squares work well for this project. Use a ruler and pencil to ensure precise measurements and markings.
Next, cut the colored or patterned paper into strips or shapes that will fit onto the cardboard. You can experiment with different colors and patterns to create a visually appealing design.
Once you have the paper pieces ready, apply glue to one side of the cardboard and carefully place the paper onto it. Press firmly to ensure proper adhesion. Repeat this step for each side of the cardboard.
After all the paper pieces are attached, allow the glue to dry completely. This may take a few hours, so be patient.
Once the glue is dry, carefully fold the cardboard along the edges to form the lampshade shape. Use additional glue if necessary to secure the folds.
Finally, attach the lampshade to the lamp base and switch on the light to see the beautiful geometric patterns come to life. You can adjust the intensity of the light by using different types of bulbs.
Building a geometric paper lampshade is an enjoyable and rewarding DIY project that can instantly transform the look of your living space. Get creative with different shapes, colors, and patterns to match your personal style and create a stunning focal point in any room.
4. 3. Upcycling and Recycling
Upcycling and recycling are great ways to not only save money but also reduce waste and contribute to a more sustainable lifestyle. When it comes to lighting, there are plenty of creative and affordable DIY ideas that can be achieved using upcycled or recycled materials. By giving old items a new purpose, you can create unique and environmentally-friendly lighting fixtures for your home. From mason jar chandeliers to wine bottle pendant lights, the possibilities are endless. Not only will you have a one-of-a-kind piece, but you’ll also be doing your part in reducing the demand for new materials and minimizing your carbon footprint. So, why not get creative and start upcycling and recycling to brighten up your living space?
4.1. Using old wine corks to make a cork lamp
Using old wine corks to make a cork lamp is a creative and eco-friendly way to upcycle and recycle. Instead of throwing away your used wine corks, you can repurpose them to create a unique and stylish lighting fixture. Cork lamps add a rustic and charming touch to any space, and they are easy to make with just a few materials.
To start, gather a sufficient amount of wine corks. You can ask friends and family to save their corks or visit local restaurants or wineries that may be willing to give them away. Once you have enough corks, you’ll need a lamp base, lamp kit, lampshade, and a hot glue gun.
To assemble the cork lamp, begin by attaching the lamp kit to the lamp base according to the manufacturer’s instructions. Then, carefully arrange the wine corks around the lamp base, using the hot glue gun to secure them in place. Make sure to create a sturdy and even layer of corks to ensure the lamp’s stability.
Once the corks are securely attached, you can customize your lamp further by painting the corks or adding embellishments. Consider using metallic spray paint or colorful acrylic paint to give your cork lamp a personalized touch. You can also add decorative elements such as ribbons, beads, or small trinkets to enhance its visual appeal.
Finally, attach the lampshade to the lamp kit and test your creation by plugging it in. You’ll be amazed at how the soft glow of the light shines through the tiny gaps between the corks, creating a cozy and inviting atmosphere in any room.
By repurposing old wine corks into a cork lamp, you not only reduce waste but also add a unique and eco-friendly lighting solution to your home. So, gather those wine corks and get creative with this fun and budget-friendly DIY project!
4.2. Repurposing tin cans into stylish luminaries
Repurposing tin cans into stylish luminaries is a creative and eco-friendly way to add unique lighting to your home. Not only does it help reduce waste by upcycling old cans, but it also adds a charming touch to any space. With a few simple steps, you can transform ordinary tin cans into beautiful luminaries that will illuminate your surroundings with a warm and inviting glow. Whether you hang them outdoors for a cozy evening atmosphere or use them as table centerpieces for a special occasion, these DIY tin can luminaries are sure to impress.
4.3. Creating a pendant light from plastic bottles
One creative and eco-friendly way to upcycle and recycle is by creating a pendant light from plastic bottles. This DIY lighting project not only helps reduce waste but also adds a unique and stylish touch to your home decor.
To start, gather a few empty plastic bottles of the same size. Make sure to clean them thoroughly and remove any labels or stickers. You can use soda bottles, water bottles, or any other plastic containers you have on hand.
Next, decide on the design and shape of your pendant light. You can choose to keep the bottles intact or cut them into different shapes to create a more interesting pattern. For example, cutting the bottom part of the bottles and keeping the tops can give a modern and sleek look.
After deciding on the design, it’s time to prepare the bottles for assembly. Make small holes near the top of each bottle using a sharp tool or a heated nail. These holes will serve as attachment points for the light fixtures.
Now, it’s time to wire the bottles together. Use a strong and durable wire to connect the bottles in the desired arrangement. Make sure to secure the wire tightly to avoid any accidents or loose connections.
Once the bottles are securely wired, it’s time to add the light fixtures. You can use LED lights or small pendant light sockets with bulbs. Insert the light fixtures into the holes you made earlier and secure them in place.
Finally, hang your DIY pendant light in the desired location. You can use a ceiling hook or a sturdy cord to suspend the light from the ceiling. Make sure to test the light and adjust the height and position as needed.
By creating a pendant light from plastic bottles, you not only reduce waste but also showcase your creativity and commitment to sustainable living. This affordable and easy DIY lighting idea can transform any space into a unique and environmentally-friendly oasis.
4.4. Using old books to make a bookshelf lamp
Using old books to make a bookshelf lamp is a creative and eco-friendly way to upcycle and recycle. Not only does it add a unique touch to your home decor, but it also gives new life to old books that would otherwise be discarded. By repurposing these books into a functional piece of lighting, you can create a one-of-a-kind bookshelf lamp that will be a conversation starter in any room.
To make a bookshelf lamp, you will need a stack of old books, a lamp kit, and some basic tools. Start by drilling a hole through the center of the books, creating a space for the lamp cord to pass through. Make sure to choose books of varying sizes and colors to add visual interest to the lamp.
Next, assemble the lamp kit according to the manufacturer’s instructions. Thread the lamp cord through the drilled holes in the books, starting from the bottom book and working your way up. Secure each book in place by gluing them together or using bookends.
Once the lamp kit is fully assembled, attach a lightbulb to the socket and plug it in. Voila! You now have a stunning bookshelf lamp that not only illuminates your space but also showcases your love for books and recycling.
In addition to being a cost-effective DIY lighting idea, using old books for a bookshelf lamp promotes sustainability by giving discarded items a new purpose. It’s a creative way to reduce waste and make use of items that might otherwise end up in landfills. So, the next time you come across a stack of old books, consider turning them into a beautiful and functional bookshelf lamp that will brighten up your space.
4.5. Transforming an old film reel into a unique lamp base
Transforming an old film reel into a unique lamp base is a great way to upcycle and recycle. Not only will you be giving new life to an old item, but you’ll also be creating a one-of-a-kind piece of lighting for your home. To start, gather an old film reel that you no longer use or can find at a thrift store. Remove any film that may still be on the reel. Next, clean the reel thoroughly to remove any dust or dirt. Once clean, you can begin the transformation process. Consider painting the reel with a color of your choice or leaving it as is for a rustic look. You can also add decorative elements like beads, ribbons, or buttons to further personalize the lamp base. Once you’re satisfied with the reel’s appearance, it’s time to turn it into a lamp. Purchase a lamp kit from a hardware store, which will include the necessary wiring and socket. Follow the instructions provided with the kit to attach the wiring to the film reel securely. Finally, insert a lightbulb into the socket and voila! You now have a unique and eco-friendly lamp base that will surely be a conversation starter in any room.
Conclusion
In conclusion, these 10 easy and affordable DIY lighting ideas are perfect for adding a touch of creativity and ambiance to any space. Whether you’re looking to revamp your living room, bedroom, or outdoor area, these ideas offer a budget-friendly way to enhance the lighting in your home. From mason jar lanterns to fairy light curtains, there’s something for everyone to try. Get ready to brighten up your space with these simple yet stunning lighting solutions!


These 10 innovative and imaginative DIY home decor ideas from [object Object] provide a refreshing approach to enhancing ones living…