
Are you looking to give your home a stylish makeover without breaking the bank? Look no further! In this article, we will explore 10 easy DIY home decor projects that will transform your space into a stylish haven. From simple crafts to creative hacks, these projects are perfect for adding a personal touch to your home and making it truly unique. Get ready to unleash your creativity and create a stylish space that reflects your personality and taste!
- 1. Introduction
- 1.1. Benefits of DIY home decor projects
- 1.2. Why choose easy DIY projects
- 1.3. Materials needed for DIY home decor projects
- 1.4. Safety precautions for DIY projects
- 1.5. Budget-friendly DIY ideas
- 2. DIY Wall Art
- 2.1. Creating a gallery wall
- 2.2. Making your own abstract art
- 2.3. Personalizing a canvas
- 2.4. DIY wall decals
- 2.5. Upcycling old frames
- 3. DIY Furniture Makeovers
- 3.1. Repurposing a dresser
- 3.2. Refurbishing wooden chairs
- 3.3. Painting an old table
- 3.4. Reupholstering a sofa
- 3.5. Restoring antique furniture
- 4. DIY Home Accessories
- 4.1. Handmade throw pillows
- 4.2. Creating decorative vases
- 4.3. DIY candle holders
- 4.4. Customized picture frames
- 4.5. Making your own wreath
1. Introduction
When it comes to home decor, sometimes the best way to achieve a stylish and personalized space is by taking matters into your own hands. DIY home decor projects not only allow you to unleash your creativity, but they also offer a cost-effective and unique alternative to store-bought items. From simple crafts to more involved projects, there is a wide range of DIY options to suit every skill level and style preference. In this article, we will explore 10 easy DIY home decor projects that will help you transform your space into a stylish haven.
1.1. Benefits of DIY home decor projects
DIY home decor projects have gained immense popularity in recent years, and for good reason. Engaging in do-it-yourself projects not only allows you to express your creativity but also offers numerous benefits for your home and personal well-being. Whether you are a seasoned DIY enthusiast or a beginner, there are countless easy and stylish projects that you can undertake to transform your living space. In this article, we will explore the various benefits of DIY home decor projects and how they can help you create a stylish and personalized environment.
1.2. Why choose easy DIY projects
When it comes to home decor, there is a growing trend of people opting for easy DIY projects. These projects offer a great way to personalize your space and add a touch of creativity. Whether you are a seasoned DIY enthusiast or just starting out, easy DIY projects are a fantastic option for creating a stylish and unique home.
One of the main reasons why people choose easy DIY projects is because they are cost-effective. Home decor items can often be expensive, but with DIY projects, you can achieve a similar look for a fraction of the price. By using materials that are readily available and affordable, you can transform your space without breaking the bank.
Another advantage of easy DIY projects is the sense of accomplishment they bring. There is something incredibly satisfying about creating something with your own hands and seeing the end result. DIY projects allow you to unleash your creativity and showcase your skills while making your home more beautiful.
Furthermore, easy DIY projects offer flexibility and customization. When you make your own decor items, you have complete control over the design, colors, and materials used. This ensures that your space reflects your personal style and preferences. You can tailor each project to match the existing decor or create a statement piece that stands out.
Additionally, easy DIY projects provide an opportunity for upcycling and repurposing. Instead of throwing away old or unused items, you can give them a new life by transforming them into something useful and visually appealing. This not only reduces waste but also adds a unique and eco-friendly touch to your home.
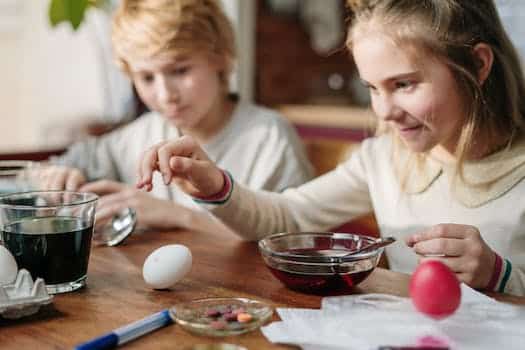
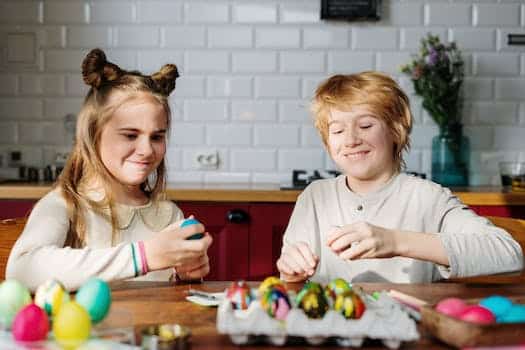
Lastly, easy DIY projects are a great way to bond with family and friends. Engaging in creative activities together promotes teamwork, communication, and fun. Whether you involve your kids, partner, or friends, DIY projects can be a great way to spend quality time and create lasting memories.
In conclusion, opting for easy DIY home decor projects is a smart choice for anyone looking to create a stylish space. From cost-effectiveness to customization and the joy of creating, these projects offer numerous benefits. So, roll up your sleeves and get ready to embark on a creative journey to transform your home.
1.3. Materials needed for DIY home decor projects
When it comes to DIY home decor projects, having the right materials is essential. Whether you’re a seasoned crafter or just starting out, having the necessary supplies will make your projects go smoothly and ensure a stylish end result. Here are some materials you’ll need for your DIY home decor projects:
1. Paint: A versatile and essential tool for any DIY project, paint can transform old furniture, walls, or accessories into something new and stylish. Choose colors that complement your existing decor or go bold with a pop of color.
2. Brushes: To apply paint smoothly and evenly, you’ll need a set of good quality brushes in various sizes. A larger brush is great for covering larger surfaces, while smaller brushes are perfect for detailed work.
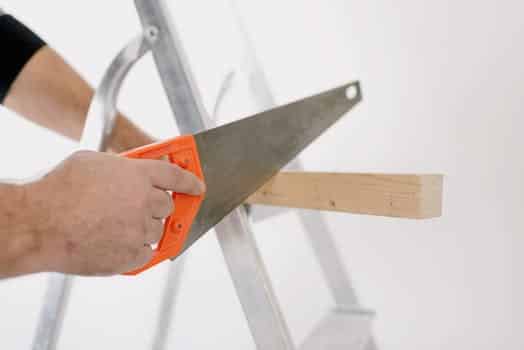
3. Wood: If you’re into woodworking projects, having a variety of wood materials is a must. From reclaimed pallets to unfinished boards, wood can be used to create unique wall art, shelves, and furniture.
4. Fabric: Whether you’re sewing curtains, pillow covers, or recovering furniture, having a collection of fabric is essential. Choose fabrics that match your style and color scheme to add a personalized touch to your home decor.
5. Adhesives: From glue guns to strong adhesives, having the right bonding materials will ensure that your DIY projects stay intact. Make sure to choose adhesives that are suitable for the materials you’re working with.
6. Scissors: A good pair of scissors is a must-have for any DIY enthusiast. Whether you’re cutting fabric, paper, or other materials, sharp and sturdy scissors will make your projects much easier.
7. Decorative accessories: To add the finishing touches to your DIY home decor projects, consider investing in decorative accessories such as knobs, handles, and decorative trims. These small details can elevate the overall look of your creations.
8. Measuring tools: Accurate measurements are crucial in DIY projects, especially when it comes to furniture or wall installations. Make sure to have measuring tapes, rulers, and a level to ensure precise results.
9. Safety equipment: Don’t forget about safety! Depending on the projects you’re undertaking, you may need safety goggles, gloves, or masks. Always prioritize your safety while working on DIY projects.
10. Creativity and imagination: While not a physical material, creativity and imagination are essential for DIY home decor projects. Don’t be afraid to think outside the box and experiment with different ideas and techniques to create a stylish space that reflects your personality.
1.4. Safety precautions for DIY projects
When it comes to DIY home decor projects, safety should always be a top priority. Whether you’re a seasoned DIY enthusiast or just starting out, it’s essential to take certain precautions to protect yourself and others. By following some basic safety guidelines, you can ensure a successful and accident-free DIY experience.
First and foremost, make sure to wear appropriate safety gear. This includes safety goggles to protect your eyes from dust and debris, gloves to safeguard your hands from sharp objects or chemicals, and a dust mask to prevent inhalation of harmful particles.
Before starting any DIY project, it’s important to familiarize yourself with the tools and materials you’ll be using. Read the instruction manuals and safety guidelines provided by the manufacturers. This will help you understand how to properly handle and operate the tools, reducing the risk of accidents.
Furthermore, create a well-ventilated workspace. If you’re working indoors, open windows and use fans to improve air circulation. This will help minimize the buildup of fumes or dust particles, which can be hazardous to your health.
Another crucial aspect of DIY safety is proper storage and disposal of materials. Keep hazardous substances, such as paints, solvents, and adhesives, in a secure location away from children and pets. Dispose of waste materials responsibly, following local regulations and guidelines.
Lastly, never underestimate the power of proper electrical safety. Ensure that your work area has a grounded electrical outlet and use surge protectors when necessary. Avoid overloading circuits and always turn off power before working on electrical components.
By taking these safety precautions, you can enjoy your DIY projects while keeping yourself and your loved ones safe. Remember, DIY should be fun and rewarding, but it’s crucial to prioritize safety at all times.
1.5. Budget-friendly DIY ideas
Decorating your home doesn’t have to break the bank. With a little creativity and some DIY skills, you can transform your space into a stylish haven without spending a fortune. In this article, we will explore 10 budget-friendly DIY home decor projects that will add a touch of charm and personality to your living space. Whether you’re a seasoned DIY enthusiast or just starting out, these projects are easy to tackle and will leave you with a home that reflects your unique style. So, roll up your sleeves and get ready to unleash your inner decorator!
2. DIY Wall Art
DIY Wall Art
One of the easiest ways to add a personal touch and style to your home decor is by creating your own wall art. Not only is it a cost-effective option, but it also allows you to showcase your creativity and unique taste. Whether you’re an experienced artist or a beginner, there are plenty of DIY wall art projects that you can try. From canvas paintings to wall hangings, the options are endless. With a few basic materials and some inspiration, you can transform any blank wall into a stunning focal point. So, roll up your sleeves and get ready to unleash your inner artist with these 10 easy DIY wall art projects!
2.1. Creating a gallery wall
Creating a gallery wall is a fun and creative way to add personality and style to your home decor. Whether you have a large blank wall or a small space that needs some attention, a gallery wall can be the perfect solution. Here are some tips to help you create a stunning gallery wall that will showcase your favorite artwork and photos.
First, gather your artwork and photos. Choose a variety of pieces that reflect your personal style and interests. This could include paintings, prints, photographs, or even objects like mirrors or wall sculptures. Consider the colors, themes, and sizes of the pieces to ensure a cohesive look.
Next, plan out the layout of your gallery wall. Measure the wall space and mark it out on the floor using painter’s tape or newspaper. Arrange your artwork and photos on the floor until you find a layout that you like. Play around with different arrangements until you achieve the desired look.
Once you have finalized your layout, it’s time to hang your artwork. Start by hanging the largest piece first as the focal point of the gallery wall. Use a level and measuring tape to ensure that it is straight and centered. Then, work your way out from the center, hanging the remaining pieces around the focal point. Use picture hooks, nails, or adhesive strips to securely hang your artwork.
To add visual interest to your gallery wall, consider incorporating other elements such as shelves, decorative objects, or even plants. This will help break up the wall space and add dimension to your display. Experiment with different arrangements and combinations until you achieve a balanced and visually appealing look.
Finally, don’t be afraid to switch up your gallery wall over time. As your tastes and interests change, you can easily swap out artwork or add new pieces to keep your wall fresh and updated. Remember to regularly dust and clean your gallery wall to keep it looking its best.
Creating a gallery wall is a DIY home decor project that allows you to express your creativity and showcase your personal style. With a little planning and creativity, you can transform any blank wall into a stunning focal point in your space.
2.2. Making your own abstract art
Abstract art is a great way to add a unique touch to your home decor. By creating your own abstract art, you can personalize your space and showcase your artistic skills. Making your own abstract art is not only a fun project but also a cost-effective way to decorate your walls.
To start, gather your materials. You will need a canvas or a sturdy piece of paper, acrylic paints in various colors, paintbrushes, and a palette. Choose colors that complement your existing decor or go for bold and vibrant shades for a pop of color.
Next, prepare your workspace. Lay down some old newspapers or a drop cloth to protect your surface from any paint spills. It’s also a good idea to wear old clothes or an apron to avoid any stains.
Now, it’s time to unleash your creativity. Dip your paintbrush into one of the colors and start making random brushstrokes on the canvas. Don’t worry about making it perfect – abstract art is all about expressing yourself freely. Experiment with different brush sizes and techniques to create texture and depth.
Once you’re satisfied with the first layer, let it dry completely. You can then add more layers or mix different colors to create interesting patterns and designs. Remember, there are no rules in abstract art, so feel free to explore and try new things.
Finally, when your artwork is dry, it’s ready to be displayed. Hang it on a blank wall or place it on a floating shelf for a modern look. You can also frame it for a more polished appearance.
Creating your own abstract art is a rewarding experience that allows you to infuse your personality into your home decor. Give it a try and see how your artistic skills can transform your space!
2.3. Personalizing a canvas
Personalizing a canvas is a fun and creative way to add a personal touch to your home decor. With DIY wall art, you can showcase your unique style and create a stylish space that reflects your personality. Whether you are an experienced artist or a beginner, there are plenty of easy DIY projects that can transform a plain canvas into a work of art. From painting and stenciling to adding embellishments and quotes, the possibilities are endless. In this section, we will explore some simple yet impactful ideas to personalize a canvas and enhance your home decor.
2.4. DIY wall decals
DIY wall decals are a fantastic way to add a personal touch to your home decor. Whether you want to spruce up your living room, bedroom, or even your kitchen, creating your own wall decals allows you to unleash your creativity and make a statement. Plus, it’s a budget-friendly alternative to buying expensive artwork or wallpaper.
To make your own DIY wall decals, you’ll need a few basic supplies. Start by choosing a design or pattern that you love. This could be anything from geometric shapes to floral motifs or inspirational quotes. Once you have your design in mind, gather materials such as adhesive vinyl, transfer paper, scissors, and a cutting machine (if you have one).
Next, it’s time to bring your design to life. Use a cutting machine or scissors to carefully cut out your design from the adhesive vinyl. Make sure to be precise and follow the lines of your design. If you’re using a cutting machine, you can easily upload your design and let the machine do the work for you.
Once your design is cut out, use transfer paper to transfer it onto the wall. This step is crucial in ensuring that your wall decal sticks properly and doesn’t get damaged during the application process. Simply peel off the backing of the adhesive vinyl and place the transfer paper on top. Smooth out any air bubbles or wrinkles with a squeegee or a credit card.
Finally, carefully peel off the transfer paper, leaving the adhesive vinyl design on the wall. Smooth out any remaining air bubbles or wrinkles, and voila! You’ve created your very own DIY wall decal.
The great thing about DIY wall decals is that they are not permanent. If you ever want to change up your decor or remove the decal altogether, simply peel it off the wall. It won’t damage the paint or leave any residue behind.
So why not give DIY wall decals a try? They are a fun and creative way to transform any space in your home. Get inspired, gather your supplies, and let your imagination run wild!
2.5. Upcycling old frames
Upcycling old frames is a great way to create unique and stylish wall art. Instead of throwing away old frames, you can transform them into beautiful pieces that add a personal touch to your home decor. With a little creativity and some simple materials, you can easily turn an old frame into a stunning piece of DIY wall art.
One idea is to use the old frame as a backdrop for a gallery wall. You can paint the frame in a color that complements your existing decor and then hang multiple frames of different sizes and shapes within it. This creates a visually interesting display that showcases your favorite photos, artwork, or even small decorative objects.
Another option is to repurpose the frame as a memo board. You can attach a piece of corkboard or metal sheet to the back of the frame and use it to pin notes, photos, and other important reminders. This not only adds functionality to the frame but also gives it a unique and personalized touch.
If you’re feeling more adventurous, you can try transforming the frame into a decorative tray. Simply remove the glass and backing, and then attach handles to the sides of the frame. You can paint or stain the frame to match your decor and use it to display candles, small vases, or other decorative items.
Upcycling old frames not only helps reduce waste but also allows you to create one-of-a-kind wall art that reflects your style and personality. So, don’t throw away those old frames – get creative and give them a new lease on life!
3. DIY Furniture Makeovers
Whether you’re looking to spruce up your living space or simply want to add a personal touch to your home decor, DIY furniture makeovers are a great way to achieve a stylish look without breaking the bank. With a little creativity and some basic tools, you can transform old or outdated furniture into unique pieces that reflect your personal style. Here are 10 easy DIY home decor projects that will help you create a stylish space:
1. Painted Dresser: Give an old dresser a fresh new look by painting it in a bold and vibrant color. Choose a paint color that complements your existing decor and add some decorative knobs or handles for an extra touch of elegance.
2. Upcycled Coffee Table: Instead of buying a new coffee table, why not repurpose an old one? Sand down the surface, paint it in a trendy color, and add some decorative stencils or patterns for a one-of-a-kind piece.
3. Reupholstered Chair: Give a tired-looking chair a makeover by reupholstering it with a fabric of your choice. This not only adds a pop of color to your space but also gives new life to an old piece of furniture.
4. Distressed Side Table: Achieve a rustic and shabby-chic look by distressing a side table. Sand down the surface, apply a coat of paint, and then gently sand it again to create a worn and weathered appearance.
5. Stenciled Bookcase: Add some personality to a plain bookcase by stenciling a pattern or design onto the back panels. This will instantly transform a boring piece of furniture into a focal point in your room.
6. Decoupage Nightstand: Give a plain nightstand a unique and artistic look by decoupaging it with patterned paper or fabric. This technique allows you to create a custom design that suits your personal style.
7. Fabric-Covered Bulletin Board: Turn a plain bulletin board into a stylish and functional decor piece by covering it with fabric. Choose a fabric that matches your room’s color scheme and use it to pin up important notes or reminders.
8. Chalkboard Wall: Create a fun and interactive feature in your home by turning a wall into a chalkboard. This allows you to write messages, draw doodles, or even use it as a calendar.
9. Painted Mason Jars: Give old mason jars a new lease on life by painting them in vibrant colors. Use them as vases, storage containers, or even as candle holders.
10. Washi Tape Wall Art: Create your own unique wall art by using washi tape. Cut out different shapes or patterns and stick them directly onto the wall to create a colorful and eye-catching design.
These DIY furniture makeovers are not only cost-effective but also allow you to unleash your creativity and personalize your home decor. So, grab your tools and get ready to transform your space into a stylish haven!
3.1. Repurposing a dresser
Repurposing a dresser can be a fun and creative way to give new life to an old piece of furniture. With a little imagination and some DIY skills, you can transform a plain dresser into a stylish and unique statement piece for your home. Whether you want to add a pop of color, create extra storage space, or simply update the look of your furniture, repurposing a dresser offers endless possibilities. In this section, we will explore some DIY furniture makeovers that you can easily do to enhance the overall aesthetic of your living space.
3.2. Refurbishing wooden chairs
Refurbishing wooden chairs can be a fun and rewarding DIY project. Whether you have old chairs that are in need of a makeover or you simply want to give your existing chairs a fresh new look, this is a great way to add style and personality to your home decor. With a few simple steps, you can transform worn-out wooden chairs into beautiful pieces that will enhance the overall aesthetic of your space.
To begin the refurbishing process, start by thoroughly cleaning the chairs to remove any dirt or grime. Use a mild soap and water solution or a wood cleaner specifically designed for furniture. Once the chairs are clean and dry, inspect them for any damages or loose parts that need to be repaired.
Next, sand the chairs to create a smooth surface for painting or staining. This will also help to remove any existing finish or paint. Use a medium-grit sandpaper to sand the entire surface of the chairs, paying extra attention to any rough areas or imperfections.
After sanding, wipe away the dust with a damp cloth and let the chairs dry completely. Now, you can choose to paint or stain the chairs, depending on the look you want to achieve. If you prefer a bold and colorful style, opt for a vibrant paint color that complements your existing decor. On the other hand, if you prefer a more natural and rustic look, consider staining the chairs with a wood stain in a shade that enhances the natural beauty of the wood.
Once the paint or stain is dry, apply a clear coat of varnish or sealant to protect the chairs and give them a polished finish. This will help to prevent any damage from daily use and make the chairs easier to clean and maintain.
Finally, add some personal touches to the refurbished chairs to make them truly unique. You can reupholster the seat cushions with a fabric of your choice or add decorative elements such as stencils, decals, or even hand-painted designs.
By refurbishing wooden chairs, you can breathe new life into old furniture and create a stylish and inviting space in your home. This DIY project allows you to showcase your creativity and transform ordinary chairs into statement pieces that will impress your guests. So why not give it a try and enjoy the satisfaction of having beautiful and personalized furniture that reflects your unique style?
3.3. Painting an old table
Painting an old table can be a fun and cost-effective way to give it a fresh new look. Whether you have an antique piece or a worn-out table that needs a makeover, a fresh coat of paint can transform it into a stylish and unique piece of furniture. With a little time and effort, you can create a beautiful and personalized table that complements your home decor.
To start, gather the necessary supplies. You will need sandpaper, primer, paint, a paintbrush or roller, and a drop cloth to protect your work surface. Before painting, make sure to clean the table thoroughly to remove any dirt or grease.
Next, lightly sand the surface of the table to create a smooth and even base for the paint. This step helps the paint adhere better and ensures a long-lasting finish. After sanding, wipe away any dust with a damp cloth.
Once the table is prepped, apply a coat of primer. Primer helps the paint adhere to the surface and provides a base for the color. Choose a primer that is suitable for the type of paint you will be using.
After the primer has dried, it’s time to apply the paint. Select a paint color that complements your existing decor or go bold with a vibrant hue to make a statement. Apply thin and even coats of paint, allowing each coat to dry before applying the next. This will help prevent drips and ensure a smooth finish.
Once the paint is dry, you can add additional decorative elements if desired. Consider stenciling a pattern or adding a decal to create a unique design. Finally, finish off the table with a clear topcoat to protect the paint and add durability.
With a little creativity and some basic supplies, you can transform an old table into a stunning piece of furniture. Painting allows you to customize the look to fit your personal style and can breathe new life into outdated or worn-out pieces. So grab your paintbrush and get ready to give your old table a fresh and stylish makeover!
3.4. Reupholstering a sofa
Reupholstering a sofa can completely transform its look and breathe new life into your living space. It is a cost-effective way to update your furniture and create a stylish and personalized piece. With a little time and effort, you can give your old sofa a modern and trendy makeover. Here are some steps to guide you through the process of reupholstering your sofa:
1. Choose the fabric: Select a fabric that suits your style and complements your existing decor. Consider the durability, color, and texture of the fabric.
2. Remove the old fabric: Carefully remove the existing fabric from the sofa frame, making sure to save any zippers, buttons, or trimmings that you can reuse.
3. Repair and prep the frame: Inspect the sofa frame for any damages or loose parts. Fix any issues and sand down the frame to create a smooth surface for the new fabric.
4. Measure and cut the new fabric: Take precise measurements of each section of the sofa and cut the fabric accordingly. Leave a little extra for tucking and securing.
5. Attach the fabric: Starting with the seat cushions, staple or glue the fabric to the frame, pulling it tightly to create a smooth and wrinkle-free finish. Continue with the backrest and armrests.
6. Add finishing touches: Once the fabric is securely attached, trim off any excess and add decorative elements like piping or buttons for a polished look.
By following these steps, you can achieve a professional-looking reupholstered sofa that adds charm and style to your home. Get creative with fabric choices and experiment with different patterns or textures to make your sofa truly unique.
3.5. Restoring antique furniture
Restoring antique furniture is a great way to add character and charm to your home decor. Whether you have inherited a family heirloom or found a hidden gem at a thrift store, giving new life to old furniture can be a rewarding DIY project. With a few simple tools and techniques, you can transform worn-out pieces into beautiful treasures that complement your stylish space.
To begin the restoration process, start by assessing the condition of the furniture. Look for any structural damage, loose joints, or missing parts. Take note of any scratches, dents, or stains on the surface as well. This will help you determine the extent of the restoration required.
Next, gather the necessary supplies. You may need sandpaper, wood glue, clamps, putty, paint, varnish, and brushes, depending on the type of furniture and the desired outcome. It’s important to choose materials that are suitable for antique pieces to ensure the authenticity and longevity of the restored furniture.
Once you have all the supplies, begin by cleaning the furniture thoroughly. Use a mild detergent and water to remove dirt and grime. Be gentle and avoid using harsh chemicals that might damage the wood or the existing finish. After cleaning, allow the furniture to dry completely.
After cleaning, you may need to address any structural issues. If there are loose joints or broken parts, use wood glue and clamps to secure and repair them. Fill any gaps or holes with putty, and sand the surface to make it smooth and even.
Now comes the fun part – applying a new finish to the furniture. Choose a stain or paint color that matches your decor style and personal preferences. Apply the stain or paint evenly, following the grain of the wood. Allow each coat to dry before applying the next one. Once you achieve the desired color and coverage, apply a protective varnish to seal the finish.
Finally, consider adding new hardware or decorative elements to enhance the overall look of the restored furniture. This could include replacing handles, knobs, or adding embellishments like decorative moldings or stenciled designs.
By following these steps, you can successfully restore antique furniture and create stunning DIY furniture makeovers. Remember to take your time, be patient, and enjoy the process of transforming old pieces into unique and stylish additions to your home.
4. DIY Home Accessories
Looking to add a personal touch to your home decor? Why not try some DIY home accessories? Not only will they add a unique and stylish flair to your space, but you’ll also have the satisfaction of creating something with your own hands. Here are 10 easy DIY home decor projects that you can tackle to elevate your space to the next level.
1. Macrame Wall Hanging
Macrame wall hangings have become increasingly popular in recent years, and for good reason. They add a bohemian touch to any room and are relatively simple to make. All you need is some macrame cord and a wooden dowel or branch to hang it from. There are plenty of online tutorials that can guide you through the process.
2. Painted Mason Jars
Mason jars are incredibly versatile and can be used in a variety of ways to enhance your home decor. One simple DIY project is to paint them in your desired color and use them as vases or candle holders. You can also add some twine or ribbon around the neck of the jar for an extra decorative touch.
3. Fabric Covered Bulletin Board
Bulletin boards are not only functional but can also serve as a statement piece on your wall. Instead of settling for a plain corkboard, why not cover it with fabric that matches your decor? Simply choose a fabric you love, cut it to size, and attach it to the board using a staple gun. You can even add some decorative buttons or pins for an extra pop.
4. Geometric Coasters
Coasters are a must-have item to protect your furniture, so why not make them stylish as well? Geometric coasters are a trendy and easy DIY project that can instantly elevate your coffee table. You can create them using wooden or ceramic tiles and some paint in geometric patterns of your choice.
5. Rope Basket
Need some extra storage space? Create a rope basket to hold your belongings in style. All you need is some thick rope and a hot glue gun. Coil the rope tightly in a circular shape, securing it with hot glue as you go. You can make the basket as large or small as you need, and it’s perfect for holding blankets, toys, or even potted plants.
6. Framed Fabric Wall Art
Give your walls a new lease on life by creating some framed fabric wall art. Choose a fabric that complements your decor and stretch it over a canvas or wooden frame. Secure it in place with staples or glue, and you’ll have a unique piece of art that adds color and texture to your space.
7. Painted Terra Cotta Pots
If you’re a plant lover, you can’t go wrong with painted terra cotta pots. They’re a fun and easy way to add a pop of color to your indoor or outdoor space. Simply choose your desired paint colors and let your creativity run wild. You can paint them solid or create intricate designs – the choice is yours.
8. Tassel Garland
Tassel garlands are a fun and whimsical addition to any room. They can be hung on walls, draped across shelves, or used as party decor. Making your own tassel garland is as simple as cutting strips of tissue paper or fabric, folding them in half, and attaching them to a string or ribbon.
9. Personalized Doormat
Welcome guests to your home with a personalized doormat. All you need is a plain coir doormat and some stencils or paint. Choose a design or message that reflects your personal style and get creative. Not only will it make your entrance more inviting, but it’s also a great conversation starter.
10. Decorative Throw Pillows
Throw pillows are an easy way to update the look of your living room or bedroom, and you can save money by making your own. Choose fabrics that coordinate with your decor and sew them into pillow covers. You can even add embellishments like buttons, tassels, or embroidery to make them truly unique.
These DIY home accessories are just the beginning. Get creative, have fun, and let your personal style shine through as you transform your space into a stylish haven.
4.1. Handmade throw pillows
Handmade throw pillows are a great way to add a personal touch to your home decor. Whether you’re looking to spruce up your living room or add some flair to your bedroom, DIY throw pillows are a fun and easy project to undertake. With just a few materials and some basic sewing skills, you can create beautiful and unique throw pillows that will instantly elevate the style of your space. From choosing the fabric to adding decorative details, making your own throw pillows allows you to customize every aspect to suit your taste and decor theme. So why settle for store-bought pillows when you can create one-of-a-kind pieces that reflect your creativity and style?
4.2. Creating decorative vases
Creating decorative vases is a fun and creative way to add a personalized touch to your home decor. Whether you’re looking to spruce up your living room, bedroom, or even your office space, DIY vases can instantly elevate the style of any room. Plus, making your own vases allows you to customize them to match your existing color scheme and design aesthetic. With just a few simple materials and some creativity, you can create unique and eye-catching vases that will impress your guests. From repurposing old glass bottles to hand-painting ceramic pots, there are endless possibilities when it comes to creating decorative vases. So, roll up your sleeves and get ready to unleash your inner artist with these inspiring DIY ideas!
4.3. DIY candle holders
DIY candle holders are a fantastic way to add a personalized touch to your home decor. Whether you’re looking to create a cozy ambiance or add a pop of color to a room, making your own candle holders allows you to customize them to match your style and taste. Plus, it’s a fun and creative project that can be done with minimal materials and effort. From simple and minimalist designs to more intricate and decorative ones, there are endless possibilities when it comes to DIY candle holders. In this section, we will explore some easy and inspiring ideas for creating your own candle holders that will instantly elevate the style of your space.
4.4. Customized picture frames
Customized picture frames are a great way to add a personal touch to your home decor. Whether you want to showcase your favorite family photos or create a unique gallery wall, DIY picture frames allow you to customize the look to match your style and preferences. There are endless options when it comes to materials, colors, and designs for creating your own picture frames. From using reclaimed wood and distressing it for a rustic look to painting plain frames in bold and vibrant colors, the possibilities are endless. Not only will customizing your picture frames add a special touch to your space, but it will also give you a sense of accomplishment knowing that you created something unique and meaningful.
4.5. Making your own wreath
Making your own wreath is a fun and creative way to add a personal touch to your home decor. Whether you’re looking to spruce up your front door or add a festive touch to your living room, a DIY wreath can instantly elevate the style of any space. Plus, crafting your own wreath allows you to customize it to match your unique taste and decor theme. With just a few simple materials and a little bit of creativity, you can create a beautiful wreath that will impress your guests and make your home feel warm and inviting. So, grab your crafting supplies and let’s get started on this DIY home accessory project!
Conclusion
In conclusion, these 10 easy DIY home decor projects offer a fantastic opportunity to transform your space into a stylish and personalized haven. From simple crafts to more intricate designs, there is something for everyone to try. Get creative, have fun, and enjoy the satisfaction of enhancing your home’s aesthetic appeal with these budget-friendly ideas.


These 10 innovative and imaginative DIY home decor ideas from [object Object] provide a refreshing approach to enhancing ones living…