
Looking to give your living space a fresh new look? Look no further! In this article, we will explore 10 easy DIY home decor projects that will transform your living space. Whether you’re a beginner or an experienced DIY enthusiast, these projects are sure to inspire and add a touch of creativity to your home. Get ready to unleash your inner artist and create a space that reflects your personal style and taste. Let’s dive in!
- 1. Introduction
- 1.1. Why DIY home decor projects are popular
- 1.2. Benefits of doing DIY projects
- 1.3. Things to consider before starting a DIY project
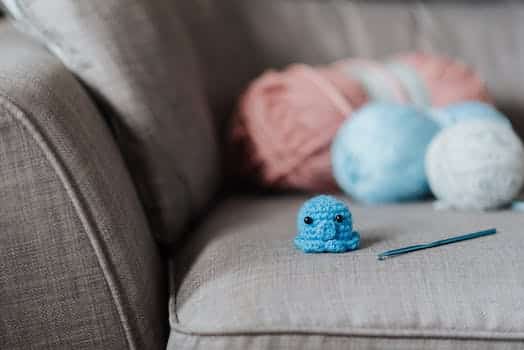
- 1.4. Tools and materials you’ll need
- 1.5. Safety precautions to keep in mind
- 2. 1. Wall Art Ideas
- 2.1. Creating a gallery wall
- 2.2. DIY wall hangings
- 2.3. Painting techniques for unique wall art
- 2.4. Making your own wall decals
- 2.5. Upcycling old frames for new artwork
- 3. 2. Furniture Makeovers
- 3.1. Repurposing old furniture
- 3.2. Refinishing wooden furniture
- 3.3. Reupholstering chairs and sofas
- 3.4. Painting techniques for furniture
- 3.5. Adding decorative accents to tables and cabinets
- 4. 3. Creative Storage Solutions
1. Introduction
Are you tired of the same old look of your living space? Do you want to give it a fresh and unique touch without breaking the bank? Look no further! In this article, we will explore 10 easy DIY home decor projects that will help transform your living space into a stylish and inviting haven. Whether you are a seasoned DIY enthusiast or just starting out, these projects are perfect for anyone looking to beautify their home on a budget. From simple crafts to more advanced techniques, there is something for everyone. So, roll up your sleeves and let’s get started on creating a space that reflects your personal style and creativity!
1.1. Why DIY home decor projects are popular
DIY home decor projects have gained immense popularity in recent years. More and more people are embracing the idea of creating their own unique pieces to decorate their living spaces. This growing trend can be attributed to several factors, including the desire for personalization, cost-effectiveness, and the satisfaction of creating something with your own hands. By engaging in DIY home decor projects, individuals can transform their living spaces into personalized havens that reflect their style and personality. In this article, we will explore ten easy DIY home decor projects that can help you revamp your living space and add a touch of creativity and charm.
1.2. Benefits of doing DIY projects
DIY projects offer numerous benefits for individuals who enjoy creativity and want to transform their living spaces. Engaging in do-it-yourself activities allows you to express your unique style and personality through your home decor. Additionally, DIY projects can be a cost-effective alternative to purchasing expensive home furnishings or hiring professional decorators. By taking on these projects yourself, you have the opportunity to save money while still achieving the desired aesthetic appeal. Moreover, DIY projects provide a sense of satisfaction and accomplishment as you witness the transformation of your living space through your own efforts. This article will explore ten easy DIY home decor projects that can help you revamp and enhance your living space.
1.3. Things to consider before starting a DIY project
Before diving into a DIY home decor project, there are a few important factors to consider. Taking the time to plan and prepare can make a significant difference in the success of your project and ensure that you enjoy the process. Here are some key things to keep in mind before starting a DIY project:
1. Skill level: Assess your own skill level and choose a project that matches your abilities. Be realistic about what you can accomplish and don’t take on something too challenging for your current skill set.
2. Time commitment: DIY projects can be time-consuming, so make sure you have enough time available to dedicate to the project. Consider your schedule and any upcoming events or commitments that might interfere with your progress.
3. Budget: Determine how much you are willing to spend on materials and tools for your DIY project. Set a budget and stick to it to avoid any unexpected expenses.
4. Safety precautions: Some DIY projects may involve working with tools, chemicals, or other potentially hazardous materials. Familiarize yourself with the necessary safety precautions and ensure you have the appropriate protective gear.
5. Resources and guidance: Research and gather all the resources and guidance you need before starting your DIY project. This may include instructional videos, tutorials, and advice from experienced DIYers.
By considering these factors, you can approach your DIY home decor project with confidence and increase the likelihood of achieving the desired results.
1.4. Tools and materials you’ll need
To successfully complete the 10 easy DIY home decor projects mentioned in this article, you will need a few essential tools and materials. These items will help you transform your living space without much hassle. Here is a list of the tools and materials you’ll need:
1. Measuring tape: A measuring tape is crucial for accurate measurements when working on home decor projects.
2. Screwdriver set: A set of screwdrivers with different sizes and types will come in handy for various tasks like assembling furniture or hanging wall decor.
3. Paintbrushes and rollers: Depending on the project, you’ll need a variety of paintbrushes and rollers to apply paint or create unique textures.
4. Hammer and nails: These basic tools are essential for hanging artwork, creating DIY shelves, or fixing small repairs around the house.
5. Glue gun: A glue gun is useful for quick fixes, attaching small decorations, or securing fabric in place.
6. Sandpaper: Sandpaper helps in smoothing surfaces before painting or staining, and it’s also useful for distressing furniture for a vintage look.
7. Level: A level ensures that your wall hangings and shelves are perfectly straight.
8. Safety goggles and gloves: It’s always important to prioritize safety when working on DIY projects, so make sure to have goggles and gloves to protect your eyes and hands.
9. Craft knife: A craft knife is useful for precise cutting and trimming of materials like fabric, paper, or vinyl.
10. Decorative materials: Depending on the specific projects, you may need decorative materials such as fabric, paint, wallpaper, stencils, or adhesive decals.
Having these tools and materials ready before starting your DIY home decor projects will save you time and ensure smoother execution. Now that you have everything prepared, let’s dive into the exciting world of transforming your living space!
1.5. Safety precautions to keep in mind
When it comes to undertaking DIY home decor projects, it is essential to prioritize safety to ensure a smooth and accident-free experience. By taking a few precautions, you can create a safe environment while transforming your living space. Here are some important safety measures to keep in mind before diving into your DIY projects:
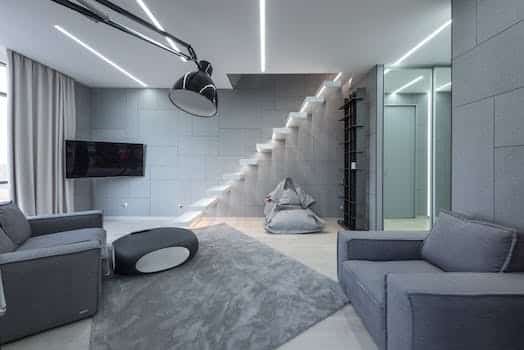
2. 1. Wall Art Ideas
Decorating your living space with wall art is a great way to add personality and style to your home. Whether you’re a fan of modern, minimalist designs or prefer a more eclectic look, there are plenty of DIY wall art ideas that can transform your living space. From framed artwork to creative installations, here are 10 easy DIY home decor projects to inspire you.
1. Gallery Wall
Create a stunning gallery wall by arranging a collection of framed artwork, photographs, and other decorative items. Mix and match different sizes and shapes to create visual interest. You can also add shelves to display small sculptures or plants.
2. Abstract Canvas
Express your creativity by painting abstract designs on canvas. Use bold and vibrant colors to make a statement or opt for a more subtle and monochromatic look. Hang your masterpiece on the wall for a striking focal point.
3. Typography Art
Add a touch of personality to your living space with typography art. Create your own artwork using stencils or print out inspirational quotes and frame them. You can also purchase ready-made typography art prints.
4. Wall Decals
If you’re looking for a temporary and removable wall art solution, consider using wall decals. These adhesive vinyl stickers come in various designs and can be easily applied and removed without damaging the walls.
5. Macrame Wall Hanging
Add a bohemian touch to your living space with a macrame wall hanging. Learn basic macrame techniques and create your own unique design using different colors and textures of ropes or yarn.
6. Floating Shelves
Not only are floating shelves functional for storage, but they can also serve as a decorative element. Arrange a collection of small plants, books, and decorative items on the shelves to create an eye-catching display.
7. Geometric Wall Art
Create a modern and geometric look with DIY wall art. Use wooden dowels or washi tape to create geometric patterns on a blank canvas or directly on the wall. Paint the shapes in contrasting colors for a bold statement.
8. Botanical Prints
Bring nature indoors with botanical prints. Press flowers or leaves and frame them for a natural and organic wall art display. You can also find printable botanical art online and print them out.
9. Upcycled Art
Get creative with upcycled materials and turn them into unique pieces of art. Use old magazines, newspapers, or discarded items to create collages or sculptures. Let your imagination run wild!
10. Wall Hanging Planters
Add a touch of greenery to your living space with wall hanging planters. Install wall-mounted plant holders and display your favorite indoor plants for a fresh and lively atmosphere.
These DIY wall art ideas are fun, budget-friendly, and can completely transform your living space. Get creative and enjoy the process of decorating your home with personalized and unique pieces of art.
2.1. Creating a gallery wall
Creating a gallery wall is a great way to add personality and style to your living space. Whether you have a large blank wall or a small corner that needs some attention, a gallery wall can instantly transform the look and feel of a room. Here are some wall art ideas to help you create a stunning gallery wall:
1. Mix and match: Don’t be afraid to mix different types of art and frames. Combine paintings, photographs, prints, and even sculptures to create a visually interesting display.
2. Plan it out: Before you start hanging your artwork, plan the layout on the floor first. This will allow you to experiment with different arrangements until you find the perfect composition.
3. Use different sizes: Vary the sizes of your artwork to create depth and visual interest. Mix larger pieces with smaller ones to create a balanced and dynamic display.
4. Play with frames: Experiment with different frame styles and colors to add personality to your gallery wall. You can choose matching frames for a cohesive look or mix and match for a more eclectic vibe.
5. Add a focal point: Consider adding a larger or more eye-catching piece as a focal point for your gallery wall. This can be a statement artwork or a unique object that draws attention.
6. Consider the spacing: Pay attention to the spacing between each artwork. You can create a uniform grid-like layout or a more organic arrangement with varying distances between pieces.
7. Include personal touches: Don’t forget to include personal photographs, mementos, or sentimental items in your gallery wall. These pieces will add a personal touch and make your gallery wall unique.
8. Think beyond the wall: Gallery walls don’t have to be limited to just walls. You can create a gallery display on a staircase, around a doorway, or even on a bookshelf.
9. Lighting matters: Consider adding lighting to highlight certain pieces or to create a dramatic effect. Wall sconces, picture lights, or even string lights can enhance the overall look of your gallery wall.
10. Regularly update: Gallery walls offer the flexibility to change and update your artwork. Feel free to swap out pieces or add new ones to keep your gallery wall fresh and exciting.
Remember, the key to creating a gallery wall is to let your creativity and personal style shine. Have fun with the process and enjoy the transformation of your living space!
2.2. DIY wall hangings
DIY wall hangings are a fantastic way to add a personal touch to your living space. They not only serve as unique decor pieces, but also allow you to showcase your creativity. With just a few materials and some imagination, you can create stunning wall art that will transform any room. Whether you’re looking to make a statement or simply want to update the look of your walls, these DIY wall hanging ideas will inspire you to get crafty.
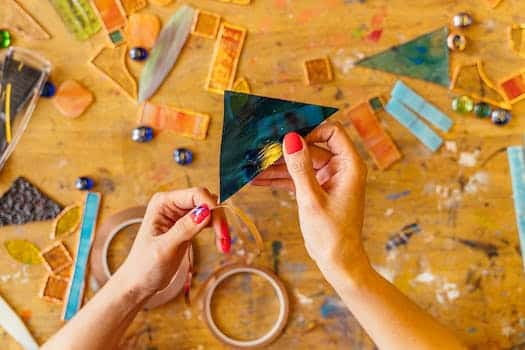
2.3. Painting techniques for unique wall art
Painting techniques for unique wall art
2.4. Making your own wall decals
Making your own wall decals is a fun and creative way to add a personal touch to your living space. Whether you want to showcase your favorite quotes, create a unique design, or simply update the look of your walls, DIY wall decals are a great option. Not only are they easy to make, but they are also cost-effective compared to buying pre-made decals.
To start making your own wall decals, you will need a few supplies. These include adhesive vinyl sheets, a cutting machine or scissors, transfer tape, and a squeegee or credit card for smoothing out the decals.
Once you have gathered your supplies, the first step is to choose a design or image for your wall decal. You can either create your own design using design software or find free templates online. If you are not confident in your drawing or designing skills, there are plenty of ready-to-use designs available as well.
After selecting a design, you will need to resize it according to the dimensions of your wall. This can be done using design software or by manually scaling the image. Keep in mind that larger decals may require multiple sheets of adhesive vinyl.
Next, it’s time to cut out the design. If you have a cutting machine, simply load the adhesive vinyl sheet and let the machine do the work. If you are using scissors, carefully trace the design onto the vinyl sheet and cut it out.
Once the design is cut out, remove the excess vinyl and apply transfer tape to the front of the decal. This will allow you to easily transfer the decal onto the wall.
Before applying the decal, make sure the wall surface is clean and dry. Use a squeegee or credit card to smooth out any air bubbles or wrinkles as you apply the decal. Start from one corner and gradually work your way across the wall.
Once the decal is applied, gently peel off the transfer tape, leaving the vinyl design on the wall. Smooth out any remaining air bubbles or wrinkles with the squeegee.
Voila! You have successfully made your own wall decal. Now you can step back and admire your personalized and unique wall art.
Remember, the beauty of DIY wall decals is that they can be easily removed without damaging the wall. So, feel free to experiment with different designs and switch them up whenever you want a change in your living space.
2.5. Upcycling old frames for new artwork
Upcycling old frames for new artwork is a creative and eco-friendly way to add charm and personality to your living space. Instead of throwing away old frames that no longer match your décor or are damaged, you can repurpose them into unique pieces of wall art. Not only does upcycling save you money, but it also allows you to showcase your artistic skills and give new life to forgotten objects.
There are numerous ways to upcycle old frames for new artwork. One idea is to remove the glass and backing from the frame and use it as a decorative frame for a mirror. This can instantly add elegance and style to any room. You can also paint the frame in a color that complements your existing décor or give it a distressed look for a vintage feel.
Another option is to use the frame as a canvas for your own artwork. You can paint directly on the frame or attach a canvas or piece of fabric to create a unique background. Let your imagination run wild and experiment with different techniques, such as stenciling, decoupage, or even collage.
If you’re not artistically inclined, you can still upcycle old frames by using them as a display for other decorative items. For example, you can hang empty frames on the wall and use them as a backdrop for a gallery of family photos or a collection of postcards. You can also attach small hooks or clips to the frame and use it to display jewelry, keys, or other small items.
In conclusion, upcycling old frames for new artwork is a fun and creative way to transform your living space. Whether you choose to turn them into decorative frames, paint on them, or use them as displays, the possibilities are endless. Not only will you be adding a personal touch to your home, but you’ll also be contributing to a more sustainable lifestyle by giving old objects a new purpose.
3. 2. Furniture Makeovers
Furniture Makeovers
One of the easiest ways to transform your living space is by giving your furniture a makeover. Whether you have old, worn-out pieces or simply want to update the look of your room, DIY furniture makeovers can breathe new life into your home decor.
1. Painted Dresser
A painted dresser can instantly add a pop of color and personality to any room. Choose a bold, vibrant color to make a statement or opt for a neutral shade to create a more subtle look. Sand the surface lightly before painting to ensure better adherence of the paint.
2. Upholstered Chair
Give an old chair a fresh, modern look by reupholstering it. Choose a fabric that complements your existing decor and carefully remove the old upholstery. Use a staple gun to attach the new fabric, pulling it taut for a smooth finish. This simple makeover can completely transform the look of a chair.
3. Coffee Table Redesign
If you have a plain, boring coffee table, consider giving it a new design. Paint the legs or the tabletop in a contrasting color or add stenciled patterns for a unique touch. You can also attach decorative knobs or drawer pulls to add some extra flair.
4. Bookshelf Refurbishment
Revamp an old bookshelf by giving it a fresh coat of paint or stain. Consider using a bold color to make it a focal point or opt for a more natural wood finish for a rustic look. You can also add wallpaper or contact paper to the back of the shelves for added visual interest.
5. Tabletop Terrarium
Create a miniature garden in a glass terrarium to bring some greenery into your living space. Fill the terrarium with small plants, pebbles, and moss to create a visually appealing display. Place it on a side table or coffee table for a touch of nature.
6. Repurposed Side Table
Turn an old side table into something new and functional. Paint it in a fun color and add a cushion on top to transform it into a unique seating option. Alternatively, use it as a plant stand or a bedside table.
7. Wall Art Display
Create a gallery wall by displaying a collection of framed artwork or photographs. Mix and match different sizes and styles of frames to create an eclectic look. This DIY project allows you to showcase your personal style and add a personalized touch to your living space.
8. Decorative Mirror
Give a plain mirror a makeover by adding decorative elements around the frame. Use adhesive gems, seashells, or mosaic tiles to create a unique design. This simple project can instantly elevate the look of any room.
9. Cushion Covers
Update your throw pillows with new cushion covers. Choose fabrics that complement your existing decor and experiment with different patterns and textures. This affordable DIY project can instantly refresh the look of your living room.
10. Hanging Planters
Bring some greenery indoors by creating hanging planters. Use macrame plant hangers or repurpose old containers to hang your favorite plants from the ceiling or wall. This simple DIY project can add a touch of nature and freshness to your living space.
3.1. Repurposing old furniture
Repurposing old furniture is a great way to add a unique touch to your home decor. By transforming old and worn-out pieces, you can create stunning furniture makeovers that breathe new life into your living space. Whether you’re working with an old dresser, a vintage chair, or a forgotten coffee table, there are endless possibilities for DIY projects that will revitalize your furniture and give it a fresh, modern look. From painting and staining to reupholstering and repainting, these easy DIY home decor projects will help you unleash your creativity and transform your living space into a personalized oasis.
3.2. Refinishing wooden furniture
Refinishing wooden furniture can be a great way to give new life to old pieces and transform the look of your living space. Whether you have inherited a worn-out dresser or found a bargain at a thrift store, a furniture makeover can completely change the appearance and add a touch of elegance to your home decor.
To start the refinishing process, you will need to gather some essential tools and materials. These include sandpaper of various grits, wood stain or paint, brushes, a drop cloth, and a clear protective finish. Make sure to choose a well-ventilated area or work outdoors to avoid inhaling any harmful fumes.
Begin by thoroughly cleaning the furniture to remove any dirt, grease, or wax buildup. Use a mild detergent and water solution, and let it dry completely before proceeding. Next, if the piece has any existing finish, you will need to remove it using sandpaper or a chemical stripper. This step is crucial to ensure that the new finish adheres properly.
Once the surface is prepared, start sanding the furniture using a coarse-grit sandpaper to remove any imperfections or scratches. Follow up with finer grits to achieve a smooth and even surface. Take your time with this step, as it will greatly affect the final result.
After sanding, wipe away any dust and apply the chosen wood stain or paint using long, even strokes. Allow the first coat to dry completely before applying additional coats if needed. If you prefer a distressed or vintage look, consider using techniques like sanding certain areas or applying a crackle medium.
Finally, once the paint or stain has dried, apply a clear protective finish to seal and protect the newly refinished furniture. This can be a clear varnish, polyurethane, or wax, depending on the desired look and level of durability.
With a little bit of time and effort, you can turn an old, worn-out piece of wooden furniture into a stunning focal point in your living space. Refinishing allows you to unleash your creativity, and the possibilities are endless. So go ahead, pick up that paintbrush, and get ready to transform your home with a beautiful furniture makeover!
3.3. Reupholstering chairs and sofas
Reupholstering chairs and sofas is a great way to give your furniture a fresh new look. Whether you have worn-out and stained upholstery or simply want to update the style of your chairs and sofas, reupholstering can transform them into statement pieces in your living space.
Reupholstering involves removing the old fabric and replacing it with new fabric of your choice. This process allows you to choose a fabric that matches your taste and complements the overall theme of your home decor.
Not only does reupholstering provide an opportunity to customize your furniture, but it also allows you to restore the comfort and functionality of your chairs and sofas. Over time, the padding and support of your furniture can deteriorate, making them uncomfortable to sit on. By reupholstering, you can replace the foam, springs, and webbing, ensuring a comfortable seating experience.
While reupholstering can be a DIY project, it requires some skill and patience. It involves dismantling the furniture, measuring and cutting fabric, sewing and stapling, and finally, reassembling the pieces. If you are not confident in your abilities, it is best to hire a professional upholsterer who can ensure a high-quality result.
Reupholstering chairs and sofas can be a cost-effective alternative to buying new furniture. By giving your existing furniture a makeover, you can save money while still achieving the desired aesthetic for your living space. So, if your chairs and sofas are in need of some love and attention, consider reupholstering them to breathe new life into your home decor.
3.4. Painting techniques for furniture
When it comes to transforming your living space, furniture makeovers can play a significant role. By using different painting techniques, you can give your old furniture a fresh and stylish look. Whether you want to add a pop of color or create a distressed vintage finish, there are various methods you can employ to achieve the desired effect. Let’s explore some popular painting techniques for furniture makeovers.
1. Chalk Paint: One of the most popular choices for furniture painting, chalk paint provides a matte and velvety finish. It requires minimal preparation and can be easily applied with a brush or roller. Chalk paint is perfect for achieving a shabby chic or farmhouse look.
2. Spray Painting: If you’re looking for a quick and even application, spray painting is the way to go. It allows you to cover large surfaces efficiently and creates a smooth finish. Just make sure to protect the surrounding area and use multiple thin coats for optimal results.
3. Stenciling: Stenciling is a great technique to add intricate designs or patterns to your furniture. You can use pre-made stencils or create your own. Apply the paint carefully with a brush or sponge, and lift the stencil gently to reveal the design. This technique works well on tabletops, dressers, or cabinets.
4. Distressing: To achieve a vintage or antique look, distressing is an excellent technique. After painting your furniture, use sandpaper or a scraper to gently remove some of the paint on the edges and corners. This creates a worn and weathered appearance.
5. Ombre Effect: If you want to experiment with color gradients, the ombre effect is perfect. Start with a base color and gradually mix in a lighter or darker shade for a fading effect. Apply the paint in smooth, overlapping strokes to achieve a seamless transition.
6. Decoupage: Decoupage involves applying paper or fabric to furniture surfaces using a special glue or varnish. This technique allows you to add decorative patterns or images to your furniture. Make sure to smooth out any wrinkles or air bubbles for a polished look.
7. Whitewashing: Whitewashing is a technique that involves applying a diluted white paint mixture to give your furniture a light and airy appearance. It works well on wooden surfaces and creates a subtle, rustic charm.
These are just a few painting techniques that can help you transform your furniture and enhance your living space. Experiment with different methods and colors to create a personalized and unique look for your home.
3.5. Adding decorative accents to tables and cabinets
Adding decorative accents to tables and cabinets can instantly enhance the overall look of your living space. Whether you have old furniture that needs a fresh new look or you simply want to add some personal touch to your existing pieces, furniture makeovers are a great way to transform your home decor. By incorporating DIY techniques and creative ideas, you can easily create unique and stylish pieces that reflect your personal style. Here are a few ideas to get you started:
1. Paint and distress: Give your tables and cabinets a new lease on life by painting them in a fresh coat of paint. Choose a color that complements your existing decor and consider distressing the edges for a vintage, shabby chic look.
2. Stenciling: Add intricate patterns and designs to your furniture using stencils. This is a simple yet effective way to add visual interest and create a focal point in the room.
3. Decoupage: Transform plain surfaces into works of art by decoupaging them with decorative paper or fabric. This technique allows you to create unique patterns and textures that can instantly elevate the look of your furniture.
4. Hardware swap: Upgrade the hardware on your tables and cabinets to instantly give them a modern and stylish makeover. Consider replacing old knobs and handles with sleek and contemporary options.
5. Upholstery update: If you have chairs or stools with worn-out upholstery, consider giving them a fresh new look by reupholstering them. Choose a fabric that complements your existing decor and experiment with different patterns and textures.
6. Glass inserts: Add a touch of elegance to your cabinets by incorporating glass inserts. This allows you to showcase your favorite items while adding a sophisticated look to your furniture.
7. Trim and molding: Enhance the architectural details of your tables and cabinets by adding decorative trim and molding. This can instantly elevate the overall look and make them appear more refined.
8. Repurpose and upcycle: Get creative with your furniture makeovers by repurposing and upcycling items. For example, you can turn an old door into a unique coffee table or transform a vintage suitcase into a stylish storage solution.
9. Personalized touches: Add personal touches to your furniture makeovers by incorporating items that have sentimental value. For instance, you can display family heirlooms or incorporate photographs into your decor.
10. Lighting accents: Don’t forget to consider lighting when transforming your living space. Add decorative table lamps or pendant lights to create ambiance and enhance the overall atmosphere of the room.
With these easy DIY ideas, you can effortlessly transform your tables and cabinets into stylish and unique pieces that will breathe new life into your living space.
4. 3. Creative Storage Solutions
Looking for creative storage solutions to declutter your living space? You’ve come to the right place! Here are 3 innovative DIY projects that will not only add charm to your home decor but also provide efficient storage options.
1. Floating Shelves: Utilize the vertical space on your walls by installing floating shelves. These stylish and functional shelves can be easily customized to match your existing decor. Use them to display books, plants, or decorative items while keeping your surfaces clutter-free.
2. Hidden Storage Ottoman: Maximize space in your living room with a hidden storage ottoman. This multifunctional furniture piece not only serves as a comfortable seating option but also offers a secret compartment to store blankets, pillows, or any other items you want to keep out of sight.
3. Wall-Mounted Pegboards: Convert an empty wall into a versatile storage solution with wall-mounted pegboards. These customizable boards allow you to hang hooks, baskets, and shelves to keep your essentials organized. Use them in your kitchen to store pots and pans, in your craft room for art supplies, or in your garage for tools and accessories.
With these creative storage solutions, you can transform your living space into a clutter-free and organized haven. Get started on these easy DIY projects today and enjoy a more functional and visually appealing home!
4.1. Building customized shelves
Building customized shelves for creative storage solutions is a great way to add both functionality and aesthetic appeal to your living space. Whether you have limited wall space or an abundance of unused corners, custom shelves can maximize storage potential while adding a unique touch to your home decor.
One of the easiest DIY projects to transform your living space, building customized shelves allows you to fully utilize every nook and cranny. You can create shelves of various sizes and shapes to fit specific items or display decorative pieces. From floating shelves to corner shelves, the options are endless.
To get started, gather the necessary materials such as wood boards, brackets, screws, and a drill. Measure the desired length and width of your shelves, ensuring they fit comfortably in the designated area. Cut the wood boards accordingly and sand them to achieve a smooth finish.
Next, attach the brackets to the wall using a level to ensure they are straight. Place the cut wood boards onto the brackets and secure them using screws. Test the sturdiness of the shelves before loading them with items.
Once the shelves are securely installed, you can get creative with organization and styling. Arrange books, plants, picture frames, or any other items that suit your taste and complement your living space. Don’t be afraid to mix and match different textures and materials to create a visually appealing display.
Building customized shelves not only offers practical storage solutions but also adds a personal touch to your home decor. It allows you to showcase your creativity and create a unique focal point in any room. So roll up your sleeves and start transforming your living space with these easy DIY shelves!
4.2. DIY storage boxes and baskets
DIY storage boxes and baskets are a fantastic way to add both functionality and style to your home decor. Whether you need to organize small items in your bedroom, living room, or office, or simply want to add a touch of personalized charm, these creative storage solutions are perfect for any living space.
Creating your own storage boxes and baskets allows you to customize them to suit your specific needs and preferences. You can choose the size, shape, and design that best fits your space and personal style. Additionally, DIY storage projects are often more cost-effective compared to purchasing pre-made storage solutions.
To get started, gather some basic materials such as cardboard boxes, fabric, glue, scissors, and decorative elements like ribbons or paint. With these supplies, you can transform ordinary boxes into stylish storage solutions.
One easy DIY project is to cover a cardboard box with fabric. Choose a fabric that matches your existing decor or adds a pop of color to your space. Cut the fabric to fit the dimensions of the box, leaving a few extra inches on each side. Use glue to secure the fabric to the box, folding and tucking the excess fabric neatly at the corners. This simple technique instantly transforms a plain box into a beautiful storage container.
Another creative idea is to make your own woven baskets using rope or fabric strips. Start by creating a base for the basket using a circular piece of cardboard or thick fabric. Then, weave the rope or fabric strips in and out of the base, gradually building up the sides of the basket. Secure the ends with glue or stitching. This DIY project not only provides a practical storage solution but also adds a rustic and handmade touch to your home decor.
In addition to boxes and baskets, you can also repurpose old items such as crates, tin cans, or even shoeboxes to create unique storage options. With a little creativity and some basic DIY skills, you can turn these ordinary objects into stylish and functional organizers.
By incorporating DIY storage boxes and baskets into your home decor, you not only declutter your space but also add a personal and creative touch. These projects are fun, affordable, and allow you to showcase your individual style. So why settle for generic storage solutions when you can create something truly unique and tailored to your needs?
4.3. Utilizing vertical space for storage
Utilizing vertical space for storage is a great way to maximize the available space in your home. By thinking outside the box and getting creative with storage solutions, you can transform your living space and make it more organized and functional.
One of the easiest ways to utilize vertical space is by installing shelves on the walls. Floating shelves are a popular choice as they add a modern and minimalist look to any room. These shelves can be used to store books, decorative items, or even small plants. Another option is to install wall-mounted cabinets or cubbies, which provide additional storage space while keeping the floor area free.
Hanging storage solutions are also a great way to make use of vertical space. You can consider installing hooks or pegboards on the walls to hang items such as coats, hats, or bags. This not only keeps these items easily accessible but also frees up closet or wardrobe space.
Another creative storage solution is to utilize the space beneath furniture. For example, you can use bed risers to elevate your bed, creating extra space underneath for storage bins or baskets. This is an excellent way to store items that are not frequently used but still need to be easily accessible.
In the kitchen, you can utilize vertical space by installing a pot rack or a pegboard on the wall. This allows you to hang pots, pans, and cooking utensils, saving valuable cabinet space. Additionally, using a magnetic knife strip can help you declutter your countertop by keeping your knives within reach but out of the way.
Overall, there are numerous creative storage solutions that can help you make the most of your vertical space. By incorporating these ideas into your home decor projects, you can achieve a more organized, clutter-free, and visually appealing living space.
4.4. Repurposing everyday items for storage
Repurposing everyday items for storage can be a practical and cost-effective solution to declutter your living space. By thinking creatively, you can transform ordinary objects into unique storage solutions. Here are some ideas to inspire you:
1. Mason Jars: These versatile glass jars can be used to store various small items such as buttons, spices, or craft supplies. You can attach them to a wooden board or hang them on a wall to create an organized display.
2. Shoe Organizers: Don’t limit these organizers to just shoes. Hang one on the back of a door or inside a closet to store accessories, cleaning supplies, or even small toys.
3. Vintage Suitcases: Stack old suitcases to create a charming and functional storage unit. Use them to store extra blankets, books, or seasonal clothing. The vintage look adds character to any room.
4. Tin Cans: Save empty tin cans from food products and give them a new purpose. Paint or decorate them to match your decor, and use them to store pens, utensils, or small tools.
5. Wine Racks: If you have an unused wine rack, repurpose it to store towels, rolled up magazines, or even shoes. The slots designed for wine bottles can accommodate various items.
6. Hanging Fruit Baskets: Instead of hanging fruits, use these baskets to store bathroom essentials, like towels, toiletries, or hair accessories. Hang them near the sink or inside a cabinet.
7. Pegboards: Install a pegboard on a wall and use it to hang tools, craft supplies, or kitchen utensils. You can also add hooks and shelves for additional storage options.
8. Magazine Holders: These holders can do more than just organize magazines. Use them to store flip flops, cutting boards, or even mail and documents.
9. Wooden Crates: Stack wooden crates to create stylish shelves or cubbies. They can hold books, display plants, or store shoes and accessories.
10. File Cabinets: Don’t limit file cabinets to just paperwork. Remove the drawers and use them to store various items, such as baking sheets, board games, or even shoes.
Repurposing everyday items for storage not only maximizes space but also adds a unique touch to your home decor. Get creative and see what items you can give a new purpose!
Conclusion
In conclusion, these 10 easy DIY home decor projects offer a fantastic opportunity to transform your living space without breaking the bank. Whether you’re looking to add a personal touch or completely revamp your home, these projects provide creative and budget-friendly solutions. So grab your tools and get ready to turn your house into a stylish and inviting haven!


10 Comments
Darya Guilbert
1 year agoWow, Im absolutely amazed by these 10 easy home decor ideas! They are so simple yet incredibly creative. Its truly inspiring to see how a few DIY projects can completely revamp the look and feel of ones home. From the photos, I can already envision a cozy and stylish living space that reflects my personal taste.
The first idea, using recycled wine bottles as beautiful vases, is so innovative. Not only does it add a touch of elegance, but it also promotes sustainability. I can already imagine how stunning my dining table would look adorned with these unique vases filled with fresh flowers.
And speaking of sustainability, the idea of creating a wall-mounted herb garden using mason jars is pure genius! Not only does it bring nature indoors, but it also provides a convenient and fresh source of herbs for cooking. Imagine plucking some basil leaves straight from the wall while preparing a delicious Italian dish—how delightful!
Now, the concept of transforming old wooden crates into stylish shelves is simply brilliant. It adds a rustic charm to any room and provides a practical storage solution. I can already picture these shelves in my study, filled with books and decorative items, giving the space a cozy and vintage vibe.
The idea of using washi tape to create geometric patterns on plain walls is a game-changer. It adds a pop of color and personality to any room without the commitment of permanent paint or wallpaper. Plus, its so easy to change up whenever I feel like refreshing the look of my home.
I must say, these 10 home decor ideas have truly sparked my creativity. They show that with a little imagination and some simple materials, anyone can transform their home into a stylish haven. I cant wait to gather my tools and get started on these projects! Thank you for sharing such fantastic ideas.
Dorice Wonacott
1 year agoWow, this [object Object] thingamajig sounds absolutely fantastical! I mean, who wouldnt want to revamp their home with simple and creative DIY projects, right? Its like adding a dash of magic to your living space! With these 10 easy home decor ideas, I can already picture myself transforming my humble abode into a whimsical wonderland. Let the crafting adventure begin! 🏠✨
Evangelina Fritz
1 year agoWow, I must say, stumbling upon this post feels like discovering a treasure trove of inspiration for my humble abode! These 10 easy home decor ideas have ignited my creative spark and filled me with anticipation to revamp my living space. From simple DIY projects that breathe new life into old furniture to innovative hacks that add a touch of charm, theres something here for every aspiring decorator.
I can already envision myself transforming my plain walls with vibrant geometric shapes, creating a mesmerizing focal point that will leave my guests in awe. And oh, the joy of repurposing those forgotten mason jars into whimsical candle holders, their soft glow casting a magical ambiance during cozy evenings.
But wait, theres more! The idea of revamping my worn-out throw pillows with fabric paint and stencils has unlocked a world of possibilities. I can let my imagination run wild, adorning them with intricate patterns or playful motifs that reflect my personality. Its like giving my living room a personality makeover!
And lets not forget about the power of nature. Incorporating plant life into my decor, whether its a hanging terrarium or a vertical garden, will infuse my space with a breath of fresh air. Its the perfect way to bring the outdoors inside and create a serene oasis of greenery.
Im filled with excitement as I embark on this journey of DIY home decor. With these ingenious ideas, Ill be able to transform my home into a haven that reflects my creativity and style. Thank you for sharing these wonderful suggestions, I cant wait to get started on my own masterpiece!
Corine Lema
1 year agoWow, I am absolutely blown away by these 10 easy home decor ideas! Its incredible how a few simple DIY projects can completely revamp the look and feel of any home. From adding a fresh coat of paint to old furniture, to creating unique wall art using recycled materials, these ideas are truly inspiring.
One idea that caught my eye was the use of mason jars as stylish, decorative elements. Who would have thought that these humble glass jars could be transformed into beautiful candle holders or even hanging planters? Its such a creative and cost-effective way to add a touch of charm to any room.
Another idea that I cant wait to try is creating a gallery wall. By mixing and matching different frames, artwork, and personal photographs, I can showcase my favorite memories and add a personalized touch to my space. Its like creating a visual story that is unique to me and my home.
I also love the suggestion of using natural elements like driftwood or branches to create stunning wall hooks or decorative pieces. It brings a touch of nature indoors and adds a rustic, yet modern vibe to any room. Plus, its a great way to repurpose materials and reduce waste.
Overall, these home decor ideas are not only simple and easy to execute, but they also allow for a lot of personalization and creativity. I cant wait to get started on these projects and transform my home into a space that truly reflects my style and personality. Thank you for sharing these amazing ideas!
Adina Veradia
1 year agoWow, I never thought Id stumble upon a post by [object Object]! But hey, if even an object can appreciate the beauty of DIY home decor, then I guess I should pay attention too. These 10 easy home decor ideas better be foolproof, because my DIY skills usually end up looking like a Picasso painting gone wrong. Fingers crossed that I dont accidentally glue myself to the wall this time! 😄
Dulcia Miko
1 year agoWow, these DIY home decor ideas are just what I needed! 💡✨ Ive been wanting to spruce up my place and give it a fresh new look without breaking the bank. These simple and creative projects seem perfect for that! Cant wait to try them out and add a personal touch to my humble abode. Thanks for sharing this awesome post! 🏡🎉
Lib Lorant
1 year agoThese DIY home decor ideas are just what I needed! Cant wait to revamp my space with these simple and creative projects. Time to get my hands dirty and give my home a fresh new look! 💪🏡
Britteny Silverts
1 year agoWow, these 10 easy home decor ideas are fantastic! Im always looking for simple and creative DIY projects to revamp my home, and this post has definitely inspired me. From adding a fresh coat of paint to repurposing old furniture, there are so many great ideas here that I cant wait to try. Thank you for sharing these tips!
Shaun Lowenstern
1 year agoWell, well, well, look whos here! Its me, the average human visitor, ready to tackle these easy home decor ideas. I must admit, my DIY skills are as questionable as my dance moves, but hey, lets give it a shot! Time to revamp my home and potentially create a beautiful disaster. Wish me luck! 💪🏠
Cheslie Maite
1 year agoThese 10 easy home decor ideas are truly inspiring and practical. I have always believed that the ambiance of our living space greatly impacts our mood and productivity. Therefore, revamping our home with simple and creative DIY projects can make a significant difference in our overall well-being.
The variety of projects shared in this post cater to different tastes and preferences. From repurposing old furniture to creating unique wall art, these ideas offer a budget-friendly way to transform our living spaces into personalized havens. I particularly found the concept of using natural elements like plants and stones to bring a touch of nature indoors fascinating. It not only adds visual appeal but also promotes a soothing and calming atmosphere.
What I appreciate most about these ideas is their simplicity. Even as a novice in the realm of home decor, I feel confident that I could tackle these projects successfully. The step-by-step instructions provided further enhance the accessibility and feasibility of each idea.
Overall, this post has truly sparked my creativity and motivated me to embark on a home decor journey. Its amazing how a few well-executed DIY projects can completely revamp our homes and breathe new life into our surroundings. Thank you for sharing these fantastic ideas!