

Are you looking to add a touch of charm and personality to your outdoor spaces? Look no further! In this article, we will explore 10 easy outdoor decor DIY ideas that will transform your backyard or patio into a stunning oasis. From repurposing old items to creating unique and eye-catching pieces, these projects are not only fun to do but also budget-friendly. Get ready to unleash your creativity and make your outdoor spaces the envy of the neighborhood with these simple yet impressive DIY ideas.
- 1. 1. Creative Outdoor Lighting
- 1.1. 1.1 Solar-Powered String Lights
- 1.2. 1.2 Mason Jar Lanterns
- 1.3. 1.3 DIY Tin Can Lanterns
- 1.4. 1.4 Fairy Light Globe
- 1.5. 1.5 DIY Firefly Lanterns
- 2. 2. Upcycled Garden Planters
- 2.1. 2.1 Repurposed Pallet Planter
- 2.2. 2.2 Hanging Tire Planters
- 2.3. 2.3 Vintage Tea Tin Planters
- 2.4. 2.4 DIY Wine Barrel Planter
- 2.5. 2.5 Upcycled Shoe Organizer Garden
- 3. 3. Outdoor Furniture Revamp
- 3.1. 3.1 Pallet Patio Furniture
- 3.2. 3.2 DIY Rope Hammock
- 3.3. 3.3 Upcycled Bench Swing
- 3.4. 3.4 Tire Ottoman
- 3.5. 3.5 Vintage Chair Makeover
1. 1. Creative Outdoor Lighting
Outdoor lighting can instantly transform your outdoor space into a magical and inviting area. Whether you have a large garden or a small balcony, adding creative outdoor lighting can enhance the ambiance and make your outdoor decor stand out. Here are 10 easy outdoor decor DIY ideas to inspire you:
1. Mason Jar Lanterns: Repurpose old mason jars by turning them into charming lanterns. Simply insert a candle or fairy lights into the jar and hang them from tree branches or place them on tables.
2. Solar-Powered Path Lights: Illuminate your pathways and garden edges with solar-powered path lights. These lights charge during the day and automatically turn on at dusk, providing a soft and inviting glow.
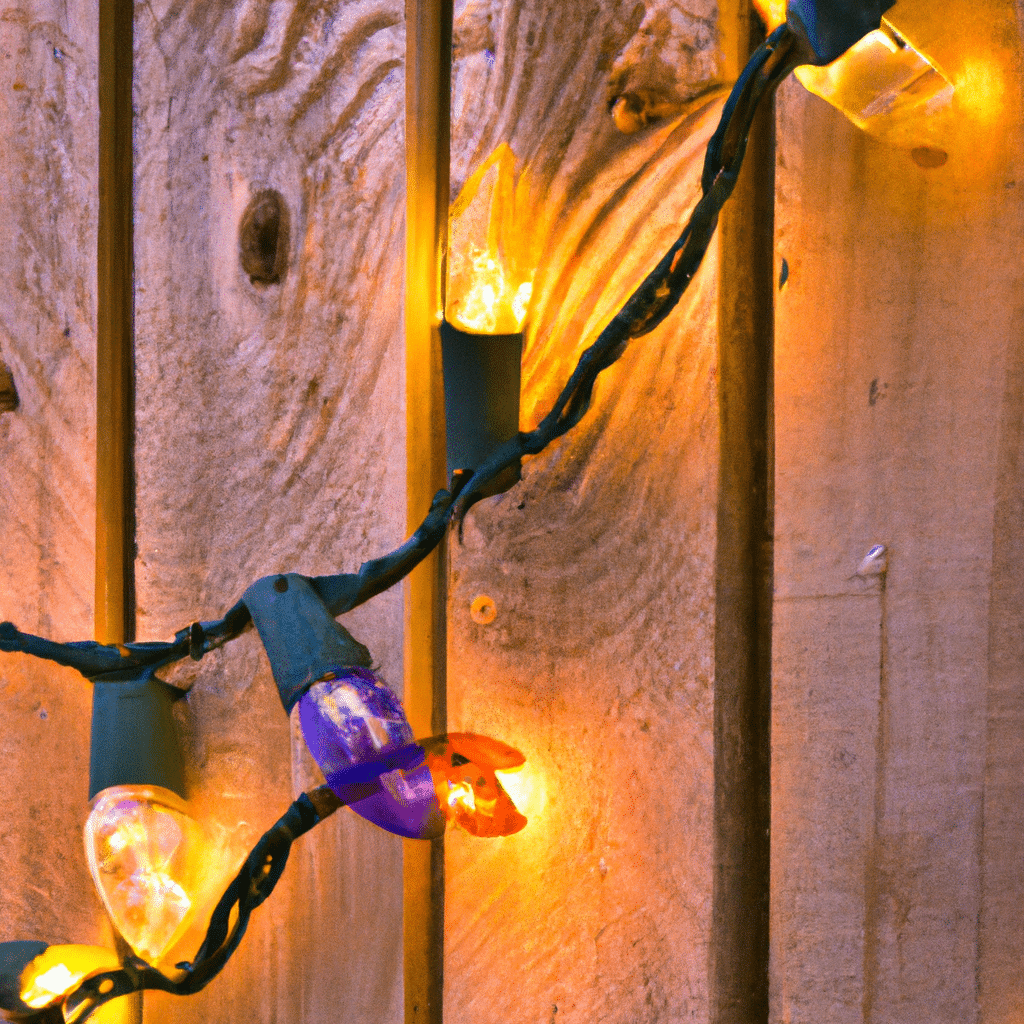
3. String Lights: String lights are versatile and can be used in various ways. Hang them along fences, drape them from pergolas, or create a cozy ambiance by wrapping them around tree trunks.
4. DIY Tin Can Lanterns: Create unique lanterns by recycling tin cans. Paint the cans in vibrant colors, punch holes in patterns, and place candles inside. These lanterns can be hung or placed on tables.
5. Outdoor Chandeliers: Add a touch of elegance to your outdoor dining area or gazebo with an outdoor chandelier. Choose a weather-resistant chandelier or make your own using strings of fairy lights.
6. DIY Fire Pit: Create a cozy gathering spot in your backyard with a DIY fire pit. Use stones or bricks to build a circular pit and add a metal fire ring. Surround the pit with comfortable seating for a perfect outdoor hangout spot.
7. Hanging Tea Light Holders: Enhance the charm of your outdoor space by hanging tea light holders from tree branches or pergolas. Choose holders with intricate designs or go for simple glass holders for a classic look.
8. Bamboo Torches: For a tropical and exotic touch, place bamboo torches around your outdoor area. These torches not only provide lighting but also keep mosquitoes away.
9. DIY Glow-in-the-Dark Planters: Create mesmerizing outdoor lighting by making your own glow-in-the-dark planters. Paint terracotta planters with glow-in-the-dark paint and place them strategically around your garden or patio.
10. Upcycled Chandelier Planter: Turn an old chandelier into a stunning planter by removing the electrical components and replacing them with hanging baskets. Fill the baskets with colorful flowers or trailing vines for a unique outdoor decor piece.
These easy outdoor decor DIY ideas will help you add a touch of creativity and warmth to your outdoor space. Get inspired and start transforming your outdoor area into a magical oasis!
1.1. 1.1 Solar-Powered String Lights
Solar-powered string lights are a popular choice for outdoor lighting. These lights harness the power of the sun to illuminate your outdoor space, making them environmentally friendly and cost-effective. With no need for electricity or batteries, you can easily install and use solar-powered string lights anywhere in your outdoor area. Whether you want to create a cozy ambiance on your patio or brighten up your garden, solar-powered string lights are a versatile and convenient option. They come in various lengths and styles, allowing you to customize the lighting to suit your needs. Additionally, many solar-powered string lights have built-in sensors that automatically turn them on at dusk and off at dawn, saving you even more energy. Upgrade your outdoor decor with these eco-friendly and stylish solar-powered string lights.
1.2. 1.2 Mason Jar Lanterns
Mason jar lanterns are a charming and easy way to add a touch of whimsy to your outdoor space. These DIY lanterns are perfect for creating a warm and inviting ambiance during those summer evenings. To make your own mason jar lanterns, start by gathering a few empty mason jars and some wire or twine. Next, wrap the wire or twine around the neck of the jar, creating a handle that can be used to hang the lantern. You can also add decorative elements like beads or ribbon to give your lanterns a personalized touch. Once you have your jars prepared, simply place a small candle or LED light inside and light it up. The soft glow emitted by the lanterns will create a cozy and magical atmosphere in your outdoor space. Whether you hang them from tree branches or place them on tables, these mason jar lanterns are sure to be a hit at your next outdoor gathering.
1.3. 1.3 DIY Tin Can Lanterns
DIY Tin Can Lanterns are a fantastic way to add a touch of whimsy and charm to your outdoor space. These lanterns are not only easy to make, but they also provide a warm and inviting glow that is perfect for those summer evenings spent outside. All you need are some empty tin cans, a hammer and nail, and a little creativity. First, clean out the cans and remove any labels. Then, fill each can with water and freeze overnight. This will make it easier to punch holes in the cans. Once the cans are frozen, take them out of the freezer and use a hammer and nail to create a pattern of holes in the sides of the cans. You can make simple designs or get more intricate with your patterns. After you have finished punching the holes, let the cans thaw and dry completely. Finally, place tea light candles or LED lights inside the cans and light them up. Hang the lanterns from trees or shepherd hooks around your outdoor space, and enjoy the magical ambiance they create. DIY Tin Can Lanterns are a cost-effective and creative way to illuminate your outdoor area and add a personal touch to your decor.
1.4. 1.4 Fairy Light Globe
Fairy Light Globe: One of the most enchanting and versatile options for creative outdoor lighting is the fairy light globe. These whimsical globes can instantly transform any outdoor space into a magical wonderland. To create your own fairy light globe, start by purchasing a large round wire basket or a metal globe frame. Next, wrap string lights around the frame, making sure to evenly distribute them. You can choose white fairy lights for a classic look or opt for colorful ones to add a vibrant touch. Once the lights are wrapped around the frame, secure them in place using zip ties or small clips. Finally, hang the fairy light globe from a tree branch or hook, and watch as it illuminates your outdoor area with its soft and mesmerizing glow. Whether used as a centerpiece for a garden party or as a charming addition to a patio, the fairy light globe is sure to create a captivating ambiance that will impress your guests.
1.5. 1.5 DIY Firefly Lanterns
1.5 DIY Firefly Lanterns
Looking to add a touch of enchantment to your outdoor space? Why not try making your own DIY firefly lanterns! These charming lanterns will create a magical ambiance in your garden or patio. Here are 1.5 simple and creative ideas to get you started:
1. Mason Jar Firefly Lanterns: Take a few mason jars and punch holes in the lids using a nail and hammer. Place an LED tea light inside each jar, close the lid, and voila! You have your very own firefly lanterns that will glow beautifully at night.
1.5. DIY Paper Bag Lanterns: Take some plain paper bags and cut out designs of fireflies using a craft knife. Insert a small LED light or a string of fairy lights inside each bag and place them around your outdoor space. These lanterns will create a soft and whimsical glow.
These DIY firefly lanterns are not only easy to make, but they also provide a cost-effective way to illuminate your outdoor area with a magical touch. So, gather your materials and let your creativity shine!
2. 2. Upcycled Garden Planters
Upcycled Garden Planters
Upcycling is a fantastic way to add a touch of creativity and sustainability to your outdoor decor. Instead of throwing away old items, why not repurpose them into unique and charming garden planters? Not only will you be reducing waste, but you’ll also have one-of-a-kind pieces that will make your garden stand out.
Here are some easy DIY ideas for upcycled garden planters:
1. Tin Can Planters: Save those empty tin cans from your kitchen and turn them into adorable planters. Paint them in vibrant colors or wrap them with twine for a rustic look.
2. Wooden Pallet Planters: Old wooden pallets can be transformed into stunning vertical planters. Simply attach some pots or containers to the pallet and fill them with your favorite flowers or herbs.
3. Bicycle Wheel Planter: Give an old bicycle wheel a new lease on life by turning it into a unique planter. Hang it on a wall or prop it up in your garden for a whimsical touch.
4. Teapot Planters: Don’t throw away chipped or cracked teapots. Instead, repurpose them as charming planters for small succulents or herbs.
5. Rain Boot Planters: Turn your kids’ outgrown rain boots into cute planters. Fill them with soil and add colorful flowers for a playful and eye-catching display.
6. Wine Barrel Planter: If you have an old wine barrel lying around, cut it in half and transform it into a rustic planter. It’s perfect for growing vegetables or cascading flowers.
7. Drawer Planters: Give an old drawer a new purpose by turning it into a stylish planter. Add some drainage holes, fill it with soil, and plant your favorite blooms.
8. Colander Planters: Dust off that old colander and repurpose it as a unique hanging planter. The holes in the colander provide excellent drainage for your plants.
9. Mason Jar Herb Garden: Transform a collection of mason jars into a charming herb garden. Attach them to a wooden board or hang them individually for a rustic and functional display.
10. Tire Planters: Instead of discarding old tires, upcycle them into large planters. Paint them in vibrant colors and stack them to create a striking focal point in your garden.
These upcycled garden planters are not only eco-friendly but also a great way to add personality and charm to your outdoor space. Get creative and start repurposing those old items into beautiful planters that will make your garden bloom with style!
2.1. 2.1 Repurposed Pallet Planter
One popular idea for upcycled garden planters is to repurpose pallets. Pallets are versatile and can be transformed into unique and charming planters for your outdoor space. By repurposing pallets, you are not only giving them a new purpose but also reducing waste. Here is a simple tutorial on how to create a repurposed pallet planter:
1. Start by finding a sturdy pallet that is in good condition. Make sure it is clean and free from any chemicals or residues.
2. Stand the pallet upright and determine which side will be the back and which will be the bottom. The back side will be where you attach the planter to a wall or fence.
3. Use a saw or a pry bar to remove any unnecessary boards from the pallet. This will create openings for your plants to grow.
4. Sand down any rough edges or splinters to make the pallet safe to handle.
5. If you want to add a splash of color, paint the pallet using outdoor paint. Choose a color that complements your outdoor decor.
6. Once the paint is dry, line the inside of the pallet with landscape fabric to prevent soil from falling out.
7. Fill the pallet with potting soil, leaving enough space for your plants to grow.
8. Carefully plant your desired flowers or herbs in the openings of the pallet, making sure they have enough room to thrive.
9. Water your plants regularly and provide them with the necessary sunlight.
10. Hang your repurposed pallet planter on a wall or fence, or place it on the ground as a unique garden display.
This repurposed pallet planter is not only functional but also adds a touch of creativity to your outdoor space. It allows you to grow your favorite plants while reusing materials and reducing waste.
2.2. 2.2 Hanging Tire Planters
Hanging tire planters are a creative and eco-friendly way to add a touch of charm to your outdoor space. By repurposing old tires, you can create unique planters that not only look great but also help reduce waste. Here’s how you can make your own hanging tire planters:
1. Start by cleaning the old tire thoroughly to remove any dirt or debris. This will ensure that your planter looks clean and presentable.
2. Once the tire is clean, decide on the color you want for your planter. You can either paint the tire in a solid color or get creative with patterns and designs.
3. After the paint has dried, cut a small section out of the tire’s sidewall. This will serve as the opening for your plants.
4. Line the inside of the tire with a piece of landscape fabric or burlap. This will help retain moisture and prevent the soil from falling out.
5. Fill the tire with potting soil, leaving enough space for your plants to grow.
6. Now, it’s time to choose the plants for your hanging tire planter. Opt for plants that thrive in containers and have trailing or cascading growth habits.
7. Carefully place the plants into the tire, making sure to position them securely.
8. Hang the tire planter using strong ropes or chains. Make sure the hanging mechanism is sturdy enough to support the weight of the tire and plants.
9. Find a suitable spot in your garden or patio to hang the tire planter. Make sure it receives enough sunlight and is easily accessible for watering and maintenance.
10. Regularly water and maintain your hanging tire planters to keep them looking vibrant and healthy.
With hanging tire planters, you can transform old tires into beautiful and functional decorations for your outdoor space. Get creative with colors and plant choices to add a unique touch to your garden!
2.3. 2.3 Vintage Tea Tin Planters
Vintage tea tin planters are a charming and creative way to upcycle and add a touch of nostalgia to your garden. These planters not only serve as functional containers for your favorite plants but also act as unique decorative elements. With their colorful and intricate designs, vintage tea tins can instantly elevate the aesthetic appeal of any outdoor space.
To create your own vintage tea tin planters, start by collecting empty tea tins in various sizes and designs. You can find these tins at thrift stores, flea markets, or even in your own kitchen cabinets. Make sure to clean them thoroughly before proceeding with the transformation process.
Next, prepare the tins for planting by drilling drainage holes in the bottom. This step is crucial to ensure proper drainage and prevent waterlogging, which can be harmful to plants. Use a drill or a hammer and nail to create small holes in the tin’s base.
Once the drainage holes are in place, fill the tins with a high-quality potting mix. Choose a potting mix that is suitable for the plants you intend to grow. Succulents, herbs, and small flowering plants work particularly well in vintage tea tin planters.
After filling the tins with potting mix, carefully plant your chosen plants or seeds. Be mindful of the tin’s size and choose plants that will thrive in the available space. You can also get creative by combining different plants in a single tin for a vibrant and visually appealing arrangement.
To maintain the health and longevity of your vintage tea tin planters, remember to water them regularly and provide adequate sunlight. Monitor the moisture levels in the soil and adjust your watering schedule accordingly. Additionally, consider placing the planters in areas that receive the appropriate amount of sunlight for the specific plants you have chosen.
In conclusion, vintage tea tin planters offer a delightful way to repurpose old tins and bring a touch of vintage charm to your garden. With a little creativity and some basic gardening knowledge, you can transform these tins into beautiful and functional planters that will enhance the overall aesthetic of your outdoor space.
2.4. 2.4 DIY Wine Barrel Planter
2.4 DIY Wine Barrel Planter
One creative and eco-friendly way to transform your garden is by repurposing old wine barrels into planters. Not only does this project give a unique and rustic touch to your outdoor space, but it also allows you to upcycle and give a second life to these barrels.
To create your DIY wine barrel planter, follow these simple steps:
1. Find a wine barrel: Look for a used wine barrel that is in good condition. You can often find them at wineries, online marketplaces, or even local classified ads.
2. Clean and prepare the barrel: Before using the barrel as a planter, make sure to clean it thoroughly. Rinse out any residue or dirt, and let it dry completely.
3. Drill drainage holes: Using a drill, create several drainage holes at the bottom of the barrel. This will ensure proper drainage for your plants.
4. Add a layer of gravel: Place a layer of gravel at the bottom of the barrel to further improve drainage and prevent waterlogging.
5. Fill with soil: Fill the barrel with a nutrient-rich potting soil, leaving enough space for your plants’ root systems.
6. Plant your desired plants: Choose a variety of flowers, herbs, or vegetables that thrive in containers. Arrange them according to your preference and plant them in the soil.
7. Water and maintain: After planting, water your wine barrel planter regularly and provide appropriate care based on the specific needs of your chosen plants.
By repurposing a wine barrel into a planter, you not only add a stylish and unique element to your garden but also contribute to sustainability by recycling and reducing waste. Give it a try and enjoy the beauty of your DIY wine barrel planter!
2.5. 2.5 Upcycled Shoe Organizer Garden
2.5 Upcycled Shoe Organizer Garden
One creative and practical way to repurpose old shoe organizers is by using them as a unique garden planter. Instead of throwing away your worn-out shoe organizer, give it a new life by turning it into a beautiful garden display. This upcycled shoe organizer garden is not only a space-saving solution but also a charming addition to any outdoor decor.
To create your own upcycled shoe organizer garden, follow these simple steps:
1. Clean the shoe organizer: Before you start planting, make sure to clean the shoe organizer thoroughly. Remove any dirt or debris to ensure a fresh start for your plants.
2. Choose the right plants: Select plants that are suitable for the amount of sunlight and space available in your garden. Consider using a mix of colorful flowers, herbs, and even small vegetables to create an attractive and functional display.
3. Prepare the shoe organizer: Depending on the design of your shoe organizer, you may need to make some adjustments. If there are any holes or gaps, consider lining the organizer with a plastic sheet to prevent soil from falling out.
4. Add soil and plants: Fill each pocket of the shoe organizer with potting soil, leaving enough space for the plants to grow. Carefully transplant your chosen plants into each pocket, ensuring they are securely placed.
5. Hang or display: Once your upcycled shoe organizer garden is ready, find a suitable spot to hang or display it. You can hang it on a fence, wall, or even place it on a table or shelf.
By repurposing an old shoe organizer, you can create a unique and eco-friendly garden that adds a touch of creativity to your outdoor space. Get creative with the types of plants you choose and enjoy the beauty of your upcycled shoe organizer garden!
3. 3. Outdoor Furniture Revamp
Revamping your outdoor furniture is a great way to breathe new life into your outdoor space. Whether you have old, worn-out furniture or you simply want to change the look and feel of your outdoor seating area, these easy DIY ideas will help you transform your outdoor furniture. From repainting and staining to adding cushions and accessories, there are plenty of ways to revamp your outdoor furniture without breaking the bank. So, let’s dive into these 10 easy outdoor decor DIY ideas!
3.1. 3.1 Pallet Patio Furniture
Pallet patio furniture is a trendy and economical way to revamp your outdoor space. By repurposing wooden pallets, you can create unique and stylish furniture pieces that are perfect for lounging and entertaining. Whether you have a spacious backyard or a small balcony, pallet patio furniture can be customized to fit any space.
To start, gather some wooden pallets that are in good condition. You can often find them for free or at a low cost from local businesses or online classifieds. Make sure to choose pallets that are sturdy and free from any damage.
Once you have your pallets, you can begin transforming them into patio furniture. For a simple and versatile option, stack two pallets on top of each other to create a comfortable seating area. You can add cushions or pillows to make it more cozy.
If you’re feeling more ambitious, you can use the pallets to build a complete outdoor sofa or coffee table. There are plenty of online tutorials and design ideas available to guide you through the process. Get creative and add your own personal touch by painting or staining the pallets in a color that complements your outdoor decor.
One of the advantages of pallet patio furniture is its flexibility. You can easily rearrange the pieces to create different seating arrangements or move them around to accommodate different events or gatherings. Plus, if you decide to change your outdoor decor in the future, you can simply repaint or restain the pallets to match the new style.
In addition to being budget-friendly and customizable, pallet patio furniture is also environmentally friendly. By repurposing old pallets, you are reducing waste and giving them a new life. It’s a great way to add a touch of sustainability to your outdoor space.
In conclusion, pallet patio furniture is a fantastic option for revamping your outdoor area. It’s affordable, customizable, and eco-friendly. So, why not give it a try and create your own unique and stylish furniture pieces? Your outdoor space will thank you!
3.2. 3.2 DIY Rope Hammock
A DIY rope hammock is a great addition to any outdoor space. Not only is it a comfortable and relaxing place to lounge, but it also adds a touch of rustic charm to your backyard. Creating your own rope hammock is easier than you might think, and it can be a fun project to tackle on a weekend. Here’s a simple guide to help you make your own DIY rope hammock.
Materials needed:
– Thick, sturdy rope
– Wooden dowels or spreader bars
– Scissors
– Measuring tape
– S-hooks or carabiners
Step 1: Measure and cut the rope
Start by measuring the length of the hammock you want to create. Double this measurement and add a few extra feet for tying knots and attaching the hammock to posts or trees. Cut the rope into two equal lengths.
Step 2: Tie the knots
Take one of the rope lengths and fold it in half. Create a loop at the folded end and secure it with a knot. This will be the attachment point for the hammock. Repeat this process with the other rope length.
Step 3: Attach the spreader bars
If you’re using wooden dowels or spreader bars to help keep the hammock spread out, attach them to the loops you created in the previous step. Make sure they are securely fastened.
Step 4: Hang the hammock
Find a suitable location to hang your hammock, such as between two sturdy trees or posts. Use S-hooks or carabiners to attach the loops of the hammock to the desired supports. Make sure the hammock is level and taut.
Step 5: Test and adjust
Once the hammock is hung, test it out to ensure it is secure and comfortable. Make any necessary adjustments, such as tightening the knots or repositioning the hammock, until it feels just right.
Now you can sit back, relax, and enjoy your DIY rope hammock in your outdoor space!
3.3. 3.3 Upcycled Bench Swing
One creative and eco-friendly idea for revamping your outdoor furniture is to create an upcycled bench swing. This DIY project not only adds a unique touch to your outdoor decor but also helps reduce waste by repurposing old materials. To make an upcycled bench swing, you will need an old wooden bench or a sturdy wooden plank, some strong ropes or chains, and a sturdy tree branch or a sturdy frame to hang the swing. Start by thoroughly cleaning and sanding the bench or plank to remove any dirt or rough edges. Next, attach the ropes or chains securely to both ends of the bench, making sure they are strong enough to support the weight. Finally, find a suitable spot in your outdoor space to hang the swing, ensuring that the tree branch or frame can handle the weight. Once everything is set up, you can enjoy swinging on your unique upcycled bench swing, adding a fun and cozy element to your outdoor area.
3.4. 3.4 Tire Ottoman
Another creative and practical DIY idea for revamping your outdoor furniture is to create a tire ottoman. This unique piece can add a touch of style and functionality to your outdoor space. To make a tire ottoman, you will need an old tire, some sturdy rope or fabric, and a cushion or padding. Start by cleaning the tire thoroughly and removing any dirt or debris. Then, wrap the tire with the chosen rope or fabric, making sure to secure it tightly. You can use hot glue or a staple gun to keep the rope/fabric in place. Finally, place a cushion or padding on top of the tire and secure it with adhesive or ties. Your tire ottoman is now ready to be used as a comfortable seating option or footrest in your outdoor area.
3.5. 3.5 Vintage Chair Makeover
3.5 Vintage Chair Makeover
Vintage chairs can add a touch of charm to any outdoor space. If you have an old, worn-out chair that is begging for a makeover, don’t throw it away just yet. With a little creativity and some basic supplies, you can transform that chair into a stunning piece of outdoor furniture.
Start by cleaning the chair thoroughly and removing any loose paint or rust. Sand down the surface to create a smooth base for painting. Choose a color that suits your outdoor decor and apply a fresh coat of paint. You can also add stenciled designs or patterns to give the chair a unique look.
Next, consider adding new cushions or upholstery to make the chair more comfortable. Look for weather-resistant fabrics that will withstand the elements. Don’t forget to measure the chair carefully to ensure a proper fit.
To complete the vintage makeover, add some finishing touches such as decorative knobs or handles. These small details can make a big difference in the overall appearance of the chair.
With a little time and effort, you can turn an old, forgotten chair into a beautiful vintage piece that will be the highlight of your outdoor space.
Conclusion
In conclusion, these 10 easy outdoor decor DIY ideas are a great way to spruce up your outdoor space. Whether you’re looking to add some color, create a cozy seating area, or simply add some personality to your yard, these DIY projects are simple yet effective. With a little creativity and some basic materials, you can transform your outdoor space into a beautiful oasis. So, get ready to roll up your sleeves and start crafting!


These 10 innovative and imaginative DIY home decor ideas from [object Object] provide a refreshing approach to enhancing ones living…