
Are you a beginner looking to add a touch of creativity to your walls? Look no further! In this article, we will explore 10 easy wall painting designs that are perfect for beginners. Whether you want to add a pop of color, create a stunning accent wall, or experiment with different techniques, these designs will inspire you to unleash your artistic side. So grab your paintbrushes, and let’s dive into the world of wall painting!
- 1. Introduction
- 1.1. Why choose wall painting as a beginner?
- 1.2. Essential tools and materials for wall painting
- 1.3. Safety precautions for beginners
- 1.4. Preparing the wall surface
- 1.5. Choosing the right paint colors
- 2. Basic Techniques for Wall Painting
- 2.1. Brushing techniques for beginners
- 2.2. Roller painting techniques for beginners
- 2.3. Sponge painting techniques for beginners
- 2.4. Stenciling techniques for beginners
- 2.5. Color blending techniques for beginners
- 3. Popular Wall Painting Designs for Beginners
1. Introduction
Wall painting designs can add a touch of creativity and personality to any space. Whether you are a beginner or have some experience in painting, these 10 easy wall painting designs can help you transform your walls into stunning works of art. From simple geometric patterns to nature-inspired motifs, there is something for everyone. In this article, we will explore different techniques and ideas that you can try out to create beautiful wall designs. So grab your paintbrushes and let’s get started!
1.1. Why choose wall painting as a beginner?
Wall painting is a great choice for beginners who want to explore their creativity and enhance the aesthetics of their living spaces. It is a fun and rewarding activity that allows individuals to express themselves through colors and designs. Whether you are looking to add a personal touch to your home or simply want to try something new, wall painting can be a fulfilling hobby.
One of the reasons why wall painting is an ideal choice for beginners is its simplicity. Unlike other art forms, you don’t need any prior experience or extensive artistic skills to get started. With just a few basic tools and materials, you can create beautiful designs on your walls.
Additionally, wall painting offers a wide range of design possibilities. You can experiment with different techniques, such as stenciling, sponge painting, or even freehand designs. This allows beginners to explore their artistic abilities and discover their own unique style.
Moreover, wall painting is a cost-effective way to revitalize your living space. Instead of spending a significant amount of money on expensive wallpapers or professional painters, you can achieve stunning results with your own hands. It gives you the freedom to customize your walls according to your preferences and create a personalized ambiance.
Lastly, wall painting is a therapeutic activity that can help reduce stress and promote relaxation. It allows you to immerse yourself in the creative process and disconnect from the outside world. The act of painting can be calming and meditative, providing a sense of accomplishment and satisfaction.
Overall, choosing wall painting as a beginner is a fantastic decision. It is a beginner-friendly, versatile, cost-effective, and therapeutic art form that can bring joy and beauty to your living space.
1.2. Essential tools and materials for wall painting
Before you begin your wall painting journey, it is important to gather all the essential tools and materials to ensure a smooth and successful project. Having the right equipment will not only make the process easier but also help you achieve professional-looking results. Here are some must-have items for beginners in wall painting:
1. Paintbrushes: Invest in a variety of paintbrushes in different sizes to accommodate various areas and details. Flat brushes are ideal for larger surfaces, while angled brushes are great for cutting in and achieving clean lines.
2. Roller and Tray: A roller and tray are essential for covering larger areas quickly and efficiently. Look for a roller with a medium nap length suitable for your wall texture.
3. Drop Cloths: Protect your floors and furniture from paint spills and splatters with drop cloths or plastic sheets. These will ensure easy cleanup and prevent any accidental damage.
4. Painter’s Tape: Use painter’s tape to mask off areas you want to keep paint-free, such as trim, windows, and ceilings. This will help you achieve sharp edges and avoid any messy mistakes.
5. Sandpaper: Before painting, it’s crucial to prepare the surface by sanding it lightly. Sandpaper will help you smooth out any imperfections, ensuring a flawless finish.
6. Putty Knife: Fill in any holes, cracks, or imperfections on the wall with a putty knife and spackling compound. This will create a smooth and even surface for painting.
7. Primer: Applying a coat of primer before painting is essential, especially if you’re working on a porous or previously unpainted surface. Primer helps the paint adhere better and provides a uniform base.
8. Paint Trays and Liners: Use paint trays and liners to pour and mix your paint colors. This will make the process more organized and prevent cross-contamination of different shades.
9. Paint: Choose high-quality paint in your desired colors. Opt for acrylic latex paint, which is easy to clean, durable, and offers a wide range of color options.
10. Ladder or Step Stool: Depending on the height of your walls, you may need a ladder or step stool to reach the upper areas safely. Ensure it’s stable and secure before climbing.
Having these essential tools and materials at hand will set you up for a successful wall painting experience. Now, let’s explore some easy wall painting designs that are perfect for beginners!
1.3. Safety precautions for beginners
When it comes to wall painting, beginners should always prioritize safety. Before embarking on any painting project, it is essential to take certain precautions to ensure a safe and enjoyable experience. This section will outline some important safety measures that beginners should follow before starting their wall painting journey. By following these precautions, beginners can minimize potential risks and create a safe environment for themselves and others.
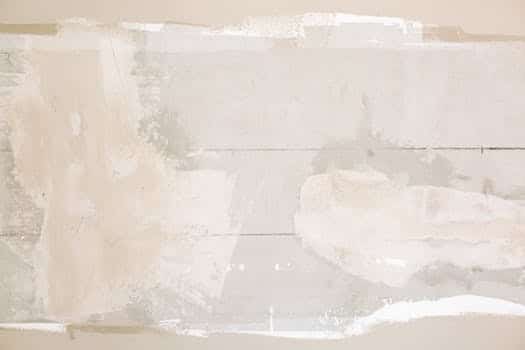
1.4. Preparing the wall surface
Preparing the wall surface is a crucial step before diving into any painting project. A well-prepared surface ensures that the paint adheres properly and results in a smooth and professional finish. Here are some essential steps to follow when preparing your wall for painting:
1. Clean the wall: Start by removing any dust, dirt, or grease from the wall surface. Use a mild detergent mixed with water and a sponge or cloth to gently scrub the wall. Rinse it thoroughly and allow it to dry completely.
2. Repair any damages: Inspect the wall for any cracks, holes, or imperfections. Fill them with spackling paste or putty, using a putty knife. Smooth out the surface and let it dry. Once dry, sand the repaired areas gently to achieve a level surface.
3. Remove old paint or wallpaper: If there is existing paint or wallpaper on the wall, it is essential to remove it before painting. Use a paint scraper or wallpaper stripper to peel off the old layers. Sand the surface lightly to create a smooth base.
4. Sand the wall: Even if the wall is in good condition, it’s recommended to lightly sand the entire surface. This helps to remove any rough spots, bumps, or glossiness, allowing the new paint to adhere better.
5. Protect surrounding areas: Before you start painting, make sure to protect the surrounding areas such as floors, furniture, and fixtures. Cover them with drop cloths or plastic sheets to prevent any accidental spills or splatters.
By following these preparation steps, you will create a solid foundation for your wall painting project. Taking the time to prepare the wall surface properly will ultimately result in a more professional and long-lasting finish.
1.5. Choosing the right paint colors
Choosing the right paint colors is a crucial step when it comes to wall painting designs, especially for beginners. The colors you choose will set the mood and ambiance of the room, and can greatly impact the overall aesthetic appeal. With countless options available, it can be overwhelming to make a decision. However, with a few considerations and tips, you can easily find the perfect paint colors for your project. In this article, we will explore some useful guidelines and techniques to help you choose the right paint colors for your wall painting designs as a beginner.
2. Basic Techniques for Wall Painting
When it comes to wall painting, beginners often feel overwhelmed with the numerous techniques and designs available. However, with a little guidance, anyone can create beautiful and artistic wall paintings. Here are some basic techniques that beginners can try:
1. Preparing the wall: Before starting the painting process, it is crucial to prepare the wall properly. This involves cleaning the surface, filling any cracks or holes, and applying a primer.
2. Choosing the right paint: Selecting the appropriate type and color of paint is essential. For beginners, it is recommended to start with acrylic paint as it is easy to work with and dries quickly.
3. Using painter’s tape: To create clean lines and avoid paint bleeding, use painter’s tape to mask off areas that you don’t want to paint. Apply the tape carefully and ensure it is properly secured.
4. Brush techniques: Experiment with different brush strokes to add texture and depth to your painting. Try techniques like stippling, cross-hatching, or blending to create interesting effects.
5. Sponge painting: Using a natural sea sponge or a sponge roller, you can achieve a textured and mottled look on your walls. Dip the sponge in paint and dab it gently on the wall, creating a random pattern.
6. Color washing: This technique involves applying a translucent layer of paint over a base color to create a soft, washed-out effect. Use a large brush or a rag to apply the paint in long, sweeping motions.
7. Stenciling: Stencils are a great way for beginners to create intricate designs on their walls. Secure the stencil onto the wall and use a sponge or stencil brush to apply the paint evenly.
8. Dry brushing: This technique involves using a dry brush with minimal paint to create a subtle and textured finish. Lightly dip the brush into the paint, remove excess on a paper towel, and then brush it over the wall with quick strokes.
9. Creating a focal point: Choose one wall or a specific area to be the focal point of your painting. Experiment with different colors, patterns, or textures to make it stand out and draw attention.
10. Practice and experiment: The key to improving your wall painting skills is practice. Don’t be afraid to try new techniques, mix colors, or create your own designs. The more you paint, the more confident and proficient you will become.
Remember, wall painting is a creative process, so have fun and let your imagination guide you!
2.1. Brushing techniques for beginners
Brushing techniques for beginners
When it comes to wall painting, knowing the proper brushing techniques is essential, especially for beginners. These techniques ensure a smooth and professional-looking finish. Here are some basic brushing techniques that every beginner should know:
1. Load the brush properly: Dip the brush into the paint about one-third of its length and tap it gently against the side of the can to remove excess paint.
2. Use steady and even strokes: Start painting from the top and work your way down using steady and even strokes. This will help to avoid visible brush marks.
3. Paint in overlapping sections: Divide the wall into smaller sections and paint them one at a time. Overlapping the paint strokes slightly will ensure even coverage.
4. Maintain a wet edge: To achieve a seamless finish, always work on a wet edge. This means painting adjacent sections before the previous section dries completely.
5. Blend the paint: If you need to switch paint cans, mix the remaining paint with the new one in a larger container to ensure a consistent color throughout the wall.
By following these basic brushing techniques, beginners can achieve professional-looking results in their wall painting projects. Practice and patience are key to mastering these techniques, so don’t be afraid to experiment and improve your skills.
2.2. Roller painting techniques for beginners
Roller painting techniques for beginners:
1. Prep the surface: Before starting, make sure to clean the wall and remove any dust or debris. Patch any holes or cracks and sand the surface if necessary.
2. Use primer: Apply a coat of primer to create a smooth and even base for the paint. This will help the paint adhere better and provide better coverage.
3. Choose the right roller: Select a roller suitable for the type of wall and paint you are using. A shorter nap roller is ideal for smooth surfaces, while a longer nap roller is better for textured walls.
4. Load the roller: Dip the roller into the paint tray and roll it back and forth to evenly distribute the paint. Avoid overloading the roller to prevent drips.
5. Start painting: Begin by painting the edges and corners with a brush for better precision. Then, use the roller to cover the larger areas of the wall. Start from the top and work your way down, applying even pressure.
6. Use the W technique: To ensure an even coat of paint, use the W technique. Start by painting a W shape on the wall, then fill it in by rolling the roller up and down. Repeat this technique until the entire wall is covered.
7. Maintain a wet edge: To avoid visible lines or marks, always maintain a wet edge while painting. This means overlapping the previous stroke while the paint is still wet.
8. Apply multiple coats: Depending on the desired color and coverage, you may need to apply multiple coats of paint. Allow each coat to dry before applying the next.
9. Clean up properly: After you finish painting, clean the roller and brushes with soap and water. Proper cleaning will help prolong their lifespan.
10. Enjoy your newly painted wall: Once the paint is dry, step back and admire your work! Your newly painted wall will add a fresh and beautiful touch to your space.
2.3. Sponge painting techniques for beginners
Sponge painting is a fun and easy technique that beginners can try when it comes to wall painting. This technique involves using a natural sea sponge or a sponge roller to create textured patterns on the walls. Here are some basic sponge painting techniques for beginners:
1. Prep the walls: Before starting the sponge painting process, make sure to clean and prime the walls. This will ensure a smooth surface for the paint to adhere to.
2. Choose your colors: Select two or more paint colors that complement each other. It’s best to start with lighter shades and gradually build up the intensity.
3. Dip the sponge: Moisten the sponge with water, wring out any excess, and dip it lightly into the paint. Make sure not to overload the sponge with paint.
4. Test on a sample board: Before applying the sponge to the walls, practice the technique on a sample board or a spare piece of cardboard. This will help you get a feel for the amount of pressure and the desired effect.
5. Start sponging: Begin by lightly dabbing the sponge onto the wall in a random pattern. You can overlap the colors or create a more uniform look, depending on your preference.
6. Blend the colors: To achieve a seamless transition between colors, gently blend them together while the paint is still wet. This will create a softer and more natural appearance.
7. Add depth and dimension: For a more textured look, vary the pressure and angle of the sponge while applying the paint. This will add depth and dimension to your sponge painting.
8. Step back and assess: Take breaks and step back to see how the overall design is coming together. Make adjustments as needed to create a balanced and visually appealing pattern.
9. Allow drying time: Let the paint dry completely before applying any additional layers or finishing touches. This will prevent smudging or smearing of the design.
10. Seal the paint: Once the sponge painting is dry, consider sealing it with a clear coat of varnish or sealer. This will protect the design and enhance its longevity.
Remember, practice makes perfect when it comes to sponge painting. Don’t be afraid to experiment with different techniques and colors to create your own unique wall designs!
2.4. Stenciling techniques for beginners
Stenciling techniques for beginners are a fantastic way to add a creative touch to your walls. Whether you’re looking to transform a plain room or add some personality to a dull space, stenciling can help you achieve stunning results. Here are some basic techniques to get you started with wall painting using stencils:
1. Preparing the Surface: Before you begin stenciling, make sure the wall surface is clean and smooth. Remove any dust, dirt, or imperfections by washing or sanding the wall as necessary.
2. Choosing the Right Stencil: Select a stencil design that suits your style and complements the room’s decor. There are various stencil patterns available in different sizes and shapes, so choose one that fits your vision.
3. Positioning the Stencil: Once you have your stencil, decide where you want to place it on the wall. Use painter’s tape to secure the stencil in position, ensuring it doesn’t move while you’re painting.
4. Preparing the Paint: Pour a small amount of paint onto a palette or paper plate. Dip your stencil brush or sponge into the paint, making sure to remove any excess. You can also use a foam roller for larger stencils.
5. Applying the Paint: Lightly dab or swirl the brush/sponge over the stencil openings. Start from the outside edges and work your way towards the center. Be careful not to apply too much pressure or the paint may bleed under the stencil.
6. Building Layers: If you want to create a multi-colored or textured effect, wait for the first layer to dry before adding another stencil or changing colors. This will prevent smudging or blending of paints.
7. Removing the Stencil: Once you’re satisfied with the paint coverage, carefully remove the stencil while the paint is still wet. Slowly peel it off, starting from one corner, to reveal the beautifully stenciled design.
8. Cleaning and Reusing the Stencil: Rinse the stencil with warm water and mild soap immediately after use to remove any paint residue. Pat it dry with a clean cloth and store it flat to prevent warping or damage.
Remember, practice makes perfect. Don’t be discouraged if your first attempt doesn’t turn out exactly as expected. With time and practice, you’ll master these stenciling techniques and create stunning wall designs that reflect your personal style.
2.5. Color blending techniques for beginners
Color blending techniques for beginners:
Blending colors is a great way to add depth and dimension to your wall paintings. If you’re a beginner, here are some basic techniques to try:
1. Wet-on-wet blending: This technique involves applying wet paint on top of wet paint. Start by applying a base color, then add another color on top while the base color is still wet. Use a brush or sponge to gently blend the colors together.
2. Dry brushing: This technique requires a dry brush with very little paint. Dip the brush lightly in the paint and remove any excess. Then, using quick and light strokes, brush the paint onto the wall. This creates a subtle blend of colors and adds texture.
3. Feathering: Feathering involves using a feather-like stroke to blend two colors together. Start by applying one color on the wall. Then, using a dry brush or sponge, gently stroke the second color onto the wall, blending it with the first color in a feather-like motion.
Remember, practice makes perfect when it comes to color blending. Don’t be afraid to experiment and try different techniques to achieve the desired effect.
3. Popular Wall Painting Designs for Beginners
When it comes to wall painting, beginners often feel overwhelmed by the numerous design options available. However, there are several popular wall painting designs that are perfect for those just starting out. These designs are relatively easy to create and require minimal artistic skills. Here are 10 easy wall painting designs for beginners:
1. Geometric Patterns: A simple yet stylish option is to create geometric patterns on your walls. You can use masking tape to create straight lines and shapes, or even invest in stencils for more intricate designs.
2. Ombre Effect: This trend involves blending two or more colors seamlessly, creating a beautiful gradient effect on your walls. It’s a simple technique that can instantly add depth and visual interest to any room.
3. Polka Dots: Playful and charming, polka dots are a timeless design choice. You can use a round sponge or even the end of a paintbrush to create evenly spaced dots on your walls.
4. Stripes: Vertical or horizontal stripes can instantly transform a plain wall into a focal point. Use painter’s tape to create clean and crisp lines, and experiment with different widths and colors.
5. Tree Silhouettes: If you want to add a touch of nature to your walls, try painting tree silhouettes. This design works particularly well in bedrooms or living rooms, creating a serene and calming atmosphere.
6. Abstract Art: Don’t be afraid to let your creativity shine with abstract art. Use bold and vibrant colors, and let your brushstrokes flow freely on the canvas. The beauty of abstract art is that there are no rules or limitations.
7. Stenciled Quotes: Add a personal touch to your walls by stenciling meaningful quotes or phrases. Choose a font style that reflects your personality, and carefully paint over the stencil to create clean and legible letters.
8. Floral Designs: Flowers are always a popular choice when it comes to wall painting. Whether you prefer realistic or abstract floral designs, they can instantly brighten up any space.
9. Animal Prints: For a bold and adventurous look, consider painting animal prints on your walls. Leopard spots, zebra stripes, or even a giraffe pattern can add a unique and eye-catching element to your room.
10. Watercolor Wash: Achieve a soft and dreamy look by applying a watercolor wash to your walls. Dilute the paint with water and use a large brush to create a translucent effect, reminiscent of a beautiful watercolor painting.
These 10 easy wall painting designs for beginners are just the starting point. Feel free to experiment, mix and match, and let your imagination run wild as you embark on your wall painting journey.
3.1. Stripes and chevron patterns
When it comes to popular wall painting designs for beginners, stripes and chevron patterns are top choices. These designs are not only easy to create but also add a stylish and modern touch to any room.
Stripes can be painted vertically, horizontally, or even diagonally, depending on the desired effect. They can be as thin or as wide as you like, allowing for endless possibilities. The key is to use painter’s tape to create clean and crisp lines.
On the other hand, chevron patterns are zigzag designs that can instantly elevate the look of a plain wall. To create this design, start by marking the center of the wall and then use painter’s tape to create V-shaped patterns. Fill in the spaces with your chosen paint colors, making sure to remove the tape while the paint is still wet for sharp lines.
Both stripes and chevron patterns offer a great way for beginners to experiment with different colors and create visually appealing walls. So, grab your paintbrushes and get ready to transform your space with these easy and trendy designs!
3.2. Geometric shapes and patterns
Geometric shapes and patterns are a popular choice for wall painting designs, especially for beginners. These designs add a modern and stylish touch to any space. Geometric patterns can be simple yet striking, making them an ideal option for those who are new to painting. They are also versatile and can be adapted to suit any room or aesthetic.
When it comes to geometric shapes, there are endless possibilities. Some popular choices include triangles, squares, circles, and hexagons. These shapes can be combined or used individually to create visually appealing patterns on the walls.
One easy wall painting design for beginners is to paint a geometric pattern using masking tape. Start by choosing the desired shapes and sizes, then apply the masking tape to create the outlines. Once the tape is in place, you can start painting within the taped areas. Once the paint is dry, carefully remove the tape to reveal clean and crisp lines.
Another beginner-friendly idea is to paint a simple and repetitive pattern using stencils. Stencils are pre-made templates that allow you to easily recreate specific shapes or patterns. You can find a variety of geometric stencil designs in craft stores or online. Simply place the stencil on the wall and use a brush or sponge to fill in the shapes with paint.
For those who want to add a bit of depth and dimension to their wall paintings, a gradient effect can be achieved with geometric shapes. Start by choosing two or more colors that blend well together. Paint the desired shapes on the wall using the lighter color as the base. Then, gradually add the darker color to create a gradient effect. This technique adds visual interest and makes the wall painting appear more dynamic.
In conclusion, geometric shapes and patterns offer a wide range of possibilities for wall painting designs. They are beginner-friendly, versatile, and can add a modern touch to any space. Whether you choose to use masking tape, stencils, or create a gradient effect, experimenting with geometric designs is a great way to enhance your walls with a unique and artistic flair.
3.3. Abstract designs and textures
Abstract designs and textures can add a unique and artistic touch to any wall. These designs are perfect for beginners as they do not require advanced painting skills. Abstract designs allow for creative freedom and experimentation, making them a popular choice among novice painters.
One popular abstract design is the use of bold and vibrant colors in a random pattern. This technique creates a visually appealing and energetic look on the wall. Another option is creating geometric shapes using different shades of the same color or contrasting colors. This adds depth and dimension to the wall.
Textures can also be incorporated into wall paintings to enhance the overall visual appeal. One simple technique is using a sponge or rag to create a textured effect on the wall. This can be done by dabbing or dragging the sponge or rag in a random or deliberate manner. Textures can also be achieved by using stencils or textured rollers.
Abstract designs and textures offer endless possibilities for beginners to explore their creativity and express their personal style on their walls. With practice and experimentation, beginners can create stunning wall paintings that are both visually captivating and unique.
3.4. Floral and nature-inspired motifs
Floral and nature-inspired motifs are a popular choice for wall painting designs, especially among beginners. These designs bring a refreshing and vibrant touch to any space, creating a soothing and relaxing ambiance. Whether you are looking to add a pop of color or create a serene atmosphere, floral and nature-inspired motifs can be the perfect choice.
One popular design idea is to paint a large flower or a bouquet of flowers on a focal wall. This can serve as a stunning centerpiece and instantly grab attention. You can choose to paint realistic flowers or opt for a more abstract and artistic approach. The colors you choose will play a crucial role in setting the mood of the room. Soft pastel shades can create a delicate and feminine look, while bold and vibrant hues can add energy and dynamism.
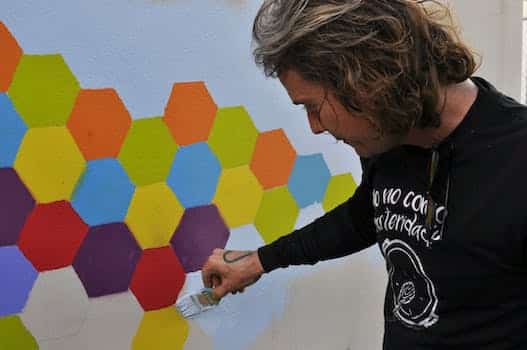
Another option is to create a nature-inspired mural on one of the walls. This could include a scenic landscape, a forest, or even a garden filled with blooming flowers. Such murals can instantly transport you to a peaceful and picturesque setting, making it an ideal choice for bedrooms or living rooms.
For beginners, simpler designs like painting vines or leaves can be a great starting point. These motifs can be painted as borders or used to create a decorative pattern on the walls. You can experiment with different colors and sizes to find the perfect combination that suits your style.
In conclusion, floral and nature-inspired motifs offer a wide range of wall painting design options for beginners. Whether you choose to paint a large flower, create a nature-inspired mural, or incorporate vines and leaves, these designs can add beauty and tranquility to your living spaces.
3.5. Simple mural or silhouette designs
Simple mural or silhouette designs are popular wall painting designs for beginners. These designs are easy to create and can add a touch of creativity to any room. Mural designs often feature large-scale images, such as nature scenes, cityscapes, or abstract patterns. Silhouette designs, on the other hand, focus on creating a simple outline of an object or figure. Both of these designs can be achieved using basic painting techniques and tools. They are a great way for beginners to explore their artistic skills and add a unique touch to their walls.
Conclusion
In conclusion, these 10 easy wall painting designs for beginners are a great way to add a touch of creativity and style to any space. Whether you’re looking to experiment with bold colors or create intricate patterns, these designs offer a variety of options to suit your personal taste. With a little practice and patience, you’ll be able to transform your walls into stunning works of art.


These 10 innovative and imaginative DIY home decor ideas from [object Object] provide a refreshing approach to enhancing ones living…