
If you’re looking to transform your home decor, one of the easiest and most affordable ways to do so is by giving your furniture a makeover. With just a few simple steps and some creativity, you can completely transform the look of your space. To help get you started, we’ve compiled a list of 10 furniture makeover tutorials that are sure to inspire you. From painting to reupholstering, these tutorials cover a range of techniques that will help you achieve the perfect look for your home. So, grab your paintbrush and get ready to transform your furniture!
- 1. Furniture Makeover Tutorials
- 1.1. Introduction
- 1.2. Choosing the Right Furniture
- 1.3. Preparation
- 1.4. Techniques
- 1.5. Finishing Touches
- 2. Introduction
- 2.1. What is Furniture Makeover?
- 2.2. Why Should You Learn Furniture Makeover?
- 2.3. Basic Tools and Materials Needed
- 3. Choosing the Right Furniture
- 4. Preparation
- 4.1. Cleaning and Sanding
- 4.2. Repairing Damaged Furniture
- 4.3. Primers and Paints
- 5. Techniques
- 5.1. Painting Techniques
- 5.2. Distressing Techniques
- 5.3. Stenciling Techniques
- 6. Finishing Touches
- 6.1. Adding Hardware
- 6.2. Styling Your Furniture
- 6.3. Maintenance Tips
1. Furniture Makeover Tutorials
If you are looking to transform your home decor without breaking the bank, furniture makeover tutorials are a great option. Not only do they allow you to repurpose furniture you already own, but they also give you the opportunity to add your own personal touch to your home. Here are 10 furniture makeover tutorials that are sure to inspire you:
1. Chalk Paint Dresser: Transform a boring dresser into a shabby chic masterpiece with chalk paint.
2. Upholstered Headboard: Give your bedroom a luxurious update by upholstering your headboard with a bold fabric.
3. Stenciled Coffee Table: Add some personality to your living room with a stenciled coffee table.
4. Ombre Chest of Drawers: Create a stunning ombre effect on a chest of drawers with some paint and a sponge.
5. Vintage Suitcase Nightstand: Repurpose a vintage suitcase into a unique and functional nightstand.
6. Painted End Tables: Add some color to your living room with painted end tables.
7. Woven Bench: Use jute rope to create a woven bench that adds texture and interest to your space.
8. Decoupaged Dresser: Give an old dresser new life by decoupaging it with patterned paper.
9. Faux Marble Table: Create a high-end look on a budget by painting a table to look like marble.
10. Stenciled Bookcase: Add some flair to a plain bookcase by stenciling a fun pattern on the back panel.
1.1. Introduction
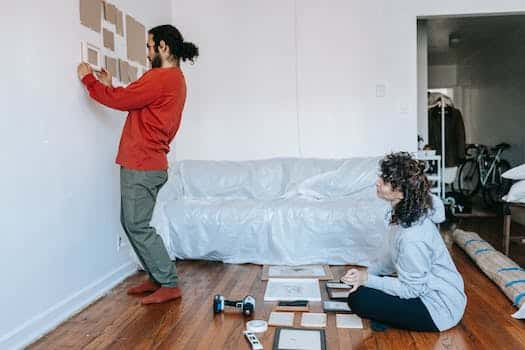
Are you tired of your current home decor and looking for a way to give it a fresh new look? One of the easiest and most cost-effective ways to transform your space is by giving your furniture a makeover. With the right tools and techniques, you can turn old, outdated pieces into stylish and modern furnishings that will breathe new life into any room. In this article, we’ll share 10 furniture makeover tutorials that will help you revamp your decor and create a space that you’ll love to come home to.
1.2. Choosing the Right Furniture
When it comes to decorating your home, choosing the right furniture is essential. Not only does it need to fit the style of your home, but it also needs to be functional and comfortable. Before making any big purchases, consider the size of your space, the color scheme of the room, and your personal style. It’s important to invest in quality pieces that will last for years to come.
1.3. Preparation
Before diving into the world of furniture makeovers, it is important to prepare the necessary materials and tools. Start by selecting a piece of furniture that you want to transform and determine the type of makeover you want to give it. This will help you decide on the materials and tools you will need.
Next, gather all the necessary supplies such as sandpaper, paint, brushes, tape, and any other items specific to your chosen makeover technique. Make sure you have a well-ventilated workspace and protect the surrounding area with drop cloths or newspaper.
Once you have all your supplies ready, start by cleaning and prepping the furniture. Remove any hardware or accessories, and sand the surface to create a smooth, even base for the paint or finish. Wipe the furniture down with a damp cloth to remove any dust or debris.
Finally, follow the instructions for your chosen makeover technique, whether it be painting, staining, decoupage, or any other creative method. With a little preparation and some elbow grease, you can transform your old furniture into stunning new pieces that will enhance your home decor.
1.4. Techniques
When it comes to transforming your home decor with furniture makeovers, there are a variety of techniques you can use. One popular technique is painting furniture to give it a fresh, updated look. Another technique is decoupage, which involves adding decorative paper or fabric to furniture surfaces. Stenciling is another option, allowing you to add intricate designs to furniture surfaces. Don’t forget about the power of upholstery – reupholstering furniture can completely change its look and feel. And finally, adding new hardware or knobs can make a big impact on furniture pieces. Try a combination of these techniques to create unique and personalized furniture pieces for your home.
1.5. Finishing Touches
Once you’ve completed your furniture makeover, it’s time to add the finishing touches to really make it stand out. One easy way to do this is by adding new hardware, such as knobs or drawer pulls. This can give your piece a completely new look and feel. Another option is to add a fresh coat of paint or stain to really make the colors pop. Finally, consider adding some decorative elements, such as stenciling or decoupage, to really make your piece unique and personalized.
2. Introduction
Furniture makeovers are an excellent way to transform your home decor without breaking the bank. With a little creativity and some elbow grease, you can update your old furniture and give it a fresh, new look. Whether you’re a seasoned DIYer or just starting, these 10 furniture makeover tutorials will provide you with inspiration and guidance to create beautiful and unique pieces for your home. From painted dressers to reupholstered chairs, there’s something for everyone in this roundup. So, grab your tools and get ready to transform your space!
2.1. What is Furniture Makeover?
Furniture makeover refers to the process of transforming old, outdated or worn-out furniture into new, fresh and modern pieces. This can be done through a variety of techniques such as painting, staining, reupholstering, or even repurposing old furniture into completely new items. Furniture makeovers are a great way to breathe new life into your home decor without having to spend a lot of money on new furniture. In this article, we will provide you with 10 furniture makeover tutorials that will help you transform your home decor.
2.2. Why Should You Learn Furniture Makeover?
Learning furniture makeover can be a great way to transform your home decor without breaking the bank. By repurposing or refinishing old furniture pieces, you can give them a new lease on life and create a unique look for your home. Not only is furniture makeover a fun and creative hobby, but it also helps reduce waste by keeping furniture out of landfills. Additionally, learning furniture makeover can be a valuable skill for those interested in interior design or home staging. So why not give it a try and see what you can create?
2.3. Basic Tools and Materials Needed
Before embarking on any furniture makeover project, it is important to have the necessary tools and materials. Some basic items you will need include sandpaper, paintbrushes, paint or stain, a screwdriver, and a hammer. You may also need wood filler, a putty knife, and a drill depending on the project. It is important to have high-quality tools and materials to ensure a successful and long-lasting transformation.
3. Choosing the Right Furniture
When transforming your home decor with furniture makeovers, it’s important to choose the right pieces to work on. Consider the style and functionality of the furniture in relation to the overall aesthetic you’re trying to achieve. Don’t be afraid to mix and match different styles for a unique look, but make sure they complement each other. Additionally, consider the quality of the furniture and whether it’s worth investing time and effort into transforming it. Choose pieces that are sturdy and in good condition for the best results.
3.1. Finding the Perfect Piece
When it comes to choosing furniture for your home, it’s important to find the perfect piece that not only fits your style and aesthetic, but also your needs. Consider the size and layout of your space, as well as the functionality of the piece. Whether you’re looking for a statement piece or something more practical, take your time to find the right furniture that will enhance your home decor.
3.2. Types of Furniture to Choose From
When it comes to choosing furniture for your home, there are many types to choose from. Some popular types include:
3.3. Sourcing Furniture
When it comes to transforming your home decor with furniture makeovers, sourcing the right pieces is key. Start by determining your style and the overall look you want to achieve. Then, consider where you can find furniture that fits that style and budget. You can check out thrift stores, garage sales, and online marketplaces like Craigslist or Facebook Marketplace. Don’t be afraid to negotiate prices or ask for discounts. Remember, the goal is to find pieces that have good bones and can be transformed with a little TLC.
4. Preparation
Before diving into the tutorials, it is important to prepare yourself and your furniture for the makeover process. First, make sure you have all the necessary materials and tools, such as sandpaper, paint brushes, and primer. It is also important to choose a well-ventilated area to work in and to protect your work surface with a drop cloth. Before starting any painting or staining, clean and sand your furniture to ensure a smooth and even finish. Finally, take your time and enjoy the process – transforming your furniture can be a rewarding and fulfilling experience!
4.1. Cleaning and Sanding
Before starting any furniture makeover project, it is essential to prepare the piece properly. Cleaning and sanding are two crucial steps in the preparation process. Firstly, remove any dust or dirt from the surface of the furniture using a soft cloth or a vacuum cleaner. Next, sand the surface of the furniture lightly to remove any rough spots or imperfections. This will also help the paint or stain to adhere better to the surface. Make sure to wipe away any dust or debris with a clean cloth after sanding. With these simple steps, your furniture is now ready for the next stage of the makeover process.
4.2. Repairing Damaged Furniture
Before you begin any furniture makeover project, it’s important to assess the condition of the piece you want to transform. If the furniture is damaged, you’ll need to address those issues before moving forward with any cosmetic changes. Some common furniture damage includes scratches, dents, and broken or loose joints. To repair scratches, use a wood filler or a furniture marker that closely matches the color of the wood. For dents, use a damp cloth and a hot iron to steam the wood fibers back into place. Broken or loose joints can be fixed with wood glue and clamps. Once the repairs are complete, you can move on to the fun part of transforming your furniture!
4.3. Primers and Paints
Before starting any furniture makeover project, it’s important to choose the right primer and paint. Primers are essential for creating a smooth surface that will allow the paint to adhere properly. There are different types of primers available depending on the type of surface you’re working with. For example, if you’re painting over a dark or heavily stained piece of furniture, you may want to use a stain-blocking primer to prevent any bleed-through. If you’re working with a piece of furniture that has a lot of detail or intricate carving, you may want to use a primer that is specifically designed for such surfaces.
When it comes to choosing the right paint, there are many options available. Acrylic latex paint is a popular choice for furniture makeovers because it dries quickly and is easy to clean up. It also comes in a wide variety of colors and finishes. Chalk paint is another option that has gained popularity in recent years. It has a matte finish and creates a shabby-chic look that is perfect for vintage or rustic furniture. Milk paint is another option that is popular for its eco-friendly properties and ability to create a distressed look.
No matter what type of primer or paint you choose, be sure to follow the manufacturer’s instructions carefully. Proper preparation and application are key to achieving a beautiful and long-lasting finish.
5. Techniques
When it comes to transforming your home decor, furniture makeovers can be a great way to achieve a new look without breaking the bank. Whether you’re a seasoned DIYer or a beginner, there are plenty of techniques you can use to give your furniture a fresh new look. Some of the most popular techniques include sanding and painting, staining, reupholstering, and decoupage. Sanding and painting is a great option if you want to completely change the color of your furniture, while staining is ideal if you want to enhance the natural wood grain. Reupholstering is a bit more involved, but can completely transform the look of a piece of furniture. And if you’re feeling particularly creative, decoupage can be a fun way to add a unique touch to your furniture. Whatever technique you choose, be sure to take your time and follow the proper steps to ensure a beautiful and long-lasting result.
5.1. Painting Techniques
Painting is a great way to transform old furniture and give it a new lease on life. Here are some painting techniques you can use to achieve different effects:
1. Distressing: This involves painting the furniture and then sanding it down to create a worn, vintage look.
2. Ombre: This technique involves blending two or more colors together to create a gradient effect.
3. Stenciling: Use stencils to create a pattern or design on your furniture.
4. Color blocking: This technique involves painting different sections of your furniture in contrasting colors.
5. Chalk painting: This method involves using chalk paint to create a matte, velvety finish.
Try out these techniques to create unique and personalized furniture pieces that will add character to your home decor.
5.2. Distressing Techniques
Distressing furniture is a popular technique used to give a vintage, shabby-chic look to your home decor. There are several distressing techniques you can use, including sanding, dry brushing, and using a crackle medium. Sanding involves using sandpaper to remove the top layer of paint or stain, revealing the wood or previous layers of paint underneath. Dry brushing involves lightly brushing paint over the surface of the furniture, leaving some areas exposed for a worn look. Crackle medium creates a cracked effect on the surface of the furniture, giving it an antique appearance.
5.3. Stenciling Techniques
Stenciling is a great way to add a personal touch to your furniture makeovers. There are many different stenciling techniques that you can use to create unique designs on your furniture pieces. Some popular techniques include:
1. Dry brushing: This technique involves using a dry brush to lightly apply paint over a stencil. The result is a subtle, distressed look.
2. Sponge painting: With this technique, you use a sponge to apply paint over a stencil. This creates a soft, textured look.
3. Stippling: Stippling involves using a stippling brush to dab paint over a stencil. This creates a speckled, textured look.
4. Layering: Layering involves using multiple stencils and colors to create a complex design. This technique requires some planning and patience, but the end result can be stunning.
No matter which stenciling technique you choose, be sure to practice on a scrap piece of wood or paper before applying it to your furniture piece. This will help you get a feel for the technique and ensure that you are happy with the end result.
6. Finishing Touches
After completing the furniture makeover tutorials, it’s important to add some finishing touches to truly transform your home decor. Consider adding decorative hardware, such as knobs or handles, to give the furniture a new look. You can also add some decorative elements like stenciling, painting or decoupage on the furniture. Additionally, adding some complementary accessories like throw pillows, rugs, or curtains can help tie the new furniture into your overall home decor theme.
6.1. Adding Hardware
d
6.2. Styling Your Furniture
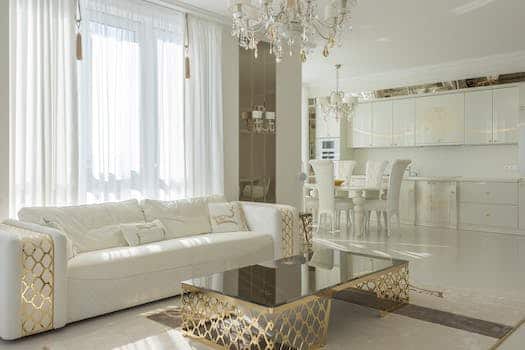
Once you have completed your furniture makeover, it’s time to style it in a way that enhances your home decor. Here are some tips to help you achieve a cohesive and stylish look:
1. Choose a color scheme: Decide on a color palette and stick to it when choosing accessories and decor.
2. Mix textures: Add interest by incorporating different textures such as woven baskets, plush pillows, and metal accents.
3. Create balance: Arrange decor items in a way that creates balance and symmetry.
4. Add greenery: Bring life to your furniture by adding plants or flowers.
By following these styling tips, you can transform your furniture makeover into a stunning addition to your home decor.
6.3. Maintenance Tips
Once you have completed your furniture makeover, it is important to maintain it properly to ensure it lasts for a long time. Here are some maintenance tips:
1. Clean regularly: Dust and debris can accumulate on furniture, so it is important to clean it regularly. Use a soft cloth or brush to remove dust, and wipe it down with a damp cloth.
2. Avoid direct sunlight: Direct sunlight can cause furniture to fade or warp, so it is important to place it in a shaded area or use curtains to block out the sun.
3. Use coasters and placemats: To prevent scratches and stains, use coasters and placemats on furniture surfaces.
4. Avoid harsh chemicals: Harsh chemicals can damage the finish on furniture, so it is important to use gentle, non-abrasive cleaners.
By following these maintenance tips, you can keep your newly transformed furniture looking beautiful for years to come.
Conclusion
In conclusion, these 10 furniture makeover tutorials are sure to give your home decor a fresh and stylish new look. From repainting to reupholstering, these projects are easy to follow and will transform your space in no time.


These 10 innovative and imaginative DIY home decor ideas from [object Object] provide a refreshing approach to enhancing ones living…