

- 1. 1. Creative DIY Room Decor Storage Ideas
- 1.1. 1.1 Utilizing Wall Space for Storage
- 1.2. 1.2 Repurposing Everyday Items for Storage
- 1.3. 1.3 DIY Storage Solutions for Small Spaces
- 1.4. 1.4 Stylish and Functional Storage Containers
- 1.5. 1.5 Maximizing Closet Space with DIY Organizers
- 2. 2. DIY Room Decor Storage Projects for Bedrooms
- 2.1. 2.1 DIY Floating Shelves for Bedroom Storage
- 2.2. 2.2 Transforming Old Dressers into Storage Units
- 2.3. 2.3 Creating Under-Bed Storage with DIY Drawers
- 2.4. 2.4 Hanging Jewelry Organizers for Bedroom
- 2.5. 2.5 DIY Storage Headboard for Functional Décor
- 3. 3. DIY Room Decor Storage Ideas for Living Rooms
1. 1. Creative DIY Room Decor Storage Ideas
When it comes to organizing and decorating your room, DIY projects can be a game-changer. Not only do they add a personal touch to your space, but they also provide clever storage solutions. If you’re looking to maximize the storage in your room while adding some creative flair, these DIY room decor storage ideas are perfect for you. From repurposing everyday items to creating custom storage pieces, these hacks are both practical and stylish. Get ready to transform your room with these genius DIY room decor storage ideas!
1.1. 1.1 Utilizing Wall Space for Storage
Utilizing Wall Space for Storage
When it comes to maximizing storage in your room, don’t overlook the potential of your walls. Wall space can provide valuable storage solutions, especially in smaller rooms where floor space may be limited. By utilizing the vertical space on your walls, you can create functional and stylish storage options for your DIY room decor.
One of the easiest ways to utilize wall space for storage is by installing shelves. Floating shelves, in particular, are a popular choice as they not only provide storage but also add a decorative element to your room. You can DIY your own floating shelves using basic materials like wood and brackets or purchase pre-made ones from a home improvement store.
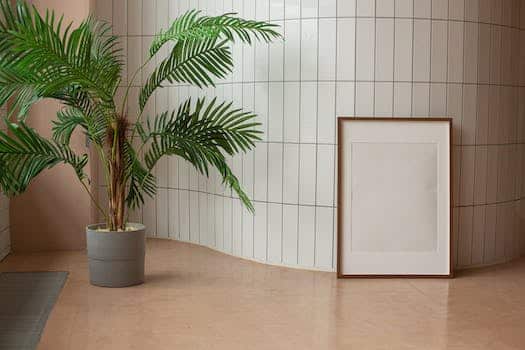
Another option for utilizing wall space is by hanging organizers. These can be in the form of hanging baskets, fabric pockets, or even a pegboard system. You can use these organizers to store various items such as books, plants, art supplies, or even small decor pieces.
Additionally, you can consider installing hooks or racks on your walls. These can be used to hang items like hats, scarves, jewelry, or even bags. By utilizing wall space for storage, you not only free up floor space but also keep your belongings easily accessible and visually appealing.
In conclusion, when it comes to DIY room decor storage, utilizing wall space is a genius hack that can help you maximize storage options while adding style to your room. So, get creative and start utilizing those walls!
1.2. 1.2 Repurposing Everyday Items for Storage
1.2 Repurposing Everyday Items for Storage
One of the easiest and most cost-effective ways to create storage in your room is by repurposing everyday items. By thinking outside the box, you can turn ordinary objects into functional storage solutions. Here are a few ideas to inspire your DIY room decor storage projects:
1. Use an old ladder as a stylish bookshelf. Simply prop the ladder against the wall and place books or decorative items on each rung.
2. Hang a shower caddy on the wall to store and organize small items like toiletries or craft supplies.
3. Transform an old wooden crate into a trendy storage ottoman. Just add some foam padding and fabric to the top, and you’ll have a dual-purpose piece of furniture.
4. Repurpose an old wine rack as a towel holder in your bathroom. The slots designed for wine bottles can easily hold rolled-up towels.
5. Hang a pegboard on the wall and use it to hang and organize your collection of hats, scarves, or jewelry.
These are just a few examples of how you can repurpose everyday items for creative DIY room decor storage. The possibilities are endless, so let your imagination run wild and turn your clutter into stylish storage solutions.
1.3. 1.3 DIY Storage Solutions for Small Spaces
In addition to adding style and personality to your space, DIY room decor storage solutions can also help maximize storage in small areas. Whether you live in a tiny apartment or just need some extra organization in your room, these creative DIY ideas are perfect for keeping your belongings neat and tidy. From repurposing everyday items to creating custom storage pieces, here are some genius DIY room decor storage hacks that you need to try!
1. Utilize Wall Space:
One of the best ways to create storage in a small room is by utilizing wall space. Install floating shelves or wall-mounted baskets to hold books, plants, or other small items. You can also hang a pegboard on the wall to store and display your accessories or craft supplies.
2. Repurpose Old Items:
Instead of throwing away old items, repurpose them into unique storage solutions. For example, use an old ladder as a bookshelf or hang it horizontally on the wall to create a hanging storage rack. You can also transform an old wooden crate into a stylish storage ottoman by adding some cushions on top.
3. Over-the-Door Storage:
Make use of the space behind your doors by adding over-the-door storage. Hang a shoe organizer or a pocket organizer to store shoes, accessories, or other small items. This is a great solution for small bedrooms or bathrooms where floor space is limited.
4. Under Bed Storage:
Maximize the space under your bed by using it for storage. Invest in some under bed storage containers or repurpose old drawers to slide under the bed. This is a perfect solution for storing out-of-season clothing, shoes, or extra bedding.
5. DIY Floating Desk:
If you need a workspace in your room but don’t have much floor space, consider building a DIY floating desk. Install a sturdy shelf on the wall at the desired height and use it as a desk. This will not only provide you with a functional workspace but also free up floor space.
These DIY room decor storage ideas are not only practical but also add a touch of creativity to your space. With a little imagination and some basic tools, you can easily create stylish and efficient storage solutions for your small room. Give these hacks a try and enjoy a clutter-free and organized living space!
1.4. 1.4 Stylish and Functional Storage Containers
1.4 Stylish and Functional Storage Containers
When it comes to organizing your room decor, having stylish and functional storage containers is a must. Not only do they help you keep your belongings in order, but they also add a touch of style to your space. Here are some creative DIY ideas for storage containers that will not only enhance the decor of your room but also provide practical storage solutions.
1. Mason Jar Organizers: Repurpose those empty mason jars into beautiful and versatile storage containers. You can use them to store small items like makeup brushes, pens, or even as a vase for flowers.
2. Fabric Covered Boxes: Give plain cardboard boxes a makeover by covering them with your favorite fabric. This simple DIY project will instantly add a pop of color and pattern to your room while providing a storage solution for items like accessories, craft supplies, or small toys.
3. Hanging Wall Baskets: Utilize the vertical space in your room by creating hanging wall baskets. You can use wire baskets, wicker baskets, or even repurpose old wooden crates. Hang them on the wall to store items like books, magazines, or even toiletries.
4. Decorative Storage Trays: Transform ordinary trays into stylish storage solutions. You can use a variety of materials like wood, acrylic, or even repurpose old picture frames. These trays can be used to store jewelry, keys, or even as a catch-all for small items.
5. Vintage Suitcase Storage: Give new life to old suitcases by turning them into storage containers. Stack them up or place them under your bed to store clothes, shoes, or other items you want to keep out of sight.
These DIY storage ideas are not only budget-friendly but also allow you to personalize your room decor. Get creative and have fun while organizing your space with these genius DIY room decor storage hacks!
1.5. 1.5 Maximizing Closet Space with DIY Organizers
When it comes to maximizing closet space, DIY organizers are a game-changer. Not only do they help keep your belongings organized, but they also add a touch of personalization to your space. With a little creativity and some basic materials, you can create your own DIY organizers that are not only functional but also stylish. Here are 1.5 DIY organizer ideas to help you make the most of your closet space.
1. Utilize Shoe Organizers: Shoe organizers are not just for shoes. They can be a great way to store small items like socks, scarves, and accessories. Hang a shoe organizer on the back of your closet door or on a wall to free up drawer space and keep everything within reach.
1.5. Build Custom Shelves: If your closet has empty walls or unused corners, consider building custom shelves. Measure the available space and use plywood or reclaimed wood to create sturdy shelves. These shelves can be used to store folded clothes, handbags, or even display your favorite decor pieces.
With these DIY organizers, you can transform your cluttered closet into a well-organized and visually appealing space. Get creative and start maximizing your closet space today!
2. 2. DIY Room Decor Storage Projects for Bedrooms
When it comes to room decor, storage is often a key factor. Having ample storage space in your bedroom can help keep the room organized and clutter-free. If you’re looking to add some creative and functional storage solutions to your bedroom, DIY room decor storage projects are a great option. Not only are they cost-effective, but they also allow you to personalize your storage according to your style and needs. From repurposing old items to creating unique storage pieces from scratch, there are endless possibilities for DIY room decor storage. In this article, we will explore 10 genius DIY room decor storage hacks that you need to try. These projects will not only provide practical storage solutions but also add a touch of creativity and charm to your bedroom. So, let’s dive in and discover some exciting DIY room decor storage ideas!
2.1. 2.1 DIY Floating Shelves for Bedroom Storage
2.1 DIY Floating Shelves for Bedroom Storage
One of the most efficient and stylish ways to add storage to your bedroom is by installing DIY floating shelves. These shelves not only provide a functional storage solution but also serve as decorative elements for your room decor. With a few simple materials and some basic carpentry skills, you can easily create your own floating shelves.
To start, gather the necessary materials, including wooden boards, screws, a drill, a level, and a stud finder. Measure the desired length and width of your shelves, keeping in mind the available space in your bedroom. Next, mark the wall where you want to install the shelves and use a stud finder to locate the wall studs for added stability.
Once you have determined the placement of the shelves, use a level to ensure they will be straight. Pre-drill holes on the marked spots, then attach the wooden boards to the wall using screws. Make sure the shelves are securely attached to the wall and can support the weight of your items.
After installing the shelves, you can personalize them by painting or staining them to match your bedroom decor. You can also add decorative brackets or hooks to hang small items or accessories. Once everything is in place, arrange your belongings on the floating shelves, keeping them organized and easily accessible.
DIY floating shelves are a cost-effective and versatile storage solution that can enhance the functionality and aesthetic appeal of your bedroom. By incorporating these shelves into your room decor, you can create a clutter-free and visually pleasing space.
2.2. 2.2 Transforming Old Dressers into Storage Units
Transforming old dressers into storage units is a great DIY room decor storage project for bedrooms. Not only does it provide a stylish and functional storage solution, but it also allows you to repurpose an old piece of furniture. By giving your old dresser a fresh coat of paint or stain, adding new hardware, and rearranging the drawers, you can create a unique and personalized storage unit that fits perfectly in your bedroom. Use the drawers to store clothing, accessories, or any other items that need to be organized. This DIY project is not only cost-effective but also allows you to unleash your creativity and add a touch of personal style to your bedroom decor. So why not give it a try and transform your old dresser into a practical and beautiful storage unit today?
2.3. 2.3 Creating Under-Bed Storage with DIY Drawers
2.3 Creating Under-Bed Storage with DIY Drawers
One of the most effective ways to maximize storage space in your bedroom is by utilizing the area under your bed. By creating DIY drawers, you can easily organize and store various items, such as clothing, shoes, or extra bedding. Here’s how you can create under-bed storage with DIY drawers:
1. Measure the space under your bed: Start by measuring the height, width, and length of the vacant area under your bed. This will help you determine the size of the drawers you need to build.
2. Gather the materials: You will need plywood or other sturdy wood for the drawer boxes, drawer slides, screws, a saw, a drill, and sandpaper.
3. Cut the wood: Use the saw to cut the plywood into pieces according to the measurements you took earlier. You will need four pieces for each drawer – two sides, one front, and one back.
4. Assemble the drawer boxes: Use screws and a drill to assemble the cut pieces into rectangular boxes. Make sure the corners are square and the boxes are sturdy.
5. Attach the drawer slides: Install the drawer slides on the inside of the bed frame, following the manufacturer’s instructions. These slides will allow the drawers to glide in and out smoothly.
6. Attach the drawer fronts: Use screws to attach the front piece of each drawer to the corresponding box, ensuring they are aligned properly.
7. Sand and finish: Sand the surfaces of the drawers to smooth out any rough edges. You can also paint or stain the drawers to match your bedroom decor.
8. Install the drawers: Carefully slide each drawer into place on the drawer slides. Test their movement to ensure they glide smoothly.
Now you have created convenient under-bed storage with DIY drawers. You can now easily keep your bedroom organized and clutter-free with this simple and practical storage solution.
2.4. 2.4 Hanging Jewelry Organizers for Bedroom
Hanging jewelry organizers are a great addition to any bedroom. They not only provide a stylish way to display and organize your jewelry, but they also help save space. With a hanging jewelry organizer, you can easily find and access your favorite necklaces, bracelets, and earrings without having to search through a tangled mess. These organizers come in various styles and designs, from simple hooks to intricate fabric pockets. Whether you prefer a minimalist look or a bohemian vibe, there is a hanging jewelry organizer that will suit your bedroom decor. Hang it on a wall or behind a door to keep your jewelry within reach and add a touch of elegance to your room. With a DIY approach, you can create a customized hanging jewelry organizer that perfectly matches your bedroom style and storage needs. So, if you’re looking for a practical and decorative storage solution for your jewelry collection, consider adding a hanging jewelry organizer to your bedroom.
2.5. 2.5 DIY Storage Headboard for Functional Décor
2.5 DIY Storage Headboard for Functional Décor
One brilliant way to maximize storage space in your bedroom is by incorporating a DIY storage headboard. Not only does it provide a functional solution for organizing your belongings, but it also adds a stylish touch to your room decor. With just a few materials and some creativity, you can create a storage headboard that perfectly suits your needs and enhances the overall aesthetic of your bedroom.
To start, gather the necessary materials such as plywood, screws, a saw, drill, and sandpaper. Measure the width of your bed to determine the dimensions of the headboard. Cut the plywood accordingly and sand the edges for a smooth finish.
Next, decide on the storage compartments you want to include in your headboard design. You can opt for open shelves, cubbies, or even hidden compartments for a more organized look. Use the saw and drill to create the desired compartments, making sure to measure and align everything accurately.
Once the compartments are ready, attach the plywood pieces together using screws. Ensure that the headboard is sturdy and secure by reinforcing the joints. Sand any rough surfaces and apply a coat of paint or varnish to match your room’s decor.
Now comes the fun part – organizing your belongings within the storage headboard. Use the compartments to store books, magazines, electronics, or any other items you want to keep within reach. You can also decorate the shelves with small plants, picture frames, or decorative items to personalize the headboard.
A DIY storage headboard not only serves as a functional storage solution but also adds a unique element to your room decor. It allows you to make the most of limited space while keeping your belongings neatly organized. So, get creative and give your bedroom a practical and stylish upgrade with this DIY project!
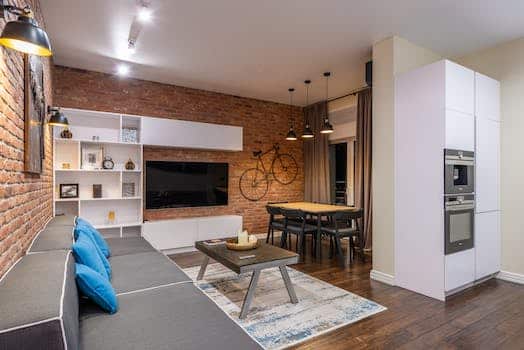
3. 3. DIY Room Decor Storage Ideas for Living Rooms
Are you tired of clutter in your living room? Looking for creative and budget-friendly storage solutions? Look no further! In this section, we will explore some genius DIY room decor storage ideas specifically tailored for living rooms.
1. Floating Shelves: Floating shelves are a fantastic way to add storage and display space without taking up valuable floor space. You can easily create your own floating shelves using basic materials like wood and brackets. These shelves are perfect for showcasing decorative items or storing books, magazines, and other essentials.
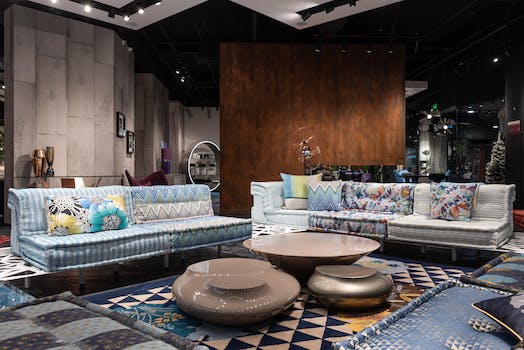
2. Ottoman with Hidden Storage: An ottoman with hidden storage is both stylish and functional. You can find ottomans with built-in storage compartments or even repurpose an old ottoman by adding a hinged lid. This clever storage solution provides a place to store blankets, pillows, and other items while also serving as a comfortable footrest or extra seating.
3. Wall-Mounted Baskets: Wall-mounted baskets are not only practical but also serve as decorative accents. You can easily mount baskets on the wall using hooks or brackets. These baskets are perfect for storing small items like remotes, keys, and magazines. Additionally, you can choose baskets that match your room’s decor to enhance the overall aesthetic.
4. DIY Storage Coffee Table: A storage coffee table is a great way to maximize storage space in your living room. You can repurpose an old coffee table by adding drawers or compartments underneath. This DIY project allows you to have a functional piece of furniture that also keeps your living room clutter-free.
5. Ladder Shelf: A ladder shelf is a trendy and versatile storage solution. You can create your own ladder shelf using wooden planks and a ladder. This unique storage idea provides multiple shelves where you can display decorative items, plants, and books. It’s a great way to add both storage and style to your living room.
These DIY room decor storage ideas for living rooms will help you declutter and organize your space while adding a touch of creativity. Get ready to transform your living room into a functional and stylish haven!
3.1. 3.1 DIY Wall-Mounted Storage for Living Rooms
3.1 DIY Wall-Mounted Storage for Living Rooms
One of the best ways to maximize storage in your living room is by utilizing wall-mounted storage solutions. Not only does this save valuable floor space, but it also adds a stylish and functional element to your room decor. From shelves to hanging baskets, there are plenty of DIY options to choose from.
One idea is to create a wall-mounted shelf using wooden planks and brackets. This simple yet effective storage solution can be customized to fit your specific needs. You can paint the shelves in a color that complements your room decor or leave them natural for a more rustic look.
Another DIY option is to repurpose old wooden crates or boxes and mount them on the wall. These crates can be used to store books, magazines, or even display decorative items. For a unique touch, you can paint the crates in different colors or add fun patterns.
If you’re looking for a more minimalist storage solution, consider using wall-mounted hooks or pegboards. These can be used to hang hats, scarves, or even small baskets for storing smaller items. Additionally, you can attach small shelves or hooks underneath the pegboard for added storage.
Overall, DIY wall-mounted storage is a great way to declutter your living room and create a visually appealing space. By utilizing simple materials and a little creativity, you can transform your walls into functional storage areas that perfectly complement your room decor.
3.2. 3.2 Repurposing Old Trunks as Coffee Tables with Storage
If you’re looking for a creative and functional way to add storage to your living room, consider repurposing old trunks as coffee tables. Not only do they provide a unique and vintage touch to your space, but they also offer a practical solution for storing various items. These DIY room decor storage hacks are perfect for those who love to combine style and functionality.
By repurposing old trunks, you can create a coffee table that not only serves as a surface for drinks and snacks but also offers hidden storage space. You can store extra blankets, pillows, books, or even board games inside the trunk, keeping your living room organized and clutter-free.
To repurpose an old trunk as a coffee table, start by cleaning and restoring it if needed. Remove any old hardware or handles and give it a fresh coat of paint or varnish to match your room’s decor. You can also add decorative elements like stencils or decals to personalize the trunk.
Once your trunk is ready, place it in front of your sofa or seating area. You can use the top surface for placing drinks, magazines, or decorative items. To access the storage space, simply lift the trunk’s lid. You can add hinges or a support mechanism to make it easier to open and close.
Repurposing old trunks as coffee tables with storage is a budget-friendly and eco-friendly way to add both style and functionality to your living room. It’s a DIY room decor storage idea that not only saves money but also gives a unique touch to your space. Give it a try and see how it transforms your living room!
3.4. 3.4 Stylish Bookshelf Storage Solutions
3.4 Stylish Bookshelf Storage Solutions:
When it comes to organizing your living room, having stylish bookshelf storage solutions can make all the difference. Not only do bookshelves provide a practical way to store your belongings, but they also add a touch of sophistication to your space. Here are some DIY room decor storage ideas that will transform your living room:
1. Floating Bookshelf: Create a modern and minimalist look by installing floating bookshelves. These shelves not only save space but also create an illusion of a larger room. Arrange your favorite books and decorative items on these shelves to add personality to your living room.
2. Built-in Bookcase: If you have a wall that needs some attention, consider building a built-in bookcase. This can be a great way to maximize storage space while adding a focal point to your room. Customize the size and design of the bookcase to fit your specific needs and style.
3. Ladder Shelf: Ladder shelves are not only functional but also visually appealing. You can easily create a ladder shelf using reclaimed wood or even old ladders. Paint them in a color that complements your room’s decor and use them to display books, plants, or other decorative items.
4. Corner Bookshelf: Utilize the corners of your living room by installing corner bookshelves. These space-saving solutions can provide ample storage space while adding an interesting element to your room. Fill them with books, photo frames, or unique knick-knacks to showcase your personal style.
5. Open Shelving Unit: If you prefer a more open and airy look, consider using open shelving units. These can be easily created using wooden planks or metal brackets. They provide a versatile storage solution and allow you to display your favorite books, plants, or decorative items in a visually appealing way.
Incorporating these stylish bookshelf storage solutions into your living room can help you achieve both functionality and aesthetic appeal. Whether you prefer a modern, minimalist look or a cozy, eclectic feel, there is a DIY room decor storage idea that will suit your style. Get creative and start transforming your living room today!
3.5. 3.5 DIY TV Stand with Built-in Storage Compartments
3.5 DIY TV Stand with Built-in Storage Compartments
If you’re looking for a creative way to add storage to your living room while also keeping your TV organized, a DIY TV stand with built-in storage compartments is a perfect solution. This project allows you to customize the design to fit your space and style while providing ample storage for your media devices, DVDs, and other living room essentials.
To create this DIY TV stand, you’ll need some basic woodworking skills and tools. Here’s a step-by-step guide to help you get started:
1. Measure and plan: Determine the size and dimensions of your TV stand based on the space available in your living room. Consider the height, width, and depth of the stand to ensure it fits your TV and other components.
2. Gather materials: Purchase the necessary materials, including plywood or solid wood for the frame, screws, wood glue, and paint or stain for finishing.
3. Cut and assemble the frame: Cut the plywood or solid wood pieces according to your measurements. Assemble the frame using screws and wood glue, ensuring it is sturdy and level.
4. Create storage compartments: Decide on the number and size of storage compartments you want. Cut additional pieces of plywood to create shelves or dividers within the stand. Attach them securely to the frame.
5. Sand and finish: Sand the entire TV stand to smooth any rough edges. Apply paint or stain of your choice to enhance the appearance and protect the wood.
6. Add finishing touches: Once the paint or stain is dry, you can add decorative hardware, such as knobs or handles, to the storage compartments for a personalized touch.
With this DIY TV stand, you’ll not only have a functional piece of furniture but also a stylish storage solution for your living room. It’s a great way to keep your space organized and clutter-free while adding a unique touch to your decor.


These 10 innovative and imaginative DIY home decor ideas from [object Object] provide a refreshing approach to enhancing ones living…