
Are you looking to spruce up your living space without breaking the bank? Look no further! In this article, we will explore 10 amazing homemade DIY home decor ideas that will transform your home into a personalized haven. Whether you’re a seasoned DIY enthusiast or a beginner, these creative and budget-friendly projects will inspire you to add a unique touch to every room. Get ready to unleash your inner artist and let’s dive into the world of DIY home decor!
- 1. Introduction
- 1.1. Why choose homemade DIY home decor ideas?
- 1.2. Benefits of DIY home decor
- 1.3. Importance of creativity in home decoration
- 1.4. Materials and tools needed for DIY home decor
- 1.5. Budget-friendly options for DIY home decor
- 2. Wall Decor Ideas
- 2.1. DIY wall art using recycled materials
- 2.2. Creating a gallery wall with personal photographs
- 2.3. Using stencils and paint to create a unique wall design
- 2.4. Making your own wall hangings with fabric and embroidery
- 2.5. Incorporating nature-inspired elements into wall decor
- 3. Furniture Makeover
- 3.1. Repurposing old furniture with a fresh coat of paint
- 3.2. Upcycling wooden pallets into trendy furniture pieces
- 3.3. Adding decorative trims and knobs to give furniture a new look
- 3.4. Recovering and reupholstering old chairs and sofas
- 3.5. Creating DIY headboards for beds using various materials
- 4. DIY Accessories
1. Introduction
If you’re looking to add a personal touch to your home decor, why not try some homemade DIY projects? Creating your own home decorations not only allows you to showcase your creativity, but it also gives your space a unique and personalized feel. In this article, we will explore 10 homemade DIY home decor ideas that are easy to make and will add charm to any room in your house. Whether you’re a crafting enthusiast or just looking for a fun weekend project, these ideas will inspire you to get creative and transform your living space into a cozy and stylish haven.
1.1. Why choose homemade DIY home decor ideas?
Choosing homemade DIY home decor ideas offers a multitude of benefits for homeowners. Not only does it allow individuals to showcase their creativity and personal style, but it also provides a budget-friendly alternative to expensive store-bought decorations. DIY home decor projects allow individuals to transform their living spaces into unique and personalized havens that reflect their individual tastes and preferences. Additionally, creating homemade decor provides a sense of accomplishment and satisfaction, as individuals can take pride in their own handcrafted creations. With the wide range of DIY home decor ideas available, it is easy to find projects that suit any skill level or design aesthetic. From upcycling old items to creating custom pieces from scratch, the possibilities are endless. By choosing homemade DIY home decor ideas, homeowners can add a touch of personality and charm to their living spaces while saving money and unleashing their creativity.
1.2. Benefits of DIY home decor
DIY home decor has become increasingly popular in recent years, and for good reason. There are numerous benefits to creating your own decorations for your home. Not only does it allow you to infuse your personal style and creativity into your living space, but it also offers a cost-effective alternative to buying expensive home decor items. By using everyday materials and household items, you can transform your space into a unique and personalized oasis. In addition, DIY home decor projects can be a fun and rewarding way to spend your free time, providing a sense of accomplishment and satisfaction. Whether you’re a seasoned DIY enthusiast or just starting out, these 10 homemade DIY home decor ideas are sure to inspire and motivate you to create something truly special for your home.
1.3. Importance of creativity in home decoration
Creativity plays a vital role in home decoration as it allows individuals to express their unique style and personality. When it comes to DIY home decor ideas, creativity is the key ingredient that can transform ordinary spaces into extraordinary ones. By incorporating creative elements into home decoration, homeowners can create a visually appealing and personalized environment that reflects their taste and preferences. Whether it’s through the use of color, texture, or innovative design concepts, creativity adds a touch of charm and character to any living space. In this article, we will explore the importance of creativity in home decoration and provide you with some inspiring DIY ideas to enhance the beauty of your home.
1.4. Materials and tools needed for DIY home decor
When it comes to DIY home decor projects, having the right materials and tools is essential. Whether you’re a seasoned DIY enthusiast or just starting out, having the necessary supplies will make your projects easier and more successful. In this section, we will discuss the materials and tools needed for various homemade DIY home decor ideas.
1. Paint and Brushes: One of the most common materials needed for DIY home decor projects is paint. Choose a high-quality paint that suits your desired color scheme. Additionally, make sure to have a variety of brushes in different sizes for different painting techniques.
2. Fabric and Sewing Supplies: If you’re planning on creating fabric-based home decor items such as curtains, pillow covers, or table runners, you’ll need various fabrics, sewing machine, threads, and other sewing supplies.
3. Wood and Woodworking Tools: For DIY projects involving wooden furniture, shelves, or wall hangings, you’ll need a variety of wood, including plywood, boards, or pallets. Make sure to have essential woodworking tools such as a saw, drill, sandpaper, and screws.
4. Adhesives: Adhesives like glue, hot glue gun, and double-sided tape are essential for various DIY home decor projects. They can be used to attach embellishments, secure fabric, or create unique designs.
5. Decorative Materials: Depending on the specific DIY project, you may need decorative materials such as beads, buttons, ribbons, or sequins. These items can add a personal touch and enhance the visual appeal of your home decor.
6. Measuring and Cutting Tools: Accurate measurements and precise cuts are crucial for successful home decor projects. Make sure to have measuring tools like a tape measure, ruler, and level. Additionally, cutting tools like scissors, utility knife, and a cutting mat will come in handy.
7. Decorative Hardware: If you’re planning on revamping furniture or cabinets, having decorative hardware such as knobs, handles, or hinges can elevate the overall look. Choose hardware that complements your desired aesthetic.
8. Safety Equipment: It’s important to prioritize safety when working on DIY projects. Have safety equipment like gloves, safety goggles, and a dust mask to protect yourself from potential hazards.
Remember, the specific materials and tools needed for each DIY home decor project may vary. Always refer to the project instructions and make a list of the required supplies before starting.
1.5. Budget-friendly options for DIY home decor
Decorating your home can be a fun and creative way to personalize your space. However, it can also be expensive if you opt for store-bought items. If you’re looking to save some money while adding a personal touch to your home decor, DIY projects are the way to go. In this article, we will explore budget-friendly options for DIY home decor that will not only save you money but also allow you to unleash your creativity. With these homemade ideas, you can transform your living space into a unique and stylish haven without breaking the bank.
2. Wall Decor Ideas
When it comes to home decor, walls are often overlooked as potential design elements. However, with a little creativity and DIY skills, you can transform your walls into stunning focal points. Here are some homemade DIY wall decor ideas that will add personality and style to any room.
1. Gallery Wall: Create a gallery wall by hanging a collection of your favorite artwork, photographs, and prints. Mix different sizes and frames for a visually appealing display.
2. Wall Decals: Use wall decals or stickers to add patterns, quotes, or designs to your walls. They are easy to apply and remove, making them perfect for renters.
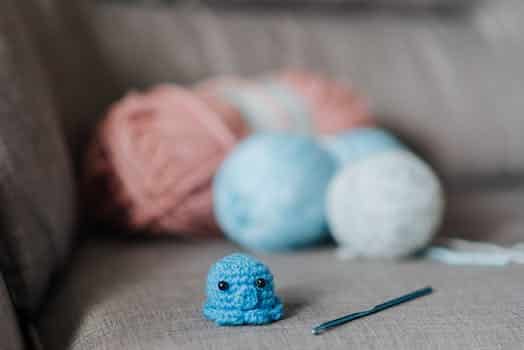
3. Wall Hangings: Make your own wall hangings using materials like yarn, fabric, or macrame. Choose colors and textures that complement your existing decor.
4. Wall Shelves: Install wall shelves to display small plants, books, or decorative items. Choose floating shelves for a modern and minimalist look.
5. Painted Accent Wall: Add a pop of color to your room by painting one wall in a bold shade. This will create a focal point and instantly transform the space.
6. Wall Mirrors: Hang decorative mirrors to create the illusion of a bigger space and reflect natural light. Choose mirrors in different shapes and frames for added visual interest.
7. Wall Plates: Display decorative plates or platters on your walls for a unique and eclectic look. Mix and match patterns and colors for a vibrant display.
8. Wall Stencils: Use stencils to create intricate patterns or designs on your walls. This is a cost-effective way to add visual interest without the need for wallpaper.
9. Wall Planters: Hang wall planters to bring a touch of nature indoors. Choose plants that thrive in low-light conditions, such as pothos or snake plants.
10. Wall Clocks: Invest in a statement wall clock that not only tells time but also serves as a decorative piece. Choose a design that complements your overall decor style.
These are just a few ideas to get you started. The possibilities are endless when it comes to DIY wall decor. Get creative and have fun transforming your walls into personalized works of art!
2.1. DIY wall art using recycled materials
Are you looking for creative and budget-friendly ways to decorate your walls? Look no further! In this section, we will explore the world of DIY wall art using recycled materials. Not only will you be able to add a personal touch to your home decor, but you will also be helping the environment by repurposing items that would have otherwise been discarded. Let’s dive into some exciting ideas that will transform your walls into unique and eye-catching focal points!
2.2. Creating a gallery wall with personal photographs
Creating a gallery wall with personal photographs is a wonderful way to add a personal touch to your home decor. It allows you to showcase your favorite memories and create a unique and meaningful display. Here are some tips to help you create a stunning gallery wall with your personal photographs:
1. Choose the Right Wall: Select a wall that is large enough to accommodate your gallery. It could be a focal point in your living room, hallway, or even the staircase wall.
2. Gather Your Photographs: Collect a variety of your favorite photographs. These could be family portraits, vacation pictures, or candid shots that hold special memories for you.
3. Plan the Layout: Before hanging the photographs, plan the layout on the floor. Arrange them in different ways until you find a design that you like. You can opt for a symmetrical arrangement or a more eclectic mix.
4. Mix and Match Frames: Use a combination of different frames to add visual interest to your gallery wall. You can choose frames in various sizes, colors, and materials to create a dynamic display.
5. Add Personal Touches: Along with the photographs, consider adding personal touches such as framed quotes, artwork, or even small decorative items that complement the overall theme.
6. Hang with Care: Once you have finalized the layout, start hanging the photographs on the wall. Use a level and measuring tape to ensure that they are properly aligned. Consider using adhesive hooks or picture-hanging strips for easy installation.
7. Maintain Balance: As you hang the photographs, maintain a balance between the frames. Distribute the colors, sizes, and shapes evenly throughout the gallery wall.
Creating a gallery wall with personal photographs is a creative and sentimental way to decorate your walls. It not only adds visual appeal but also serves as a constant reminder of cherished moments. So, get started and transform a plain wall into a captivating gallery of memories!
2.3. Using stencils and paint to create a unique wall design
Using stencils and paint to create a unique wall design is a great way to add a personal touch to your home decor. Whether you want to express your creativity or simply update the look of a room, this DIY project can be both fun and rewarding.
To start, gather the necessary materials including stencils, paint, paintbrushes, painter’s tape, and a drop cloth to protect your floor or furniture. Choose a stencil pattern that suits your style and complements the overall theme of the room.
Before applying the stencil, ensure that the wall surface is clean and smooth. Use painter’s tape to securely position the stencil on the wall, making sure it doesn’t shift during the painting process.
Next, dip the paintbrush into the desired paint color and lightly dab off any excess. Gently apply the paint onto the stencil, using a stippling or swirling motion. Be careful not to overload the brush with paint to prevent bleeding under the stencil.
Once you have painted the entire stencil design, carefully remove the stencil from the wall while the paint is still wet. This will help create crisp lines and prevent smudging. Allow the paint to dry completely before moving on to the next stencil or adding any additional decorative elements.
To add depth and dimension to your wall design, consider using multiple stencils with different patterns or layering colors. Experiment with different techniques and color combinations to achieve the desired effect.
Remember, the beauty of using stencils and paint for wall decor is that it allows you to customize and create a unique design that reflects your individual style. So go ahead, unleash your creativity, and transform your walls into stunning works of art!
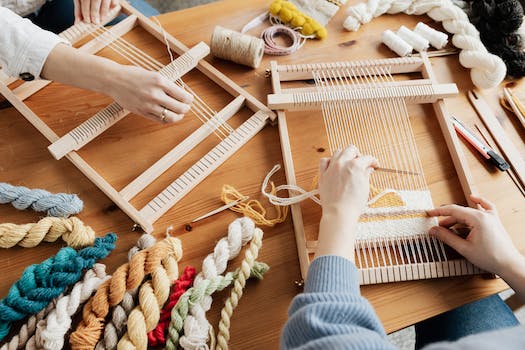
2.4. Making your own wall hangings with fabric and embroidery
Making your own wall hangings with fabric and embroidery can add a personal touch to your home decor. It allows you to showcase your creativity and create unique pieces that reflect your style. With a few simple materials and some basic embroidery skills, you can create beautiful and customized wall decorations.
To start, gather your materials. You will need a piece of fabric of your choice, embroidery hoop, embroidery floss, embroidery needles, and scissors. Choose a fabric that complements your existing decor or adds a pop of color to your space.
Next, decide on the design you want to create. You can either sketch it directly onto the fabric or use a stencil for guidance. If you’re new to embroidery, start with simple designs like flowers, leaves, or geometric shapes.
Once you have your design ready, place the fabric in the embroidery hoop and tighten the hoop to secure the fabric. Thread your embroidery needle with the desired floss color and start stitching. There are various embroidery stitches you can use, such as the backstitch, satin stitch, or French knot. Experiment with different stitches to add texture and dimension to your wall hanging.
As you progress with your embroidery, don’t be afraid to mix and match colors and stitches to create a visually interesting piece. You can also incorporate other materials like beads or sequins for added embellishment.
Once you’ve finished stitching your design, trim any excess fabric and secure the back of the hoop with a piece of felt or fabric to hide the stitches. This will give your wall hanging a clean and finished look.
Finally, hang your creation on a wall using a nail or adhesive hook. You can display it as a standalone piece or combine it with other wall decorations to create a gallery wall.
Making your own wall hangings with fabric and embroidery is a fun and rewarding DIY project that allows you to showcase your creativity. It adds a personal touch to your home decor and can become a conversation starter when guests admire your unique and handmade wall decorations.
2.5. Incorporating nature-inspired elements into wall decor
When it comes to decorating our homes, finding unique and creative ideas can bring a refreshing touch to any space. One popular trend in home decor is incorporating nature-inspired elements into wall decor. By bringing the beauty of the outdoors indoors, you can create a calming and serene atmosphere in your home.
There are numerous ways to incorporate nature-inspired elements into your wall decor. One idea is to use botanical prints or paintings. These can feature various plants, flowers, and leaves, adding a touch of nature to your walls. You can also opt for wallpaper with nature-inspired patterns, such as floral or leaf motifs. This can instantly transform a plain wall into a captivating focal point.
Another way to incorporate nature into your wall decor is by using natural materials. For instance, you can create a stunning display of driftwood by arranging different pieces on the wall. This not only adds an organic and rustic element to the room but also serves as an intriguing conversation starter.
Additionally, you can consider hanging shelves made of reclaimed wood or bamboo. These materials not only add an eco-friendly touch but also bring a natural and earthy feel to your wall decor. You can display small potted plants, succulents, or even nature-inspired trinkets on these shelves, further enhancing the natural aesthetic.
Furthermore, incorporating natural colors into your wall decor can have a significant impact. Earthy tones like greens, browns, and blues can create a harmonious and soothing ambiance. You can paint an accent wall in a calming shade of green or hang artwork that features these colors.
In conclusion, incorporating nature-inspired elements into your wall decor can bring a sense of tranquility and beauty to your home. Whether it’s through botanical prints, natural materials, or earthy colors, these ideas can transform your walls into stunning focal points. So, unleash your creativity and embrace the serenity of nature within your living space.
3. Furniture Makeover
One of the easiest and most affordable ways to update the look of your home is through furniture makeovers. Instead of buying new furniture, you can transform your existing pieces into something fresh and stylish. Whether you have old wooden chairs, a worn-out coffee table, or outdated cabinets, a furniture makeover can breathe new life into them.
There are plenty of DIY home decor ideas that you can try to give your furniture a makeover. For example, you can paint your wooden chairs in a trendy color to match your interior theme. You can also decoupage your old coffee table with pretty patterned paper to create a unique and personalized piece. Additionally, you can give your cabinets a fresh coat of paint and change the hardware to instantly update their appearance.
Not only will furniture makeovers save you money, but they also allow you to express your creativity and add a personal touch to your home decor. So, roll up your sleeves, gather some supplies, and get ready to transform your furniture into stunning pieces that will impress your guests and make your home feel more inviting.
3.1. Repurposing old furniture with a fresh coat of paint
Repurposing old furniture with a fresh coat of paint is a great way to give your home a fresh new look without breaking the bank. Instead of buying brand new furniture, you can transform your existing pieces into something completely different and unique. With a little bit of creativity and some paint, you can breathe new life into old dressers, tables, chairs, and more.
One of the easiest ways to repurpose old furniture is by giving it a fresh coat of paint. Whether you want to go for a bold and vibrant color or a more subtle and neutral tone, painting your furniture can instantly transform its appearance. You can choose to paint the entire piece or just certain parts, depending on the look you’re going for.
Before you start painting, it’s important to properly prepare the furniture surface. Clean it thoroughly to remove any dirt or grime, and sand down any rough spots or imperfections. This will ensure that the paint adheres properly and gives you a smooth and even finish.
Once the furniture is prepped, you can start applying the paint. Use a high-quality paintbrush or a foam roller for larger surfaces. Apply thin and even coats, allowing each layer to dry completely before applying the next one. This will help prevent drips and ensure a professional-looking finish.
To add some extra flair to your repurposed furniture, consider using stencils or decals. These can be used to create unique patterns or designs on the painted surface. You can also experiment with different painting techniques, such as distressing or antiquing, to give your furniture a vintage or shabby chic look.
With just a few supplies and some imagination, you can turn your old and worn-out furniture into beautiful and stylish pieces that will enhance the overall look of your home. Repurposing furniture not only saves you money but also allows you to put your own personal touch on your home decor. So, don’t be afraid to get creative and start giving your furniture a makeover today!
3.2. Upcycling wooden pallets into trendy furniture pieces
Upcycling wooden pallets into trendy furniture pieces is a great way to add a unique touch to your home decor. Not only is it an eco-friendly option, but it also allows you to create one-of-a-kind furniture items that reflect your personal style. By repurposing old wooden pallets, you can transform them into stunning coffee tables, shelves, or even bed frames. With a little creativity and some basic DIY skills, you can give these pallets a new lease on life and turn them into beautiful and functional pieces of furniture. Whether you prefer a rustic, vintage look or a more modern and sleek design, upcycling wooden pallets offers endless possibilities for furniture makeovers.
3.3. Adding decorative trims and knobs to give furniture a new look
Adding decorative trims and knobs is a great way to give furniture a fresh new look. Whether you have an old piece that needs a facelift or you want to personalize a new piece, decorative trims and knobs can instantly transform the appearance of your furniture. These small details can add character, style, and uniqueness to your home decor.
There are countless options available when it comes to decorative trims and knobs. You can choose from a variety of materials such as metal, wood, ceramic, or glass. Consider the style and theme of your furniture and select trims and knobs that complement it.
For example, if you have a vintage-inspired dresser, you can enhance its charm by adding antique brass knobs. On the other hand, if you have a modern coffee table, sleek and minimalist metal trims can give it a contemporary touch.
The process of adding decorative trims and knobs is relatively simple. Start by removing the existing hardware, if any, from your furniture. Clean the surface thoroughly and measure the areas where you want to attach the trims or knobs.
Once you have your trims and knobs ready, use appropriate tools and adhesive to secure them in place. Make sure they are aligned properly and firmly attached. Take your time during this step to ensure a neat and professional-looking result.
The addition of decorative trims and knobs not only enhances the aesthetic appeal of your furniture but also provides functional benefits. You can easily open drawers and doors with the help of well-designed knobs, and trims can protect the edges of your furniture from wear and tear.
In conclusion, adding decorative trims and knobs is a simple and effective way to give your furniture a new look. Experiment with different styles, materials, and finishes to create a personalized touch in your home. Let your creativity shine and enjoy the transformation of your furniture with these small but impactful DIY ideas.
3.4. Recovering and reupholstering old chairs and sofas
Recovering and reupholstering old chairs and sofas can be a great way to give them a fresh new look and extend their lifespan. Whether you have inherited a vintage piece or found a gem at a thrift store, this DIY project allows you to transform your furniture into something unique and personalized.
To begin, you will need some basic upholstery tools such as a staple gun, fabric scissors, and a screwdriver. Start by removing the existing fabric carefully, making note of how it was attached and any areas that may need repair or replacement.
Next, choose a fabric that suits your style and the overall theme of your home. Consider factors such as durability, color, and pattern. Measure the dimensions of the chair or sofa and add a few extra inches to ensure you have enough fabric for tucking and stapling.
Once you have your fabric, lay it out flat and place the pieces of the chair or sofa on top. Use the old fabric pieces as a guide to cut out the new fabric, ensuring you leave enough allowance for folding and stapling.
With the new fabric cut and ready, start attaching it to the chair or sofa frame using a staple gun. Begin at the back or bottom of the furniture piece and work your way around, pulling the fabric taut as you go. Make sure to fold and staple neatly at corners and curves for a professional finish.
Finally, trim any excess fabric and reattach any decorative elements such as buttons or trim. Give your newly upholstered furniture a thorough cleaning and take a step back to admire your work. You now have a beautifully transformed chair or sofa that adds a personal touch to your home decor.
Recovering and reupholstering old chairs and sofas not only allows you to save money but also gives you the opportunity to unleash your creativity. With a little time and effort, you can breathe new life into worn-out furniture and create stunning pieces that reflect your style and taste.
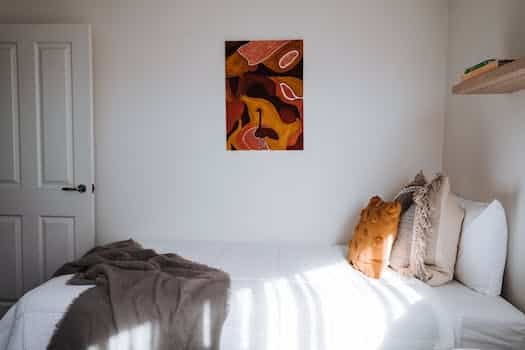
3.5. Creating DIY headboards for beds using various materials
Creating DIY headboards for beds using various materials
When it comes to giving your bedroom a fresh new look, one of the easiest and most affordable ways is by creating a DIY headboard for your bed. Not only does a headboard add a focal point to your room, but it also provides extra comfort and support while you sleep. Plus, the best part is that you can customize it to match your personal style and taste. Here are some ideas for DIY headboards using various materials:
1. Pallet Headboard: If you’re looking for a rustic and budget-friendly option, consider using pallets to create a unique headboard. Simply sand and paint the pallets in your desired color, then attach them to the wall behind your bed.
2. Upholstered Headboard: For a more luxurious and cozy look, opt for an upholstered headboard. Choose a fabric that complements your bedroom decor and wrap it around a piece of plywood or foam board. Secure the fabric tightly with a staple gun, and voila – a stylish headboard!
3. Bookshelf Headboard: If you’re short on storage space, a bookshelf headboard is the perfect solution. Find an old bookshelf or build one from scratch, then attach it securely to the wall behind your bed. You can use the shelves to store books, decorative items, or even your alarm clock.
4. Vintage Door Headboard: Add a touch of vintage charm to your bedroom by repurposing an old door as a headboard. Clean and sand the door, then paint or stain it to match your decor. Mount the door horizontally on the wall, and you have a unique and eye-catching headboard.
5. Woven Tapestry Headboard: Create a bohemian-inspired look by using a woven tapestry as a headboard. Simply hang the tapestry behind your bed using a curtain rod or hooks. Choose a tapestry with colors and patterns that complement your bedroom decor.
These are just a few ideas to get you started on your DIY headboard project. Remember to measure your bed and take into consideration the size and weight of the materials you choose. With a little creativity and some basic DIY skills, you can transform your bedroom into a cozy and stylish retreat!
4. DIY Accessories
DIY Accessories
When it comes to home decor, sometimes it’s the little details that can make a big difference. Adding some personalized DIY accessories to your living space can not only enhance the overall look, but also add a touch of uniqueness and creativity. Here are some homemade DIY accessories ideas that you can easily make at home:
1. Decorative Throw Pillows: Transform plain and boring pillows into eye-catching pieces by using fabric paint, stencils, or even embroidery. You can create intricate patterns, monograms, or playful designs to match your decor style.
2. Customized Wall Art: Instead of buying expensive wall art, why not create your own? Use canvas, paints, stencils, or even repurpose old items like wooden pallets or vintage frames to make personalized artwork that reflects your personality and taste.
3. Handmade Candles: Add warmth and ambiance to your home with handmade candles. You can experiment with different shapes, colors, and scents using candle-making kits or repurposing old candle jars. These DIY candles also make great gifts for friends and family.
4. Upcycled Planters: Give your indoor plants a stylish home by repurposing old containers or objects. Turn teacups, mason jars, or even old boots into unique planters that will bring a touch of greenery and charm to any room.
5. Fabric Coasters: Protect your furniture in style with fabric coasters. Cut fabric into circles or squares, add a layer of cork or felt to the bottom, and voila! You have personalized coasters that can match your decor and keep your surfaces safe.
6. Vintage-inspired Photo Frames: Showcase your favorite memories with vintage-inspired photo frames. You can find old frames at thrift stores or flea markets and give them a new life with a fresh coat of paint and decorative accents like lace, beads, or buttons.
7. Statement Mirrors: Create a focal point in any room with a statement mirror. You can find inexpensive plain mirrors and transform them into unique pieces by adding a frame made of driftwood, seashells, or even colorful washi tape.
8. Fabric Banners: Add a festive touch to your home with fabric banners. Cut out triangles or other shapes from colorful fabric, attach them to a string or ribbon, and hang them across a mantel, window, or wall for a charming and whimsical look.
9. Personalized Doormats: Welcome guests with a personalized doormat. Use stencils and outdoor paint to create a custom design or write a fun and welcoming message. It’s a simple DIY project that can add a touch of personality to your entrance.
10. Decorative Storage Boxes: Keep your space organized and stylish with decorative storage boxes. You can cover plain cardboard boxes with fabric, wallpaper, or even paint to create beautiful storage solutions that can be displayed on shelves or under tables.
These DIY accessories are not only budget-friendly but also allow you to unleash your creativity and add a personal touch to your home decor. So why not give them a try and see how they can transform your living space?
4.1. Designing and crafting personalized throw pillows
Designing and crafting personalized throw pillows can add a unique touch to your home decor. DIY accessories like these allow you to showcase your creativity and style. With just a few materials and some imagination, you can create beautiful and custom throw pillows that reflect your personality.
Start by selecting the fabric for your throw pillows. Choose a fabric that complements the color scheme and theme of your room. You can opt for bold and vibrant patterns or soft and neutral tones, depending on your preference.
Next, measure and cut the fabric according to the desired size of your throw pillows. It’s important to ensure that the dimensions are accurate for a professional-looking result.
Once the fabric is cut, you can begin the process of sewing or gluing the edges together. If you have sewing skills, you can use a sewing machine to create clean and sturdy seams. Alternatively, you can use fabric glue for a no-sew option.
After the edges are secured, it’s time to stuff the pillows. You can use polyester fiberfill or foam inserts, depending on the level of firmness you prefer. Make sure to evenly distribute the filling for a plush and comfortable pillow.
To add a personal touch, consider adding decorative elements to your throw pillows. This can include embroidery, applique, or even hand-painted designs. Get creative and experiment with different techniques to make your pillows truly one-of-a-kind.
Finally, don’t forget to add a closure to your throw pillows. This can be a zipper, buttons, or even a simple envelope-style opening. A closure not only adds functionality but also enhances the overall look of the pillows.
Designing and crafting personalized throw pillows is a fun and rewarding DIY project. It allows you to infuse your own style into your home decor while creating something practical and beautiful. So, grab your materials and get ready to transform your living space with custom throw pillows!
4.2. Creating unique candle holders using mason jars or wine bottles
Creating unique candle holders using mason jars or wine bottles can add a charming touch to your home decor. These DIY accessories are not only easy to make but also allow you to upcycle old jars or bottles that would otherwise be discarded. With just a few simple materials and creative ideas, you can transform ordinary containers into stylish candle holders that will enhance the ambiance of any room.
To create a mason jar candle holder, start by thoroughly cleaning the jar and removing any labels or residue. You can then paint the jar in your desired color or leave it as it is for a rustic look. Next, insert a candle into the jar, making sure it is secure and centered. You can also add decorative elements such as ribbons, lace, or twine around the neck of the jar to give it a personalized touch. Finally, light up the candle and enjoy the cozy glow it brings to your space.
If you prefer using wine bottles, the process is quite similar. Begin by cleaning and removing the labels from the bottle. You can choose to paint the bottle in a color that matches your decor theme or leave it transparent for a more elegant look. Insert a tapered candle into the bottle’s opening, ensuring it fits snugly. You can also add embellishments like beads, charms, or even dried flowers inside the bottle to create a unique and eye-catching candle holder.
Creating your own candle holders using mason jars or wine bottles not only allows you to save money but also adds a personal touch to your home decor. Get creative with different colors, textures, and decorative elements to make each candle holder truly one-of-a-kind. Whether you place them on a mantel, dining table, or in the bathroom, these DIY accessories will surely impress your guests and create a warm and inviting atmosphere in your home.
4.3. Handmade wreaths for different seasons and occasions
Handmade wreaths are a charming way to add a personalized touch to your home decor. Whether you want to celebrate a specific season or create a festive ambiance for a special occasion, DIY wreaths offer endless possibilities. Here are some ideas for creating beautiful handmade wreaths for different seasons and occasions.
1. Spring Wreath: Embrace the blooming season by crafting a wreath with vibrant flowers like daisies, tulips, and daffodils. Add a touch of freshness with greenery and incorporate pastel-colored ribbons to enhance the springtime feel.
2. Summer Wreath: Capture the essence of summer with a wreath made of seashells, starfish, and colorful beach-themed decorations. Use a straw or burlap base and adorn it with nautical elements like anchors or sailboats.
3. Fall Wreath: Embrace the warm hues of autumn by creating a wreath with dried leaves, pinecones, and miniature pumpkins. Add a rustic touch by using a grapevine or wooden base and incorporate warm-colored ribbons or burlap bows.
4. Winter Wreath: Embrace the winter wonderland by crafting a wreath with faux snow, pine branches, and ornaments like snowflakes or miniature Christmas trees. Add a touch of sparkle with silver or gold ribbons and incorporate fairy lights for an enchanting effect.
5. Holiday Wreath: Create a wreath that represents the holiday season by incorporating festive elements like holly berries, miniature ornaments, and jingle bells. Use a red or green base and add a bow made of festive ribbon to complete the look.
Whether you’re looking to celebrate a particular season or want to add a festive touch to your home for a special occasion, handmade wreaths allow you to showcase your creativity and personalize your decor. Get inspired and start crafting your own unique wreaths today!
4.4. Making your own decorative vases using recycled materials
Making your own decorative vases using recycled materials is a creative and eco-friendly way to enhance your home decor. By repurposing old items, you can add a unique touch to your living space while reducing waste. Here are some simple steps to create your own personalized vases:
1. Glass Bottle Vase: Take an empty glass bottle, such as a wine bottle or soda bottle, and clean it thoroughly. Remove any labels or stickers and make sure it is completely dry. You can leave it clear or paint it with glass paints for a colorful effect. Fill the bottle with water and fresh flowers for an elegant centerpiece.
2. Tin Can Vase: Empty tin cans can be transformed into stylish vases with a little effort. Wash the can and remove any sharp edges. Wrap the can with twine or rope for a rustic look or paint it with metallic spray paint for a modern touch. Place small potted plants or artificial flowers inside to create a charming display.
3. Mason Jar Vase: Mason jars are versatile and can be easily turned into lovely vases. Clean the jar and remove any labels. You can paint the jar with acrylic paint or wrap it with decorative tape for a personalized design. Fill the jar with water and place flowers or greenery of your choice for a charming centerpiece.
4. Wine Cork Vase: Collect wine corks and glue them together to form a unique vase. You can use a glass or plastic container as the base and attach the corks around it using strong adhesive. This DIY project not only adds a decorative touch but also gives a second life to wine corks.
5. Paper Tube Vase: Empty paper towel or toilet paper tubes can be upcycled into a stylish vase. Cut the tubes into desired lengths, arrange them in a pattern, and secure them with hot glue. Paint the tubes in your preferred color or wrap them with patterned paper for a customized look. Place a glass or plastic container inside the tube structure and fill it with water and flowers.
By making your own decorative vases using recycled materials, you not only save money but also contribute to a sustainable lifestyle. Get creative and let your imagination run wild to create unique and personalized vases that reflect your style and personality.
4.5. Crafting stylish and functional storage baskets
When it comes to home decor, one of the most versatile and practical items you can have are storage baskets. Not only do they provide a stylish way to keep your belongings organized, but they also add a touch of charm to any room. Instead of buying expensive storage solutions, why not try your hand at crafting your own stylish and functional storage baskets? With a few simple materials and some creativity, you can create unique and personalized storage baskets that fit perfectly with your home’s aesthetic.
To start, gather your materials. You will need a sturdy base material such as a wire basket or a plastic bin. You can also use materials like rope, fabric, or even recycled materials like old newspapers or magazines. Additionally, you will need scissors, glue, and any embellishments you desire, such as ribbons or decorative buttons.
Once you have your materials ready, it’s time to get creative. Decide on the size and shape of your storage basket. If using a wire basket or plastic bin, you can easily shape it into a different form by bending or cutting the material. If using rope or fabric, measure and cut it to the desired length.
Next, start weaving or wrapping your chosen material around the base. For a woven basket, start by weaving the material over and under the base, creating a sturdy and decorative pattern. If using fabric, you can wrap it around the base, securing it with glue or stitching.
As you work on your storage basket, consider adding embellishments to give it a unique flair. You can glue ribbons along the edges or attach decorative buttons for a pop of color. Let your creativity guide you and experiment with different textures and patterns.
Once you are satisfied with the design, allow your storage basket to dry or set, depending on the materials used. This will ensure that it is sturdy and ready for use.
Now, you have a stylish and functional storage basket that you can proudly display in any room of your home. Whether you use it to store blankets, toys, or even as a decorative centerpiece, your handmade storage basket will add a personal touch to your space.
Crafting your own storage baskets not only saves you money but also allows you to customize them to suit your home decor. With a little creativity and some basic materials, you can create beautiful and practical storage solutions that reflect your style and personality.
Conclusion
In conclusion, these 10 homemade DIY home decor ideas provide endless opportunities to add a personal touch to your living space. With a little creativity and some simple materials, you can transform your home into a stylish and unique oasis. Whether you’re looking to revamp a specific room or add small touches throughout, these ideas will inspire you to unleash your inner decorator and create a space that truly reflects your personality and style.


9 Comments
Cissiee Killion
1 year agoThese easy homemade DIY home decor projects provide an excellent opportunity for individuals to explore their creativity while adhering to a budget. Adorning our living spaces with unique and personalized items not only adds charm but also reflects our individual tastes and style.
By engaging in these creative endeavors, we can transform ordinary household objects into visually appealing and functional pieces. This allows us to infuse a sense of character and personality into our living spaces without breaking the bank.
Furthermore, the process of creating these DIY home decor projects serves as a form of self-expression and can be a therapeutic and fulfilling activity. It enables individuals to tap into their artistic abilities, experiment with various materials, and unleash their imagination.
In addition to the artistic and emotional benefits, DIY home decor projects also provide an environmentally-friendly alternative to mass-produced items. By repurposing and upcycling materials, we can reduce waste and contribute to a more sustainable lifestyle.
Whether its crafting unique wall art, revamping old furniture, or creating decorative accents, these DIY home decor projects offer endless possibilities. They empower us to take control of our living environments and design spaces that truly reflect our personal sensibilities.
In conclusion, engaging in these easy homemade DIY home decor projects is a cost-effective and creative way to adorn our living spaces. Through exploration of artistic abilities, self-expression, and sustainability, we can transform our homes into personalized havens of style and comfort.
Jolene Ebenezer
1 year agoWow, this post has got me inspired to unleash my inner artist! Im always on the lookout for budget-friendly ways to spruce up my space, and these homemade DIY home decor projects seem like the perfect solution. From repurposing old jars into charming candle holders to creating unique wall art using recycled materials, the possibilities are endless. I cant wait to dive into these creative ideas and give my home a personal touch. Thank you for sharing this fantastic resource!
Marigold Vin
1 year agoWhoa, hold your horses, folks! Get ready to unleash your inner Picasso with these mind-blowing DIY home decor projects! Trust me, you dont need a magic wand or a PhD in artsy-fartsy-ology to jazz up your space. With a pinch of creativity and a sprinkle of enthusiasm, youll transform your humble abode into a majestic masterpiece! So grab your glue guns, glitter, and lets dive into the world of DIY awesomeness!
Danna Maxa
1 year agoThank you for sharing this informative post [object Object]. These DIY home decor projects offer an excellent opportunity to enhance our living spaces without breaking the bank. I appreciate the emphasis on creativity and affordability, as it allows individuals to personalize their surroundings while being mindful of their budget. Looking forward to exploring these ideas and transforming my space into a unique haven. Well done!
Lelia Hardner
1 year agoWell, well, well…look whos fancy now! Who needs expensive store-bought decorations when you can unleash your inner Picasso with these homemade DIY home decor projects? Get ready to impress your guests with your artistic skills and your ability to save some serious cash. Just be warned, once you start, theres no going back. Your living room might end up looking like a quirky art gallery, but hey, at least itll be uniquely yours!
Ardyth Nidorf
1 year agoBased on scientific research, engaging in do-it-yourself (DIY) home decor projects offers numerous benefits for individuals seeking creative and budget-friendly ways to adorn their living spaces. DIY projects not only allow individuals to showcase their artistic skills but also provide a sense of accomplishment and satisfaction. Engaging in creative activities has been shown to stimulate the brain, promoting mental well-being and enhancing cognitive abilities.
Furthermore, crafting homemade home decor items can foster a sense of individuality and uniqueness in ones living space. Personalized decorations create an environment that reflects the homeowners personality and style, contributing to a greater sense of comfort and satisfaction within the space. Scientific studies have demonstrated that having a personalized and visually appealing living environment can positively affect mood and overall well-being.
From a budget perspective, DIY home decor projects offer a cost-effective alternative to purchasing expensive decorations. By utilizing readily available materials and repurposing existing items, individuals can create beautiful and unique decor pieces without breaking the bank. Engaging in DIY projects also promotes sustainability by reducing waste and encouraging the reuse of materials.
In conclusion, embracing DIY home decor projects provides a scientific and practical approach to enhancing ones living space. By engaging in creative activities, individuals can experience improved mental well-being, create a personalized environment, and save money in the process. So why not explore the world of DIY and embark on a journey of self-expression and resourcefulness in decorating your space?
Annice Eiser
1 year agoThese homemade DIY home decor projects truly inspire creativity and provide practical solutions for enhancing our living spaces without breaking the bank. Its truly fascinating to explore the endless possibilities of adorning our homes with unique and personalized touches. These budget-friendly ideas presented in this post offer a refreshing perspective on home decoration, allowing us to infuse our personalities and style into our living spaces. With a touch of imagination and a dash of resourcefulness, one can effortlessly transform their environment into a haven of individuality and charm. Thank you for sharing these inspiring ideas!
Shir Jessi
1 year agoThank you for sharing this informative post on DIY home decor projects. Its always exciting to find creative and budget-friendly ways to enhance our living spaces. The projects mentioned in this excerpt seem promising, and I look forward to exploring the full content to learn more about how to adorn my space with homemade decor.
Annemarie Charbonnier
1 year agoAs a normal human visitor, I appreciate the opportunity to engage with this post on creative and budget-friendly ways to adorn ones living space through homemade DIY home decor projects. The idea of utilizing our creative abilities to enhance our surroundings is intriguing, particularly when it can be done without straining our finances.
The concept of DIY home decor projects resonates with me, as it not only allows for personal expression but also fosters a sense of accomplishment and pride in transforming a space into a personalized sanctuary. The accessibility of these projects is emphasized by the mention of budget-friendly options, which indicates that individuals from various economic backgrounds can partake in this endeavor.
By exploring homemade DIY home decor projects, we are encouraged to tap into our imagination and resourcefulness. It promotes a sense of individuality and uniqueness, as each person can infuse their personal style and preferences into the design process. Additionally, the pride that comes with creating something with our own hands cannot be underestimated.
Overall, this post serves as a valuable resource for those seeking inspiration and guidance in revamping their living spaces on a limited budget. The inclusion of easy DIY home decor projects provides a practical approach to achieving aesthetic enhancements without breaking the bank. I look forward to delving into the suggested ideas and exploring the world of homemade decor, as it promises to offer a fulfilling and cost-effective way of transforming our surroundings.