
Looking to spruce up your living space without breaking the bank? In this article, we will explore 10 amazing homemade DIY home decor ideas that will add a touch of creativity and style to your home. Whether you’re a seasoned crafter or a beginner, these ideas are easy to execute and will give your space a unique and personalized look. Get ready to unleash your inner artist and transform your home into a cozy and inviting haven with these budget-friendly decor projects.
- 1. Introduction
- 1.1. Why choose homemade DIY home decor?
- 1.2. Benefits of DIY home decor
- 1.3. Materials and tools needed for DIY home decor
- 1.4. Safety precautions for DIY home decor
- 1.5. Tips for successful DIY home decor projects
- 2. Wall Decor Ideas
- 2.1. Creating a gallery wall with personal photos
- 2.2. DIY wall art using recycled materials
- 2.3. Decorative wall hangings using fabric and embroidery
- 2.4. Wall-mounted shelves for storage and display
- 2.5. Painting techniques for unique wall designs
- 3. Furniture Makeover Ideas
- 3.1. Refurbishing old furniture with paint and new hardware
- 3.2. Repurposing wooden crates into functional furniture
- 3.3. Upcycling old doors into stylish tables
- 3.4. Creating personalized upholstered headboards
- 3.5. Restoring antique furniture with DIY techniques
- 4. Creative Lighting Solutions
1. Introduction
In this article, we will explore 10 homemade DIY home decor ideas that you can easily create to add a personal touch to your living space. Decorating your home can be a fun and creative way to express your style while also saving money. Whether you’re a seasoned DIY enthusiast or just starting out, these ideas will inspire you to transform your home into a unique and cozy haven. From repurposing old items to creating your own artwork, there’s something for everyone in this list. Let’s dive in and discover the endless possibilities of DIY home decor!
1.1. Why choose homemade DIY home decor?
When it comes to decorating our homes, many of us are often drawn towards store-bought items and pre-made decor. However, there is a growing trend in choosing homemade DIY home decor. This approach to decorating offers numerous benefits that make it an appealing option for many individuals.
One of the main reasons to choose homemade DIY home decor is the opportunity to unleash your creativity. By making your own decor, you have the freedom to design and customize items according to your personal style and preferences. This allows you to create a unique and personalized space that truly reflects your personality.
Another advantage of homemade DIY home decor is the cost-effectiveness. Store-bought decor can often be quite expensive, especially if you have a specific theme or style in mind. By opting for homemade decor, you can save money by utilizing materials that are easily accessible and affordable. Additionally, DIY projects provide a great way to repurpose or upcycle items, reducing waste and promoting sustainability.
In addition to being cost-effective, homemade DIY home decor also offers a sense of accomplishment and satisfaction. Completing a DIY project successfully can be incredibly fulfilling, as you get to see the tangible results of your efforts. It can also be a great way to engage in a productive and enjoyable hobby, allowing you to relax and de-stress while creating something beautiful.
Lastly, homemade DIY home decor allows for flexibility and customization. Unlike store-bought items that often come in standard sizes and designs, DIY projects can be tailored to fit your specific needs and preferences. Whether you are looking to create a statement piece or add small touches to enhance the overall aesthetic of your home, DIY decor gives you the freedom to experiment and adapt to your space.
In conclusion, choosing homemade DIY home decor offers a range of benefits that make it a worthwhile endeavor. From unleashing your creativity and saving money to experiencing a sense of accomplishment and enjoying flexibility, DIY projects can transform your living space into a unique and personalized haven.
1.2. Benefits of DIY home decor
DIY home decor has become increasingly popular in recent years as people are looking for creative and affordable ways to decorate their homes. There are numerous benefits to taking on DIY projects for home decor. Firstly, it allows individuals to express their personal style and creativity. By making their own decorations, people can design their living spaces to reflect their unique taste and preferences. DIY home decor also offers a sense of accomplishment and satisfaction. Completing a project with your own hands can be incredibly rewarding and can boost your self-confidence. Additionally, DIY home decor is often much more cost-effective compared to buying pre-made decorations from stores. With some basic materials and a little bit of creativity, you can transform ordinary items into beautiful and personalized decor pieces. Moreover, DIY projects provide an opportunity to upcycle and repurpose old or unused items. By giving a new life to these objects, you not only contribute to the environment by reducing waste but also create one-of-a-kind decor items with sentimental value. Lastly, engaging in DIY home decor can be a fun and enjoyable activity for individuals or even families. It allows you to bond with loved ones while working together on creative projects. Overall, the benefits of DIY home decor are plenty, making it a popular choice for those who want to add a personal touch and style to their living spaces.
1.3. Materials and tools needed for DIY home decor
When it comes to DIY home decor, having the right materials and tools is essential for a successful project. Whether you’re a beginner or an experienced DIY enthusiast, having the right supplies will make your homemade creations easier and more enjoyable to create. In this section, we will discuss the various materials and tools needed for DIY home decor projects.
To start with, you’ll need basic tools such as a hammer, screwdriver set, pliers, measuring tape, and a level. These tools will come in handy for various tasks like hanging artwork, assembling furniture, or installing shelves. It’s always a good idea to invest in quality tools that will last and provide accurate results.
Next, you’ll need a variety of materials depending on the specific project you’re working on. Common materials for DIY home decor include paint, brushes, sandpaper, adhesive, and various types of wood. These materials can be easily found at your local hardware stores or online.
If you’re into upcycling or repurposing items, you may need additional materials such as old furniture, fabrics, or glass jars. These items can be transformed into unique and personalized decor pieces with a little bit of creativity and some DIY skills.
Lastly, don’t forget about safety equipment. Depending on the project, you may need gloves, safety goggles, a mask, or ear protection. It’s important to prioritize safety while working on any DIY project.
Now that we have discussed the essential materials and tools needed for DIY home decor, let’s dive into some exciting homemade ideas to inspire your creativity!
1.4. Safety precautions for DIY home decor
When it comes to DIY home decor projects, safety should always be a top priority. Whether you are a seasoned DIY enthusiast or just starting out, it is important to take necessary precautions to ensure your well-being and the well-being of those around you. This section will provide some essential safety measures that you should keep in mind before diving into your homemade DIY home decor projects.
1. Wear protective gear: Before you start any DIY project, make sure to wear appropriate protective gear such as safety goggles, gloves, and a dust mask. This will protect your eyes, hands, and respiratory system from any potential hazards.
2. Use the right tools: Always use the correct tools for the job. Using improper tools can not only lead to poor results but also increase the risk of accidents. Ensure that your tools are in good condition and handle them with care.
3. Work in a well-ventilated area: If you are working with paints, adhesives, or any other chemicals, ensure that you are in a well-ventilated area. Proper ventilation will help prevent the inhalation of harmful fumes.
4. Follow instructions and guidelines: Read and understand the instructions and guidelines provided with your DIY project materials. Following them carefully will help you avoid any mishaps and achieve the desired results.
5. Keep children and pets away: When undertaking DIY home decor projects, it is crucial to keep children and pets away from your work area. Sharp tools, chemicals, and other materials can pose a danger to their safety.
By taking these safety precautions, you can enjoy the process of creating beautiful homemade DIY home decor while ensuring a safe environment for yourself and others.
1.5. Tips for successful DIY home decor projects
DIY home decor projects are a great way to personalize your living space and add a touch of creativity to your home. Not only do they allow you to express your unique style, but they can also save you money compared to buying expensive home decor items. Whether you’re a seasoned crafter or a beginner, these tips will help ensure the success of your DIY home decor projects.
1. Plan and gather inspiration: Before starting any DIY project, it’s important to have a clear plan in mind. Browse through magazines, websites, and social media platforms to gather inspiration and ideas. Create a mood board or a Pinterest board to organize your thoughts and visualize the end result.
2. Start small: If you’re new to DIY home decor, it’s best to start with smaller projects that are more manageable. This will give you a chance to practice your skills and build your confidence before taking on larger and more complex projects.
3. Use quality materials: Investing in good quality materials is crucial for the success of your DIY home decor projects. Cheap and low-quality materials may not provide the desired results and can lead to disappointment. Research and source the best materials within your budget.
4. Take measurements: Before purchasing any materials or starting a project, make sure to take accurate measurements of the space where the decor item will be placed. This will help you determine the right size and proportions for your project.
5. Experiment with colors and patterns: DIY home decor allows you to play with colors and patterns to create unique and personalized pieces. Don’t be afraid to mix and match different colors, textures, and patterns to add visual interest to your home.
6. Pay attention to details: The little details can make a big difference in the final outcome of your DIY home decor projects. Take the time to pay attention to small details like trimmings, finishes, and hardware to give your project a polished and professional look.
7. Practice patience: DIY projects can be time-consuming and require patience. Take your time and enjoy the process of creating something with your own hands. Remember, the end result will be worth the effort.
By following these tips, you’ll be well-equipped to embark on your DIY home decor journey and create beautiful and personalized pieces for your home.
2. Wall Decor Ideas
One of the easiest ways to add a personal touch to your home is through wall decor. By creating your own DIY wall decor, you can showcase your creativity and style while saving money. Here are 10 homemade DIY home decor ideas for adding a unique touch to your walls:
1. Gallery Wall: Create a gallery wall by hanging a collection of your favorite photos, artwork, and prints. Mix and match different sizes and frames to create an eclectic display.
2. Paper Flower Wall Art: Use colorful craft paper to create beautiful paper flowers. Arrange them on a canvas or frame them to create a stunning piece of wall art.
3. Macrame Wall Hanging: Learn the art of macrame and create a bohemian-inspired wall hanging. Use different knots and patterns to add texture and visual interest.
4. Painted Wall Mural: Let your creativity run wild by painting a mural directly on your wall. Choose a theme or design that reflects your personality and style.
5. Floating Shelves: Install floating shelves on your wall to display small decor items, such as plants, books, and trinkets. Arrange them in a visually appealing way.
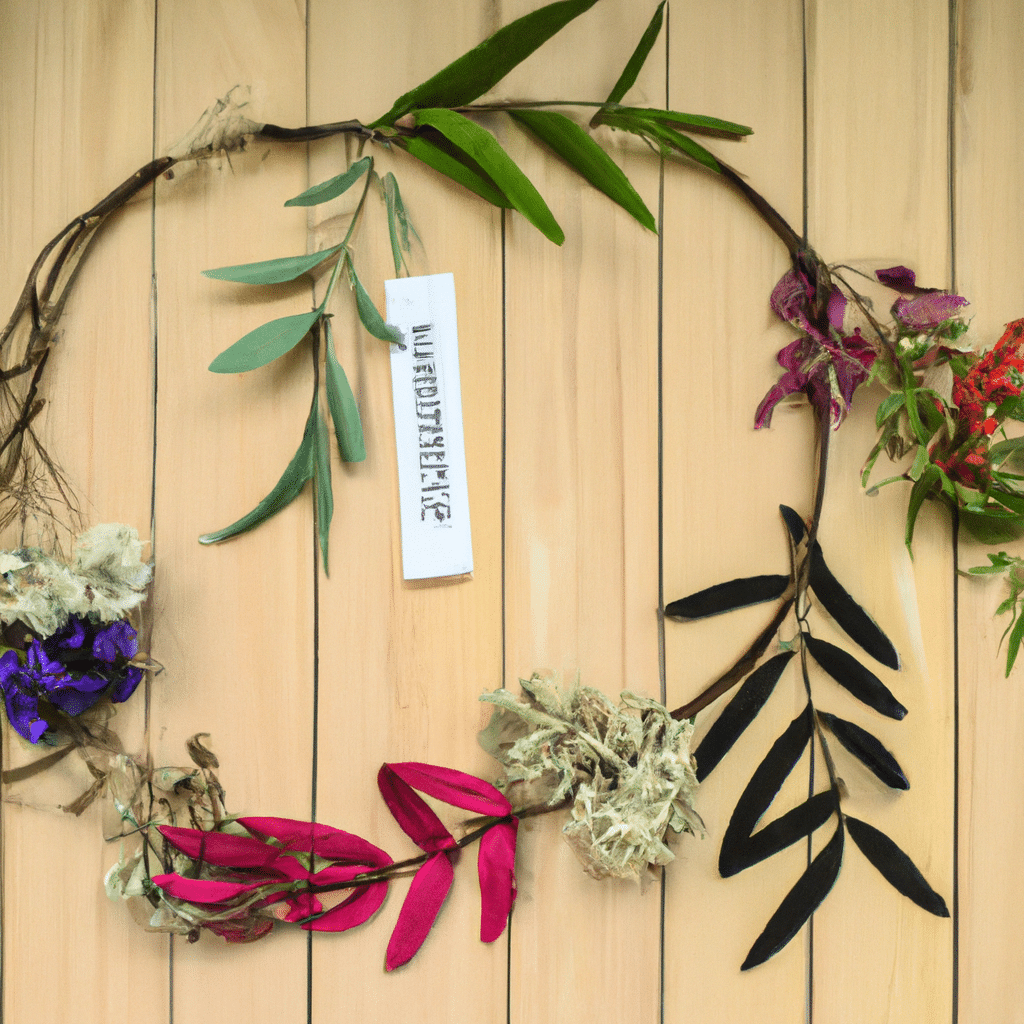
6. Fabric Wall Hangings: Use fabric scraps or old textiles to create unique wall hangings. Cut out different shapes and patterns, and attach them to a wooden dowel or branch.
7. Geometric Wall Art: Create geometric patterns using tape or stencils, and paint them on your wall. This simple yet stylish wall decor idea can instantly transform a room.
8. Mirrors: Hang mirrors of different shapes and sizes on your wall to add depth and light to a room. They can also create an illusion of a larger space.
9. Wall Decals: Use removable wall decals to add a temporary design element to your walls. They come in various designs and can be easily applied and removed.
10. String Art: Create unique designs by hammering nails into a wooden board or canvas and wrapping colorful strings around them. This DIY wall decor idea adds a pop of color and texture to any space.
These homemade DIY home decor ideas are not only budget-friendly but also allow you to showcase your personal style and creativity. Get inspired and start transforming your walls into works of art!
2.1. Creating a gallery wall with personal photos
Creating a gallery wall with personal photos is a great way to add a personal touch to your home decor. It allows you to showcase your favorite memories and create a unique and meaningful display. Here are some steps to help you create a stunning gallery wall with your personal photos:
1. Choose the Right Wall: Select a wall in your home that will serve as the perfect backdrop for your gallery. Consider factors such as lighting, size, and visibility.
2. Select Your Photos: Go through your collection of personal photos and choose the ones that hold special meaning to you. Whether it’s a family portrait, a vacation snapshot, or a candid moment, pick photos that evoke happy memories.
3. Plan the Layout: Before hanging your photos, plan the layout on the floor or a large table. Arrange the photos in different configurations until you find a layout that you love. Consider mixing different sizes and orientations for visual interest.
4. Prepare the Frames: If your photos are not already framed, select frames that complement your home decor style. You can choose matching frames for a cohesive look or mix and match for a more eclectic vibe.
5. Hang the Photos: Once you have your layout and frames ready, start hanging the photos on the wall. Use a level and measuring tape to ensure that the photos are straight and evenly spaced. You can use nails, picture hooks, or adhesive strips, depending on the weight of your frames.
6. Add Personal Touches: To enhance the gallery wall, consider adding personal touches such as decorative objects, artwork, or even small shelves to display mementos or trinkets.
Creating a gallery wall with personal photos is a fun and creative way to decorate your walls while showcasing your cherished memories. It adds a personal touch to your home and makes it truly unique.
2.2. DIY wall art using recycled materials
DIY wall art using recycled materials is a great way to add a personal touch to your home decor. Not only does it allow you to express your creativity, but it also promotes sustainability by repurposing items that would otherwise end up in the landfill.
There are countless possibilities when it comes to creating wall art using recycled materials. One idea is to use old magazines or newspapers to create a collage. Cut out interesting images, words, or phrases and arrange them on a piece of cardboard or canvas. You can then frame it or simply hang it on the wall for a unique and eye-catching display.
Another option is to repurpose old wooden pallets. These can be easily transformed into rustic wall art by painting them in different colors or adding stenciled designs. Arrange the pallets in various patterns or shapes to create a visually appealing focal point in any room.
If you have a collection of wine corks lying around, why not turn them into a piece of wall art? Glue the corks together in a desired pattern or shape, such as a heart or initials, and mount them on a wooden board. This not only looks visually interesting but also adds a touch of sophistication to your walls.
Old window frames can also be repurposed into unique wall decor. Remove the glass panes and replace them with mirrors, chalkboards, or even fabric for a personalized touch. Hang multiple frames in different sizes and shapes for an eclectic and charming display.
Lastly, consider using old vinyl records to create a statement piece for your walls. Heat the record in the oven and then mold it into a desired shape, such as a bowl or flower. Once cooled, mount it on the wall using adhesive or display it on a stand for a retro-inspired art piece.
With a little creativity and resourcefulness, you can easily transform recycled materials into stunning wall art. Not only will it add a unique touch to your home decor, but it will also showcase your commitment to sustainable living.
2.3. Decorative wall hangings using fabric and embroidery
Decorative wall hangings can add a touch of elegance and personality to any space. Using fabric and embroidery, you can create unique and beautiful wall decor pieces that will instantly transform the look of your home. Whether you are a skilled seamstress or just starting out with embroidery, these DIY ideas are perfect for unleashing your creativity.
Fabric wall hangings are a versatile option that allows you to play with different colors, patterns, and textures. You can choose to use a single fabric or mix and match various fabrics to create a visually appealing design. Consider using fabrics with intricate prints or bold colors to make a statement.
Embroidery adds a charming and intricate detail to wall hangings. You can opt for simple embroidery stitches to create patterns or go for more complex designs. From floral motifs to geometric patterns, the possibilities are endless. Use different types of threads and stitches to add depth and dimension to your wall decor.
To create fabric and embroidery wall hangings, start by selecting a piece of fabric as your base. Cut it into your desired shape and size, making sure to leave some extra fabric for hemming. Next, sketch or trace your chosen design onto the fabric using a pencil or disappearing ink pen. Once you have your design in place, start embroidering using a needle and thread. You can experiment with different stitches to achieve the desired effect.
Once you have finished embroidering, trim any excess fabric and hem the edges to give your wall hanging a neat and finished look. Finally, attach a hanging mechanism to the back of your wall hanging, such as a wooden dowel or a decorative rod, and hang it on your wall.
Decorative wall hangings made with fabric and embroidery can add a personal touch to your home decor. They are not only visually appealing but also serve as a reflection of your creativity and style. So, gather your materials, unleash your imagination, and create stunning wall decor pieces that will impress your guests and make your space truly unique.
2.4. Wall-mounted shelves for storage and display
Wall-mounted shelves are a great addition to any home decor, providing both storage and display solutions. These versatile shelves not only help you declutter your space but also allow you to showcase your favorite decorative items. Whether you have a small apartment or a spacious house, wall-mounted shelves can be easily installed and customized to suit your needs.
One of the benefits of wall-mounted shelves is that they save floor space, making them ideal for smaller rooms. You can use them to store books, photo frames, plants, or any other items you want to keep within easy reach. By utilizing vertical space, these shelves help maximize storage without sacrificing style.
Moreover, wall-mounted shelves can be a statement piece on their own. With various designs and materials available, you can find shelves that complement your existing decor or create a bold contrast. Whether you prefer rustic wooden shelves, sleek metal ones, or minimalist floating shelves, there is an option for every style.
In addition to their practicality, wall-mounted shelves also serve as a decorative element. You can use them to showcase your collection of art pieces, family photos, or unique trinkets. By arranging the items creatively, you can create a visually appealing display that adds personality to your space.
Overall, wall-mounted shelves are an excellent choice for both storage and display purposes. They offer a functional solution for organizing your belongings while enhancing the aesthetic appeal of your home. Whether you need extra storage in your living room, bedroom, kitchen, or hallway, wall-mounted shelves are a versatile and stylish option to consider.
2.5. Painting techniques for unique wall designs
When it comes to creating a unique and visually appealing wall design, painting techniques can make all the difference. With a little creativity and some DIY skills, you can transform your walls into stunning works of art. Here are some painting techniques to consider for your next wall decor project:
1. Color Blocking: This technique involves using contrasting colors to create bold and geometric shapes on your walls. By painting different sections of the wall in different colors, you can add depth and visual interest to your space.
2. Stenciling: Stenciling is a popular technique that allows you to create intricate patterns and designs on your walls. You can use pre-made stencils or create your own using cardboard or plastic sheets. Simply secure the stencil to the wall and apply paint using a brush or sponge.
3. Ombre Effect: The ombre effect involves blending different shades of the same color to create a gradient effect on your walls. Start by applying the darkest shade at the bottom and gradually lighten the color as you move up the wall. This technique can add a subtle and elegant touch to any room.
4. Textured Finishes: Adding texture to your walls can create a unique and tactile design. You can achieve this by using techniques like sponging, ragging, or even applying joint compound with a trowel. Experiment with different textures to find the one that best suits your style.
5. Trompe-l’oeil: This technique involves creating realistic illusions on your walls, making them appear as though they have depth or are three-dimensional. You can paint a faux window, bookshelf, or even a mural to add a whimsical touch to your space.
By exploring these painting techniques, you can unleash your creativity and bring a touch of uniqueness to your home decor. Whether you prefer bold and modern designs or subtle and elegant finishes, there is a painting technique for every style and taste.
3. Furniture Makeover Ideas
Are you looking to give your home a fresh new look without breaking the bank? Furniture makeovers are a great way to transform your space and add a personal touch to your decor. With a little creativity and some DIY skills, you can easily turn old, worn-out furniture into stylish statement pieces. Here are 10 homemade DIY home decor ideas to inspire your next furniture makeover project.
1. Painted Dresser
Give an old dresser a new lease on life by giving it a fresh coat of paint. Choose a bold, vibrant color to make a statement or opt for a soft pastel shade for a more subtle look. Don’t forget to sand and prime the dresser before painting to ensure a smooth and long-lasting finish.
2. Upholstered Headboard
Create a luxurious focal point in your bedroom by upholstering your headboard. Choose a fabric that complements your existing decor and add some padding for extra comfort. This DIY project is a great way to add a touch of elegance to your space.
3. Repurposed Coffee Table
Turn an old coffee table into a unique and functional piece for your living room. Consider adding a fresh coat of paint, glass top, or even a mosaic design to give it a fresh new look. You can also repurpose an old door or window as a tabletop for a truly one-of-a-kind piece.
4. Decoupage Nightstand
Add some personality to your bedroom with a decoupage nightstand. Choose your favorite patterned paper or fabric and adhere it to the surface of the nightstand using decoupage glue. Finish off with a coat of varnish for a polished and durable finish.
5. Stenciled Cabinet
Give your kitchen or bathroom cabinets a stylish makeover with stencils. Choose a design that suits your taste and carefully apply the stencil to the cabinet doors. Paint over the stencil and remove it to reveal a beautifully stenciled design.
6. Distressed Side Table
Create a shabby chic look by distressing a side table. Sand down the edges and corners to give it a worn-out appearance. You can also add some decorative accents like vintage knobs or a weathered finish for an added touch of charm.
7. Fabric-Covered Ottoman
Transform an old and worn-out ottoman into a cozy and stylish piece with fabric. Choose a fabric that matches your decor and carefully cover the ottoman, securing it with a staple gun. Add some decorative trim or buttons for a polished look.
8. Painted Bookshelf
Give your bookshelf a pop of color by painting it. Choose a bright and bold color to make it a statement piece in your living room or go for a more subdued hue for a subtle look. Don’t forget to sand and prime the bookshelf before painting for a professional finish.
9. Chalkboard Table
Turn a plain table into a versatile piece by adding a chalkboard surface. Paint the tabletop with chalkboard paint and let it dry. You can then use chalk to write messages, draw doodles, or even create a menu for your next gathering.
10. Reupholstered Dining Chairs
Give your dining room a fresh new look by reupholstering your dining chairs. Choose a fabric that is durable and easy to clean, and carefully remove the old upholstery. Secure the new fabric in place with a staple gun and trim any excess for a neat and polished finish.
These furniture makeover ideas are a great way to unleash your creativity and add a personal touch to your home decor. Whether you’re a seasoned DIYer or just starting out, these projects are sure to inspire you to transform your space.
3.1. Refurbishing old furniture with paint and new hardware
Refurbishing old furniture with paint and new hardware is a fantastic way to give your home a fresh new look without breaking the bank. Whether you have outdated pieces that need a modern touch or simply want to breathe new life into worn-out furniture, these furniture makeover ideas will inspire your creativity. With a little time and effort, you can transform old and tired furniture into stylish and unique pieces that will enhance your home decor.
One of the easiest and most cost-effective ways to refurbish old furniture is by using paint. A fresh coat of paint can instantly revitalize a worn-out piece and completely change its appearance. Choose a color that complements your existing decor or go bold with a vibrant hue for a statement piece. Remember to properly prepare the furniture surface before painting by sanding it down and priming if necessary.
In addition to paint, updating the hardware on your furniture can make a significant difference. Swapping out old knobs, handles, or pulls with new ones can instantly give a piece a modern and stylish look. Consider choosing hardware that matches the overall style of the furniture or opt for contrasting pieces to create a unique and eye-catching design.
Another idea for refurbishing old furniture is to experiment with different painting techniques. From distressed finishes to ombre effects, there are endless possibilities to add texture and visual interest to your pieces. You can also try stenciling or adding decorative patterns for a personalized touch. Don’t be afraid to get creative and let your imagination run wild.
If you’re feeling adventurous, consider repurposing old furniture for a completely different function. Turn an old dresser into a chic bathroom vanity or transform a wooden door into a rustic dining table. With a little ingenuity, you can give new life to old pieces and create unique and functional items for your home.
Refurbishing old furniture with paint and new hardware is not only a budget-friendly way to update your home decor, but it also allows you to unleash your creativity and add a personal touch to your space. So, grab your paintbrushes, gather some inspiration, and start transforming your old furniture into stunning pieces that will impress everyone who enters your home.
3.2. Repurposing wooden crates into functional furniture
Repurposing wooden crates into functional furniture is a great way to add a touch of creativity and uniqueness to your home decor. These versatile crates can be transformed into various pieces of furniture that are not only functional but also stylish. Here are some furniture makeover ideas using wooden crates:
1. Crate Coffee Table: Stack a few wooden crates on top of each other and secure them with screws or nails to create a rustic coffee table. You can leave the crates as they are or paint them in your preferred color to match your decor.
2. Crate Shelving Unit: Attach wooden crates to the wall to create a unique shelving unit. You can arrange the crates in different ways to create a customized look. Use them to display books, plants, or other decorative items.
3. Crate Nightstand: Place a wooden crate next to your bed and use it as a nightstand. You can add a wooden board on top of the crate for extra surface space. Decorate it with a lamp, alarm clock, and your favorite books.
4. Crate Storage Bench: Combine multiple wooden crates to create a storage bench. Attach them together and add a cushion on top for seating. This is a perfect solution for small spaces as it provides both seating and storage.
5. Crate Wine Rack: Turn a wooden crate on its side and add dividers to create a unique wine rack. You can stain or paint the crate to match your kitchen or dining room decor.
These are just a few ideas to inspire you to repurpose wooden crates into functional furniture. Get creative and think outside the box to transform these simple crates into beautiful and practical pieces for your home.
3.3. Upcycling old doors into stylish tables
Upcycling old doors into stylish tables is a creative and eco-friendly way to give new life to discarded furniture. With a little bit of DIY skills and some imagination, you can transform an old door into a unique and stylish table that will become a centerpiece in your home.
First, start by finding an old door that suits your style and aesthetic. Look for doors with interesting designs, textures, or materials that will add character to your table. You can often find old doors at salvage yards, thrift stores, or even online marketplaces.
Next, prepare the door for transformation by cleaning it thoroughly and removing any hardware or unnecessary elements. Sand the surface to create a smooth and even base for painting or staining.
Once the door is prepped, you can get creative with the finishing touches. Consider painting the door in a color that complements your home decor or applying a stain to enhance the natural wood grain. You can also add decorative elements such as stencils, decals, or even mosaic tiles to make your table truly one-of-a-kind.
To transform the door into a functional table, you’ll need to add legs or a base. You can purchase pre-made table legs from a hardware store or get creative by repurposing other items such as old furniture legs or even metal pipes. Attach the legs securely to the door, making sure they are level and stable.
Once your upcycled door table is complete, you can use it in various ways. It can serve as a dining table, a coffee table, a side table, or even a desk, depending on the size and design of the door. The table will not only be a functional piece of furniture but also a conversation starter and a testament to your creativity and sustainability.
Upcycling old doors into stylish tables is just one of the many furniture makeover ideas you can try to add a personal touch to your home decor. By repurposing old and discarded items, you not only save money but also contribute to reducing waste and promoting a more sustainable lifestyle.
3.4. Creating personalized upholstered headboards
Creating personalized upholstered headboards is a fantastic way to add a touch of luxury and style to your bedroom. With just a few materials and some basic sewing skills, you can transform an ordinary headboard into a beautiful and customized piece of furniture.
To begin, choose a fabric that complements the overall theme and color scheme of your bedroom. Consider the texture, pattern, and durability of the fabric to ensure it will withstand daily use.
Next, measure and cut the fabric according to the size of your headboard. Make sure to leave some extra fabric for wrapping around the edges and securing it to the back of the headboard.
If your headboard has any existing upholstery, remove it carefully and inspect the padding. Replace or add padding as needed to ensure a comfortable and plush finish.
Now, it’s time to attach the fabric to the headboard. Start by securing one side of the fabric to the back of the headboard using a staple gun. Pull the fabric taut and continue stapling along the edges, making sure to smooth out any wrinkles or creases.
Once all the fabric is secured, trim any excess fabric and neatly fold and staple the corners to create a clean and professional finish.
Finally, attach the upholstered headboard back onto your bed frame or wall, depending on the type of headboard you have. Admire your beautiful creation and enjoy the luxurious feel it adds to your bedroom.
Creating personalized upholstered headboards allows you to express your creativity and customize your bedroom decor. It’s a DIY project that not only enhances the aesthetics of your space but also provides a comfortable and stylish backdrop for your bed.
3.5. Restoring antique furniture with DIY techniques
Restoring antique furniture can be a rewarding and cost-effective way to breathe new life into your home decor. With some DIY techniques, you can transform worn-out pieces into stunning focal points. Here are some ideas for restoring antique furniture:
1. Cleaning and Repairing: Start by cleaning the furniture with a mild soap and water solution. Remove any dirt or grime gently using a soft cloth or sponge. Repair any loose joints or broken parts before proceeding with further restoration steps.
2. Stripping and Sanding: If the furniture has layers of old paint or varnish, stripping them off can reveal the beautiful wood underneath. Use a chemical stripper following the manufacturer’s instructions. After stripping, sand the surface to remove any remaining residue and to smooth out imperfections.
3. Staining and Finishing: Choose a stain color that complements the style of your furniture. Apply it evenly using a brush or cloth, following the wood grain. Allow the stain to dry completely before applying a protective finish. You can use varnish, lacquer, or wax for a glossy or matte look.
4. Upholstering and Reupholstering: Consider reupholstering the furniture if the fabric is worn out or outdated. Remove the old upholstery, repair the padding if necessary, and choose a new fabric that matches your decor. Use a staple gun or upholstery tacks to secure the new fabric in place.
5. Hardware Replacement: Sometimes, antique furniture might have damaged or missing hardware. Replace these with period-appropriate or matching hardware to maintain the authenticity of the piece. Clean and polish the new hardware before attaching it to the furniture.
By following these DIY techniques, you can restore antique furniture and add a touch of vintage charm to your home. Enjoy the process of transforming old pieces into unique treasures that reflect your personal style.
4. Creative Lighting Solutions
When it comes to home decor, lighting plays a crucial role in creating the right ambiance and atmosphere. Instead of sticking to traditional lighting options, why not get creative and try some homemade DIY lighting solutions? Not only will these ideas add a unique touch to your home, but they are also cost-effective and fun to make. Here are 10 creative lighting ideas that you can easily incorporate into your home decor:
1. Mason Jar Chandeliers: Transform ordinary mason jars into stunning chandeliers by attaching them to a wooden plank and adding string lights inside. Hang them above your dining table or in the living room for a rustic and charming look.
2. Wine Bottle Lamps: Empty wine bottles can be repurposed into elegant lamps. Simply insert a string of fairy lights into the bottle and seal it with a cork or a cap. Place these lamps on shelves or side tables to create a cozy and whimsical vibe.
3. Paper Lanterns: Create your own paper lanterns using colorful craft paper or old book pages. Fold the paper into a cylindrical shape and attach a bulb or a tea light inside. Hang these lanterns from the ceiling or place them on tables for a soft and enchanting glow.
4. Vintage Teacup Sconces: If you have vintage teacups lying around, why not turn them into unique wall sconces? Drill a small hole at the bottom of the cup to accommodate a bulb holder. Attach these teacup sconces to your walls for a vintage-inspired and elegant lighting option.
5. Twig Lights: Bring the beauty of nature indoors by making twig lights. Collect small twigs or branches and wrap them around a string of LED lights. Place these twig lights in a vase or hang them on the wall to add a rustic and whimsical touch to your home.
6. Rope Pendant Lights: Give your home decor a nautical vibe with rope pendant lights. Dip lengths of rope into a mixture of glue and water, shape them into pendant shapes, and let them dry. Insert a bulb or a light cord into the rope pendants and hang them above your kitchen island or dining table.
7. Lace Lampshades: Add a touch of elegance to your home with lace lampshades. Apply fabric stiffener to lace fabric and drape it over a balloon. Once the fabric is dry, pop the balloon and attach the lace lampshade to a bulb holder. Hang these lampshades in your bedroom or living room for a romantic and delicate lighting effect.
8. Tin Can Lanterns: Upcycle tin cans into beautiful lanterns by punching holes in them to create patterns or designs. Place a tea light or a small candle inside the can and enjoy the mesmerizing patterns that these lanterns create when lit. These tin can lanterns can be hung or placed on tables for a rustic and cozy ambiance.
9. Bottle Cap Marquee Lights: Gather colorful bottle caps and transform them into marquee lights. Drill small holes in the center of each bottle cap and insert LED lights through them. Arrange these bottle cap marquee lights to spell out words or create shapes, and hang them on your walls for a playful and eye-catching display.
10. Geometric Pendant Lights: Add a modern and stylish element to your home with geometric pendant lights. Create geometric shapes using wooden dowels or metal wire and attach them together to form a pendant structure. Insert a light bulb or a light cord through the structure and hang these geometric pendant lights above your study desk or in the hallway for a contemporary and artistic look.
These homemade DIY lighting solutions are not only budget-friendly but also allow you to showcase your creativity and personal style. So, unleash your inner artist and brighten up your home with these unique and charming lighting ideas!
4.1. DIY pendant lights using mason jars or wine bottles
DIY pendant lights using mason jars or wine bottles are a creative and cost-effective way to add a unique touch to your home decor. With just a few simple materials, you can transform ordinary household items into stunning lighting fixtures that will instantly elevate the ambiance of any room.
To make a mason jar pendant light, start by removing the lid and inserting a pendant light kit through the opening. Secure the kit in place by attaching the necessary hardware. You can choose to leave the mason jar as is for a rustic look, or you can paint it in your desired color for a more personalized touch. Hang the pendant light from the ceiling using a sturdy chain or rope, and voila! You have a charming and eye-catching lighting fixture.
If you prefer wine bottles, you can repurpose them into pendant lights as well. Begin by cleaning and removing any labels from the bottle. Next, using a glass cutter, carefully score the bottle at your desired height. Apply heat to the scored line using a candle or a heat gun, and then quickly cool it with cold water. This will cause the bottle to break cleanly along the scored line. Insert a pendant light kit through the top of the bottle, secure it in place, and attach a cord or chain for hanging. Arrange a cluster of these wine bottle pendant lights at varying heights to create a stunning focal point in your living space.
DIY pendant lights using mason jars or wine bottles offer a fun and creative way to brighten up your home. They not only provide beautiful lighting but also serve as unique decorative elements. So, why not unleash your creativity and give these homemade lighting solutions a try?
4.2. Decorative lampshade makeover ideas
Decorative lampshade makeover ideas can transform the look and feel of any room in your home. Whether you want to add a touch of elegance or a pop of color, there are endless possibilities to explore. One creative lighting solution is to give your old lampshades a fresh makeover. Here are some DIY ideas to inspire you:
1. Fabric-Wrapped Lampshade: Select a fabric that matches your home decor and wrap it around the lampshade. Secure the fabric with glue or double-sided tape for a seamless finish.
2. Painted Lampshade: Get creative with paint by adding patterns, designs, or even a mural to your lampshade. Use stencils or freehand techniques to achieve the desired look.
3. Ribbon Embellished Lampshade: Add a touch of glamour by attaching ribbons, lace, or trimmings to the edges of your lampshade. Experiment with different colors and textures for a unique and personalized touch.
4. Decoupage Lampshade: Cut out images or patterns from magazines or decorative paper and glue them onto your lampshade. Seal with decoupage glue for a polished and customized look.
5. Tassel Accented Lampshade: Attach tassels or fringe to the bottom edge of your lampshade for a bohemian or eclectic vibe. Choose tassels that complement your overall decor for a cohesive look.
These decorative lampshade makeover ideas are budget-friendly and allow you to unleash your creativity. With a little time and effort, you can transform your plain lampshades into stunning pieces that enhance your home decor.
4.3. Creating a unique chandelier with found objects
Creating a unique chandelier with found objects
Are you looking to add a touch of creativity and uniqueness to your home decor? Why not try creating a one-of-a-kind chandelier using found objects? Not only will it add a stunning focal point to any room, but it will also showcase your artistic flair and resourcefulness.
To begin, start by scouring flea markets, thrift stores, and even your own attic for interesting and eye-catching objects. Look for items such as vintage teacups, old silverware, colorful glass bottles, or even discarded bicycle parts. The possibilities are endless!
Once you have gathered your found objects, it’s time to get creative. Think about how you can arrange and assemble these items to form a visually captivating chandelier. You may want to experiment with different combinations and configurations until you find the perfect design.
Next, consider how you will attach the objects together. Depending on the materials used, you can use wire, strings, or even strong adhesive to secure the pieces in place. Keep in mind the overall weight and balance of the chandelier to ensure it hangs safely.
Finally, don’t forget about the lighting aspect. Choose a suitable light fixture or pendant that will complement the style and theme of your chandelier. Opt for warm, soft lighting to create a cozy and inviting ambiance in your space.
Once you have completed your unique chandelier, find the perfect spot to hang it and watch as it becomes a conversation starter and a true work of art in your home. So, let your imagination run wild and create a stunning chandelier that reflects your personal style and adds a touch of whimsy to your living space!
4.4. Homemade candles and candle holders
Homemade candles and candle holders are a fantastic way to add a touch of warmth and ambiance to any room. Not only are they a cost-effective alternative to store-bought candles, but they also allow for endless creativity and personalization. With just a few simple materials and some imagination, you can create stunning candles and unique candle holders that will impress your guests and enhance the overall aesthetic of your home.
To make homemade candles, start by melting a wax of your choice in a double boiler. You can use beeswax, soy wax, or even repurpose old candles by melting them down. Once melted, add your desired fragrance or essential oils for a delightful scent. Next, carefully pour the melted wax into a heat-resistant container, such as a mason jar or a teacup, and insert a pre-waxed candle wick in the center. Allow the wax to cool and solidify, and voila! Your homemade candle is ready to be lit and enjoyed.
When it comes to candle holders, the possibilities are endless. Get creative by repurposing old glass bottles, mason jars, or even tin cans. You can paint them, wrap them in twine or lace, or decorate them with beads and ribbons to match your home decor. Alternatively, you can also create unique candle holders using natural materials such as driftwood, seashells, or tree branches. Simply drill a hole or carve a groove to hold the candle securely, and you’ll have an eye-catching centerpiece that will add a rustic and charming touch to any room.
By making your own candles and candle holders, not only will you have a personalized home decor item, but you’ll also have the satisfaction of knowing that you’ve created something beautiful with your own hands. So why not unleash your creativity and give these DIY projects a try? Your home will thank you for the cozy and inviting atmosphere you’ll create with homemade candles and candle holders.
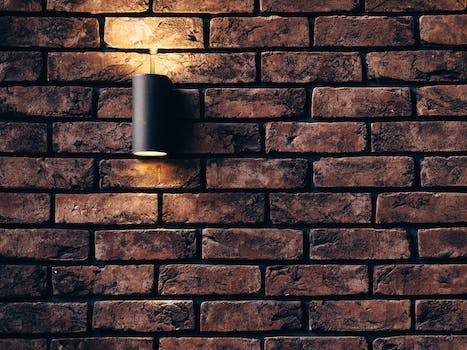
4.5. LED strip lighting for accent and ambiance
LED strip lighting is an excellent choice for adding accent and ambiance to any space. These versatile lights can be easily installed and offer a wide range of creative lighting solutions for your home decor. Whether you want to highlight a specific area or create a cozy atmosphere, LED strip lighting can help you achieve the desired effect. With their flexible design, these lights can be easily bent or twisted to fit around corners, curves, or any other shape you desire. This makes them perfect for accentuating architectural features, such as cove ceilings or recessed niches. Additionally, LED strip lighting comes in various colors, allowing you to customize the ambiance according to your personal style and preferences. Whether you prefer warm, inviting hues or vibrant, energizing tones, there is an LED strip lighting option for every mood. Moreover, these lights are energy-efficient and long-lasting, making them an eco-friendly choice for your home decor. So, if you’re looking for a creative lighting solution to enhance the ambiance of your living space, consider incorporating LED strip lighting into your DIY home decor projects.
Conclusion
In conclusion, these 10 homemade DIY home decor ideas provide a cost-effective and creative way to transform your living space. Whether it’s repurposing old items or creating unique pieces from scratch, these projects offer endless possibilities for adding style and personal touch to your home. So, roll up your sleeves and unleash your inner artist to give your living space a stunning makeover with these DIY home decor ideas!


These 10 innovative and imaginative DIY home decor ideas from [object Object] provide a refreshing approach to enhancing ones living…