

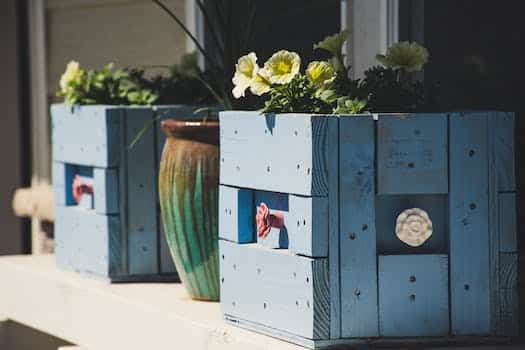
Painting furniture can be a fun and rewarding way to breathe new life into old pieces. However, without the proper techniques and tools, it can also be a frustrating and time-consuming process. In this article, we will share 10 tips for painting furniture like a pro, so you can achieve a flawless finish and transform your furniture into something beautiful.
- 1. Painting Furniture Tips
- 1.1. Choosing the Right Paint
- 1.2. Prepping the Furniture
- 1.3. Applying the Paint
- 1.4. Tips for a Smooth Finish
- 1.5. Caring for Your Newly Painted Furniture
- 2. Choosing the Right Paint
- 2.1. Selecting the Right Type of Paint
- 2.2. Choosing the Right Color
- 2.3. Consider Using a Primer
- 2.4. Eco-Friendly Paint Options
- 2.5. Testing the Paint on a Small Area
- 3. Prepping the Furniture
- 3.1. Clean the Furniture
- 3.2. Sand the Furniture
- 3.3. Fill Any Holes or Cracks
- 3.4. Remove Hardware and Drawers
- 3.5. Tape Off Areas You Don’t Want Painted
- 4. Applying the Paint
- 4.1. Use the Right Tools
- 4.2. Start with Thin Coats
- 4.3. Apply Multiple Coats
- 4.4. Don’t Rush the Drying Process
- 4.5. Consider Using a Sealant
- 5. Tips for a Smooth Finish
- 5.1. Avoid Overbrushing
- 5.2. Use a Light Touch
- 5.3. Work in a Well-Ventilated Area
- 5.4. Avoid Painting in Direct Sunlight
- 5.5. Consider Using a Paint Sprayer
- 6. Caring for Your Newly Painted Furniture
1. Painting Furniture Tips
Painting furniture can be a fun and rewarding DIY project, but it can also be challenging if you don’t know what you’re doing. To help you achieve a professional-looking finish, we’ve compiled 10 tips for painting furniture like a pro.
1. Clean and prep your furniture beforehand. This includes sanding, filling in any cracks or holes, and wiping down the surface with a damp cloth.
2. Use high-quality paint and primer for best results. Don’t skimp on the materials.
3. Invest in good brushes and rollers. Cheap ones can leave streaks and bristles behind.
4. Apply thin coats of paint, allowing each one to dry completely before adding another.
5. Use a paint sprayer if possible, as it can save time and produce a smoother finish.
6. Take your time and be patient. Rushing the process can lead to mistakes and a less-than-perfect outcome.
7. Paint in a well-ventilated area to avoid inhaling fumes.
8. Don’t forget to paint the edges and hard-to-reach areas.
9. Consider adding a protective top coat, such as polyurethane, for added durability.
10. Lastly, have fun with it! Experiment with different colors and techniques to create a unique piece of furniture that reflects your personal style.
1.1. Choosing the Right Paint
Choosing the right paint is crucial when painting furniture. You want a paint that is durable, long-lasting, and provides good coverage. There are many different types of paint to choose from, including latex, oil-based, and chalk paint. Latex paint is easy to clean up with water and dries quickly, making it a popular choice. Oil-based paint is more durable and provides a smoother finish, but it takes longer to dry and requires solvents for cleanup. Chalk paint has a matte finish and is great for achieving a vintage or shabby chic look. Consider the type of furniture you are painting and the look you want to achieve when selecting your paint.
1.2. Prepping the Furniture
Before you start painting your furniture, you need to prepare it properly. This will ensure that the paint adheres well and results in a smooth and long-lasting finish. Here are some tips for prepping your furniture:
1. Clean the furniture thoroughly. Use a mild soap and water solution to remove any dirt, grime, or grease.
2. Sand the furniture lightly with fine-grit sandpaper. This will help the paint adhere better and smooth out any imperfections.
3. Fill any holes, cracks, or dents with wood filler. Sand the filler smooth once it’s dry.
4. Remove any hardware or knobs from the furniture.
5. Use painter’s tape to protect any areas you don’t want to paint.
6. Prime the furniture with a good quality primer. This will help the paint adhere better and cover any stains or dark colors.
7. Sand the primer lightly once it’s dry to smooth out any brush strokes.
8. Wipe the furniture down with a tack cloth to remove any dust.
9. Apply the paint in thin, even coats. Allow each coat to dry completely before applying the next.
10. Sand lightly between coats with fine-grit sandpaper to smooth out any brush strokes or imperfections.
1.3. Applying the Paint
Applying the paint is a crucial step in painting furniture. It is important to use thin, even coats of paint and to allow each coat to dry completely before applying the next. When applying the paint, use a high-quality brush or roller, and be sure to follow the grain of the wood. It is also important to apply the paint in a well-ventilated area, and to wear a mask to avoid inhaling any fumes. Additionally, if you are using a spray paint, be sure to hold the can at the correct distance from the furniture and to apply the paint in a sweeping motion to avoid drips and uneven coverage.
1.4. Tips for a Smooth Finish
Achieving a smooth finish when painting furniture can be a challenging task, but with the right techniques and tools, anyone can do it like a pro. Here are some tips to help you achieve a smooth finish when painting furniture:
1. Sand the surface: Before painting, make sure to sand the surface of the furniture to ensure that the paint adheres well and the finish is smooth.
2. Use a primer: Applying a primer before painting can help to create an even surface and improve the durability of the paint.
3. Choose the right brush: Use a high-quality brush that is appropriate for the type of paint you are using to achieve a smooth finish.
4. Apply thin coats: Apply thin coats of paint to avoid drips and achieve a smooth finish.
5. Sand between coats: Sand between coats of paint to create a smooth surface and ensure good adhesion of subsequent coats.
6. Use a paint conditioner: Adding a paint conditioner to the paint can help to improve the flow and leveling of the paint, resulting in a smoother finish.
7. Avoid painting in direct sunlight: Painting in direct sunlight can cause the paint to dry too quickly and result in a rough finish.
8. Use a paint strainer: Use a paint strainer to remove any lumps or impurities in the paint before painting.
9. Allow sufficient drying time: Allow each coat of paint to dry completely before applying the next coat to achieve a smooth finish.
10. Finish with a clear coat: Apply a clear coat of polyurethane or wax to protect the painted surface and achieve a smooth, professional-looking finish.
1.5. Caring for Your Newly Painted Furniture
Once you’ve completed painting your furniture, it’s important to take proper care of it to ensure it lasts as long as possible. Here are some tips for caring for your newly painted furniture:
1. Allow the paint to fully cure before using the furniture. This can take up to a week.
2. Avoid placing hot items directly on the painted surface.
3. Use coasters and placemats to protect the surface.
4. Avoid using harsh chemicals or abrasive cleaners.
5. Clean up any spills or messes immediately.
6. Dust the furniture regularly with a soft cloth.
7. Avoid exposing the furniture to direct sunlight for extended periods of time.
8. Use furniture wax or polish to protect the surface and add shine.
9. Consider using furniture covers when not in use.
10. If you need to move the furniture, lift it rather than dragging it to avoid scratching or chipping the paint.
2. Choosing the Right Paint
Choosing the right paint is crucial to achieving a professional-looking finish on your furniture. Here are some tips to help you select the best paint for your project: 1. Consider the type of furniture you are painting – certain paints work better on certain materials. 2. Choose a paint with a durable finish to ensure your furniture lasts. 3. Look for a paint that is easy to apply and dries quickly. 4. Consider the color and finish you want to achieve – matte, glossy, or satin. 5. Choose a paint that is safe for indoor use if you are painting furniture for your home. 6. If you are painting outdoor furniture, choose a paint that is weather-resistant. 7. Consider the level of VOCs in the paint if you have allergies or sensitivities. 8. Opt for a paint with good coverage to save time and money. 9. Test the paint on a small area of the furniture before committing to painting the whole piece. 10. Finally, choose a paint that fits within your budget and meets all of your requirements.
2.1. Selecting the Right Type of Paint
When it comes to painting furniture, selecting the right type of paint is crucial to achieving a professional-looking finish. There are a variety of paint types to choose from, each with their own unique properties and benefits. Some popular options include latex paint, oil-based paint, and chalk paint. Consider the type of furniture you are painting, the desired finish, and your personal preferences when selecting the right type of paint for your project.
2.2. Choosing the Right Color
Choosing the right color for your furniture is just as important as choosing the right paint. The color can set the tone for the room and tie everything together. When choosing a color, consider the style of the furniture and the overall look you want to achieve. Neutral colors like white, gray, and beige are great for a modern or minimalist look, while bold colors like red, blue, and yellow can add a pop of color to a room. Don’t be afraid to experiment with different colors and finishes, and remember to always test the color on a small area before committing to painting the entire piece.
2.3. Consider Using a Primer
Before you start painting your furniture, it’s important to consider using a primer. A primer helps to create a smooth surface for the paint to adhere to and can also help hide any imperfections in the wood. Additionally, using a primer can help you achieve a more even and professional-looking finish. When choosing a primer, look for one that is specifically designed for the type of paint you plan to use. For example, if you’re using an oil-based paint, you’ll need an oil-based primer. If you’re using a water-based paint, you’ll need a water-based primer. Taking the time to choose the right primer can make a big difference in the outcome of your project.
2.4. Eco-Friendly Paint Options
Eco-friendly paint options are becoming increasingly popular due to their low VOC (volatile organic compounds) content. These paints are better for the environment and for your health as they emit fewer harmful chemicals. Look for paints that are labeled low or zero VOC, and make sure to properly dispose of any leftover paint to minimize environmental impact.
2.5. Testing the Paint on a Small Area
Before diving into painting your furniture, it’s important to test the paint on a small area first. This will help ensure that you have chosen the right paint for the job and that it will adhere properly to the surface. Choose an inconspicuous spot, such as the back of a leg on a chair or the underside of a table, and apply a small amount of paint. Let it dry completely and then check to see if it has adhered properly and if the color is what you were expecting. If you’re happy with the results, then you can proceed with confidence knowing that you’ve chosen the right paint for your project.
3. Prepping the Furniture
Before painting any piece of furniture, it is important to properly prep the surface to ensure that the paint adheres well and the finish is smooth. Here are some tips for prepping your furniture:
1. Clean the surface thoroughly with soap and water, and let it dry completely.
2. Sand the surface lightly to remove any rough spots or old finish.
3. Fill any cracks or holes with wood filler and sand again.
4. Remove any hardware or knobs from the furniture.
5. Cover any areas you don’t want to paint with painter’s tape or plastic.
6. Prime the surface with a good quality primer.
7. Sand the primer lightly to ensure a smooth finish.
8. Clean the surface again with a tack cloth to remove any dust or debris.
9. Apply the first coat of paint.
10. Sand lightly between coats and apply additional coats as needed.
3.1. Clean the Furniture
Before you begin painting your furniture, it’s important to properly prep the surface. Start by cleaning the furniture thoroughly to remove any dust, dirt or debris. Use a damp cloth or sponge and a mild soap solution to gently scrub the surface. Make sure to rinse the furniture with clean water and let it dry completely before moving on to the next step.
3.2. Sand the Furniture
Before painting any furniture, it’s important to properly prep the surface. This will ensure a smooth and long-lasting finish. One of the key steps in prepping furniture is sanding. Sanding not only removes any old paint or varnish, but also smooths out any imperfections in the wood. Use a sanding block or sandpaper with a grit of 120 to 150 to gently sand the entire surface of the furniture. Be sure to sand in the direction of the wood grain to avoid any scratches. Once you’ve finished sanding, wipe down the furniture with a damp cloth to remove any dust or debris.
3.3. Fill Any Holes or Cracks
Before painting, it’s important to fill any holes or cracks in the furniture. Use wood filler or putty to fill in larger holes and sand the surface smooth once it’s dry. For smaller holes and cracks, use spackling compound and sand smooth. This will create a smooth surface for the paint to adhere to and prevent any imperfections from showing through.
3.4. Remove Hardware and Drawers
Before you start painting, it is important to remove any hardware and drawers from the furniture piece. This will make it easier to paint and ensure that all surfaces are covered evenly. Use a screwdriver to remove any screws or bolts holding the hardware in place. Place the hardware in a safe location so that it doesn’t get lost or damaged. For drawers, gently remove them from the piece and place them on a flat surface. You can paint them separately or leave them for later. Once all hardware and drawers are removed, use a damp cloth to wipe down the furniture and remove any dust or debris.
3.5. Tape Off Areas You Don’t Want Painted
Before you start painting your furniture, it is important to properly prep the piece. One key step is to tape off any areas that you do not want painted. This could include hardware, drawers, or certain sections of the piece that you want to leave unpainted. Use painter’s tape to carefully cover these areas, making sure to press the tape down firmly to create a tight seal. This will help ensure that your paint job looks clean and professional when you are finished.
4. Applying the Paint
Applying the paint is one of the most important steps in achieving a professional-looking finish on your furniture. Here are some tips to make sure you do it right:
1. Use a high-quality paintbrush or roller to ensure even coverage.
2. Apply thin coats of paint, waiting for each coat to dry completely before applying the next.
3. Always paint in the direction of the wood grain.
4. Don’t overload your brush or roller with paint, as this can lead to drips and uneven coverage.
5. Use a paint additive like Floetrol to help eliminate brush marks and extend drying time.
6. If you’re using a spray paint, make sure to work in a well-ventilated area and wear protective gear.
7. Don’t rush the process – take your time to ensure a smooth finish.
8. Sand between coats with a fine-grit sandpaper to smooth out any imperfections.
9. If you’re painting a piece with intricate details, use a small brush to get into tight spaces.
10. Finally, always follow the manufacturer’s instructions for drying time and cleanup.
4.1. Use the Right Tools
To paint furniture like a pro, it is important to use the right tools. This includes high-quality brushes, rollers, and paint sprayers. It is also important to choose the right type of paint for the job, whether it be oil-based or water-based. Additionally, using painter’s tape and drop cloths can help protect surfaces from accidental paint spills or splatters. Taking the time to gather and use the proper tools will result in a more professional-looking finished product.
4.2. Start with Thin Coats
Start with thin coats when applying paint to furniture. It is better to do several thin coats rather than one thick coat, as thick coats are more likely to drip and leave an uneven finish. Allow each coat to dry completely before applying another, and use a high-quality brush or roller to ensure a smooth application.
4.3. Apply Multiple Coats
One of the most important steps in painting furniture is applying multiple coats of paint. This not only ensures a smooth and even finish, but it also helps to increase the longevity of the paint job. When applying multiple coats, it is important to wait for each coat to dry completely before moving on to the next. This will help to prevent the paint from becoming tacky or peeling. It is also important to sand lightly between each coat to remove any bumps or imperfections. By taking the time to apply multiple coats, you can achieve a professional-looking finish that will last for years to come.
4.4. Don’t Rush the Drying Process
One of the biggest mistakes people make when painting furniture is rushing the drying process. It can be tempting to try to speed up the process by using a hair dryer or placing the furniture in direct sunlight, but this can cause the paint to dry unevenly and result in a less-than-perfect finish. Instead, it’s important to allow each coat of paint to dry completely before applying the next coat. This will ensure that the paint adheres properly and results in a smooth, even finish. Additionally, make sure to follow the manufacturer’s instructions for drying time and avoid using the furniture until the paint is fully cured.
4.5. Consider Using a Sealant
Consider using a sealant to protect your newly painted furniture. A sealant can help prevent scratches, chipping, and fading, and can also make the surface easier to clean. There are several types of sealants available, including clear varnish, polyurethane, and wax. Choose the one that best fits your needs and follow the manufacturer’s instructions for application.
5. Tips for a Smooth Finish
1. Sand the surface of the furniture before painting to ensure a smooth finish.
2. Use a primer before applying paint to help the paint adhere better and last longer.
3. Use a high-quality paintbrush or roller to apply the paint evenly.
4. Apply thin coats of paint rather than one thick coat to prevent drips and ensure even coverage.
5. Allow each coat of paint to dry completely before applying the next coat.
6. Sand lightly between coats of paint to ensure a smooth and even finish.
7. Use a paint conditioner to help the paint flow smoothly and prevent brush marks.
8. Use a topcoat or sealer to protect the paint and add durability.
9. Clean your brushes and tools thoroughly after each use to prolong their lifespan.
10. Take your time and be patient – rushing the painting process can lead to mistakes and an uneven finish.
5.1. Avoid Overbrushing
Overbrushing is a common mistake when painting furniture. This occurs when you apply too much pressure on the brush, causing the paint to streak and leave unsightly brush marks. To avoid overbrushing, use a light touch when applying paint. Take your time, and use smooth, even strokes, allowing the paint to settle in between each stroke. This will help you achieve a smooth, professional-looking finish.
5.2. Use a Light Touch
When it comes to painting furniture, it’s important to use a light touch. This means applying thin, even coats of paint rather than thick, heavy ones. Not only will this help prevent drips and smudges, but it will also ensure a smooth and professional-looking finish. Additionally, using a light touch will help you conserve paint and make the most of your supplies. So, be patient, take your time, and don’t rush the process. Your furniture will thank you for it!
5.3. Work in a Well-Ventilated Area
One of the easiest ways to achieve a smooth finish when painting furniture is to work in a well-ventilated area. This will not only ensure that the paint dries evenly, but also prevent you from inhaling harmful fumes. If you’re painting indoors, make sure to open windows and doors to allow for proper air circulation. If you’re painting outdoors, choose a day with little wind and avoid painting in direct sunlight, as this can cause the paint to dry too quickly and result in a streaky finish.
5.4. Avoid Painting in Direct Sunlight
Painting furniture in direct sunlight can lead to a variety of issues, including uneven drying, bubbling, and peeling. It is best to find a shaded area to work in, or wait for a time when the sun is not directly shining on the piece you are painting. This will ensure a smooth and even finish that lasts.
5.5. Consider Using a Paint Sprayer
Consider Using a Paint Sprayer
Using a paint sprayer can greatly speed up the painting process and produce a smooth, even finish. However, it is important to properly prepare the sprayer and your workspace before beginning. Make sure to read the manufacturer’s instructions and wear proper safety gear, such as a mask and goggles. Additionally, test the sprayer on a scrap piece of wood to ensure the settings are adjusted correctly before spraying your furniture.
6. Caring for Your Newly Painted Furniture
After spending time and effort painting your furniture, it’s important to care for it properly to ensure it lasts a long time. Here are some tips to help you care for your newly painted furniture:
1. Allow the paint to fully cure before using or moving the furniture.
2. Use coasters or placemats to protect the surface from scratches and spills.
3. Avoid placing hot items directly on the painted surface.
4. Clean the surface regularly with a soft, damp cloth.
5. Avoid using harsh chemicals or abrasive cleaners.
6. Touch up any nicks or scratches with matching paint.
7. Keep the furniture out of direct sunlight to prevent fading.
8. Avoid placing heavy objects on the painted surface.
9. Use furniture wax or a sealant to protect the surface.
10. Store the furniture in a dry, cool place when not in use.
6.1. Avoid Scratching the Surface
Avoid scratching the surface of your newly painted furniture by using caution when placing objects on top of it. Allow the paint to fully cure before placing any heavy objects on it. When moving the furniture, lift it instead of dragging it across the floor. Additionally, avoid using harsh chemicals or abrasive cleaners on the surface, as this can damage the paint and cause it to peel or chip.
6.2. Clean Regularly with Mild Soap and Water
To keep your newly painted furniture looking its best, it’s important to clean it regularly with mild soap and water. This will help remove any dirt or grime that may have accumulated on the surface, and will also prevent any stains or discoloration from setting in. Avoid using harsh chemicals or abrasive cleaners, as these can damage the paint and cause it to peel or fade over time. Instead, opt for a gentle, non-abrasive soap and a soft cloth or sponge to gently clean the surface. Be sure to rinse the furniture thoroughly with clean water after washing, and allow it to dry completely before using or storing.
6.3. Avoid Harsh Chemicals
When caring for your newly painted furniture, it’s important to avoid harsh chemicals. These chemicals can not only damage the paint, but also pose a health risk to you and your family. Instead, opt for gentle cleaning solutions such as soap and water or vinegar and water. You can also use a soft microfiber cloth to gently wipe down the surface of your furniture. By avoiding harsh chemicals, you can ensure that your newly painted furniture stays looking its best for years to come.
6.4. Use Coasters and Mats
Using coasters and mats is an essential step in caring for your newly painted furniture. Moisture from drinks and heat from plates can damage the finish of your furniture, leading to unsightly marks or discoloration. By placing coasters and mats on your furniture, you can protect it from these potential damages. Additionally, make sure to clean your coasters and mats regularly to prevent any dirt or debris from scratching the surface of your furniture.
6.5. Touch Up as Needed
After painting your furniture, it’s important to touch up any areas that may need it. This includes filling in any missed spots or smoothing out any rough edges. You can use a small paintbrush or a foam roller to touch up these areas. It’s also important to let the paint dry completely before touching up, as this will ensure the best results.
Conclusion
By following these 10 tips, you can paint your furniture like a pro. With the right preparation, tools, and techniques, you can achieve a beautiful and long-lasting finish that will enhance the look of any room.


These 10 innovative and imaginative DIY home decor ideas from [object Object] provide a refreshing approach to enhancing ones living…