
Are you sick and weary of the same old pieces in your house? Do you long for one-of-a-kind, customized pieces that really capture your style? Seek no more! This post will go over ten incredible do-it-yourself furniture projects that will completely revamp your living area. Whether you’re an experienced do-it-yourselfer or a novice, these creative projects will motivate you to make unique, aesthetically beautiful, and functional things. Prepare yourself to let your imagination go wild and create a statement with these amazing furniture ideas, which range from upcycling everyday objects to reusing aged materials.
- 1. Introduction
- 1.1. Why choose DIY furniture
- 1.2. Benefits of DIY furniture
- 1.3. Materials and tools needed
- 1.4. Safety precautions
- 1.5. Tips for successful DIY projects
- 2. Repurposed Furniture Ideas
- 2.1. Transforming old pallets into a coffee table
- 2.2. Upcycling an old dresser into a kitchen island
- 2.3. Creating a bookshelf from wooden crates
- 2.4. Turning an old ladder into a unique shelving unit
- 2.5. Repurposing a vintage suitcase into a side table
- 3. Space-Saving Furniture Ideas
- 3.1. Building a foldable wall-mounted desk
- 3.2. Creating a storage ottoman from an old chest
- 3.3. Constructing a compact folding dining table
- 3.4. Designing a modular storage system for small spaces
- 3.5. Building a loft bed with integrated storage
- 4. Outdoor Furniture Ideas
1. Introduction
Do your outdated, dull furniture pieces bore you? Do you wish to give your home’s design a dash of originality and creativity? Seek no more! This post will look at ten creative do-it-yourself furniture projects that will encourage you to let your creative side loose and makeover your room. These DIY project ideas are guaranteed to spark your creativity and give your living area a new, unique appeal, regardless of your level of experience. Now that you have your equipment, let’s explore the world of do-it-yourself furniture!
1.1. Why choose DIY furniture
With good cause, DIY furniture has grown in popularity in recent years. The process of creating your own furniture has a particular allure and rewards. It not only lets you let your imagination run wild, but it also allows you to completely personalize the furniture to your exact specifications. You can make one-of-a-kind, customized furniture pieces that are fashionable and useful with a little time, effort, and basic tools. We’ll look at ten different do-it-yourself furniture projects in this post, maybe motivating you to start creating furniture of your own.
1.2. Benefits of DIY furniture
The popularity of DIY furniture has grown over the past several years as more and more people become aware of its advantages. Making your own furniture gives you the chance to showcase your creativity, save money, and have one-of-a-kind items that suit your tastes and style. We’ll look at ten creative do-it-yourself furniture projects in this post to help you improve the look of your house. These projects will motivate you to take on fascinating furniture projects, regardless of your level of experience with do-it-yourself projects. So let’s get started and explore the amazing world of do-it-yourself furniture!
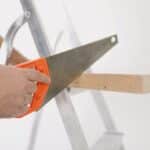
1.3. Materials and tools needed
The correct supplies and equipment are necessary for making handmade furniture. Having the essential supplies will make the process simpler and more pleasurable, regardless of experience level. We’ll talk about the supplies and equipment needed in this section to help you realize your ten creative DIY furniture ideas.
Initially, a range of materials will be required based on the kind of furniture you intend to make. Wood boards, plywood, recycled timber, metal pipes, and concrete are typical materials. These materials can be recycled from old furniture or construction sites, or they can be purchased at your neighborhood hardware shop.
A set of necessary tools is also required in addition to the supplies. A power drill, circular saw, jigsaw, sander, measuring tape, level, and clamps are a few examples of these instruments. The complexity of your furniture designs will determine whether you additionally need specialized instruments like a router or a miter saw.
Additionally, it is crucial to keep safety gear on available. This contains a dust mask, gloves, and safety glasses so you can keep yourself safe while construction is underway.
With confidence and imagination, you may start your DIY furniture project if you have the necessary supplies and equipment on hand. Now let’s move on to the fascinating concepts that will motivate you to design one-of-a-kind items for your house!
1.4. Safety precautions
It is crucial to put safety first when starting do-it-yourself furniture projects. Making furniture at home may be enjoyable and fulfilling, but it also requires using potentially dangerous tools and materials. It is possible to guarantee a safe and fun procedure when creating DIY furniture by adhering to a few basic safety standards.
The most crucial thing to remember is to always wear the proper safety gear. Gloves, closed-toe shoes, and protective eyewear are examples of this. These things can lessen the risk of cuts from flying debris, sharp objects, and unintentional chemical or adhesive leaks.
Always operate in an area with adequate ventilation as well. This is especially crucial if you’re using adhesives, paints, or stains that could release fumes. Minimizing the inhalation of potentially hazardous compounds is made easier with proper ventilation.
Additionally, be sure to read and comprehend the safety instructions and instructions supplied by the producers of the tools and materials. There may be particular safety instructions for each instrument and material that need to be followed in order to avoid mishaps.
Refueling and taking breaks are two more crucial safety precautions when working on do-it-yourself furniture projects. Working nonstop for long stretches of time can cause exhaustion and a loss of concentration, which raises the possibility of accidents. Drink lots of water to stay hydrated throughout the procedure.
Last but not least, maintain a tidy and orderly workspace. Work environments that are overly cluttered can be dangerous and increase the risk of accidents. To keep a safe working environment, regularly pick up any trash, tools, or materials that are not in use.
You may reduce the hazards involved in do-it-yourself furniture projects and enjoy the process of making one-of-a-kind pieces for your house by taking these safety steps.
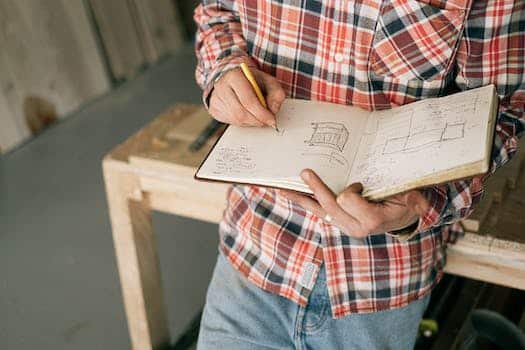
1.5. Tips for successful DIY projects
Do-it-yourself projects have grown in popularity among people looking to give their houses a more unique touch. Making one-of-a-kind furniture is a fantastic way to express your creativity and save money. DIY projects must, however, be carefully planned and carried out to be successful. We’ll provide you some helpful advice in this part to help you succeed in your do-it-yourself furniture projects.
2. Repurposed Furniture Ideas
Repurposed furniture is a great way to give worn-out pieces a new lease on life and give your home design a distinctive touch. We have ideas for repurposing furniture that are both innovative and achievable, whether you enjoy doing do-it-yourself tasks. We’ll look at ten original DIY furniture projects in this post, which should encourage you to use your old items in new ways.
1. Vintage Suitcase Coffee Table: Add legs and a glass top to an old suitcase to make it a lovely coffee table. This idea for repurposing furniture gives your living area a nostalgic feel.
2. Bookshelf Headboard: Make a chic headboard for your bed out of an old bookshelf. This furniture not only gives storage for your favorite books, but it also has other uses.
3. Pallet Wine Rack: Construct a rustic wine rack out of wooden pallets. This rustic-inspired DIY furniture concept is ideal for wine connoisseurs and gives your kitchen or dining room a bit of charm.
4. Dresser Bathroom Vanity: Repurpose an old dresser into a stylish bathroom vanity to give it a new lease on life. This idea for repurposing furniture gives your bathroom charm and extra storage.
5. Tire Ottoman: By adding fabric and foam padding, you can upcycle an old tire into a stylish ottoman. Not only is this recycled furniture idea environmentally beneficial, but it also gives your living room a splash of color.
6. Window Frame image Display: Create a lovely image display out of an old window frame. This easy-to-make furniture idea highlights your most treasured memories while giving your interior design a vintage feel.
7. Ladder bookcase: By adding wooden planks, you may turn an outdated ladder into a chic bookcase. This idea for repurposing furniture gives your living room or home office a rustic vibe and works well in tiny areas.
8. Suitcase Nightstand: Convert an old suitcase into a distinctive nightstand to give it a new lease on life. This idea for repurposing furniture gives your bedroom dcor a vintage feel.
9. Bicycle Wheel Chandelier: Repurpose a bicycle wheel to create a one-of-a-kind lighting fixture. This do-it-yourself furniture project makes a statement in any space and gives your home design an industrial feel.
Repurpose a wine barrel to create a chic coffee table for your home. This idea for repurposing furniture gives your living space a sophisticated yet rustic feel.
These are but a handful of the numerous alternatives for reused furniture that exist. By using some imagination and do-it-yourself abilities, you can turn used items into gorgeous, useful furniture that expresses your own sense of style.
2.1. Transforming old pallets into a coffee table
Making a coffee table out of old pallets is a great way to recycle furniture and give your living area a distinctive look. Pallets are frequently thrown away or left unused, but with a little imagination and work, they may be made into stunning and useful furniture. Reusing pallets helps to reduce waste and promote sustainability in addition to saving money.
You’ll need a few simple supplies and equipment to make an old pallet coffee table. First, take the pallets apart carefully, being careful to remove any nails or screws. You can begin constructing the table as soon as you have the individual planks.
To start, determine the size of the pallet planks for the tabletop and cut them accordingly. To guarantee a smooth finish, sand down any uneven areas or sharp edges. Next, use more pallet planks or other wood pieces to build a solid base. This will function as the tabletop’s support.
After the base is finished, use screws or nails to fasten the tabletop planks to it. The planks can be arranged either vertically or horizontally, depending on the style you want. Think about installing more support beams or strengthening the corners for increased stability.
Sand the coffee table well to get rid of any last bits of roughness or splinters after securing all the parts. After that, you can add a stain, paint, or varnish to improve the look and preserve the wood. Remember that before using it or decorating the table, it must thoroughly dry.
The last step is to customize your coffee table by adding any extra embellishments or decorations. To make it more mobile, you may put in wheels, a glass top, or even ornamental handles. Give your creativity free rein and design a coffee table that expresses your own style and sense of design.
Making a coffee table out of recycled pallets not only gives you a one-of-a-kind piece of furniture but also highlights your do-it-yourself abilities. It’s a worthwhile endeavor that promotes eco-friendly behaviors and reduces waste in addition to saving money. So go ahead and gather some old pallets and start turning them into a unique coffee table for your house!
2.2. Upcycling an old dresser into a kitchen island
Making a kitchen island out of an old dresser is a clever and useful way to reuse old furniture. With this do-it-yourself technique, you can turn an outdated dresser into a useful and fashionable kitchen accessory.
To start, pick a dresser that is robust and well-made, able to support the weight and use of a kitchen island. To make sure the dresser will fit comfortably in your kitchen, take into account its size and measurements.
First, take off all of the dresser’s shelves and drawers. This will make an open area that can be utilized to set up bar stools for seating or to store kitchen necessities.
After that, completely clean and sand the dresser to get rid of any leftover paint or finish. Painting or staining will be possible on a flat surface as a result.
You can personalize the dresser to fit the style of your kitchen after it has been cleaned and sanded. Think about giving it a new coat of paint in a hue that goes well with your kitchen’s color palette. Alternatively, to bring out the original wood grain of the dresser, you may dye it.
Think about giving the dresser a butcher block or stainless steel tabletop to increase practicality. This will give the surface where food is prepared a long-lasting and clean surface.
To polish off the makeover, add a few finishing details like ornate knobs or handles. These minor accents can improve the kitchen island’s overall appearance and help it blend in better with the rest of your kitchen.
Making a kitchen island out of an old dresser not only breathes new life into a piece of furniture that would have otherwise been thrown away, but it also adds a special and customized touch to your kitchen. This do-it-yourself project brings some flair into your house and lets you show off your artistic side.
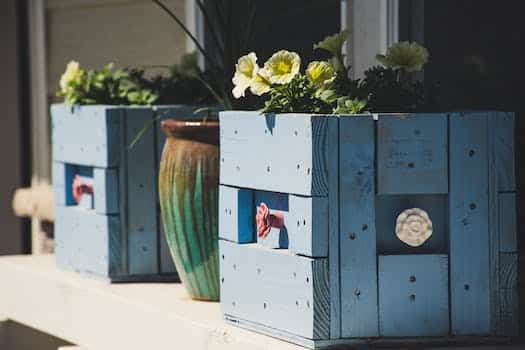
2.3. Creating a bookshelf from wooden crates
One of the best uses for reused furniture is to make a bookcase out of wooden crates. It not only gives your room a hint of rustic beauty, but it also offers a useful place to store your books and decorative objects. You can turn plain wooden crates into a chic bookcase that will make your pals green with envy in only a few easy steps.
Get a few identical-sized wooden crates to begin with. These crates are frequently available online, at flea markets, and in antique stores. Since the crates will be bearing the weight of your books, make sure they are strong and in good shape.
Afterwards, give the crates a thorough cleaning and smooth down any sharp edges or splinters. This will guarantee a flat surface for afterwards staining or painting. You can omit this step if you like the wood’s raw appearance.
After the crates are dry and clean, you can start putting the bookcase together. The containers should be stacked on top of one another, evenly aligned. Whichever way you want to arrange them, vertical or horizontal, you can do it as long as there’s room.
You can use screws or wood glue to hold the boxes together. Tightly press each crate into place by liberally applying wood glue between them. An even stronger hold can be achieved by fastening the crates from the inside using screws.
Once the crates are firmly in place, you may apply paint or stain to personalize your bookcase. Select a finish or color that goes well with the furnishings you already have, or opt for a striking contrast. Paint or stain should be applied evenly, letting each layer dry completely before adding the next.
It’s time to use your bookshelf after the paint or stain has dried. Arrange your ornamental objects and books on the shelves to make a well-organized and eye-catching display. To make it very special, you can also add personal touches like framed pictures, tiny trinkets, or potted plants.
In conclusion, repurposing furniture in the form of a bookshelf made out of wooden crates is both inventive and reasonably priced. It offers a useful storage solution along with the opportunity for you to personalize your area. Why not give it a shot and experience the delight of turning plain crates into a stunning bookshelf?
2.4. Turning an old ladder into a unique shelving unit
Making an antique ladder into a distinctive shelving unit is one inventive method to reuse used furniture. With this do-it-yourself technique, you can turn an outdated ladder into a useful and eye-catching piece of furniture. The ladder can be given a new lease on life and a dash of originality to your home design by being repurposed.
You will need an old ladder, sandpaper, paint or stain, a paintbrush, and a drill to make this unusual shelving unit. To begin, give the ladder a thorough cleaning and take off any loose or cracked paint. Sandpaper can be used to level any uneven surfaces or sharp edges.
Next, choose the width and height that you want for your shelf unit. The ladder can be left exactly as it is, or you can use a saw to trim it to the length you want. After figuring out the measurements, mark the locations for the shelves. Make holes for the shelves with a drill.
Once the ladder is ready, you can paint or stain it to go in with the design of your house. Opt for a color that blends well with the décor or use a contrasting shade to make a statement. Using a paintbrush, evenly apply the paint or stain, and then let it dry fully.
It’s time to put the shelving unit together when the ladder has dried. After drilling the holes, position the shelves there and fasten them with brackets or screws. Place no objects on the shelves until you are certain they are stable and level.
You now have a distinctive shelving unit constructed from upcycled furniture. With this do-it-yourself technique, you can personalize your house while simultaneously cutting down on trash. It can be used as a plant stand or to showcase books or other decorative things. Use your imagination and relish the process of turning used furniture into something fresh and useful.
2.5. Repurposing a vintage suitcase into a side table
An inventive and distinctive approach to breathe new life into an old object is to repurpose it as a side table out of a vintage suitcase. It’s a useful and fashionable piece of furniture that not only gives your living area a hint of vintage charm. You can simply turn an old suitcase into a gorgeous side table with a little bit of inspiration and do-it-yourself talent.
You’ll need an antique suitcase that is in decent shape to start. Seek for one with a unique design and a strong construction. Thoroughly clean the suitcase to get rid of any dust or grime. For this, you can use a solution of mild soap and water.
Next, choose how tall you want your side table to be. To get the appropriate height, you might need to add or remove stuff from the luggage. If necessary, you can raise the luggage using books or wooden blocks.
You can give the suitcase a tabletop once you’ve measured its height. To accomplish this, use a piece of glass or wood that is the right size for the luggage. You can use screws or adhesive to firmly fasten the tabletop to the suitcase.
You can add ornamental features to the side table, like metal corner brackets or drawer knobs with a vintage vibe, to improve its appearance. Stores that sell hardware or antiques will likely have these. For a more polished appearance, you can also line the suitcase’s interior with fabric or wallpaper.
Lastly, before setting anything on the side table, be careful to evaluate its stability. If necessary, raise the structure or change its height. You may use the repurposed old suitcase side table to display books, plants, or other decorative objects once you’re happy with how it turned out.
Repurposing furniture gives your home design a distinctive touch while also encouraging sustainability because it breathes fresh life into outdated objects. The side table made from a repurposed vintage suitcase is just one of the many inventive ways you can turn commonplace items into unique furniture.
3. Space-Saving Furniture Ideas
Furnishing small areas can be made much easier with furniture that takes up less room. Any room’s utility and beauty can be enhanced with the help of these original and imaginative furniture concepts. Make the most of your space, whether you live in a small apartment or not, with DIY furniture projects. The choices are unlimited. These ten inventive and useful space-saving furniture ideas are simple to make on your own.
1. Wall-Mounted Folding Desk: When not in use, this small desk folds down and is mounted to the wall. It offers a practical workstation without consuming valuable floor space.
2. Secret Storage Ottoman: An elegant ottoman that transforms into a storage space is a great accent piece for any living area. To keep your area uncluttered, you can store extra blankets, books, and periodicals within.
3. Fold-Out Sofa Bed: A fold-out sofa bed provides both seating and sleeping choices, making it perfect for guest rooms or tiny living areas. As an economical and useful way to host overnight guests, it saves room.
4. Floating Shelves: Using floating shelves to store daily necessities or to showcase ornamental objects is a terrific idea. Their tiny size on the wall makes them perfect for compact bathrooms or bedrooms.
5. Multipurpose Coffee Table: In a small living space, a coffee table that can be used as a dining table or storage unit can be a game-changer. Seek for one with characteristics that can be extended or built-in drawers.
6. Hunging Closet Organizer: Hanging organizers make the most of the space in your closet. It adds extra space for storing accessories, shoes, or clothing without using any more floor space.
7. Murphy Desk: This wall-mounted desk folds down to fit on any wall. For setting up a home office in a tiny apartment or bedroom, it’s ideal.
8. Nesting Tables: For little living spaces, nesting tables are a practical and room-saving option. When more surface area is required, they may be pushed apart and used as side tables.
9. Over-the-Door Shoe Rack: Keeping your shoes organized and conserving closet space can be achieved with an over-the-door shoe rack.
10. Corner Shelving Unit: Make use of your room’s frequently underutilized corners by installing a corner shelving unit. It’s a clever approach to increase storage and display space without taking up a lot of room.
These do-it-yourself furniture ideas are clever and useful ways to maximize the space you have. These space-saving furniture options are worthwhile to investigate, regardless of your décor goals.
3.1. Building a foldable wall-mounted desk
Having furniture that is both practical and compact is essential for making the most of the available space in a tiny place. I think it would be a terrific idea to design a wall-mounted, folding desk. If you need a workstation but don’t have a lot of space, this kind of desk is ideal. In addition to offering a useful answer, it infuses the space with a little originality.
You will need a robust wooden board, screws, hinges, a drill, and a measuring tape to make a foldable wall-mounted desk. Take measurements of the desk’s required height and width on the wall where it will be installed first. Make a pencil mark on the measurements. The hinges should next be attached to the wooden board, being careful to place them appropriately. After that, screw the hinges firmly into place by aligning them with the wall’s indicated measures.
Make sure the desk folds up and down smoothly by testing it once the hinges are installed. Make any necessary modifications to the screws or hinges. Lastly, add a lock or hook to ensure that the desk stays firmly in its folded position. This will increase safety and stop any unintentional opening.
In addition to saving room, a wall-mounted desk that folds up is a useful piece of equipment. In a compact flat, it can serve as a dining table as well as an office and study area. To save important floor space, just fold it up against the wall when not in use. With a little imagination and do-it-yourself know-how, you may make a chic and useful wall-mounted folding desk that will work wonderfully for you.
3.2. Creating a storage ottoman from an old chest
Repurposing an old chest into a storage ottoman is a clever way to add a bit of individuality and save space in your home. With this do-it-yourself technique, you can update an outdated piece of furniture while still getting a chic and useful storage solution.
To construct a storage ottoman from an old chest, you’ll need a few supplies and some simple tools. First, take out any decorative pieces or hardware from the chest. It will be simpler to deal with and you’ll have a blank canvas when you start your project as a result.
Next, take a measurement of the chest’s measurements and decide how tall you want your ottoman to be. To cut a piece of plywood or MDF board for the ottoman’s base, use these measurements. Screws are used to firmly fasten the board to the chest’s bottom.
To make a comfy seat, you can begin adding cushioning once the base is in place. Cover the top of the base with batting or foam, making sure to use a staple gun to fix it firmly. You can also cover the foam with a layer of fabric for increased comfort.
It’s time to apply the final details after the padding is in place. To make the chest’s lid hinge so that the storage compartment is easily accessible, attach a hinge to the back of the chest. You can also improve the ottoman’s overall appearance by adding ornamental components like trim or upholstery nails.
Lastly, apply a fresh coat of paint or stain to your storage ottoman to achieve the look you want. This will assist in turning the worn-out chest into a gorgeous and useful piece of furniture that fits well into your room.
By converting an old chest into a storage ottoman, you not only save money but also add a distinctive and customized touch to your home decor. This do-it-yourself solution is a fantastic way to maximize storage space and show off your ingenuity. Why not give it a shot and experience the delight of making something useful and lovely with your own hands?
3.3. Constructing a compact folding dining table
A little folding dining table is a fantastic piece of furniture that saves room and is simple to build as a do-it-yourself project. Modern houses are small spaces, so it’s critical to discover furniture solutions that enhance utility without sacrificing design. With the help of this do-it-yourself project, you can make a functional dining table that folds up and stores away to conserve floor space.
To build a small folding dinner table, you will need plywood or a strong hardwood board for the tabletop. Make sure the board’s measurements fit the amount of area you need. Four folding table legs or brackets that may be firmly fastened to the underside of the tabletop are also required.
To begin, measure each corner of the tabletop and note the height at which you want the table legs to be. To make slots or holes at the designated locations, use a saw or other suitable cutting tool. The foldable table legs will be fastened to these slots.
Next, use bolts or screws to fasten the folding table legs to the tabletop. To ensure stability when the table is in use, make sure they are firmly fastened. To guarantee stability and smooth operation, test the folding mechanism.
To improve the appearance and safeguard the wood from harm, you can paint or varnish the tabletop and legs once the legs are mounted. Pick a hue that goes well with the furnishings you already have, or use a contrasting tone to make a statement.
You can use your little folding dining table as soon as the paint or varnish has cured. Just fold the legs under the tabletop and store it in its assigned spot when not in use. This multipurpose piece of furniture is portable and may be used for working, eating, or even as a makeshift serving table for parties.
To sum up, building a small folding dining table is an inventive and useful approach to maximize the space in your house. You can make a useful and fashionable piece of furniture that enhances the value of your living area by following these do-it-yourself instructions. Retain the comfort and convenience of a regular-sized table while taking use of the advantages of a small dining table.
3.4. Designing a modular storage system for small spaces
The cryptocurrency community is a dynamic, fast-growing network of people who are enthusiastic about blockchain technology and cryptocurrencies. With this thorough guide, we hope to bring you a better knowledge of this community, its principles, and how it affects the world financial scene. Through investigating the several facets of the cryptocurrency scene, we will delve into its background, important figures, and the importance of decentralized finance. Come along on this trip with us as we solve the puzzles around the cryptocurrency community and reveal the possibilities for a decentralized future.
3.5. Building a loft bed with integrated storage
A loft bed with built-in storage is a fantastic way to make the most of the available space in a tiny space. In addition to offering a cozy resting area, this furniture solution maximizes available space by providing lots of storage for personal items. A loft bed with built-in storage is ideal for tiny flats or bedrooms since it uses the vertical space in the space, saving room for extra dressers or cupboards.
Determine the ideal bed height and the room’s size before beginning to build a loft bed with built-in storage. Next, collect the supplies you’ll need, like plywood, screws, and lumber. It’s critical to select durable materials that can withstand the weight of the bed and the belongings being stored.
Next, lay out the bed’s design while keeping the location of the storage compartments in mind. Depending on available space and personal taste, the storage can be placed on the sides or underneath the bed frame. For simple organization, think about including cubbies, drawers, or shelves.
After the final design is decided upon, start building the bed frame and installing the storage compartments. To guarantee accurate and secure assembly, use the right measurement and cutting procedures. To improve the bed’s longevity and look, sand the surfaces and apply a protective coating.
Installing the loft bed in the room’s allocated area is the last step. For stability, make sure it is firmly fastened to the wall or ceiling. Organize the storage spaces to maximize both use and beauty by adding ornamental accents and necessities.
Constructing a loft bed with built-in storage is a fulfilling do-it-yourself project that lets you make the most of your available space and produce a chic and useful piece of furniture. A space-saving bed that satisfies your storage demands can be yours with careful planning and attention to detail.
4. Outdoor Furniture Ideas
Ideas for Outdoor Furniture
Why not give some do-it-yourself projects a shot if you’re trying to furnish your outside area with some original and imaginative furniture? Making your own outdoor furniture at home may be an enjoyable and cost-effective way to showcase your creativity. Here are ten original DIY furniture projects to get you motivated:
1. Pallet Swing Bed: If you add cushions and ropes, you can turn a wooden pallet into a comfortable swing bed.
2. Cinder Block Bench: To create a basic yet fashionable bench, stack cinder blocks and place a cushion on top.
3. Wine Barrell Table: Convert an aged wine barrel into an earthy outdoor dining surface.
4. Hanging Macrame Chair: A handcrafted macrame chair can add a bohemian-chic vibe.
5. Tree Stump Side Table: Make a rustic and natural side table out of a tree stump.
6. Outdoor Pallet Sofa: Construct an attractive and cozy outdoor sofa out of several pallets.
7. Tire Ottoman: Repurpose discarded tires into comfortable ottomans.
8. Upcycled Planter Bench: This piece combines planters with a bench to create a useful and attractive accent.
9. Rope Swing: Take a leisurely swing by suspending a strong rope from a tree branch.
10. Concrete Fire Pit: Use concrete blocks to construct a sturdy and contemporary fire pit.
These are just a few of the many homemade furniture projects. Give your creativity free rein and produce one-of-a-kind items that will elevate your outdoor living area!
4.1. Building a wooden bench with storage
Constructing a wooden bench with storage is a fantastic concept for outdoor furniture that blends style and use. It gives a useful way to store different objects in addition to being a pleasant seating option for your outside area. For a versatile addition to your outdoor furniture collection, a wooden bench with storage can be placed on a small patio or in a large garden.
You will need wood planks, screws, a saw, a drill, sandpaper, and a measuring tape to start creating the bench. To begin, measure and cut the wood boards to the exact size you want for your bench. Ensure that extra planks are included for the storage area.
Next, put the bench’s base together with the help of the screws and the cut wood boards. Making sure the basis is strong and stable is crucial. To add more comfort and support, add the armrests and backrest after the base is finished.
Using the extra wood boards, construct a box-like structure to serve as the storage chamber. Assemble the box onto the bench’s underside, making sure to allow sufficient room for the storage section to be easily accessed. For an easy way to open and close the box, you can also add hinges to it.
Sand the entire bench when construction is finished to get rid of any sharp edges or splinters. A polished and seamless finish can only be achieved by following this procedure. To shield the wood from the outdoors, apply a layer of paint or weather-resistant sealer.
To sum up, creating a wooden bench with storage is a do-it-yourself furniture project that will improve the usability and design of your outdoor area. It offers a smart storage solution together with a seating option. You can make a one-of-a-kind, useful piece of outdoor furniture that will wow your guests and last for years with the correct supplies and equipment.
4.2. Creating a DIY outdoor bar cart
Building a do-it-yourself outdoor bar cart is a terrific way to give your outdoor area more functionality and design. An outdoor bar cart is a flexible addition to any patio or deck, whether you want to host events or just want a handy place to mix drinks.
First, assemble the necessary supplies. As the base, you’ll need a strong cart or serving trolley. Seek for one with wheels so you can move around easily. Next, select a weather-resistant material, like a stone or a wooden board, for the top surface.
Now that you have your supplies set, unleash your inner artist! To hang barware and glasses, think about including hooks or racks. For added convenience, you can even install a tiny sink or a bottle opener. Remember to provide room for storing mixers, bottles, and other necessities.
You can be as creative as you want with the design. The cart can be painted a striking color, or you can apply stencils to make designs. Incorporate some cushions or pillows to enhance the comfort and ambiance of the cart. Of course, don’t forget to fill it with your preferred toppings and drinks.
You may save money and add personality to your outdoor party area by building your own DIY outdoor bar cart. You can also take pleasure in this enjoyable and fulfilling hobby for years to come. So gather your materials and begin constructing your own outdoor bar cart right now!
4.3. Constructing a pallet sofa for your patio
Different sorts of crypto communities can be distinguished according to their objectives, organizational structure, and degree of participation. Gaining knowledge of these various kinds can help you better understand the dynamics within each community as well as how the cryptocurrency ecosystem functions. We shall examine several prevalent forms of cryptocurrency communities and their attributes in this piece.
4.4. Designing a fire pit table from concrete blocks
Creating a Community With Cryptos
Creating a vibrant and supportive community is essential to the success and expansion of any project in the bitcoin space. A collection of people that are interested in cryptocurrencies and blockchain technology is referred to as a “crypto community.” This community is essential to raising awareness, developing confidence, and promoting adoption.
Building a strong crypto community requires careful consideration of a number of important criteria. First and foremost, the community needs to have a distinct vision and purpose. This entails outlining the community’s aims, principles, and ambitions in order to draw in like-minded people.
Promoting open dialogue and engagement within the community is another crucial element. Numerous venues, including social media groups, online forums, and specialized chat rooms, can be used to accomplish this. Fostering dialogue, exchanging perspectives, and enabling information sharing will contribute to the development of a lively and involved community.
Moreover, setting up webinars, meetups, and events can be quite helpful in developing a robust crypto community. Community members can network, make in-person connections, and pick the brains of industry professionals at these events. It also fortifies the ties that bind community members together and fosters a sense of belonging.
Additionally, newbies can be drawn to the community and assisted in comprehending the intricacies of cryptocurrencies by offering helpful resources, instructional content, and tutorials. This can comprise content for various knowledge and skill levels, such as articles, films, podcasts, and online courses.
Finally, it is imperative that the community have a robust web presence. In order to guarantee visibility and reach, this entails keeping an active website, consistently updating social media profiles, and utilizing search engine optimization (SEO) strategies. Being easily found will help the community grow in membership and influence.
In summary, developing a crypto community necessitates a calculated strategy that emphasizes a distinct goal, honest communication, offline gatherings, educational materials, and an internet presence. Projects and organizations can build a robust and encouraging community that supports the expansion and improvement of the bitcoin ecosystem by adhering to these standards.
4.5. Building a garden swing from wooden pallets
Building a garden swing from wooden pallets is a fantastic way to add a unique and charming piece of outdoor furniture to your backyard. Not only is it a cost-effective option, but it also allows you to repurpose old pallets and contribute to sustainability. Plus, it’s a fun DIY project that you can enjoy with family and friends.
To start building your garden swing, gather a few wooden pallets in good condition. Make sure they are sturdy and free from any damage. You will also need some basic tools such as a saw, drill, screws, and sandpaper.
Begin by disassembling the pallets carefully, removing any nails or staples. This will give you the individual wooden planks that you will use to construct the swing. Next, measure and cut the planks to the desired length for the seat, backrest, and armrests.
Once you have all the necessary pieces, it’s time to assemble the swing. Start by creating the frame using the longer planks for the sides and the shorter ones for the front and back. Use screws to secure the pieces together firmly.
Next, attach the seat and backrest planks to the frame, ensuring they are level and comfortable to sit on. For added stability, you can reinforce the joints with additional screws. Finally, install the armrests, making sure they are securely attached.
After the swing is assembled, give it a thorough sanding to remove any rough edges or splinters. You can also apply a coat of weather-resistant paint or stain to protect the wood from the elements.
To hang the swing, find a sturdy tree branch, pergola, or porch beam that can support the weight. Use strong ropes or chains to suspend the swing, making sure it is level and secure.
Now you can sit back, relax, and enjoy your newly built garden swing made from wooden pallets. It’s a charming addition to any outdoor space and provides a cozy spot to unwind and enjoy nature.
Conclusion
In conclusion, these 10 unique DIY furniture ideas provide a creative and cost-effective solution for transforming your home. Whether you’re a seasoned DIY enthusiast or a beginner, these projects offer endless possibilities to showcase your personal style and add a touch of uniqueness to your living space. From repurposing old materials to incorporating unexpected elements, these DIY furniture ideas are sure to inspire and impress.


10 Comments
Sofia Chader
1 year agoThese furniture projects are absolutely amazing! Im always on the lookout for creative and budget-friendly ideas to spruce up my home decor, and these examples really hit the mark. Its incredible how a touch of DIY can transform ordinary furniture into something truly unique and personal. I cant wait to get inspired by these projects and start revamping my own space. Thank you for sharing this fantastic collection!
Carlotta Philipp
1 year agoWow, these creative and budget-friendly furniture projects are truly inspiring! Im always on the lookout for unique ways to enhance my home decor without breaking the bank, and these ideas seem perfect. Cant wait to try some of them out and add a personal touch to my living space!
Rubi Zulema
1 year agoThank you for sharing these innovative and cost-effective furniture projects. They serve as a great source of inspiration for homeowners looking to add a distinct touch to their home decor. By incorporating these creative ideas, individuals can enhance the overall aesthetic appeal of their living spaces while adhering to a budget. These projects offer a unique opportunity to showcase individuality and personal style through DIY furniture, providing a sense of accomplishment and satisfaction. I look forward to exploring these ideas further and transforming my own living space into a truly unique and personalized haven.
Mehetabel Gussy
1 year agoThank you for sharing these fantastic furniture projects! Im always on the lookout for creative and budget-friendly ways to enhance my home decor. These ideas have truly inspired me to think outside the box and add a unique touch to my living space. Cant wait to get started on my own DIY furniture project!
Shoshanna Shandie
1 year agoWow, these furniture projects are seriously awesome! 😍 Im always on the lookout for budget-friendly ideas to spruce up my home decor, and this post definitely nailed it! The creativity behind these projects is mind-blowing. I cant wait to give them a try and add a unique touch to my humble abode. Thanks for sharing! 🙌
Elisabet Hubsher
1 year agoThese furniture projects are seriously amazing! I love how they bring a unique touch to home decor without breaking the bank. Cant wait to try them out and add a creative flair to my place! 💡🛋️✨
Doria Macegan
1 year agoThese creative and budget-friendly furniture projects showcased in [object Object] are truly inspiring! Its fascinating to see how individuals can bring a unique touch to their home decor without breaking the bank. These innovative ideas not only add personality to the living space but also demonstrate the power of imagination and resourcefulness. Whether its repurposing old materials or crafting from scratch, this collection serves as a great source of inspiration for anyone looking to elevate their home decor on a budget.
Jennilee Robby
1 year agoWow, I am absolutely amazed by the creativity and ingenuity showcased in these budget-friendly furniture projects! Its truly inspiring to see how ordinary objects can be transformed into unique pieces that bring a whole new character to home decor. From repurposing old crates into stylish shelves to turning vintage suitcases into trendy side tables, these ideas prove that you dont need to break the bank to have a beautiful and personalized living space. I cant wait to try out some of these DIY projects myself and add a touch of my own personality to my home. Kudos to the imaginative minds behind these incredible designs!
Blondelle Gunnar
1 year agoThese creative and budget-friendly furniture projects are truly inspiring! Its amazing how a little bit of creativity can bring a unique touch to our home decor without breaking the bank. I cant wait to try some of these ideas and add a personal touch to my living space. Thank you for sharing these incredible projects!
Jackquelin Christyna
1 year agoWow, these furniture projects are seriously awesome! Im always on the lookout for budget-friendly ways to spruce up my home decor, and this post has given me so much inspiration. I cant wait to try out some of these creative ideas and add a unique touch to my living space. Thanks for sharing!