
Painting the walls of a space is a quick and easy method to give it a whole new vibe. You can make your home a true reflection of who you are with some careful planning and the correct tools. Ten distinct wall-painting methods that will take your home decoration to the next level are discussed in this article. You can use these methods to create the ideal atmosphere in any room, whether you’re a novice or a skilled painter.
- 1. Unique Wall Painting Techniques
- 1.1. Introduction
- 1.2. Preparation
- 1.3. Tape Techniques
- 1.4. Stencil Techniques
- 1.5. Sponge Techniques
- 2. Introduction
- 2.1. What are Unique Wall Painting Techniques
- 2.2. Why Use Unique Wall Painting Techniques
- 2.3. Benefits of Using Unique Wall Painting Techniques
- 2.4. Popular Unique Wall Painting Techniques
- 2.5. Examples of Unique Wall Painting Techniques
- 3. Preparation
- 3.1. Choosing the Right Paint
- 3.2. Selecting the Right Tools
- 3.3. Preparing the Surface
- 3.4. Applying the Base Coat
- 3.5. Allowing the Paint to Dry
- 4. Tape Techniques
- 4.1. Creating Stripes
- 4.2. Making Geometric Shapes
- 4.3. Designing Patterns
- 4.4. Layering Colors
- 4.5. Removing the Tape
- 5. Stencil Techniques
- 5.1. Selecting the Right Stencil
- 5.2. Positioning the Stencil
- 5.3. Applying the Paint
- 5.4. Adding Detail
- 5.5. Removing the Stencil
- 6. Sponge Techniques
- 6.1. Choosing the Right Sponge
- 6.2. Preparing the Sponge
- 6.3. Applying the Paint
- 6.4. Adding Texture
- 6.5. Blending Colors
1. Unique Wall Painting Techniques
Do you want to change the look of your room but don’t know where to start? Here are ten creative ways to decorate your walls. These tips, including ombre and geometric patterns, stenciling, and textured finishes, will make any space seem more like home. Now is the time to break out the paints and tap into your creative side.
1.1. Introduction
Have you had enough of looking at the same four walls every day at work or at home? It’s time to break out your artistic side and try some new approaches to painting walls. A little bit of creativity and some inexpensive painting materials can help you give your walls an appearance that is all your own. In this article, we’ll look at ten different ways to paint walls for a totally new aesthetic.
1.2. Preparation
For distributed teams, the advent of cloud-based collaboration tools has been a game-changer. It provides a number of tools that improve cross-location collaboration. The ability to talk to one another in real time is a crucial part of any cloud-based collaboration program. Team members can have a live conversation, video conference, and screen share. This paves the way for remote teams to work together as efficiently as in-house groups. Cloud-based communication software often includes a project management component. Teams can monitor their workload, due dates, and current status in near real-time. With everyone on the same page, projects are more likely to be finished on schedule. Sharing and storing files can also be done with cloud-based collaborative tools. This allows team members to easily share and collaborate on documents regardless of their current location. In conclusion, cloud-based collaboration software is an effective solution that may boost the efficiency and effectiveness of distributed teams.
1.3. Tape Techniques
Cloud-based collaboration software has real-time communication as a central component. This feature enables global, real-time interaction between members of distributed teams. Several methods exist for this, including online chats, video conversations, and phone calls. By keeping everyone on the same page and up to date in real time, real-time communication helps teams work together more effectively.
1.4. Stencil Techniques
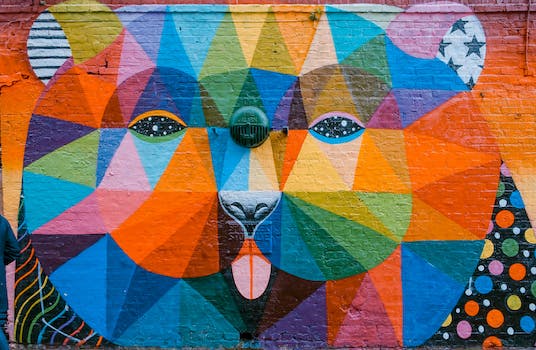
Stencils are an excellent tool for creating one-of-a-kind wall murals. Some examples of stencil methods are:
First, use several different stencils to build up an image. Use a basic stencil as a foundation for more intricate embellishments.
Ombre: Making a gradient with a stencil and varying the intensity of the same hue.
Add glitz to your walls by painting them with metallic paint and stenciling them.
4. Texture: Apply texture paste or joint compound through a stencil for a three-dimensional look on your walls.
5. Negative space: When working with a stencil, leave the negative space unfilled and fill in the surrounding area.
These are only a few basic methods for using stencils. The potential outcomes are wide open with some imagination.
1.5. Sponge Techniques
Managing and delegating tasks is an essential part of leading a distributed team. Cloud-based collaboration software makes it simple to delegate work and monitor team members’ progress in real time. With this function, there is no room for misunderstandings or missteps in communication. The program also facilitates clear task delegation, so everyone on the team understands what they should be working on. This is useful for increasing output and meeting deadlines effectively.
2. Introduction
One of the most useful functions of cloud-based collaboration software is the capability for several users to edit and provide input on a single document. With this function, team members in different locations can collaborate in real time on the same document. Since all team members may see and make changes to the same document in real time, version control issues are avoided. The review process can be streamlined because team members can make comments and feedback directly in the document. As a whole, this function helps remote teams function more effectively and efficiently.
2.1. What are Unique Wall Painting Techniques
Are you sick of staring at the same boring wall color every day at work or at home? Try out one of these 10 creative wall painting methods to inject some of your own style into your home or office. There’s a method suitable for your taste and ability level, from striking geometric designs to understated ombre effects. Keep reading to find out how to make your walls the showpiece of any room.
2.2. Why Use Unique Wall Painting Techniques
The appearance of a room can be radically altered by using innovative painting techniques on the walls. There is a wide range of options available, whether you want to make a dramatic statement with a feature wall or just add depth and texture to an existing space. Make your house or workplace more like you by incorporating some one-of-a-kind touches. In this post, we’ll go over 10 different ways to paint the walls of your home to give it a fresh new look.
2.3. Benefits of Using Unique Wall Painting Techniques
You may dramatically alter the feel of your home by using creative wall painting techniques. It’s a great way to show off your individuality and make a space feel more like you. Unique wall painting techniques provide countless options, whether you’re looking to make a striking statement or a quiet backdrop. In this post, we’ll look at ten different ways to paint walls that will take your home from boring to fantastic.
2.4. Popular Unique Wall Painting Techniques
Do you wish your walls were something other than a solid color? If you want to give your room some extra character, you might want to try out some creative wall painting methods. There are countless ways to give a space a one-of-a-kind appearance, from ombre walls to geometric patterns. In case you’re looking for some creative wall-painting ideas, consider these 10 tried-and-true methods:
2.5. Examples of Unique Wall Painting Techniques
Painting the walls is a fantastic method to breathe new life into a room that has become drab and lifeless. The appropriate methods can allow you to design an appearance that is truly your own and special. Ten distinct methods of wall painting are discussed here, each one capable of transforming a plain room into a showpiece. These methods, which range from stenciling to sponging, are simple to pick up and can be used in virtually any space. The wonderful world of wall painting awaits, so let’s get started.
3. Preparation
It is essential to thoroughly prepare the surface before beginning any of these special wall painting procedures. The walls must be cleaned of any dirt or grime, holes must be patched, and rough spots must be sanded. Priming the walls before painting helps the paint stick better and lasts longer. If you want professional results from your paint job, you should take the time to properly prepare the area first.
3.1. Choosing the Right Paint
There are a few factors to think about when selecting a paint color for your walls. Before you start painting, decide what kind of room it is. Is it a common place used by many people, such as a hallway or kitchen? If so, pick a paint that will last and can be easily maintained. A more stimulating color might not be the best choice for a bedroom or living area. Next, think about the hue. Is it a vibrant, eye-catching shade that you’re after, or something more subdued? Last but not least, consider the conclusion. Which kind of finish—matte or shiny—are you looking for? You can choose the best paint for your room and get the desired effect by thinking about these things.
3.2. Selecting the Right Tools
When planning a radical makeover of a room via unconventional wall painting methods, picking the correct equipment is essential. Brushes, rollers, paint trays, drop cloths, painter’s tape, sandpaper, and sandpaper paper are the bare minimum of instruments required. However, accessories like stencils, sponges, or even a sprayer may be required for your chosen approach. To ensure a smooth and effective painting experience, it is crucial to complete your homework and make sure you have all the necessary supplies before starting the project.
3.3. Preparing the Surface
It is essential to properly prepare the surface before attempting any of the innovative wall painting techniques discussed in this article. This entails removing any debris from the wall, filling up any holes or fractures, and sanding down the surface to produce a uniform smoothness. If the surface is not adequately prepared, the paint may peel or chip after being applied. Investing effort into surface preparation will pay off in a stunning, long-lasting makeover of your home.
3.4. Applying the Base Coat
It’s important to apply a foundation coat before experimenting with more advanced painting techniques on your walls. The paint will stick better and the surface will be smoother if you do this. Before applying the base coat, make sure the walls are spotless and any holes or cracks are filled with spackling product. Sand the walls after the compound has dried to achieve a smooth finish. Then, using a high-quality paint roller or brush, apply the base coat. Do not attempt any fancy painting techniques until the base coat has dried completely.
3.5. Allowing the Paint to Dry
It’s crucial to wait for the paint to dry between coats. Avoid touching the painted surface until it has dried completely, as per the manufacturer’s recommendations. Avoid smudges, unevenness, and peeling by taking your time with this step. Waiting for the paint to cure completely before moving on is recommended.
4. Tape Techniques
You don’t need to be an expert painter to use tape techniques to create beautiful designs and patterns for your walls. Stripes or geometric forms can be easily made with painter’s tape using this method. Tape is applied to the wall in the appropriate pattern, paint is applied, and the tape is removed once the paint has dried. Washi tape is another choice because it is removable without leaving any marks on the wall and comes in a wide range of colors and designs. Washi tape may be used to make all sorts of wall decorations, from patterns and forms to phrases and quotes. With some imagination and tape, you can make any wall into a work of art.
4.1. Creating Stripes
Adding stripes to your walls is a simple and enjoyable method to do that. One of the simplest ways to make stripes is with painter’s tape, however there are other methods. Putting the tape down firmly in the areas where you want stripes to appear is all that’s required. Then, after the tape has dried, paint the stripes the color you want. It’s possible to make diagonal stripes in addition to the more common horizontal and vertical ones.
4.2. Making Geometric Shapes
Taping off geometric forms on a wall is a common way to add personality to a room. This method is taping off and painting over a predetermined pattern or design on the wall. The tape is peeled off after the paint has set, revealing a neat geometric outline. You can achieve a clean, contemporary aesthetic in any space by employing this method. Use removable tape like painters tape or washi tape to avoid damage the wall and speed up the process.
4.3. Designing Patterns
Creating patterns on the walls is a great way to give a room more personality. You may add patterns to your wall painting in a variety of ways, from using stencils to freehand drawing. Taping off areas to make straight lines or geometric shapes is a common practice. A plain wall may be turned into a work of art with just a little imagination and some inexpensive materials. If you need some ideas for your next wall painting endeavor, check out these tape techniques:
4.4. Layering Colors
Colors Stacking
Adding multiple layers of color to a wall is a creative way to give a room a whole new look. By layering colors, a three-dimensional impression can be achieved in painting. You may get this appearance by first painting the wall with your base color and letting it dry. Then, tape off geometric forms or patterns on the wall with painter’s tape. Apply the second color over the tape and wait for it to dry. In the end, you can reveal your layered masterpiece by carefully removing the tape. With this method, even a modest room can feel more three-dimensional and interesting.
4.5. Removing the Tape
To get a smooth and finished paint job, removing the tape is an absolute must. To avoid paint peeling or tearing when removing the tape after painting, pull at a 45-degree angle. Remove the tape before the paint is completely dry to prevent peeling. Left on for too long, the tape can rip off pieces of paint along with it. Remove the tape slowly and carefully to avoid leaving any residue and achieve a professional-looking result.
5. Stencil Techniques
Using stencils is a fantastic alternative to freehanding elaborate wall designs. You can either buy premade stencils or use a cutting machine to make your own. Apply the paint with a roller or brush after taping the stencil to the wall. You can use numerous stencils to make a more intricate design, or you can make a pattern that repeats itself. Layered effects can also be achieved using stenciling, which can be done with numerous colors.
5.1. Selecting the Right Stencil
Several factors should be considered before deciding on a stencil for a wall-painting project. The stencil’s dimensions and the available space on the wall should be your first concerns. A bigger stencil may be more practical on a bigger wall. Think about the stencil’s design and how it will go in with the theme of your room. Find stencils that have a pattern and color palette that you like. Finally, ensure the stencil is constructed from a material that will withstand repeated painting.
5.2. Positioning the Stencil
The success of any wall-painting job depends on your ability to properly position the stencil. Before applying the stencil, make sure the wall surface is clean and free of any debris. If you want perfectly straight and even lines, use a level and a pencil. Next, secure the stencil in place by spraying the back with adhesive or taping it down using painter’s tape. Apply the paint gently and evenly using a stencil brush or roller, moving inward from the stencil’s edges. When you’re done painting, remove the stencil gently to keep the paint from smearing. Try out several color palettes and design patterns to give your room a style that is all your own.
5.3. Applying the Paint
Painting can begin once the stencil is in place. When painting with a stencil, it’s best to use a small roller or a stencil brush to ensure an even coat. Dabbing the paint on in little amounts rather than using a brush will produce the best results. The design won’t be ruined by paint seeping under the stencil thanks to this. Carefully peel the stencil off the wall once you’ve painted completely over it. Don’t go on to the next stencil or phase in the painting procedure until the previous one is dry.
5.4. Adding Detail
Taking your wall painting to the next level can be as simple as adding detail to your stencil techniques. You can make a statement with a giant stencil, or go for a more detailed look with a smaller, complex one. Try out different ways of stacking stencils to make 3D effects. If you want a more three-dimensional look, try using a different color for each stencil layer. If you want to give your room a truly one-of-a-kind style, don’t be hesitant to combine different stencil patterns.
5.5. Removing the Stencil
After you have done stenciling an area of wall, you must carefully peel off the stencil. Carefully remove the stencil from one corner to avoid smearing the paint as you go. To remove a stencil that is stubborn, try prying it off with tweezers or a craft knife. Take your time and be thorough in your removal of the stencil. Don’t attempt any touch-ups until the paint has fully dried.
6. Sponge Techniques
Sponge painting is an unusual method of wall decoration. Using a sea sponge, a rough, mottled appearance is achieved on the wall. You’ll need a marine sponge, multiple paint colors, and a tray or plate to pull off this method. Apply a foundation coat of paint and wait for it to dry before proceeding. Then, using the same sea sponge, randomly dab the second paint color over the wall. To get the desired appearance, keep dipping the sponge into the paint and dabbing it on the wall. Walls can be given a variety of textures and patterns by utilizing sponges of varying shapes and colors.
6.1. Choosing the Right Sponge
The success of any wall-painting job depends on your selection of a suitable sponge. The paint on your wall will have a different texture and pattern depending on the type of sponge you use. Smooth and even results can be achieved using synthetic sponges, while a more natural and textured appearance can be achieved with natural sponges. Think about the size, shape, and finish you’d like to achieve before purchasing a sponge. Try out a few distinct sponges to see which one performs best for your task.
6.2. Preparing the Sponge
It’s vital to get the sponge ready before beginning any painting technique. First, completely saturate the sponge with water. Remove excess water by squeezing and air drying the sponge. This will make sure the sponge is just wet enough to hold paint without dripping or smearing. After getting the sponge ready, you can try out several methods to paint stunning murals.
6.3. Applying the Paint
The Painting Process
After settling on a method, you can begin putting down paint strokes. Make sure you have everything you need before you start. You might need a roller, some brushes, a sponge, some drop cloths, and some painter’s tape.
It’s crucial to adhere to the guidelines for your chosen painting method when applying the paint. Applying a foundation coat of paint using a roller or brush is a good idea before utilizing a sponge technique. After the base coat has dried, you can use the sponge to add texture.
Take your time and break up the task into manageable chunks. You’ll have more time to work with each portion of the wall before the paint dries and the paint will dry more evenly. And don’t be scared to try out various methods and color palettes to find what works best for you!
6.4. Adding Texture
Using sponges, you can give your walls a lot of character. Apply a foundation coat and wait for it to dry completely before proceeding. Then, dab a natural sea sponge or a synthetic sponge into the paint of your choice and apply it to the wall in a haphazard fashion. For more depth and drama, you can also overlay colors. Create new textures by playing around with various sponge sizes and shapes. To avoid generating harsh lines or smudges, be sure to let each coat dry completely before applying the next.
6.5. Blending Colors
Color blending is an excellent technique for creating the illusion of depth and dimension in a wall painting. It’s the process of combining two or more colors to make a new one that works better in a certain setting. To do this, pick a base color and then add little quantities of the secondary color of your choice until you get the desired hue. Create unique textures and patterns by playing around with brush strokes and blending modes.
Conclusion
Walls painted in unconventional ways may radically alter a room and inject it with personality. There are countless ways to make a bold statement with your walls, from ombre effects to geometric patterns.


These 10 innovative and imaginative DIY home decor ideas from [object Object] provide a refreshing approach to enhancing ones living…