
Family time spent outside may be a sustainable adventure as well as a fun opportunity to strengthen relationships. Here are 10 pleasant and environmentally acceptable green family outings:
1. Hiking: Explore the trails in your area to take in the scenery and get some exercise.
2. Have a sustainable picnic in the park using recyclable plates, cups, and other utensils. This is a terrific way to savor a meal outside.
3. Farmer’s market: By purchasing fresh produce from a farmer’s market, you can support regional farmers and lessen your carbon impact.
4. Geocaching: Go on a fun scavenger search to find buried treasures while enjoying the outdoors.
5. Beach clean-up: Help the environment by getting your family involved in a beach clean-up.
6. Go camping: Disconnect from technology and spend time with your family in the great outdoors.
7. Cycling: Take a family bike trip to lessen your carbon impact and to enjoy the outdoors.
8. Take a leisurely stroll through a park or woodland to appreciate the surrounding natural splendor.
9. Volunteering: Join a neighborhood environmental group and contribute back to your neighborhood.
10. Create art outside by using the natural elements you might find in your environment.
- 1. Preparation
- 1.1. Clean the walls thoroughly
- 1.2. Fill in any cracks or holes
- 1.3. Sand the walls
- 1.4. Tape off any areas you don’t want painted
- 1.5. Prime the walls
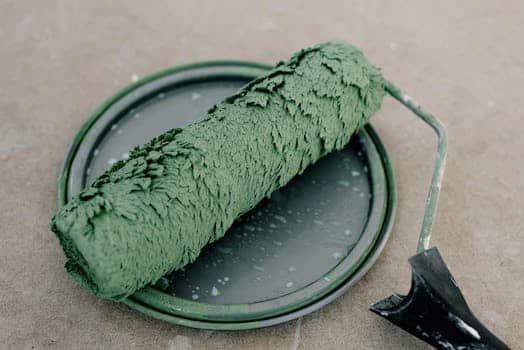
- 2. Painting Techniques
- 2.1. Use a roller for larger areas
- 2.2. Use a brush for corners and edges
- 2.3. Paint from top to bottom
- 2.4. Apply a second coat of paint
- 2.5. Use a paint extender to reduce brush strokes
- 3. Tips for a Professional Finish
1. Preparation
It is crucial to thoroughly prepare the surface before beginning your wall painting project. Cleaning the walls, patching any holes or cracks, and sanding the surface to achieve a smooth finish are all included in this. It’s also critical to assemble all required equipment and supplies, including paint rollers, paint trays, paint brushes, painter’s tape, and drop cloths. Making the necessary preparations will guarantee a finished product that looks professional and make the painting process much easier.
1.1. Clean the walls thoroughly
To ensure a professional finish, it is crucial to carefully prepare the surface before beginning any painting process. Cleaning the walls completely is one of the first phases in this procedure. To start, use a broom or vacuum to dust the walls to get rid of any cobwebs or loose dirt. Then, wash the walls from top to bottom using a damp cloth or sponge and a light detergent. Before starting to paint, make sure to thoroughly rinse the walls with clean water and let them dry fully.
1.2. Fill in any cracks or holes
It’s necessary to adequately prepare the walls before you begin painting. This involves using putty or spackling to cover any cracks or holes. Sand the filler until it is completely smooth after allowing it to dry completely. This will guarantee an even, smooth finish when you paint. Clean the walls thoroughly as well to get rid of any dust or grime that may have accumulated. This will improve paint adhesion and shield the finished product from flaws or faults.
1.3. Sand the walls
It’s crucial to prepare the wall surface adequately before you begin painting. To ensure a smooth and even finish, this also entails sanding the walls. Sand the walls in a circular motion while paying particular attention to any lumps or flaws using fine-grit sandpaper. Use a moist cloth to clean the walls after sanding to get rid of any dust or dirt. By doing this, you can be sure that your paint will adhere properly and have a polished appearance.
1.4. Tape off any areas you don’t want painted
You can’t expect a high-quality result from your painting if you don’t first take the time to properly prepare the surface. The first step is to protect the parts you don’t want to paint using tape. Baseboards, trim, windows, and doors are all fair game. If you want to stop paint from seeping through, use good painter’s tape and apply it firmly to the surface. If you don’t want the paint to come off with the tape when you remove it, do it as soon as you’re done painting.
1.5. Prime the walls
It’s important to adequately prepare the walls before beginning the painting process. Your paint will adhere properly, and the result will seem polished and expert. Priming the walls is the first step. Priming is the first step in painting since it helps to seal porous surfaces and gives the paint something to adhere to. It’s a great tool for disguising wall imperfections, too. Apply a uniform coat of primer using a roller or brush and a high-quality product. It’s important to wait until the priming has dried before painting.
2. Painting Techniques
Even though painting a room can seem like an insurmountable undertaking, a polished result is possible with practice and the correct equipment. If you need a hand getting things done, consider these ten suggestions.
First, invest in good paint and equipment. When the quality is high, the end result is high as well.
The walls must be carefully cleaned before being painted. Doing so will guarantee adequate paint adhesion.
Third, if you need to, you should start with a primer. This will aid in hiding flaws and providing a smooth base for the paint to adhere to.
Apply the paint in a W formation using a roller. Doing so will aid in a more uniform coating of paint.
Avoid using too much paint on the roller. 5. Dripping and a messy final product will result from this.
Cut in with a paintbrush along the borders and corners.
Make sure the ceiling is painted before the walls. Drips and splatters won’t be able to harm your freshly painted walls.
To make painting easier and to minimize brush strokes, use an extender.
Step back and refresh before continuing. Doing so will aid in error detection and guarantee a high quality final product.
Count to ten before applying a second layer of paint.
2.1. Use a roller for larger areas
A roller is the best instrument to use for painting a large surface, such a wall. It facilitates speedy and uniform covering, saving both time and energy. Make sure the nap (the thickness of the roller cover) is right for the surface you’re painting on. Textured surfaces require a thicker nap, while smooth surfaces are preferable with a thinner nap. Apply the paint in parts, beginning at the top and working your way down, using a paint tray to load the roller evenly with paint. For uniform covering and to prevent drips, roll in a W pattern.
2.2. Use a brush for corners and edges
Use a brush made for painting edges and corners when you’re doing interior work. Paint is applied more precisely with these brushes because of the angle and the finer hairs. Carefully paint the edges, corners, and trim using even strokes and a steady hand. Doing so will assist you avoid splattering paint on unintended areas and achieve a more polished look.
2.3. Paint from top to bottom
It’s best to begin painting a room’s ceiling and work your way down. This prevents previously painted surfaces from being ruined by drips and splatters. Start with the ceiling and work your way down to the walls. Painting a wall is best done in portions, beginning at one corner and working your way to the other. Apply the paint in long, even strokes, and avoid piling on too much paint to one coat. Move on to the next section and continue doing this until you’ve painted the entire room. At last, you can begin painting the trim and any other finishing touches.
2.4. Apply a second coat of paint
For a more finished and expert look, a second coat of paint should be applied once the first has dried fully. Always brush in long, even strokes and avoid using too much pressure. Wait until the second layer is completely dry before making any final adjustments.
2.5. Use a paint extender to reduce brush strokes
When painting walls, using an extension might help you use fewer strokes with the brush. Paint extenders are additives you apply to your paint to improve its flow and mask brush strokes and other flaws in the finished product. They are in very handy when painting expansive spaces, since they allow you to cover more terrain in less time without sacrificing quality. Follow the manufacturer’s instructions for mixing the paint extender with your paint before applying. The quality of your paint work should improve instantly in terms of its smoothness and uniformity.
3. Tips for a Professional Finish
Paying close attention to detail and being well-prepared are the keys to a job well-done when painting walls. To maximize your effectiveness, consider the following:
1. Remove all dirt and dust from the walls before painting.
Lightly sand the walls so that the paint can adhere properly.
Third, invest in high-quality paint and equipment to achieve a uniform appearance.
If you want better paint adhesion and coverage, step four is to apply a primer coat first.
5. Cover trim and any places you don’t want painted with painter’s tape.
Thin, consistent layers of paint are the best way to prevent drips and runs.
Seven, maneuver a paintbrush into tight spaces like corners and edges.
To avoid splatters and drips, you should paint the ceiling before the walls.
Nine, be sure the paint is totally dry between coats.
Take your time and don’t rush through the project; doing so will only result in sloppy work.
3.1. Don’t skimp on quality paint
One of the most crucial things you can do when painting walls to make them look professional is to invest in high-quality paint. Although it’s tempting to save money by going with a lower-quality paint, doing so can result in an uneven finish, the need for further coats, and eventual peeling or cracking. High-quality paint is an investment that will pay off in the form of reduced labor costs and improved aesthetics in the long run.
3.2. Invest in good brushes and rollers
A professional look is much easier to achieve using high-quality brushes and rollers. To minimize the visual impact of their use, high-quality brushes and rollers are constructed from long-lasting materials and are designed to properly disperse paint. They have larger capacities, so you can paint larger areas without having to stop as often to reload. Good brushes and rollers are a valuable investment for creating a faultless finish, but they are more expensive than their lower-quality equivalents.
3.3. Avoid drips and splatters
Dealing with drips and splatters is one of the most aggravating parts of painting. They are unsightly and can be a hassle to remove from freshly painted surfaces. Use a brush or roller that is proportional to the surface area being painted to prevent drips. Be sure to clean your brush or roller thoroughly before using it to apply paint to the wall. Use a drop cloth to protect the floor and any furnishings in the room from paint splatters. Taping off the parts you don’t want painted is another option. You may avoid the mess and frustration of drips and splatters when painting by following these easy steps.
3.4. Use a paint edger for a clean line
It might be difficult to paint walls such that they look neat and polished. A paint edger is a useful tool for this purpose. Use this convenient tool to avoid getting paint on neighboring surfaces while painting along edges and corners. A paint edger is a tool used to paint the edge of a wall, ceiling, or other flat surface. For the greatest outcomes, use consistent pressure and go gently.
3.5. Remove tape before the paint dries
Enjoyable and environmentally sound family outings in the great outdoors. You can do your part for the environment while making memories with your family at one of these 10 eco-friendly places to visit.
Conclusion
If you follow these ten guidelines, your next painting project will seem like it was done by a pro. Learn how to produce a smooth and perfect finish that will impress guests and make your home look lovely by properly prepping the walls and using the appropriate tools and techniques.

These 10 innovative and imaginative DIY home decor ideas from [object Object] provide a refreshing approach to enhancing ones living…