
Looking to add a personal touch to your living space? Get inspired by these 20 creative homemade DIY home decor ideas. Whether you’re a seasoned DIY enthusiast or just starting out, these projects offer a fun and budget-friendly way to transform your home. From upcycling old items to creating unique pieces from scratch, you’ll find plenty of inspiration to unleash your creativity and make your home truly one-of-a-kind. Let’s dive into these exciting DIY ideas and make your home decor dreams a reality!
- 1. 1. Introduction
- 1.1. Importance of DIY home decor
- 1.2. Benefits of homemade decor
- 1.3. Getting started with DIY projects
- 1.4. Materials and tools needed
- 1.5. Safety precautions for DIY projects
- 2. 2. Wall Decor Ideas
- 2.1. Creating a gallery wall
- 2.2. Making personalized wall art
- 2.3. Using repurposed materials for wall decor
- 2.4. DIY wall hanging ideas
- 2.5. Adding mirrors to enhance wall decor
- 3. 3. Furniture Makeover Ideas
- 3.1. Repainting old furniture
- 3.2. Reupholstering chairs and sofas
- 3.3. Adding decorative knobs and handles
- 3.4. Creating unique coffee tables or side tables
- 3.5. Transforming outdated dressers
- 4. 4. DIY Lighting Ideas
1. 1. Introduction
When it comes to home decor, there’s something special about adding your personal touch. DIY home decor projects allow you to unleash your creativity and transform your living space into a unique and personalized sanctuary. From simple crafts to more complex projects, there are endless possibilities for creating beautiful and functional pieces for your home. In this article, we will explore 20 creative homemade DIY home decor ideas that will inspire you to get crafty and make your home truly one-of-a-kind.
1.1. Importance of DIY home decor
DIY home decor has gained immense popularity in recent years. More and more people are opting to create their own unique and personalized decorations for their homes. This trend not only allows individuals to save money but also provides them with a creative outlet to express their style and personality. By engaging in DIY home decor projects, one can transform their living space into a reflection of their individual taste and preferences. In addition, DIY home decor offers a sense of accomplishment and satisfaction as individuals can take pride in their own handcrafted masterpieces. Whether it’s repurposing old items or creating something entirely new, DIY home decor allows for endless possibilities and the ability to create a truly one-of-a-kind home. In this article, we will explore 20 creative homemade DIY home decor ideas that will inspire and motivate you to embark on your own DIY journey.
1.2. Benefits of homemade decor
Homemade decor has become increasingly popular in recent years, and for good reason. Not only does it allow you to unleash your creativity, but it also offers a wide range of benefits. Whether you’re looking to spruce up your living space or add a personal touch to your home, homemade decor can be a cost-effective and rewarding option. In this article, we will explore the numerous benefits of homemade decor and provide you with 20 creative DIY home decor ideas to inspire your inner artist.
1.3. Getting started with DIY projects
DIY projects are a fantastic way to add a personal touch to your home decor. Whether you’re on a budget or simply love the satisfaction of creating something with your own hands, DIY home decor ideas can transform your space into a unique and stylish sanctuary. From upcycling old furniture to crafting decorative items from scratch, there are endless possibilities for unleashing your creativity.
In this article, we will explore 20 creative homemade DIY home decor ideas that will inspire you to embark on your own exciting projects. Whether you’re a beginner or a seasoned DIY enthusiast, this guide will provide you with the inspiration and guidance you need to get started. So, roll up your sleeves, gather your tools, and let’s dive into the wonderful world of DIY home decor!
1.4. Materials and tools needed
In order to successfully complete these 20 creative homemade DIY home decor ideas, you will need a variety of materials and tools. These items will help you bring your creative vision to life and add a personal touch to your home. Here are some essential materials and tools you will need:
1. Paint and Brushes: A variety of paint colors and different sizes of brushes will allow you to add color and decorative elements to your DIY projects.
2. Fabric and Sewing Supplies: If you plan on creating fabric-based decor items such as curtains, pillow covers, or table runners, you will need a selection of fabrics, sewing needles, thread, and scissors.
3. Wood and Woodworking Tools: For projects involving wooden elements like shelves, picture frames, or wall art, you will need different types of wood, a saw, sandpaper, a drill, and screws.
4. Glue and Adhesives: A strong and reliable adhesive is essential for various DIY projects. Make sure to have craft glue, hot glue gun, double-sided tape, and super glue on hand.
5. Decorative Paper and Scissors: Decorative papers, such as scrapbook paper or origami paper, along with a pair of scissors, will enable you to create unique paper-based decor items like wall art, garlands, or paper flowers.
6. Recycling Materials: Upcycling and repurposing old items can be a fun and sustainable way to create home decor. Keep items like glass jars, wine corks, tin cans, or old picture frames for future projects.
7. Decorative Accessories: To add finishing touches to your DIY decor, you may need various decorative accessories such as ribbons, buttons, beads, feathers, or trims.
8. Measuring Tools: Accurate measurements are crucial for successful DIY projects. Have a measuring tape, ruler, and level handy.
9. Safety Gear: When working with tools or materials that may pose safety risks, it’s important to prioritize safety. Wear protective goggles, gloves, and a dust mask when necessary.
10. Inspiration and Imagination: Last but certainly not least, bring your creativity and imagination to the table. Explore design ideas, browse through magazines or online platforms for inspiration, and let your imagination guide you in creating unique and beautiful DIY home decor.
1.5. Safety precautions for DIY projects
When it comes to DIY home decor projects, it’s important to prioritize safety. Whether you’re an experienced DIY enthusiast or just starting out, taking proper precautions can help prevent accidents and injuries. In this section, we will discuss some essential safety measures to keep in mind while embarking on your creative homemade DIY home decor ideas.
1. Use Protective Gear: Always wear appropriate protective gear such as safety goggles, gloves, and a dust mask when working with tools, chemicals, or materials that could potentially cause harm.
2. Familiarize Yourself with Tools: Before using any tools, make sure you understand how to operate them safely. Read the instruction manuals, watch tutorial videos, or seek guidance from experienced individuals if needed.
3. Keep Workspace Organized: A clutter-free workspace can significantly reduce the risk of accidents. Keep your tools, materials, and equipment properly organized and stored to avoid tripping hazards or misplaced items.
4. Work in a Well-Ventilated Area: When working with paints, adhesives, or other chemicals, ensure that the area is properly ventilated. Open windows or use fans to prevent the accumulation of harmful fumes.
5. Follow Electrical Safety Guidelines: If your DIY project involves electrical work, familiarize yourself with the necessary safety guidelines. Turn off the power supply before working on any electrical connections and use insulated tools.
6. Take Breaks: DIY projects can be time-consuming and physically demanding. Remember to take regular breaks to avoid fatigue and maintain focus, as tiredness can lead to accidents.
By following these safety precautions, you can enjoy your DIY home decor projects while minimizing the risk of injuries and ensuring a successful outcome.
2. 2. Wall Decor Ideas
When it comes to adding personality and style to your home, wall decor plays a crucial role. Whether you live in a small apartment or a spacious house, there are countless DIY wall decor ideas that can transform any room. From unique artwork to creative shelving, here are 20 homemade DIY home decor ideas to spruce up your walls.
1. Gallery Wall: Create a gallery wall by displaying a collection of your favorite photos, prints, and artwork. Mix and match different sizes and frames for an eclectic look.
2. Framed Fabric: Use colorful fabric and frame it to create a vibrant and eye-catching wall decor piece. This is a great way to add texture and pattern to any room.
3. Geometric Wall Art: Cut out various geometric shapes from different colored papers or cardboards and arrange them in a visually appealing pattern on your wall.
4. Hanging Planters: Create a vertical garden by hanging small planters filled with your favorite indoor plants. This not only adds greenery but also adds a unique touch to your walls.
5. Washi Tape Wall Design: Use washi tape in different colors and patterns to create a geometric or abstract design on your wall. It’s temporary and can be easily removed or changed.
6. Quirky Clock: Make a statement with a homemade clock using unconventional materials. You can use anything from old vinyl records to vintage plates.
7. Mason Jar Wall Vases: Attach mason jars to a wooden board and hang it on your wall. Fill the jars with fresh flowers or use them to store small items like makeup brushes or pens.
8. Hanging Wall Organizer: Create a functional and stylish wall organizer using fabric pockets or small baskets. This is perfect for keeping your keys, mail, and other essentials organized.
9. Paper Flower Wall Art: Create beautiful paper flowers and arrange them in a pattern on your wall. This adds a whimsical and feminine touch to any room.
10. Vintage Signage: Find or create vintage-inspired signs with inspirational quotes or words. Hang them on your wall to add a rustic and nostalgic feel.
11. Wall-mounted Bookshelf: Build a wall-mounted bookshelf using wooden planks and brackets. This not only adds storage space but also showcases your favorite books.
12. Painted Accent Wall: Choose a bold color and paint an accent wall to instantly transform the look of your room. This adds depth and creates a focal point.
13. Wall Stenciling: Use stencils and paint to create intricate patterns or designs on your walls. This adds a decorative touch and can be easily customized.
14. Floating Shelves: Install floating shelves to display your favorite decorative items, books, or plants. This creates a minimalist and organized look.
15. Hanging Plates: Hang decorative plates of different sizes and patterns on your wall. This adds visual interest and can be a conversation starter.
16. Macrame Wall Hanging: Create your own macrame wall hanging using different knots and fibers. This adds a bohemian and textural element to your walls.
17. Chalkboard Wall: Paint a section of your wall with chalkboard paint to create a versatile and interactive space. You can write notes, draw, or even use it as a menu board.
18. Wall Decals: Choose removable wall decals in various designs to easily update the look of your walls. This is a great option for renters.
19. Photo Collage: Create a collage of your favorite photos and arrange them on your wall. This personalized decor adds a sentimental touch.
20. Mirrors: Hang mirrors of different shapes and sizes to create the illusion of a larger space and reflect light. Mirrors also add a touch of elegance to any room.
2.1. Creating a gallery wall
Creating a gallery wall is a wonderful way to add personality and style to any room. It allows you to showcase your favorite artwork, photographs, and other decorative items in a visually appealing arrangement. Here are some steps to help you create your own gallery wall:
1. Choose a wall: Select a wall in your home that you want to transform into a gallery. It could be a blank wall in your living room, hallway, or even the staircase wall.
2. Gather your artwork: Collect different pieces of artwork, photographs, and other decorative items that you want to include in your gallery. Consider the theme and color scheme you want to achieve.
3. Plan the layout: Before hanging anything on the wall, lay out your artwork on the floor or a large table. Experiment with different arrangements until you find the perfect layout.
4. Hang the pieces: Start by hanging the largest piece in the center of the wall. Then, work your way outwards, adding smaller pieces around it. Use a level and measuring tape to ensure everything is aligned and evenly spaced.
5. Add variety: Don’t be afraid to mix different types of artwork and decorative items. Include framed prints, paintings, photographs, mirrors, and even wall sculptures to add depth and interest.
6. Consider frames and mats: Choose frames and mats that complement your artwork and the overall aesthetic you want to achieve. Opt for cohesive colors or mix and match for an eclectic look.
7. Play with spacing: Experiment with different spacing between the pieces. Some may be tightly grouped together, while others can have more breathing room. This will create a dynamic and visually appealing gallery wall.
8. Personalize it: Add personal touches to your gallery wall by including sentimental items such as family photographs, travel souvenirs, or handwritten notes.
9. Test the arrangement: Step back and observe the gallery wall from different angles. Make any necessary adjustments to ensure it looks balanced and visually pleasing.
10. Enjoy your creation: Once you’re satisfied with the arrangement, step back and admire your gallery wall. It’s a beautiful reflection of your personal style and creativity.
2.2. Making personalized wall art
Making personalized wall art is a wonderful way to add a unique touch to your home decor. Whether you want to display family photos or showcase your artistic skills, creating personalized wall art allows you to express your creativity and make your space truly your own. Here are some ideas to inspire you:
1. Photo Collage: Gather your favorite photos and create a collage on a large canvas or piece of wood. Arrange the photos in a meaningful way and use mod podge or glue to secure them in place. This personalized photo collage will serve as a beautiful reminder of cherished memories.
2. Typography Art: Choose a meaningful quote or phrase and create a typography art piece. You can use stencils, vinyl lettering, or even hand-paint the letters onto a canvas. Add your own artistic flair by incorporating different fonts, colors, and textures.
3. Monogram Wall Decor: Personalize your space with a monogram wall decor piece. Use wooden letters or metal initials to represent your family name or individual initials. Paint or embellish the letters to match your home’s color scheme and style.
4. Abstract Paintings: Let your imagination run wild and create abstract paintings for your walls. Experiment with different brush strokes, colors, and textures to create a one-of-a-kind art piece. This is a great option for those who love to paint and want to showcase their artistic abilities.
5. Fabric Wall Hangings: If you enjoy sewing or working with fabric, consider making fabric wall hangings. Choose a fabric that complements your home decor and create a unique design. You can incorporate different patterns, textures, and colors to make a statement on your walls.
These are just a few ideas to get you started on making personalized wall art. Let your creativity shine and have fun with the process. Your walls will thank you for the added personal touch!
2.3. Using repurposed materials for wall decor
Using repurposed materials for wall decor can add a unique and eco-friendly touch to your home. Instead of buying expensive artwork or generic wall hangings, consider utilizing items that may have otherwise been thrown away. Repurposing materials not only helps reduce waste but also allows you to showcase your creativity. There are numerous options for repurposed wall decor, such as using old windows as picture frames, transforming vintage doors into decorative wall panels, or creating a collage of salvaged wood pieces. By repurposing materials, you can give your walls a personalized and environmentally conscious makeover.
2.4. DIY wall hanging ideas
DIY wall hanging ideas are a great way to add a personal touch to your home decor. Not only are they fun and easy to make, but they also provide a unique and stylish look to any space. Whether you’re looking to spruce up your living room, bedroom, or office, there are plenty of creative ideas to choose from.
One idea is to create a macrame wall hanging. Macrame is a technique that involves knotting cords together to create intricate patterns. You can use various colors and textures of cords to make a stunning wall hanging that will instantly become the focal point of any room.
Another DIY wall hanging idea is to make a fabric tapestry. This is a great way to showcase your favorite fabrics and create a piece of art at the same time. Simply choose a fabric that you love, cut it into various shapes or strips, and then sew or glue them onto a canvas or wooden frame.
If you’re a nature lover, consider making a botanical wall hanging. You can collect leaves, flowers, or branches from your garden or local area and press them between two pieces of glass or in a frame. This will create a beautiful and natural wall hanging that brings the outdoors inside.
For those who prefer a more minimalist look, geometric wall hangings are a perfect choice. You can create them using wooden dowels, metal rods, or even straws. Simply arrange them in different shapes and sizes, and then hang them on the wall for a modern and eye-catching display.
In conclusion, DIY wall hanging ideas offer endless possibilities for adding a personal touch to your home decor. Whether you’re a fan of macrame, fabrics, nature-inspired designs, or geometric shapes, there’s a wall hanging idea out there for everyone. So unleash your creativity and start decorating!
2.5. Adding mirrors to enhance wall decor
Adding mirrors to enhance wall decor is a great way to elevate the style and aesthetics of any room. Mirrors not only serve a functional purpose but also act as decorative elements that can make a space appear larger and more inviting. Here are some creative ideas to incorporate mirrors into your wall decor:
1. Gallery Wall: Create a stunning gallery wall by hanging multiple mirrors of different shapes and sizes. This arrangement will not only add visual interest but also reflect light, making the room feel brighter.
2. Statement Mirror: Install a large statement mirror as a focal point on the wall. This can be a beautiful antique mirror or a modern design that complements the overall theme of the room.
3. Mirror Tiles: Use mirror tiles to create a unique pattern or mosaic on the wall. This can be a fun DIY project that adds a touch of glamour and elegance to any space.
4. Mirror Panels: Install mirror panels on an entire wall to create a stunning mirrored effect. This works particularly well in small rooms or areas with limited natural light.
5. Mirrored Wall Art: Incorporate mirrors into wall art by using mirror frames or incorporating mirrors into paintings or other artwork. This adds a touch of sophistication and can be a great conversation starter.
6. Mirrored Furniture: Consider adding mirrored furniture pieces, such as a mirrored console table or a mirrored cabinet, to enhance the overall wall decor. These pieces not only provide storage but also reflect light and create a sense of luxury.
When adding mirrors to your wall decor, keep in mind the placement and reflection angles to maximize their impact. Experiment with different styles and arrangements to find the perfect mirror addition that matches your personal taste and enhances the overall ambiance of your space.
3. 3. Furniture Makeover Ideas
If you’re looking to give your home a fresh and unique look, a furniture makeover can be a great way to achieve that. Not only is it a cost-effective option, but it also allows you to unleash your creativity and add a personal touch to your living space. Here are 20 creative homemade DIY home decor ideas to inspire you.
1. Repurposed Dresser: Transform an old dresser into a stylish and functional piece by adding a fresh coat of paint and new hardware. You can also consider adding decorative elements like stencils or decoupage.
2. Pallet Coffee Table: Use wooden pallets to create a rustic and charming coffee table. Sand and stain the pallets, then attach them together to form the tabletop. Add wheels for mobility and a glass top for a polished finish.
3. Chair Planter: Give new life to an old chair by turning it into a unique planter. Remove the seat and backrest, then place potted plants or flowers in the seat area. This eye-catching piece will add a touch of whimsy to your garden.
4. Bookshelf Makeover: Transform a plain bookshelf into a statement piece by painting it in a bold color or adding wallpaper to the back panel. You can also arrange books and decorative items in a creative and visually pleasing way.
5. Vintage Suitcase Nightstand: Stack vintage suitcases of different sizes and styles to create a one-of-a-kind nightstand. This not only provides storage but also adds a touch of nostalgia to your bedroom.
6. Chalkboard Painted Furniture: Use chalkboard paint to transform a piece of furniture into a functional and fun item. Paint a tabletop or the front of a cabinet and use it to write reminders, quotes, or doodles.
7. Floating Shelves: Install floating shelves on your walls to display small decor items, books, or plants. You can customize the size, shape, and color of the shelves to match your existing decor.
8. Wine Cork Bulletin Board: Collect wine corks and glue them together to create a unique bulletin board. This can be a useful and decorative addition to your home office or kitchen.
9. Mason Jar Wall Sconces: Attach mason jars to a piece of reclaimed wood and mount it on your wall to create charming wall sconces. Fill the jars with fairy lights or flowers for a cozy and romantic ambiance.
10. Painted Upholstery: Give new life to an old upholstered chair or sofa by painting the fabric. Use fabric paint or chalk paint mixed with fabric medium for a durable and soft finish.
11. Upcycled Window Frame: Turn an old window frame into a stunning piece of wall art. Add a mirror or attach photos, artwork, or decorative fabric to the glass panes.
12. Rope Wrapped Furniture: Use rope to add a nautical touch to your furniture. Wrap it around the legs or handles of chairs, tables, or dressers for a unique and textured look.
13. Vintage Drawer Planters: Repurpose old drawers as planters for your garden or balcony. Paint them in vibrant colors and arrange them in an interesting pattern for a playful and colorful display.
14. Painted Glass Bottles: Collect glass bottles of different shapes and sizes, then paint them in various colors. Arrange them on a windowsill or shelf for a vibrant and eclectic look.
15. Fabric Covered Storage Boxes: Transform plain storage boxes into stylish organizers by covering them with fabric. Use adhesive or fabric glue to attach the fabric, and add decorative trims or labels for a personalized touch.
16. Stenciled Tabletop: Create a unique and decorative tabletop by using stencils. Choose a pattern or design that complements your decor and use acrylic paint or spray paint to create the design.
17. Wallpapered Cabinets: Give your kitchen or bathroom cabinets a makeover by applying wallpaper to the front panels. This is a great way to add color, pattern, and personality to your space.
18. Washi Tape Wall Art: Use washi tape to create simple and temporary wall art. You can create geometric patterns, stripes, or even write inspirational quotes.
19. Embroidered Throw Pillows: Personalize your throw pillows by adding embroidered designs. Use colorful threads and different embroidery stitches to create unique and eye-catching patterns.
20. Vinyl Decals: Add a touch of personality to your walls, furniture, or accessories with vinyl decals. These are easy to apply and remove, making them a versatile option for adding temporary accents.
3.1. Repainting old furniture
Repainting old furniture is a fantastic way to give it a fresh new look and breathe new life into your home decor. Whether you have an old wooden dresser, a tired-looking coffee table, or a worn-out chair, repainting can transform these pieces into stylish and unique statement pieces. With a little bit of creativity and some basic painting supplies, you can easily create a furniture makeover that suits your personal style and adds a touch of charm to your living space.
One of the first steps in repainting old furniture is to properly prepare the surface. This includes cleaning the piece to remove any dirt, grime, or existing paint. Sanding the surface will help create a smooth base for the new paint to adhere to. Once the piece is clean and sanded, you can apply a primer to ensure better paint adhesion and durability.
When it comes to choosing the paint color, the options are endless. You can go for a classic look with neutral tones like white, gray, or beige, or opt for bold and vibrant colors to make a statement. Consider the overall color scheme of your room and choose a shade that complements the existing decor.
To add some extra flair to your repainted furniture, you can also experiment with different painting techniques. For example, you can try distressing the edges or using a sponge to create a textured finish. Stenciling or adding decorative patterns can also be a fun way to personalize your piece.
After the painting is complete, don’t forget to seal the surface with a clear topcoat or varnish. This will protect the paint from chipping or peeling and ensure the longevity of your furniture makeover.
Repainting old furniture is not only a cost-effective way to update your home decor, but it also allows you to showcase your creativity and make a one-of-a-kind piece. So, instead of getting rid of that old dresser or table, give it a fresh coat of paint and enjoy the satisfaction of transforming something old into something beautiful.
3.2. Reupholstering chairs and sofas
Reupholstering chairs and sofas is a fantastic way to give your furniture a fresh makeover. Whether you have old and worn-out pieces or simply want to update the look of your living space, reupholstering can completely transform the appearance of your chairs and sofas. Not only does it allow you to choose new fabric and patterns that match your personal style, but it also gives you the opportunity to repair any damages or sagging cushions. With a little bit of creativity and some basic sewing skills, you can easily breathe new life into your furniture and make it look brand new again. So, if you’re looking for a budget-friendly and fun DIY project, consider reupholstering your chairs and sofas for a stunning furniture makeover.
3.3. Adding decorative knobs and handles
Adding decorative knobs and handles can instantly transform the look of your furniture pieces. Whether you’re giving an old dresser a makeover or updating the cabinets in your kitchen, replacing the knobs and handles is a simple and inexpensive way to breathe new life into your furniture.
There are endless options when it comes to choosing decorative knobs and handles. You can opt for vintage-inspired knobs for a shabby chic look, or sleek and modern handles for a contemporary feel. Consider the style and theme of your room and select knobs and handles that complement the overall aesthetic.
Not only do decorative knobs and handles enhance the visual appeal of your furniture, but they also provide functional benefits. They make it easier to open and close drawers and doors, adding convenience to your everyday life.
When installing decorative knobs and handles, make sure to measure the existing holes accurately. This will ensure a proper fit and prevent any damage to your furniture. If the holes don’t align, you may need to use a drilling template or fill the existing holes and create new ones.
In conclusion, adding decorative knobs and handles is a simple and effective way to spruce up your furniture. With countless options available, you can easily find the perfect knobs and handles to match your style and transform your space.
3.4. Creating unique coffee tables or side tables
Creating unique coffee tables or side tables is a fun and creative way to add a personal touch to your home decor. Whether you have a vintage piece that needs a makeover or you want to start from scratch, there are endless possibilities for creating one-of-a-kind furniture that will make a statement in any room.
One idea is to repurpose old wooden crates or pallets to create a rustic coffee table. You can stack them on top of each other and secure them with screws or brackets. Then, sand them down and add a coat of stain or paint to match your desired color scheme. For a more eclectic look, you can mix and match different sizes and styles of crates.
Another option is to use a unique base for your coffee table, such as an old suitcase or vintage trunk. You can attach a glass or wooden tabletop to the base, creating a conversation piece that also provides storage space. This is a great way to repurpose old furniture and give it new life.
If you’re feeling more adventurous, you can try your hand at creating a coffee table from unexpected materials, such as tree stumps or industrial pipes. These unconventional materials can add a modern and artistic touch to your space.
When it comes to side tables, you can get creative with the shape and design. For example, you can repurpose an old ladder by adding wooden planks or shelves between the ladder rungs. This creates a unique and functional side table that can also be used for displaying plants or books.
In conclusion, creating unique coffee tables or side tables allows you to unleash your creativity and personalize your home decor. With a little bit of imagination and some DIY skills, you can transform ordinary furniture into extraordinary pieces that reflect your style and personality.
3.5. Transforming outdated dressers
Transforming outdated dressers is a great way to give your furniture a fresh new look. With a little creativity and some DIY skills, you can turn an old dresser into a stylish and unique piece of home decor. Here are some furniture makeover ideas to inspire you:
1. Paint and Stencil: Give your dresser a makeover by painting it in a trendy color and adding stenciled designs. This simple technique can instantly transform a boring dresser into a statement piece.
2. Decoupage: Use decorative paper or fabric to decoupage the surface of your dresser. This technique allows you to create intricate designs and patterns, giving your dresser a personalized touch.
3. Distressed Finish: For a rustic and vintage look, distress your dresser by sanding down the edges and applying a weathered finish. This technique adds character and charm to your furniture.
4. Hardware Upgrade: Replace the old handles and knobs of your dresser with new ones. Choose unique and stylish hardware that complements the overall look of your room.
5. Ombre Effect: Create a trendy ombre effect on your dresser by painting it in multiple shades of the same color. This technique adds depth and visual interest to your furniture.
Transforming outdated dressers into stunning home decor pieces is a fun and rewarding DIY project. Let your imagination run wild and give your old furniture a new lease on life!
4. 4. DIY Lighting Ideas
Looking to add some unique and personalized lighting to your home? Look no further! In this section, we will explore 4 DIY lighting ideas that will spruce up your living space. These homemade creations are not only budget-friendly but also allow you to showcase your creativity. Let’s get started!
1. Mason Jar Chandelier
Turn those old mason jars into a stunning chandelier! All you need is a wooden board, some mason jars, and a few basic electrical supplies. Drill holes in the board, insert the sockets, and wire them up. Then, screw the mason jars onto the sockets and hang the board from the ceiling. This rustic lighting fixture will add a charming touch to any room.
2. Wine Bottle Pendant Lights
Empty wine bottles can be transformed into elegant pendant lights. Cut the bottom of the bottles using a glass cutter and insert a pendant light kit into each one. Hang them individually or in a cluster to create a captivating focal point in your dining area or kitchen.
3. Paper Lanterns
Create a soft and cozy ambiance with paper lanterns. Purchase plain white paper lanterns and customize them with your preferred designs. Use paint, markers, or cut-out shapes to create unique patterns. Hang the lanterns at different heights in your living room or bedroom for a whimsical lighting effect.
4. Fairy Light Headboard
Want to add a touch of magic to your bedroom? Create a fairy light headboard! Attach fairy lights to the wall behind your bed in any pattern you like. You can create a simple rectangular shape or get creative with zigzags, hearts, or any other design. When lit up, the fairy lights will create a dreamy atmosphere perfect for relaxation.
These DIY lighting ideas offer endless possibilities for adding charm and character to your home. Get your creative juices flowing and start transforming your living space with these budget-friendly projects!
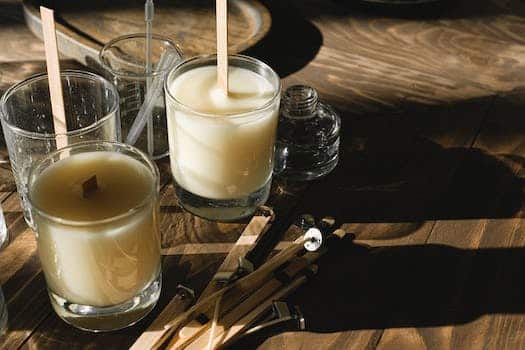
4.1. Making homemade candles and candle holders
Making homemade candles and candle holders can be a fun and creative way to add a personal touch to your home decor. Whether you want to create a cozy atmosphere or add a unique centerpiece to your dining table, DIY lighting ideas can help you achieve the desired ambiance. Here are some simple steps to make your own homemade candles and candle holders.
1. Choose your materials: To make candles, you will need wax, wicks, a melting pot, a thermometer, and fragrance oils (optional). For candle holders, you can use various materials such as glass jars, tin cans, or even recycled materials like wine bottles.
2. Melt the wax: Start by melting the wax in a melting pot over low heat. Stir occasionally and use a thermometer to ensure the wax reaches the desired temperature.
3. Prepare the wick: While the wax is melting, prepare the wick by cutting it to the desired length. Attach one end of the wick to the bottom of the candle holder using a small amount of melted wax.
4. Add fragrance (optional): If you want scented candles, add a few drops of fragrance oil to the melted wax and stir well.
5. Pour the wax: Carefully pour the melted wax into the candle holder, ensuring that the wick remains centered. Leave some space at the top to allow for any decorative elements you may want to add.
6. Customize your candle: This is where you can let your creativity shine. Consider adding dried flowers, herbs, or even glitter to the melted wax before it solidifies.
7. Let it cool and solidify: Allow the candle to cool and solidify completely before trimming the wick to the desired length.
8. Create candle holders: If you want to make candle holders, you can repurpose glass jars or tin cans by painting them, adding decorative elements, or wrapping them with twine or ribbon.
By following these simple steps, you can create unique and personalized homemade candles and candle holders that will enhance the ambiance of your living space. Enjoy the process and let your creativity guide you!
4.2. Creating unique pendant lights
DIY Lighting Ideas
When it comes to adding a touch of personal style and uniqueness to your home decor, creating your own pendant lights can be a great option. Pendant lights are not only functional but also serve as decorative elements that can enhance the overall ambiance of a space. By making your own pendant lights, you have the freedom to customize the design, materials, and colors to match your personal taste and the existing decor of your home.
To create unique pendant lights, you can explore various DIY techniques and materials. One idea is to repurpose everyday objects and transform them into stunning light fixtures. For example, you can use mason jars, wine bottles, or even old colanders to create one-of-a-kind pendant lights.
Another approach is to experiment with different materials such as wood, metal, or fabric. You can create geometric shapes using wooden dowels or metal rods, or construct pendant lights with fabric-covered lampshades for a softer, more delicate look.
Additionally, consider incorporating unique lighting elements such as Edison bulbs or LED strips to add a vintage or modern touch to your pendant lights. These bulbs not only provide ample illumination but also serve as decorative focal points.
In conclusion, DIY pendant lights offer endless possibilities for creativity and personalization. By exploring different materials, repurposing everyday objects, and incorporating unique lighting elements, you can create truly unique pendant lights that will elevate the style and charm of your home decor.
4.3. Designing your own lampshades
Designing your own lampshades can be a fun and creative way to add a personal touch to your home decor. Not only will you have a unique piece that reflects your style, but you’ll also save money by making it yourself. Here are some tips to help you get started on designing your own lampshades:
1. Choose the right materials: Consider using fabric, paper, or even unconventional materials like recycled materials or natural fibers. Think about the desired shape, texture, and color that will complement your existing decor.
2. Measure and cut: Take accurate measurements of your lamp base and determine the size and shape of the lampshade you want to create. Use these measurements to cut the fabric or other material accordingly.
3. Create a pattern: If you want a patterned lampshade, consider making a template or stencil to guide your design. This will ensure that your pattern is consistent and visually appealing.
4. Add embellishments: Get creative with embellishments such as trims, beads, ribbons, or embroidery. These small details can elevate the overall look of your lampshade and make it stand out.
5. Assemble the lampshade: Use adhesive or stitching to join the edges of the fabric or material together. Make sure to secure it tightly and neatly to avoid any loose ends.
6. Test the fit: Once your lampshade is complete, test it on your lamp base to ensure it fits properly. Make any necessary adjustments to ensure a snug fit.
7. Enjoy your creation: Once your DIY lampshade is in place, step back and admire your handiwork. You now have a unique and personalized piece of decor that adds a touch of your own style to your home.
4.4. Using fairy lights for ambiance
Fairy lights are a fantastic way to create a cozy and enchanting ambiance in your home. Whether you want to add a touch of magic to your living room, bedroom, or outdoor space, fairy lights can instantly transform the atmosphere. These tiny, delicate lights can be easily incorporated into DIY lighting projects to create a stunning visual effect. Here are some creative ideas to use fairy lights for ambiance:
1. Mason Jar Lanterns: Fill mason jars with fairy lights and hang them around your patio or garden. The soft glow emitted by the lights will create a warm and inviting atmosphere for outdoor gatherings.
2. Bed Canopy: Drape fairy lights over the frame of your bed to create a dreamy and whimsical canopy. The soft twinkle of the lights will add a romantic touch to your bedroom.
3. Photo Wall: Use fairy lights to display your favorite photos. Hang a string of lights horizontally on a wall and attach small clips to showcase your memorable pictures. This creative lighting idea will not only brighten up your space but also bring a personalized touch.
4. Bottle Lanterns: Recycle old glass bottles by turning them into beautiful lanterns. Insert fairy lights into the bottles and place them on a shelf or table. The illuminated bottles will create a cozy and magical atmosphere in any room.
5. Mirror Magic: Wrap fairy lights around a mirror to create a stunning focal point. The reflection of the lights will give the illusion of a larger space and add a touch of glamour to your decor.
These are just a few examples of how you can use fairy lights to enhance the ambiance of your home. Get creative and experiment with different placements and arrangements to achieve the desired effect. The soft, warm glow of fairy lights will undoubtedly create a magical and inviting atmosphere in any room.
4.5. Repurposing mason jars into light fixtures
One popular trend in home decor is repurposing mason jars into unique light fixtures. Mason jars are versatile and can be transformed into charming lighting elements that add a rustic touch to any space. Here are four DIY ideas to inspire you:
1. Mason Jar Pendant Lights: By attaching a pendant light kit to the lid of a mason jar, you can create a stunning pendant light fixture. Simply drill a hole in the lid, feed the wires through, and secure the light bulb inside the jar. Hang multiple jars at varying heights for an eye-catching display.
2. Mason Jar Chandelier: For a more elaborate lighting fixture, consider making a mason jar chandelier. This involves attaching multiple mason jars to a wooden or metal frame and wiring them together. The result is a beautiful and unique chandelier that will be the centerpiece of any room.
3. Mason Jar Wall Sconces: Add a touch of rustic elegance to your walls with mason jar wall sconces. Simply mount a wooden board on the wall, attach mason jars to it using pipe clamps, and insert candles or battery-operated LED lights inside the jars. The soft glow emitted from the jars will create a cozy ambiance.
4. Mason Jar Table Lamp: Transform a mason jar into a stylish table lamp by attaching it to a lamp base. You can find lamp kits that are specifically designed for mason jar projects. Fill the jar with decorative items like fairy lights, seashells, or dried flowers to add a personal touch.
Repurposing mason jars into light fixtures is a cost-effective way to create unique and personalized lighting solutions for your home. Get creative and experiment with different designs to enhance the ambiance of any room.
Conclusion
In conclusion, these 20 creative homemade DIY home decor ideas offer endless possibilities for transforming your living space. From repurposing old items to creating unique pieces from scratch, these projects allow you to add a personal touch to your home while staying on budget. Whether you’re looking to update a room or simply add a pop of color, these DIY ideas are sure to inspire your creativity and help you achieve the stylish home decor you’ve always wanted.


12 Comments
Zondra Gimble
11 months agoThese homemade DIY home decor ideas are simply brilliant! Im always on the lookout for budget-friendly ways to elevate my living space, and this post has definitely caught my attention. Cant wait to dive into it and discover unique and creative ways to spruce up my home. Thanks for sharing!
Willow Juliano
11 months agoThese homemade DIY home decor ideas are absolutely fantastic! I love how they offer unique and budget-friendly options to spruce up any living space. Its amazing how a little creativity and some simple materials can transform a room into a stylish and personalized haven. Definitely worth trying out these ideas to add a touch of charm and personality to my home!
Nonna Depoliti
11 months agoWell, well, well, look whos getting all crafty! Who needs expensive home decor when you can unleash your inner Picasso with these homemade DIY ideas? Get ready to turn your living space into a masterpiece without breaking the bank. Time to channel your inner creativity and let the glue gun do its magic! Lets see if my DIY skills can finally impress my friends and convince them Im actually Martha Stewart in disguise. Fingers crossed!
Liane Girhiny
11 months agoThese homemade DIY home decor ideas are truly remarkable! They not only offer distinctive and creative solutions but also prove to be cost-effective. Sprucing up our living spaces can sometimes be a daunting task, but with these budget-friendly alternatives, we can transform our homes into stunning and personalized havens. Thank you for sharing these amazing ideas!
Katusha Limann
11 months agoThank you for sharing this post on homemade DIY home decor ideas. The featured suggestions seem intriguing and are likely to appeal to individuals seeking unique and budget-friendly ways to enhance their living space. I appreciate the focus on homemade creations, which not only add a personal touch but also provide an opportunity for creativity and self-expression. Looking forward to exploring these amazing ideas further!
Cynde Lidah
11 months agoThese homemade DIY home decor ideas are a game-changer for anyone looking to give their living space a stylish makeover without breaking the bank. With these unique and budget-friendly suggestions, you can effortlessly elevate your homes aesthetic and create a cozy atmosphere. Get ready to unleash your creativity and transform your living space into a personalized haven with these amazing DIY home decor ideas!
Elisabeth Conall
11 months agoWow, this post sounds super interesting! Im always on the lookout for affordable ways to jazz up my living space. Cant wait to dive into these awesome homemade DIY home decor ideas! 💪🏠
Florie Mossman
11 months agoWow, these DIY home decor ideas are seriously awesome! Who knew you could create such stylish and budget-friendly pieces to spruce up your living space? Im definitely going to give some of these a try. Thanks for sharing!
Sonnie Parish
11 months agoWow, these homemade DIY home decor ideas are just what I needed! Cant wait to try some of them out and give my living space a fresh new look without breaking the bank. Thanks for sharing!
Charlene Schatz
11 months agoThese DIY home decor ideas are total game-changers! I cant wait to try them out and give my living space a fresh new look without breaking the bank. Thanks for sharing such awesome and budget-friendly tips! 😄🏡
Rivy Constantia
11 months agoOh my gosh, I cant even handle how ridiculously awesome these DIY home decor ideas are! 🙌🏼 Who knew I could transform my living space into a magical wonderland without breaking the bank? 💸✨ Seriously, Im so excited to get my crafty hands on these projects and unleash my inner artistic genius! 🎨🤩 Lets get ready to turn our homes into awe-inspiring masterpieces, one homemade decoration at a time! 🏡💫
Melisse Rola
11 months agoWow, these homemade DIY home decor ideas are just what Ive been looking for! Im always on the lookout for unique and budget-friendly ways to spruce up my living space, and these suggestions seem perfect. Cant wait to try them out and add a personal touch to my home!