

Do you want to update your living area without going over budget? Seek no more! This post has 20 incredible homemade DIY home décor ideas that will turn your property into a chic and unique retreat. Whether you’re a crafty person or you’re just searching for inexpensive ideas, these imaginative projects will encourage you to let your inner decorator go. Get ready to bring some uniqueness and charm to each space in your house by doing anything from upcycling existing objects to creating one-of-a-kind creations from start. Let’s get started on these fun do-it-yourself projects and explore the countless options available for homemade home décor!
- 1. Introduction
- 1.1. Why choose homemade DIY home decor?
- 1.2. Benefits of DIY home decor
- 1.3. Tools and materials needed
- 1.4. Important tips for success
- 1.5. Safety precautions
- 2. 1. Repurposing Furniture
- 2.1. Revamping an old dresser
- 2.2. Transforming a vintage chair
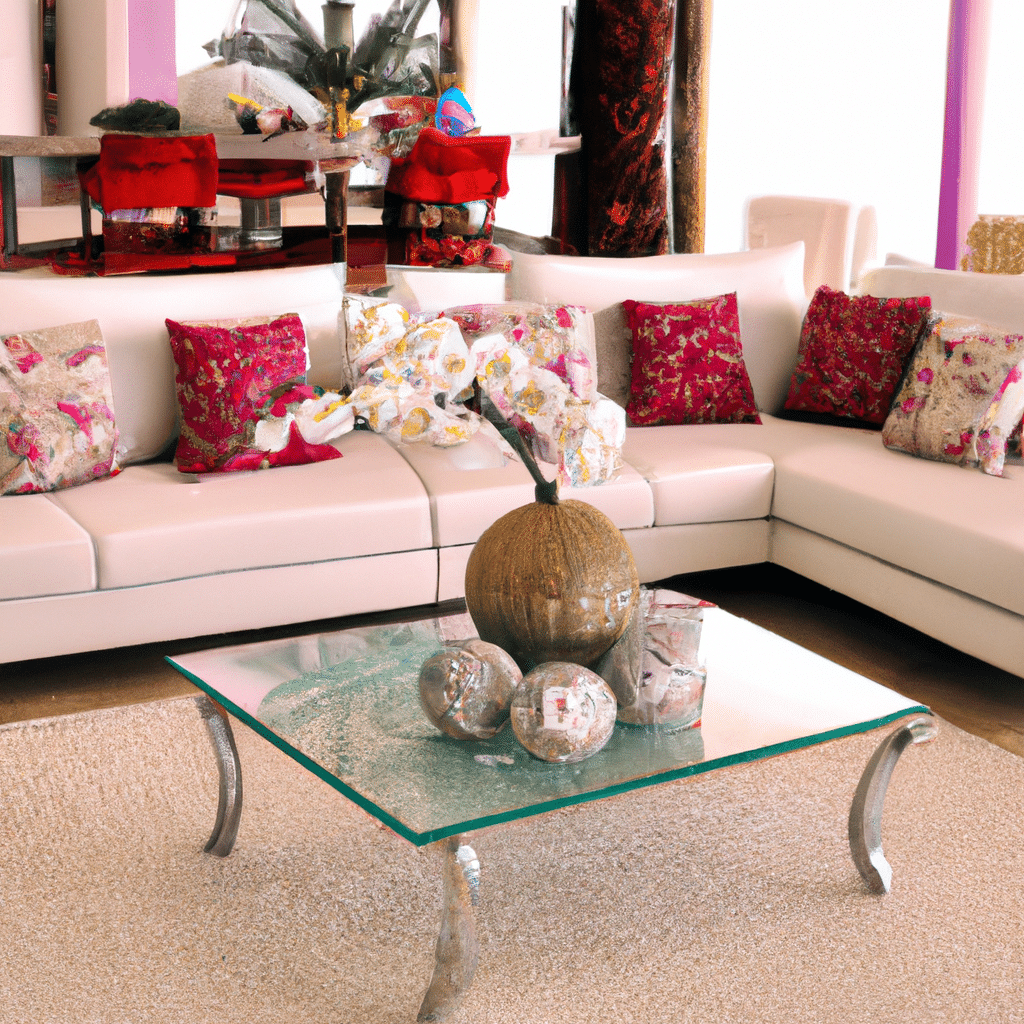
- 2.3. Creating a unique coffee table
- 2.4. Refreshing a wooden bookshelf
- 2.5. Upcycling a wooden ladder
- 3. 2. Wall Art and Hangings
- 3.1. Hand-painted canvas artwork
- 3.2. DIY photo frame collage
- 3.3. Macrame wall hanging
- 3.4. Fabric tapestry
- 3.5. Wooden pallet wall decor
- 4. 3. Creative Lighting
1. Introduction
Do you want to give the décor of your house a more unique touch? Seek no more! This post will go over 20 incredible homemade DIY home décor ideas that will turn your room into a chic and individual retreat. These ideas will spark your creativity and assist you in creating the ideal look for your home, regardless of your level of experience with do-it-yourself projects. From upcycling commonplace objects to crafting gorgeous wall décor, this assortment has something to offer everyone. Now, let’s get started and explore the countless options for do-it-yourself home décor!
1.1. Why choose homemade DIY home decor?
An increasing number of people are choosing do-it-yourself initiatives for home décor. Choosing homemade DIY home decor is a terrific choice for a number of reasons. It enables you to give your living area a uniquely personal touch, first and foremost. Making your own décor allows you to express your unique style and inventiveness. Furthermore, homemade home décor is frequently less expensive than store-bought pieces. Repurposing outdated or discarded materials allows you to look fashionable while conserving money. The sense of fulfillment and success that comes with making your own home décor is another benefit. Getting a thing finished by hand may be quite satisfying and gratifying. Plus, there are countless personalization options with do-it-yourself projects. You can customize the décor to your own tastes and make unique pieces that genuinely capture your individuality. Lastly, you can support a sustainable lifestyle by making your own home décor. Reusing and upcycling materials helps cut waste and raise environmental awareness. These are a few of the factors contributing to the growing popularity of homemade, do-it-yourself home décor. We’ll look at 20 original do-it-yourself home décor ideas in the sections that follow.
1.2. Benefits of DIY home decor
A popular trend that lets people save money and personalize their living spaces is DIY home decor. Indulging in do-it-yourself home décor projects has several advantages. It not only lets you let your imagination run wild, but it also lets you make one-of-a-kind, customized artworks that express your taste and flair. DIY home décor can involve upcycling and repurposing old objects to give them a new lease on life in addition to crafts and decorations. This not only gives your house a unique touch, but it also reduces trash, which supports sustainability. DIY home décor projects also frequently provide you a sense of satisfaction and success because you’re seeing your living environment change as a result of your own hard work. Therefore, DIY home décor is the ideal choice for you if you want to add a unique touch to your house while saving money and having fun in the process.
1.3. Tools and materials needed
Getting the required supplies and tools together is a must before you start making your own DIY home décor. Possessing the proper materials will guarantee that your creating endeavors are completed to perfection and that your experience is enjoyable. The following basic equipment and supplies are required:
1. Measuring tape: To ensure exact cuts and precise measurements of dimensions, a measuring tape is a need.
2. Screwdriver set: Having a variety of screwdriver sizes on hand will be helpful while putting together and taking apart furniture or repairing décor pieces.
3. Glue gun: An adaptable instrument that enables you to firmly join different materials together is a glue gun.
4. Paintbrushes: To apply paint or create elaborate drawings, the various sizes and types of paintbrushes are required.
5. Craft tool: Paper, cardboard, and fabric may all be cut through with a craft knife.
6. Pliers: Pliers are required for handling small components, tightening screws, and bending wires.
Apart from these instruments, it’s crucial to maintain a fully supplied inventory of items like:
1. Paint: To give your décor pieces pops of color, choose a variety of paint hues.
2. Fabric: Gather various textiles with patterns and textures to make wall hangings, pillows, and upholstery.
3. Wood: Shelves, frames, and wooden signs can be made from a variety of wood varieties.
4. Ribbons and trims: You can embellish your products with them to offer a beautiful touch.
5. Beads and buttons: These little decorations can be used to create jewelry or give accents to home décor pieces.
Keep in mind that the precise equipment and supplies you’ll want can change based on the do-it-yourself tasks you select. Before beginning any creative effort, it’s a good idea to develop a strategy and make sure you have everything you need.
1.4. Important tips for success
Do-it-yourself projects can be an inexpensive and intimate way to add a personal touch to home design. Making your own handcrafted decorations is a great way to update your living area and show off your style and inventiveness. This post will provide you with 20 simple, homemade DIY home décor ideas that will improve the visual attractiveness of your house. These pointers will assist you in making your home decor efforts successful, regardless of experience level.
1.5. Safety precautions
Do-it-yourself projects can be an inexpensive and enjoyable way to add a personal touch to your home’s décor. To make sure that your do-it-yourself home décor projects are not only lovely but also secure for you and your family, it’s crucial to put safety measures first. Before starting any do-it-yourself home décor tasks, you should keep in mind the important safety precautions listed in this section.
2. 1. Repurposing Furniture
Repurposing furniture is a clever way to give worn-out pieces new life and give your home design a distinctive touch. Ordinary furniture may be transformed into spectacular statement pieces with a little bit of ingenuity and basic do-it-yourself abilities. The uses for upcycling and reusing are numerous, whether you have an old dresser, a wooden pallet, or a vintage luggage. We’ll look at 20 homemade DIY home décor ideas in this post, which will motivate you to get artistic and give your furniture a second chance.
2.1. Revamping an old dresser
A unique and entertaining method to repurpose furniture is to give an old dresser a makeover. A plain and out-of-date dresser may be transformed into a chic and distinctive object that gives your home decor some personality with a little bit of do-it-yourself magic. There are countless ways you may update your old dresser: you can paint it a new color, add new hardware, or altogether change it into something else. Repurposing an old dresser will not only help you save money but also let you utilize your imagination and breathe new life into a piece of furniture that you might not have otherwise used.
2.2. Transforming a vintage chair
Repurposing furniture is a current trend in home decor, and repurposing an old chair is a terrific way to give your living area a distinctive touch. Repurposing an old chair can result in a stunning and environmentally sustainable statement piece.
Pick an antique chair with solid structure and good bones to start. Seek out chairs that have unique shapes or fine details that will stand out when they are transformed.
To begin, give the chair a thorough washing to get rid of any dirt or grime. Sand down any uneven surfaces or paint that is peeling, if needed. This will give you a smooth surface whether you decide to paint or refinish.
Next, choose the style you want your chair to have. For a more understated look, consider refinishing the wood and adding new upholstery instead of painting the entire thing a bright color.
Use a primer before painting to guarantee good adherence and stop chipping. Paint in thin layers, letting each coat dry completely before applying the next. To make the chair more unique, think about adding decorative components like stencils or hand-painted patterns.
Sandpaper or a chemical stripper can be used to remove the old finish in preparation for refinishing. Apply a finish of your choosing, such varnish or stain, once the wood is exposed to bring out the chair’s inherent beauty.
Lastly, for even more comfort and style, think about reupholstering the backrest or seat cushion. To ensure longevity, pick a fabric that goes well with the chair’s general design and secure it firmly.
Once your vintage chair makeover is finished, locate the ideal area of your house to display your creation. Your upcycled chair is sure to spark attention and become a treasured part of your decor, whether it’s used as a statement piece in your living room, a bedroom corner, or a reading nook.
2.3. Creating a unique coffee table
Repurposing furniture is a fantastic way to give your home’s decor a distinctive touch. An original coffee table is a creative do-it-yourself project. You can breathe new life into an old piece of furniture and create a unique focal point for your living space by repurposing it.
Furniture can be transformed into coffee tables in a variety of ways. You may give your room a rustic and vintage feel by using an old door or window as the tabletop. Another choice is to upcycle a wooden pallet or crate to create a fashionable coffee table with an industrial feel.
You may also mix and match different materials to make a one-of-a-kind coffee table. For instance, you could build a glass or hardwood tables on top of an old suitcase that serves as the base. Your guests will be impressed by the chic and unique aesthetic that this will produce.
Whatever piece of furniture you decide to refinish, be sure to give it a good sanding and a fresh coat of paint or stain. It will look polished and finished and be shielded from deterioration thanks to this.
Repurposing furniture to create a unique coffee table is an enjoyable and satisfying do-it-yourself project. It enables you to express your individuality and let your creativity run wild when decorating your house. So why not give it a shot and offer your living area a little something special?
2.4. Refreshing a wooden bookshelf
You may give your home’s dcor a new lease of life by painting a wooden bookshelf. You can turn an old, worn-out bookshelf into a gorgeous piece of furniture with a few easy steps. First, give the bookshelf a thorough cleaning and make sure all dust and debris are gone. To get a smooth finish and get rid of any flaws, sand the surface. Apply a new coat of paint or stain in the color of your choice when the sanding is finished. To add a splash of excitement to your room, think about utilizing a strong, vivid hue. To bring out the inherent beauty of the wood, go for a clear finish if you want a more organic appearance. Lastly, to finish the makeover, add some ornamental components like fresh hardware or trim. Your wooden bookshelf can be updated to create a one-of-a-kind, customized piece that flawlessly matches your interior design aesthetic.
2.5. Upcycling a wooden ladder
Repurposing furniture can be done creatively by upcycling a wooden ladder. You can create a one-of-a-kind piece of home décor out of an old wooden ladder with a little creativity and do-it-yourself abilities. An attractive and rustic touch may be added to any space by upcycling a wooden ladder, and it can be used as a bookcase, towel rack, or plant stand. The best aspect is that it’s an affordable alternative because used ladders are frequently found at salvage yards or thrift stores. Thus, try upcycling an old ladder to create a useful and fashionable element for your home rather than discarding it.
3. 2. Wall Art and Hangings
A terrific way to add a personal touch to your home decor is with wall art and hangings. They not only provide your walls flair and visual appeal, but they also serve as a reflection of your individuality and preferences. The best part is that all it takes is a few basic supplies and a little imagination to make your own wall hangings and art.
Making a gallery wall out of your best pictures or artwork is one method for making homemade wall art. You can achieve this by framing the pieces and placing them on your wall in an appealing arrangement. For a more eclectic appearance, you can mix and match different frame sizes and styles; alternatively, you can stick with one for a sleek, contemporary aesthetic.
Making your own wall hanging or tapestry is another do-it-yourself project for wall décor. You can accomplish this with yarn, fabric, or even macrame methods. You might choose a pattern or design that goes well with the décor you already have, or you can go for something striking and eye-catching to stand out.
You might also attempt making your own geometric or abstract wall art if you’re feeling very daring. Paint, stencils, or even just some masking tape might be used for this. There are countless options available, and you can alter the hues and forms to fit your own preferences.
All things considered, including handmade wall hangings and wall art into your home design not only adds a distinctive touch but also offers you the fulfillment of knowing that you crafted something lovely by hand. So start decorating and use your imagination!
3.1. Hand-painted canvas artwork
Canvas artwork that has been hand-painted is a great way to give your home decor a unique flair. Any room may be instantly transformed by these distinctive and artistic pieces, which also create a focal point that uniquely represents your personal taste and style. The atmosphere of your living room, bedroom, or even office can be improved with hand-painted canvas artwork, which comes in a variety of alternatives to fit every taste.
Because hand-painted canvas art is so adaptable, you can find pieces that go well with any existing color scheme or theme in your house. The options are unlimited, ranging from realistic landscapes to abstract patterns. Hand-painted canvas artwork is a captivating addition to any wall space because of its power to arouse emotions and draw attention.
Customizing hand-painted canvas artwork to your exact specifications is one of its many wonderful benefits. Whether you’re more interested in subdued hues or vivid colors, you can collaborate with an artist to produce a piece that precisely captures your idea. You can also select the artwork’s dimensions and size to make sure it suits your wall precisely.
Incorporating hand-painted canvas artwork into your home decor not only creates visual appeal but also gives your living area a distinct and individual feel. These unique pieces can easily bring your home’s overall design together and serve as excellent discussion starters. Hand-painted canvas artwork is an essential piece of furniture for any home, regardless of whether you’re an art aficionado or just want to improve the atmosphere in your area.
3.2. DIY photo frame collage
Making a homemade photo frame collage is a great way to give your interior design a unique flair. It’s not only a great way to showcase your best moments, but it also makes a statement piece of wall art. Start by compiling a collection of vintage picture frames in a range of shapes and sizes. You can either recycle old frames you already own or buy cheap ones from thrift stores. Then decide which wall in your house you want to use for the collage. To start, arrange the frames in various configurations and compositions on the floor. After you’re happy with the layout, make sure the frames are positioned and placed on the wall uniformly by using a level and measuring tape. You can use sticky hooks, nails, or even a combination of the two to hang the frames. Lastly, simply place your preferred pictures or artwork inside the frames, and presto! Now that you have a gorgeous homemade photo frame collage, your home decor will have a unique touch.
3.3. Macrame wall hanging
A popular option for giving any place a hint of bohemian style are wall hangings made of macrame. These elaborate works of art are made by knotting different rope or cord lengths together to produce lovely patterns and designs. A macrame wall hanging may be used to rapidly improve the aesthetics of any space, be it your office, living room, or bedroom. Modern home design has become incomplete without macrame wall hangings because of their classic charm and versatility. There’s a macrame wall hanging to fit every taste and style, ranging from simple patterns to more elaborate and detailed works of art. Thus, why not give creating a macrame wall hanging a try? It can be a rewarding and enjoyable do-it-yourself job in addition to adding a personal touch to your house. The envy of all your friends and family will be on you when you produce a gorgeous wall art with just a few simple supplies and a little perseverance. So take a piece of cord, start knotting, and let your imagination run wild!
3.4. Fabric tapestry
Wall hangings and wall art made from fabric tapestries are exquisite and one-of-a-kind. They instantly make any area feel warm and inviting by bringing some color and inventiveness into it. The living room, bedroom, or even office can all be improved with cloth tapestries; they’re a chic and adaptable option.
With regard to cloth tapestries, the possibilities are endless. A variety of patterns, colors, and designs are available for you to select from that go well with your current decor and personal style. Everybody can choose a fabric tapestry they like, ranging from contemporary geometric patterns to prints with a bohemian vibe.
The ease of installation of fabric tapestries is one of its many outstanding advantages. Fabric tapestries are much easier to hang on the wall than traditional paintings or framed art since they may be fastened using adhesive strips, hooks, or nails. Because of this, they’re a great option for people who want to switch up their wall décor without having to worry about damaging their walls or drilling holes in them.
Additionally, fabric tapestries are an affordable method to adorn your house. Because they are frequently less expensive than traditional artwork, they are a cost-effective choice for lovers of do-it-yourself home décor. Even better, you may upcycle existing fabrics and use fabric paint to create original motifs to make your own fabric tapestry.
Not only are cloth tapestries visually pleasing, but they also serve a functional purpose. They work well in rooms with high ceilings or hard surfaces because they reduce echoes and assist absorb sound. Furthermore, cloth tapestries can serve as a focus point in your home, highlighting a particular space or making a statement visually.
Fabric tapestries are a flexible and imaginative way to adorn your walls, whether you’re seeking to add a splash of color to a neutral room or create a warm environment in a small space. They are the ideal option for anyone who enjoys doing their own home decor because of their countless design options and simple installation.
3.5. Wooden pallet wall decor
A popular option for giving any living area a rustic and distinctive touch is wooden pallet wall decor. A few pallets and simple equipment are all you need to make lovely wall hangings and wall art that will completely change the appearance of your house.
Making a sign out of pallets is one concept for wooden pallet wall décor. All you have to do is take a pallet and cut it to the right dimensions. After that, paint or stain the wood to fit the design of your house. Using stencils or freehand painting, you can add any pattern or statement once the paint has dried.
The creation of a pallet shelf is another inventive idea. This can be accomplished by adding brackets for support and affixing a pallet horizontally to the wall. The shelf can then be used to showcase little plants, reading material, or other ornamental objects.
If you want something more complicated, try creating a pallet clock. After cutting the pallet into a circle, add the numerals and hands to the clock. This unusual wall hanging will look great in your house and function as a useful clock as well.
Finally, a gallery wall can be made of pallets. To make an eye-catching display for your best pictures or artwork, chop the pallets into various sizes and shapes and place them on the wall.
Wooden pallet wall décor is inexpensive, adaptable, and enables you to give your house a unique flair. Use your imagination and become creative with these do-it-yourself projects!
4. 3. Creative Lighting
An important factor in improving a home’s overall mood and decor is its lighting. Your home décor can be given a personal touch by implementing imaginative lighting ideas. To get you inspired, consider these homemade DIY home décor ideas:
1. Mason Jar Chandeliers: By fastening common mason jars to a wooden plank and adding pendant lights, you can turn them into gorgeous chandeliers. This quaint and rustic lighting fixture will instantly improve the appearance of any space.
2. Fairy Light Canopy: The canopy effect produced by suspending fairy lights from the ceiling can help to create a mystical ambiance. This dreamy lighting concept is ideal for outdoor areas or bedrooms.
3. Wine Bottle Lamps: Create chic lighting out of empty wine bottles. All you have to do is put a cork on a string of LED lights and insert it into the bottle. Your living area will feel cozier and more romantic with these unusual lighting.
4. Paper Lanterns: Make vibrant paper lanterns with beautiful paper or origami methods. Any area will seem suddenly brighter when you hang them from the ceiling or set them on a table.
5. old Edison Bulbs: Use old Edison bulbs in your lighting fixtures to embrace a retro aesthetic. Your home will have a vintage appeal thanks to the warm, nostalgic illumination these filament bulbs create.
6. Rope Lights: You may add rope lights to your home’s décor by fastening them to the bottom of cupboards, shelves, or the railings of staircases. This understated lighting solution gives your room a calming, welcoming feel.
7. Mason Jar Wall Sconces: Make handmade wall sconces by fastening mason jars to a wooden board and filling them with LED lights or tiny candles. You may alter these rustic sconces to fit any type of decor.
8. Twinkle light headboard: Make a headboard out of twinkle lights to give your bedroom a dreamlike feel. Lights can be hung from the wall in a pattern or over your bed to resemble a canopy.
Teacup Candles: Convert old teacups into adorable candles as a creative reuse. To create sophisticated and creative lighting accents, fill the cups with wax and insert a wick.
10. Branch Chandelier: Use string lights and tree branches to create a chandelier that will bring the outside inside. For a distinctive and striking focal point, hang it above a dining table or in the living room.
These imaginative lighting designs add gorgeous décor pieces to your house in addition to providing illumination. Take inspiration and let your creativity run wild to design unique lighting fixtures that express your individuality and sense of style.
4.1. Mason jar pendant lights
A stylish and imaginative way to add distinctive illumination to your house is with mason jar pendant lights. In addition to being fashionable, these DIY lights are simple to assemble. You can turn regular mason jars into gorgeous pendant lights that will improve the atmosphere of any space with only a few easy steps.
A few things are needed to make your own mason jar pendant lights. First, collect a few different-sized mason jars. These can be found at your neighborhood craft store, or you can reuse some old jars you have sitting about. The required wiring and sockets are included in pendant light kits, which are the next item you will need. You may also buy these online or at craft stores.
It’s a rather simple technique once you have your materials. First, drill a tiny hole in the middle of the lid of each mason jar. This will enable the pendant light chord to be fed through the lid. The pendant light kit should next be put together in accordance with the manufacturer’s instructions. Usually, to do this, you have to fasten the socket to the cord and insert it through the lid.
Upon completion of the pendant light kit assembly, you can now personalize your mason jars. You may use glass paint to make unique designs or paint them any color you desire. To add some personality to your pendant lights, you may also embellish them with ribbons, beads, or twine.
Just put the lids back on after painting and decorating your mason jars, making sure the pendant light chord is firmly in place. Using hooks or a ceiling plate, suspend the pendant lights from the ceiling, being cautious to adhere to electrical installation safety regulations.
You’ll be astounded by the cosy and pleasant ambiance your new mason jar pendant lights generate when you switch them on. Not only are these unusual lighting fixtures useful, but they also make striking focus pieces in any space. A touch of originality and charm may be added to your home design with mason jar pendant lights, whether you decide to place them in the living room, bedroom, or kitchen.
4.2. DIY paper lanterns
Setting priorities for your work is essential to efficient time management. Through prioritizing and concentrating on the most crucial tasks, you can optimize your output and effectiveness. You can use the following advice to help you prioritize your tasks:
Make a list of things to do: Make a list of everything you need to get done first. Be precise and divide more complex jobs into smaller, more doable ones.
2. Ascertain importance and urgency: Consider the importance and urgency of each assignment while making your evaluation. Important tasks help achieve long-term objectives, whereas urgent jobs demand immediate attention.
3. Make use of the Eisenhower Matrix. This matrix divides jobs into four groups: not urgent and not important, urgent but not important, important but not urgent, and important but not urgent. Set work priorities appropriately.
4. Take deadlines into account: Pay attention to any dates that are attached to your assignments. Assignments having impending deadlines ought to be prioritized more highly.
5. Evaluate your energy levels: Track your energy levels all day long. When your energy is at its highest, give priority to things that call for greater concentration and focus.
6. Concentrate on high-value tasks: Choose assignments that will either help you reach your overall objectives or have the ability to provide noteworthy outcomes. To have the biggest impact, give these tasks top priority.
7. Delegate or remove non-essential duties: If possible, delegate tasks that can be done by someone else. Get rid of any duties that don’t contribute much or don’t fit with your objectives.
8. check and revise priorities: As conditions change, go back and check your work priorities on a regular basis. Remain adaptable and take advantage of new chances or challenges.
You may boost your productivity and develop your time management abilities by setting priorities for your chores.
4.3. Upcycled wine bottle lamps
Make repurposed wine bottle lamps if you want to give your home decor a distinctive touch. These lights are an inventive and environmentally responsible solution to reuse used wine bottles in addition to providing useful lighting. Any wine bottle can be turned into a gorgeous light fixture that will spark conversation in any area with a few easy supplies and a basic understanding of electrical work. Upcycled wine bottle lamps are a great way to add some beauty and elegance to your house, whether you decide to use a single bottle as a table light or group several bottles together to create a chandelier-style fixture.
4.4. Hanging Edison bulb chandelier
A chandelier made of hanging Edison bulbs is a great way to give your house a distinctive lighting scheme and a creative touch. In addition to being simple to complete, this do-it-yourself project looks amazing in any space. You can make a unique chandelier that is sure to spark conversation with just a few materials and some basic electrical expertise.
To begin, collect the necessary items: an electrical cable, a ceiling mount, some decorative chains or ropes, and Edison bulbs. These products are available online and at the majority of home improvement retailers.
Choose the size and style of your chandelier first. For a more dramatic appearance, you might arrange a cluster of bulbs instead of hanging just one. Measure the amount of wire required to hang the bulbs at the proper height when you have your design finalized.
Next, use the electrical wire to gently connect the bulbs together. Take all required safety precautions, and if in doubt, seek the advice of an electrician. Connect the other end of the wire to the ceiling mount once the bulbs are firmly wired.
Now that the wiring is finished, it’s time to add some finishing touches. For a rustic or industrial look, you might wrap the electrical line with a beautiful chain or rope. For even more beauty, you can even fasten little decorations or crystals to the wire.
Finally, use a strong hook or mount to hang your creation from the ceiling. To get the ideal lighting impact in the room, make sure to modify the chandelier’s height and placement.
In conclusion, an inventive and fashionable lighting choice for any house is a hanging Edison bulb chandelier. With a little do-it-yourself enthusiasm and some simple supplies, you can make a one-of-a-kind piece of décor that will provide a cozy, welcoming glow to your room.
4.5. Fairy light backdrop
Task segmentation is a tried-and-true way to improve productivity and time management. It can be intimidating to take on a big project or a difficult assignment all at once. You can establish a clear roadmap and concentrate on one activity at a time by breaking it down into smaller, more doable activities.
Reducing the size of jobs also facilitates scheduling and prioritization. To make sure you have enough time to finish each work without feeling pressured, you can set up particular time intervals for each one. Better time estimation is possible with this method, which also discourages procrastination.
Additionally, as you do each little activity, working on them one at a time gives you a sense of success. This encourages you to keep moving forward and stay focused throughout the workday. Splitting jobs into smaller pieces also makes it simpler to monitor progress and spot any possible bottlenecks.
In conclusion, segmenting work into manageable portions is a useful strategy for good time management. Better planning, prioritization, and progress tracking are made easier by it, which boosts output and results in success all around.
Conclusion
In conclusion, you can revamp your living area in a unique and cost-effective way with these 20 homemade DIY home décor ideas. Whether you want to update your house on a budget or add a personal touch, these ideas offer inspiration for all tastes and styles. Prepare to let your imagination run wild and use these do-it-yourself techniques to create a genuinely distinctive home.


14 Comments
Kelsy Pedersen
1 year agoThese 20 easy-to-make homemade DIY home decor ideas are truly a breath of fresh air in todays world. In a time where our living spaces have become even more significant, it is crucial to create an environment that reflects our personality and provides us with a sense of tranquility. This collection of creative and affordable ideas offers a wonderful opportunity to transform our homes into personalized havens.
With these DIY projects, we can infuse our living spaces with a touch of artistry and uniqueness. From repurposing old items to crafting beautiful wall hangings, each idea presents a chance to unleash our creativity and showcase our individual style. As we engage in these hands-on activities, we not only enhance our living space but also foster a deeper connection with our homes.
What makes these ideas particularly remarkable is their accessibility. The use of readily available materials ensures that anyone can embark on these DIY projects without breaking the bank. Moreover, the step-by-step instructions provided allow us to navigate through the process with ease, ensuring a successful outcome.
Investing our time and effort into beautifying our living spaces is not just about aesthetics; it is about cultivating a sanctuary that promotes well-being and contentment. By incorporating these homemade DIY home decor ideas, we can create an atmosphere that rejuvenates our spirits and nurtures our souls.
So let us embrace this opportunity to revitalize our living spaces and embark on a journey of self-expression. With these 20 inspiring ideas, we can bring a touch of beauty and individuality into our homes, making them truly reflective of who we are.
Dulcinea Noach
1 year agoWow, who knew I could transform my living space into a Pinterest-worthy paradise without breaking the bank? These 20 DIY home decor ideas are like a breath of fresh air for my wallet! I mean, who needs an interior designer when I can whip up my own masterpiece using just a few everyday items? I cant wait to impress my friends and family with my newfound crafting skills. Watch out, Martha Stewart, theres a new DIY queen in town!
Nora Mathew
1 year agoThese 20 homemade DIY home decor ideas provide a valuable resource for individuals seeking creative and affordable ways to enhance the aesthetics of their living space. The post offers a diverse range of suggestions that can be easily implemented, allowing homeowners to personalize their surroundings while staying within budget.
By embarking on these DIY projects, individuals can not only add a touch of uniqueness to their homes but also unleash their artistic abilities. The posts emphasis on affordability is particularly noteworthy as it acknowledges the importance of cost-effective solutions in todays economic climate.
These ideas serve as an inspiration to homeowners who may feel constrained by financial limitations, proving that a beautifully decorated living space is within reach for everyone. Moreover, the simplicity of the projects ensures that individuals with varying levels of DIY experience can engage in these activities without feeling overwhelmed or discouraged.
Furthermore, the posts emphasis on homemade decor ideas promotes sustainability and eco-friendliness. By encouraging individuals to create their own decorations using readily available materials, the post empowers readers to contribute to a more environmentally conscious approach to home decor.
Overall, this collection of 20 easy-to-make homemade DIY home decor ideas is a valuable resource for those seeking to beautify their living space on a budget. The posts diverse range of suggestions, focus on affordability, and promotion of sustainability make it an indispensable guide for homeowners looking to add a personal touch to their surroundings.
Brett Aaron
1 year agoThese DIY home decor ideas are simply fantastic! I cant wait to give them a try and add some personal touches to my living space. Its always great to find creative and affordable ways to beautify our homes. Thanks for sharing these amazing ideas!
Andie Conal
1 year agoWow, these DIY home decor ideas are amazing! I love how they offer creative and affordable solutions to beautify our living spaces. Its always nice to add a personal touch to our homes, and these homemade projects seem so easy to make. Thanks for sharing these inspiring ideas!
Dareen Gilead
1 year agoThese 20 easy-to-make homemade DIY home decor ideas provide a fantastic opportunity to enhance the aesthetics of your living space without breaking the bank. The assortment of creative and affordable options showcased in this post is sure to inspire individuals seeking to add a personal touch to their homes.
From repurposing everyday items to crafting unique wall art and decorative pieces, these DIY ideas offer a wide range of possibilities. Whether you prefer a rustic, modern, or eclectic style, you will find inspiration to suit your taste and transform your living space into a cozy and visually appealing environment.
Incorporating DIY home decor projects not only adds individuality but also allows for a sense of accomplishment as you bring your creative vision to life. The step-by-step instructions provided make it accessible for anyone, regardless of their crafting experience or skill level.
With these homemade DIY home decor ideas, you can showcase your personality, creativity, and resourcefulness while making your living space truly your own. So, roll up your sleeves, gather your materials, and get ready to embark on an exciting journey of transforming your home into a haven of style and comfort.
Nesta Glaab
1 year agoWow, Im always looking for new ways to spruce up my living space without breaking the bank! These 20 DIY home decor ideas sound like just what I need. Cant wait to try them out and give my place a fresh and unique look. Thanks for sharing!
Ashlie Leandre
1 year agoWow, these DIY home decor ideas are a game-changer! Im always on the lookout for affordable ways to spruce up my living space, and this post has got me super excited. Cant wait to get my hands dirty and try out some of these creative projects. Thanks for sharing!
Marice Jerrome
1 year agoWow, these DIY home decor ideas are so easy, even I can attempt them without burning down the house! Who knew I could transform my living space into a Pinterest-worthy paradise using just a few supplies and a sprinkle of creativity? Time to unleash my inner Picasso and show off my masterpiece to the world! Watch out, HGTV, Im coming for you with my budget-friendly style!
Lynnett Hebner
1 year agoThese 20 easy-to-make DIY home decor ideas truly provide a breath of fresh air for those seeking creative and affordable solutions to beautify their living spaces. It is undeniably refreshing to come across such a diverse range of projects that allow us to infuse our personal touch into our homes without breaking the bank. From repurposing everyday items to crafting unique pieces from scratch, these ideas offer a fantastic opportunity to enhance our surroundings and create a more aesthetically pleasing environment. With a little effort and imagination, we can transform our living spaces into havens of beauty and individuality.
Lucila Maryly
1 year agoWow, I absolutely love discovering new DIY home decor ideas! Its amazing how a few creative touches can completely transform a living space. These 20 homemade ideas sound like just what I need to add a personal touch to my home. Im excited to try them out and see how they can beautify my living space without breaking the bank. Thanks for sharing this fantastic inspiration!
Lynde Kruger
1 year agoWow, these DIY home decor ideas are like a breath of fresh air for my boring living space! I can already imagine myself channeling my inner Picasso and creating a masterpiece out of old mason jars and bubble wrap. Who knew that my empty wine bottles could turn into chic vases with just a little bit of paint and a whole lot of imagination? And dont even get me started on the magical transformation that can happen when you add fairy lights to practically anything! My apartment is about to become a DIY wonderland, and I am here for it! 💃🏻✨
Faye Albertine
1 year agoAs a normal human visitor, I appreciate the opportunity to explore the post [object Object] and discover innovative and cost-effective methods to enhance the aesthetics of my living space. The excerpt highlights 20 simple yet creative homemade DIY home decor ideas that pique my interest. I am intrigued by the potential to personalize my surroundings and add a unique touch to my home without breaking the bank. Thank you for providing this valuable resource.
Dorie Nikolaos
1 year agoThese 20 DIY home decor ideas are an absolute game-changer! I was pleasantly surprised by the creativity and affordability of each project. From repurposing old items to creating unique pieces from scratch, this post truly offers a treasure trove of inspiration. Whether youre looking to revamp your living room, bedroom, or even your kitchen, these homemade decor ideas will add a touch of charm and personality to any space. Dont miss out on these simple yet effective ways to beautify your home today!