
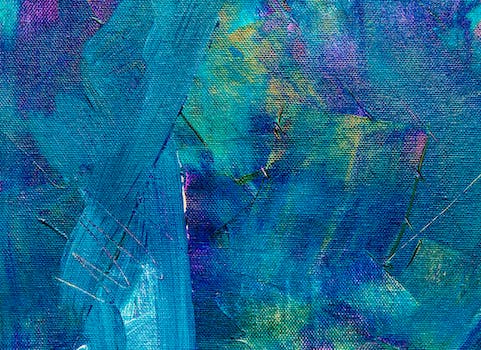
Are you looking to explore your creative side and add a unique touch to your living space? DIY Abstract Art is the perfect way to unleash your creativity and express yourself through the vibrant medium of acrylic paint. Whether you’re a seasoned artist or a beginner, this article will guide you through the process of creating stunning abstract art pieces that will leave a lasting impression. Get ready to dive into the world of acrylic paints and discover the joy of creating one-of-a-kind artworks that reflect your artistic vision.
- 1. Introduction
- 2. Materials and Tools
- 2.1. Acrylic paints
- 2.2. Canvas or art paper
- 2.3. Paintbrushes
- 2.4. Palette or disposable plate
- 2.5. Water and paper towels
- 3. Preparing for Your Artwork
- 3.1. Choosing your color palette
- 3.2. Setting up your workspace
- 3.3. Preparing your canvas or art paper
- 3.4. Mixing acrylic paint
- 3.5. Creating a rough sketch
- 4. Techniques for Creating Abstract Art
- 4.1. Splatter technique
- 4.2. Pouring technique
- 4.3. Palette knife technique
- 4.4. Masking technique
- 4.5. Textured brushstrokes
- 5. Finishing Touches and Displaying
1. Introduction
Abstract art is a fascinating and expressive form of creativity that allows artists to unleash their imagination and experiment with different techniques and materials. One popular medium for creating abstract art is acrylic paint. Acrylic paint offers a wide range of possibilities due to its versatility and vibrant colors. Whether you are an experienced artist or a beginner, exploring the world of DIY abstract art with acrylic paint can be a fulfilling and exciting journey. In this article, we will guide you through the process of creating your own abstract masterpiece using acrylic paint. Get ready to let your creativity flow and discover the joy of expressing yourself through art!
1.1. What is abstract art?
Abstract art is a form of artistic expression that does not attempt to represent an accurate depiction of visual reality. Instead, it focuses on the use of shapes, colors, forms, and gestural marks to achieve its effect. The main idea behind abstract art is to convey emotions, ideas, or concepts through non-representational means. By eliminating the need for recognizable imagery, abstract art encourages viewers to interpret and experience the artwork in their own unique way. It allows for a sense of freedom, experimentation, and self-expression, making it a popular choice for artists and art enthusiasts seeking to explore their creativity.
1.2. Why choose acrylic paint?
Acrylic paint is a popular choice among artists and DIY enthusiasts alike. Its versatility and numerous advantages make it an ideal medium for creating stunning abstract art. Whether you are a beginner or an experienced artist, there are several compelling reasons to choose acrylic paint for your creative endeavors.
Firstly, acrylic paint is known for its fast-drying properties. Unlike oil paint, which can take days or even weeks to dry, acrylic paint dries quickly, allowing artists to work efficiently and build layers of paint without waiting for extended periods. This is especially beneficial for those who prefer a more spontaneous and dynamic approach to their artwork.
Another reason to opt for acrylic paint is its flexibility. It can be used on a wide range of surfaces, including canvas, wood, paper, and even metal. This versatility opens up endless possibilities for artists to experiment with different textures and techniques. Additionally, acrylic paint can be diluted with water to create a translucent effect similar to watercolors or applied straight from the tube for vibrant and opaque colors.
Furthermore, acrylic paint is known for its durability. Once it has dried, it forms a tough and flexible layer that is resistant to cracking or yellowing over time. This makes acrylic paintings suitable for long-lasting display and ensures that your artwork will retain its original vibrancy for years to come.
Lastly, acrylic paint offers a wide range of colors and finishes for artists to choose from. Whether you prefer a bold and vibrant palette or a more subtle and muted one, acrylic paint provides countless options. Additionally, it can be easily mixed with other colors to create custom shades, giving artists complete control over their color palette.
In conclusion, the choice of acrylic paint for your DIY abstract art projects is a wise one. Its fast-drying nature, versatility, durability, and extensive color range make it an excellent medium to unleash your creativity and bring your artistic vision to life.
1.3. Benefits of DIY abstract art
Creating DIY abstract art with acrylic paint can be a fulfilling and rewarding experience. Not only does it allow you to tap into your creativity, but it also offers several benefits. Whether you are a seasoned artist or a beginner, exploring the world of abstract art can be a great way to express yourself and unleash your artistic potential.
One of the main benefits of DIY abstract art is the freedom it provides. Unlike traditional art forms that often require technical skills and adherence to specific rules, abstract art allows you to break free from conventions and create something unique. With acrylic paint, you have the flexibility to experiment with different colors, textures, and techniques, giving you the freedom to express yourself in unconventional ways.
Engaging in DIY abstract art can also be a form of therapy and stress relief. The process of creating art can be meditative and calming, allowing you to escape from daily worries and immerse yourself in the present moment. It provides an outlet for emotional expression and can help you relax, reduce anxiety, and improve your overall well-being.
Moreover, DIY abstract art offers a sense of accomplishment and personal satisfaction. As you create each piece, you will witness your skills and creativity evolve. The process of experimenting, learning, and improving can boost your confidence and self-esteem. Whether you choose to display your artwork or keep it to yourself, the joy of creating something beautiful with your own hands is truly gratifying.
In conclusion, DIY abstract art with acrylic paint has numerous benefits. It allows you to explore your creativity, provides a therapeutic outlet, and offers a sense of accomplishment. So, unleash your creativity, grab your acrylic paints, and let your imagination run wild!
2. Materials and Tools
To create your own DIY abstract art with acrylic paint, you will need a few essential materials and tools. These items will help you unleash your creativity and bring your artistic vision to life. Here are some must-have supplies for this project:
1. Acrylic Paint: Choose a variety of colors that resonate with your artistic style. Acrylic paint is known for its vibrant hues and fast-drying properties, making it perfect for creating abstract art.
2. Canvas or Art Paper: Select a canvas or art paper as your painting surface. Canvases come in various sizes, while art paper provides a more affordable option for experimentation.
3. Paintbrushes: Invest in a set of different paintbrushes, including flat and round brushes. These will allow you to create various brushstrokes and textures in your artwork.
4. Palette: Use a palette to mix and blend your acrylic paints. You can choose a traditional wooden palette or opt for a disposable palette pad for easy cleanup.
5. Palette Knife: A palette knife is a handy tool for adding texture and creating unique effects in your abstract art. Experiment with different strokes and techniques to achieve the desired results.
6. Water and Paper Towels: Keep a container of water and some paper towels nearby to clean your brushes and wipe away any excess paint.
7. Protective Covering: Lay down a protective covering, such as a plastic sheet or old newspaper, to protect your workspace from any paint spills or splatters.
With these materials and tools at your disposal, you are ready to dive into the world of DIY abstract art. Let your creativity flow and explore the endless possibilities of acrylic paint!
2.1. Acrylic paints
Acrylic paints are a versatile and popular choice for artists of all levels. Whether you are a beginner or an experienced painter, these paints offer a wide range of benefits and possibilities. With their quick drying time, vibrant colors, and ability to be used on various surfaces, acrylic paints are a fantastic option for creating abstract art.
When it comes to materials and tools for your DIY abstract art project, acrylic paints are an essential component. Here are some key factors to consider when selecting the right acrylic paints:
1. Quality: Opt for high-quality acrylic paints that offer rich pigmentation and good coverage. Cheap paints may contain less pigment, resulting in dull and less vibrant colors.
2. Color selection: Acrylic paints come in a vast array of colors, allowing you to unleash your creativity and experiment with different shades. Consider choosing a variety of colors that complement each other and suit your artistic vision.
3. Consistency: Acrylic paints can vary in consistency, from thin and fluid to thick and heavy-bodied. Thin paints are excellent for glazing and creating transparent layers, while heavy-bodied paints are ideal for impasto techniques and adding texture to your artwork.
4. Drying time: Acrylic paints dry quickly compared to other types of paints, which can be advantageous when working on layering and adding details. However, this fast-drying nature requires you to work efficiently and plan your artwork accordingly.
5. Brushes: Invest in a set of high-quality brushes suitable for acrylic painting. Different brush shapes and sizes will allow you to achieve various effects and textures in your abstract art.
6. Palette: Use a palette or palette paper to mix and blend your acrylic paints. This will give you more control over color mixing and allow you to create custom shades.
7. Surface: Acrylic paints can be applied to various surfaces, including canvas, wood, paper, and even metal. Choose a surface that suits your artistic style and desired end result.
By considering these factors and selecting the right acrylic paints, you can unleash your creativity and dive into the world of DIY abstract art with confidence.
2.2. Canvas or art paper
Canvas or art paper is an essential material for creating DIY abstract art with acrylic paint. Whether you choose to work on a canvas or art paper depends on your personal preference and the desired outcome of your artwork. Both options have their own unique characteristics and advantages.
Canvas, typically made of cotton or linen, is a popular choice among artists for its durability and texture. It provides a sturdy surface that can withstand heavy applications of paint and various techniques. Canvas also offers a professional and timeless look to your artwork, making it suitable for framing and display.
On the other hand, art paper offers a more lightweight and portable option for creating abstract art. It comes in various thicknesses and finishes, such as smooth or textured. Art paper is versatile and allows for experimentation with different paint applications. Additionally, it is often more affordable than canvas, making it a budget-friendly choice.
Whether you opt for canvas or art paper, it is important to consider the size and format that best suits your artistic vision. Larger canvases or sheets of art paper can provide more space for expressive brushstrokes and bold compositions, while smaller sizes may be ideal for detailed or intimate pieces.
Ultimately, the choice between canvas and art paper depends on your preferences, style, and the specific requirements of your abstract art project. Experimentation is encouraged, as it allows you to explore different surfaces and discover what works best for your creative process.
2.3. Paintbrushes
When it comes to creating DIY abstract art with acrylic paint, one of the essential materials you’ll need is a set of high-quality paintbrushes. Paintbrushes play a crucial role in bringing your artistic vision to life, allowing you to apply the paint with precision and control.
There are various types of paintbrushes available, each designed for different purposes and effects. Some common types include round brushes, flat brushes, filbert brushes, and fan brushes. Each brush type offers unique characteristics that can help you achieve specific textures, strokes, and details in your artwork.
When choosing paintbrushes, it’s important to consider the bristle material. Synthetic bristles are more durable and easier to clean, while natural bristles provide a softer touch and are ideal for certain painting techniques.
Additionally, the size of the paintbrushes also matters. Larger brushes are great for covering large areas quickly, while smaller brushes are perfect for adding intricate details and fine lines.
Investing in a good set of paintbrushes will ensure that you have the right tools to explore and express your creativity through abstract art. With the right brushes, you’ll be able to experiment with different techniques, layering effects, and brushstrokes to create stunning and unique artworks.
2.4. Palette or disposable plate
When it comes to creating DIY abstract art with acrylic paint, one important decision to make is whether to use a palette or disposable plate as your painting surface. Both options have their pros and cons, so it ultimately depends on your personal preference and the specific project you are working on.
A palette is a flat surface typically made of plastic or wood, specifically designed for mixing and holding paint. It allows you to easily blend different colors and test out various combinations before applying them to your canvas. Palettes can be cleaned and reused multiple times, making them a more eco-friendly choice. They also provide a stable and sturdy surface for your paint, which can be beneficial for creating precise and detailed brushstrokes.
On the other hand, disposable plates offer convenience and ease of use. They are readily available and can be easily replaced once they become too messy or filled with dried paint. Disposable plates are particularly useful if you are working on a small project or experimenting with different techniques. They are also lightweight and portable, making them ideal for outdoor painting sessions or traveling.
Ultimately, the choice between a palette and disposable plate depends on your personal preference, budget, and the specific needs of your project. Some artists prefer the traditional feel and durability of a palette, while others appreciate the convenience and flexibility of disposable plates. Whichever option you choose, make sure to clean and organize your painting surface regularly to maintain the quality of your artwork.
2.5. Water and paper towels
Water and paper towels are essential materials and tools for creating DIY abstract art with acrylic paint. Water is used to thin down the paint and create various effects such as blending and transparency. It can be applied with a brush or sprayed onto the canvas. Paper towels, on the other hand, are useful for blotting excess paint, wiping brushes, and creating texture. They can be used to lift off or remove paint, revealing underlying layers or creating interesting patterns. The combination of water and paper towels allows artists to experiment and unleash their creativity, adding depth and dimension to their abstract paintings.
3. Preparing for Your Artwork
Preparing for Your Artwork
Before you embark on your DIY abstract art project using acrylic paint, it’s important to prepare your materials and workspace. Here are some steps to follow:
1. Gather your supplies: Acrylic paint, canvas or paper, brushes, palette knife, water cup, and palette.
2. Choose your color scheme: Decide on a color palette that you want to work with. This will help create a cohesive look in your artwork.
3. Set up your workspace: Find a well-ventilated area with good lighting. Lay down a protective covering on your work surface to prevent any accidental spills or stains.
4. Prepare your canvas or paper: If you’re using a canvas, make sure it’s properly primed. If you’re working on paper, tape it down to a sturdy surface to prevent it from moving.
5. Experiment with techniques: Before starting on your final piece, take some time to experiment with different techniques. This will give you a better understanding of how acrylic paint behaves and allow you to explore your creativity.
By following these steps and preparing your materials and workspace, you’ll be ready to unleash your creativity and create a stunning piece of DIY abstract art with acrylic paint!
3.1. Choosing your color palette
Choosing the right color palette is an essential step when preparing for your artwork. The colors you select will greatly influence the overall mood and impact of your abstract art piece. Here are some tips to help you choose the perfect color palette for your DIY abstract art with acrylic paint:
1. Consider the emotions you want to evoke: Different colors have the power to evoke specific emotions. For example, warm colors like red, orange, and yellow can create a sense of energy and excitement, while cool colors like blue and green can evoke feelings of calmness and tranquility. Think about the emotions you want your artwork to convey and choose colors accordingly.
2. Experiment with color combinations: Don’t be afraid to mix and match different colors to create unique and interesting combinations. You can use a color wheel as a guide to help you find complementary or contrasting colors that work well together. Play around with various combinations until you find the ones that resonate with your artistic vision.
3. Consider the color harmony: Achieving a harmonious color palette is important to create a visually pleasing artwork. You can choose to go for a monochromatic palette, using different shades and tints of a single color. Alternatively, you can opt for a complementary palette, using colors that are opposite each other on the color wheel. Analogous palettes, which consist of colors that are adjacent to each other on the color wheel, can also create a harmonious effect.
4. Take inspiration from your surroundings: Nature, fashion, interior design, and even everyday objects can provide inspiration for your color palette. Pay attention to the colors you see in your environment and use them as a starting point for your artwork. You can also create mood boards or gather color swatches to help you visualize and plan your color scheme.
Remember, choosing the right color palette is a personal and creative decision. Trust your instincts and have fun experimenting with different colors to create a truly unique and captivating abstract art piece.
3.2. Setting up your workspace
When it comes to creating DIY abstract art with acrylic paint, setting up your workspace is an important first step. A well-organized and inspiring workspace can greatly enhance your creative process and make it easier for you to unleash your creativity. Here are some tips to help you prepare your artwork and create an ideal workspace.
1. Clear and Clean: Start by clearing your workspace of any clutter or unnecessary items. A clean and clutter-free environment will allow you to focus better on your artwork.
2. Adequate Lighting: Ensure that your workspace has proper lighting. Natural light is ideal, but if that’s not possible, invest in good quality artificial lighting that mimics natural light. This will help you see the true colors of your acrylic paints.
3. Organize Your Supplies: Sort and organize your art supplies in a way that is convenient for you. Use containers, trays, or shelves to keep your brushes, paints, mixing palettes, and other tools easily accessible.
4. Protect Your Surfaces: Lay down a drop cloth, plastic sheet, or old newspapers to protect your workspace from spills and drips. Acrylic paints can be messy, so it’s always better to be prepared.
5. Inspiring Surroundings: Surround yourself with things that inspire you. Hang up artwork or images that resonate with your artistic vision. Having a visually stimulating environment can spark your creativity.
By setting up your workspace properly, you’ll be ready to dive into the world of DIY abstract art with acrylic paint. Preparing your artwork in an organized and inspiring space will make the creative process more enjoyable and fruitful.
3.3. Preparing your canvas or art paper
Preparing your canvas or art paper is an essential step before starting your artwork. Whether you are working with a canvas or art paper, proper preparation ensures that your acrylic paint adheres well and lasts longer. Here are some steps to prepare your canvas or art paper:
1. Clean the surface: Before you begin, make sure to clean the surface of your canvas or art paper. Dust, dirt, and any other debris can interfere with the paint application. Use a soft cloth or brush to gently remove any impurities.
2. Prime the surface: Priming the surface helps create a smooth and even base for your artwork. Apply a layer of gesso, which is a white acrylic primer, using a brush or a roller. Gesso not only increases the longevity of your artwork but also enhances the vibrancy of the colors.
3. Sand the surface (optional): If you prefer a smoother texture, you can lightly sand the primed surface with fine-grit sandpaper. This step is optional and depends on your personal preference.
4. Apply additional coats of gesso (optional): If you want a more refined surface, you can apply additional coats of gesso. Allow each coat to dry completely before applying the next one. This technique is commonly used by artists who prefer a smoother and more absorbent surface for their acrylic paintings.
By following these steps, you will ensure that your canvas or art paper is well-prepared for your acrylic artwork. This preparation process sets the foundation for your creativity to flourish and allows your acrylic paint to adhere properly, resulting in a long-lasting and visually appealing piece of abstract art.
3.4. Mixing acrylic paint
Mixing acrylic paint is an essential step in preparing for your artwork. Whether you are a beginner or an experienced artist, understanding how to mix acrylic paint properly can greatly enhance your creativity and the final result of your artwork.
To begin, gather all the necessary materials for mixing acrylic paint. You will need acrylic paint tubes in various colors, a palette or mixing surface, palette knives or brushes for mixing, and a container of water for cleaning your tools.
Next, start by squeezing small amounts of the desired acrylic paint colors onto your palette or mixing surface. It’s best to start with a small amount and add more as needed, as it’s easier to darken a color than to lighten it.
Once you have the colors you want to work with, use a palette knife or brush to mix them together. Start by blending the colors in a circular motion, gradually incorporating the paint from different directions. This will help achieve a smooth and consistent color.
Remember to clean your palette knife or brush between color mixing to avoid muddying the colors. You can use a container of water to rinse off the excess paint and dry the tool before moving on to the next color.
Experiment with mixing different colors to create new shades and tones. You can also try adding white or black paint to adjust the value of a color. Don’t be afraid to play around and explore different combinations.
Once you have achieved the desired color, you are ready to start applying it to your artwork. Use a clean brush or palette knife to transfer the mixed paint onto the canvas, paper, or any other surface you are working on.
Remember to have fun and embrace the freedom of abstract art. Mixing acrylic paint allows you to unleash your creativity and create unique and captivating artwork.
3.5. Creating a rough sketch
Before diving into creating your abstract artwork, it is important to prepare your materials and workspace. This will ensure a smooth and enjoyable process that allows you to fully unleash your creativity with acrylic paint. Here are some steps to follow in order to prepare for your artwork:
1. Gather your materials: Start by gathering all the necessary materials for your abstract art project. This typically includes acrylic paints, brushes, canvas or paper, palette, water container, and a palette knife. Make sure you have a variety of colors to work with and different brush sizes for different techniques.
2. Set up your workspace: Find a well-lit and comfortable area to set up your art space. Make sure you have enough room to move around and work freely. Lay down a protective cover or old newspaper to prevent any accidental spills or messes.
3. Prepare your canvas or paper: If you are using a canvas, make sure it is clean and free from any dust or debris. You can lightly sand the surface if needed. If you are working on paper, tape it down to a sturdy surface to prevent it from moving or warping.
4. Plan your composition: Before starting your artwork, it can be helpful to have a rough idea of the composition you want to create. You can sketch out some basic shapes or lines on your canvas or paper to serve as a guide. This will help you visualize the placement of different elements and create a balanced and visually appealing piece.
5. Mix your colors: Take some time to experiment with mixing different colors on your palette. Acrylic paints can be easily mixed to create new shades and tones. Play around with different combinations to find the color palette that speaks to your artistic vision.
By following these preparation steps, you will be ready to dive into the world of DIY abstract art with acrylic paint. Remember, the key is to let your creativity flow and have fun throughout the process!
4. Techniques for Creating Abstract Art
Creating abstract art with acrylic paint is an exciting and liberating experience. This form of art allows you to express your creativity without any boundaries or restrictions. Here are some techniques that can help you unleash your creativity and create stunning abstract art.
1. Pouring Technique: This technique involves pouring acrylic paint onto the canvas and allowing it to flow freely. You can use different colors and experiment with various pouring methods like the dirty pour, flip cup, or swipe technique.
2. Sgraffito Technique: Sgraffito involves scratching or scraping off layers of wet paint to reveal the layers underneath. This technique adds texture and depth to your abstract art. You can use a palette knife, toothpick, or any other tool to create interesting patterns and designs.
3. Dripping Technique: Dripping is a popular technique used by many abstract artists. It involves dripping or splattering paint onto the canvas to create random and unpredictable patterns. You can control the flow of paint by adjusting the consistency and viscosity of the acrylic paint.
4. Palette Knife Technique: Using a palette knife instead of a brush can create unique and bold textures in your abstract art. You can apply thick layers of paint and create interesting shapes and lines. Experiment with different angles and pressures to achieve the desired effect.
5. Blending Technique: Blending colors can create smooth transitions and gradients in your abstract art. You can use a brush or sponge to blend different colors together. This technique requires patience and practice to achieve a seamless and harmonious blend.
Remember, abstract art is all about expressing yourself and embracing experimentation. Don’t be afraid to try new techniques, mix different colors, and let your imagination run wild. The key is to have fun and enjoy the process of creating your own unique masterpiece.
4.1. Splatter technique
One popular technique for creating abstract art is the splatter technique. This technique involves using acrylic paint and splattering it onto the canvas to create random patterns and textures. To achieve this effect, you can dilute the paint with water or use it straight from the tube, depending on the desired consistency.
To start, protect your work area with a drop cloth or old newspapers to prevent any mess. Then, gather a variety of paintbrushes, sponges, or even toothbrushes to create different splatter effects. Dip the brush or sponge into the paint and hold it above the canvas. Use your other hand to tap or flick the bristles, causing the paint to splatter onto the surface. Experiment with different colors and techniques to create unique and dynamic abstract compositions.
The splatter technique can be used on its own or combined with other techniques to add depth and dimension to your abstract art. It allows for spontaneity and unpredictability, making each piece truly one-of-a-kind. Don’t be afraid to embrace the mess and let your creativity flow with the splatter technique!
4.2. Pouring technique
Pouring technique is a popular method used by artists to create mesmerizing abstract art with acrylic paint. This technique involves pouring different colors of paint onto a canvas or other surface and allowing them to mix and blend together in unique ways. The result is a vibrant and unpredictable composition that captures the imagination.
To begin, gather your materials including acrylic paint in various colors, a pouring medium, a canvas or surface to paint on, and some disposable cups or containers for mixing. Start by preparing your paint mixture by combining equal parts of acrylic paint and pouring medium in separate cups. The pouring medium helps to thin out the paint and create a fluid consistency that is ideal for pouring.
Next, choose your desired colors and pour each one into a separate cup. You can experiment with different color combinations to create interesting effects. Once your paint is ready, start pouring it onto the canvas in various ways. You can pour directly from the cups or use a pouring container to control the flow of paint.
As you pour the paint, tilt and rotate the canvas to allow the colors to move and blend together. You can also use tools like palette knives or brushes to help manipulate the paint and create different patterns and textures. Experiment with different pouring techniques such as the dirty pour, the flip cup pour, or the swipe technique to achieve different results.
Once you are satisfied with the composition, set aside the painting to dry. The drying time may vary depending on the thickness of the paint and the pouring medium used. Once dry, your abstract artwork will be ready to display and admire.
The pouring technique is a fun and exciting way to create abstract art with acrylic paint. It offers endless possibilities for experimentation and allows you to unleash your creativity. So grab your paints, get pouring, and see where your imagination takes you!
4.3. Palette knife technique
Palette knife technique is a popular method used by artists to create abstract art with acrylic paint. This technique involves using a palette knife, which is a blunt tool with a flexible steel blade, instead of a brush. By applying thick layers of paint and using the edge of the palette knife to scrape and blend colors, artists can achieve unique textures and effects in their artwork.
The palette knife technique allows for more control and precision compared to traditional brushwork. It enables artists to create bold, impasto strokes that add depth and dimension to their paintings. The thick application of paint also adds a tactile quality to the artwork, making it visually interesting and engaging.
To create abstract art using the palette knife technique, artists can start by selecting a color palette that reflects the mood or concept they want to convey. They can then apply generous amounts of paint onto the canvas and use the palette knife to spread and mix the colors directly on the surface. Artists can experiment with different pressures and angles of the palette knife to create various textures and patterns.
One of the advantages of the palette knife technique is its versatility. Artists can use it to create both subtle and bold effects, depending on their desired outcome. They can layer different colors and scrape away sections to reveal underlying layers, adding depth and complexity to the artwork.
Overall, the palette knife technique offers a creative and expressive way to explore abstract art with acrylic paint. It allows artists to unleash their creativity and experiment with textures, colors, and shapes, resulting in visually captivating and unique artworks.
4.4. Masking technique
Masking technique is one of the fundamental techniques for creating abstract art with acrylic paint. This technique involves using tape or other masking materials to create clean and sharp edges in your artwork. By strategically placing tape on the canvas before painting, you can create geometric shapes, outlines, or specific patterns in your abstract composition.
To begin, gather the necessary materials including acrylic paints, brushes, canvas, and masking tape. Choose a color palette that complements your artistic vision and mood. Next, prepare your canvas by securing it on a flat surface and ensuring it is clean and dry.
Once your canvas is ready, start by planning the design and composition of your abstract artwork. Sketch out your ideas on a piece of paper or visualize it in your mind. Identify the areas where you want to create sharp edges or defined shapes.
Carefully apply the masking tape to those areas, making sure it adheres well to the canvas. Press down firmly to avoid any paint seeping underneath. You can experiment with different widths and angles of tape to achieve various effects.
Once the tape is in place, you can begin applying acrylic paint to the exposed areas of the canvas. Use a brush or palette knife to create bold strokes, textures, or gradients. Let your creativity flow as you work on each section of your artwork.
Once you are satisfied with the painted areas, allow the paint to dry completely. This is a crucial step to ensure clean and crisp lines when you remove the masking tape.
After the paint has dried, carefully peel off the masking tape. Take your time and peel slowly to avoid tearing the canvas or smudging the paint. As you remove the tape, you will reveal the masked areas, which will stand out against the painted background.
The masking technique allows you to add a level of precision and control to your abstract art. It can create a visually striking contrast between defined shapes and free-flowing brushwork. Experiment with different masking materials, such as frisket film or stencils, to expand your creative possibilities.
In conclusion, the masking technique is a valuable tool for creating abstract art with acrylic paint. It enables you to achieve clean and sharp edges, defined shapes, and intricate patterns in your artwork. Embrace this technique and unleash your creativity to create unique and captivating abstract compositions.
4.5. Textured brushstrokes
Textured brushstrokes can add depth and visual interest to your abstract art. By using various techniques, you can create unique textures that enhance the overall composition of your artwork. Here are some techniques for creating textured brushstrokes in abstract art:
1. Impasto: This technique involves applying thick layers of paint onto the canvas, creating a three-dimensional texture. You can use a palette knife or a brush to achieve different effects with impasto.
2. Dry Brushing: This technique involves using a dry brush with very little paint to create a rough, scratchy texture. It is great for adding details and highlights to your abstract artwork.
3. Stippling: Stippling involves creating texture by applying small, dotted brushstrokes onto the canvas. This technique can be used to create a variety of textures, from rough to smooth.
4. Sgraffito: Sgraffito is a technique that involves scratching or scraping the top layer of paint to reveal the layers underneath. It can create interesting textures and patterns in your abstract art.
5. Splattering: Splattering paint onto the canvas can create a random and organic texture. You can achieve this by flicking the paintbrush or using a toothbrush to create controlled splatters.
Experiment with these techniques and combine them to create your own unique textured brushstrokes in abstract art. Remember, there are no rules in abstract art, so let your creativity guide you!
5. Finishing Touches and Displaying
Once you have completed your abstract artwork using acrylic paint, it’s time to add the finishing touches and prepare it for display. Here are some steps to help you achieve a polished final result:
1. Evaluate your artwork: Take a step back and assess your piece. Look for any areas that might need additional touch-ups or adjustments.
2. Clean and protect: Gently clean the surface of your artwork using a soft, lint-free cloth. This will remove any dust or debris that may have accumulated during the painting process. Consider applying a protective varnish or sealant to safeguard your artwork from damage.
3. Choose a frame or mounting option: Decide whether you want to frame your artwork or opt for a different display method. A frame can enhance the overall presentation and protect your artwork from dust and moisture. Alternatively, you can mount it on a sturdy backing or display it on a floating shelf.
4. Consider lighting: Lighting plays a crucial role in showcasing your artwork. Ensure that the area where you plan to display your abstract art has adequate lighting. Natural light or spotlights can bring out the colors and textures of your artwork.
5. Experiment with placement: Explore different areas in your home or office to find the perfect spot for your abstract art. Consider the room’s color scheme, existing decor, and the size of the artwork. Experiment with different angles and heights to create a visually appealing display.
By following these finishing touches and display tips, you can proudly exhibit your DIY abstract art and let your creativity shine.
5.1. Adding details and highlights
Adding details and highlights is an essential step in giving your DIY abstract art a professional and polished look. Once you have completed the main elements of your painting using acrylic paint, it’s time to add those finishing touches that will make your artwork truly stand out. Here are some tips to help you enhance your piece and create a captivating display:
1. Texture and Dimension: Consider adding texture and dimension to your painting by using various techniques such as layering paint, creating texture with a palette knife, or adding texture mediums like modeling paste. This will give your artwork a tactile quality and depth.
2. Details and Fine Lines: Use a fine brush or a liner brush to add intricate details and fine lines to your painting. This could include adding highlights, shadows, or intricate patterns. These small details can make a big difference in the overall visual impact of your artwork.
3. Color Accents: Introduce pops of color to your painting by strategically adding accents in vibrant hues. This can be done by using a contrasting color or by applying a translucent glaze over certain areas. These color accents will add interest and draw the viewer’s eye to specific parts of your artwork.
4. Blending and Gradation: Achieve smooth transitions and gradients by blending colors together. This technique can be used to create a sense of depth and movement in your abstract art. Experiment with different blending techniques, such as wet-on-wet blending or dry brushing, to achieve the desired effect.
Once you have added all the necessary details and highlights, it’s time to consider how you will display your artwork. Here are some suggestions:
1. Framing: Consider framing your DIY abstract art to give it a finished and professional look. Choose a frame that complements the style and colors of your artwork. A frame can also protect your painting and make it easier to hang.
2. Mounting: If you prefer a more contemporary and minimalist look, consider mounting your artwork on a rigid surface such as a wooden panel or canvas board. This can give your artwork a clean and sleek appearance.
3. Grouping: Create a visually striking display by grouping multiple abstract art pieces together. Arrange them in a cohesive manner, considering factors such as color schemes, themes, and sizes. This can add visual interest and make a bold statement.
4. Lighting: Proper lighting can greatly enhance the visual impact of your abstract art. Consider using spotlights or track lighting to highlight specific parts of your artwork or to create dramatic shadows and highlights.
Remember, the finishing touches and display of your DIY abstract art are just as important as the painting process itself. These elements can elevate your artwork and make it truly captivating. So, let your creativity flow and have fun experimenting with different techniques and display options!
5.2. Letting the artwork dry
Once you have completed your abstract artwork using acrylic paint, it is important to let it dry thoroughly before applying any finishing touches. Allowing the paint to dry properly will ensure that your artwork remains intact and the colors do not smudge or blend together.
To let the artwork dry, find a clean and flat surface where you can place the painting. It is recommended to use a drying rack or easel to keep the artwork elevated and prevent any accidental damage. Make sure the area is well-ventilated to facilitate the drying process.
The drying time will vary depending on the thickness of the paint layers and the ambient temperature. Generally, acrylic paint dries relatively quickly compared to other mediums. However, it is best to give it ample time to dry completely. Avoid touching or moving the artwork during this stage to prevent any unwanted smudges or marks.
Once the artwork is fully dry, you can proceed with adding finishing touches to enhance its overall appearance. This could include adding additional layers of paint, using different techniques such as splattering or glazing, or applying varnish for a glossy finish. Let your creativity guide you in deciding what finishing touches will complement your abstract artwork.
Finally, it’s time to display your masterpiece! Select a suitable location in your home or office where your artwork can be showcased. Consider the size and color scheme of the room to ensure the artwork stands out and harmonizes with the surroundings. Hang it on a wall using appropriate hooks or display it on a stand or easel.
Remember, the process of creating abstract art is all about self-expression and experimentation. Let your imagination run wild and have fun throughout the journey of unleashing your creativity with acrylic paint!
5.3. Varnishing your artwork
Once you have finished painting your abstract artwork with acrylic paint, it is important to give it a final touch by varnishing it. Varnishing not only adds a protective layer to your painting but also enhances its colors and gives it a professional look. Here are some steps to follow when varnishing your artwork:
1. Prepare the area: Find a well-ventilated and dust-free space to work in. Lay down a clean drop cloth or newspaper to protect your working surface.
2. Clean the painting: Use a soft, lint-free cloth to gently remove any dust or loose particles from the surface of your painting.
3. Choose the right varnish: Select a varnish specifically designed for acrylic paintings. There are different types of varnishes available, such as glossy, matte, or satin. Consider the desired finish and effect you want to achieve.
4. Apply the varnish: Using a clean, soft brush, apply a thin and even layer of varnish over your entire painting. Start from one edge and work your way across the canvas, ensuring that you cover the entire surface. Be careful not to overbrush or create brush strokes.
5. Let it dry: Allow the varnish to dry completely as per the manufacturer’s instructions. This may take a few hours or even overnight.
Once your artwork is varnished and fully dried, you can move on to displaying it. Here are some ideas:
1. Framing: Consider framing your abstract painting to give it a polished and professional appearance. Choose a frame that complements the colors and style of your artwork.
2. Mounting: If you prefer a contemporary look, you can mount the painting on a wooden panel or a sturdy surface. This technique works well for large-scale abstract art.
3. Wall hanging: Use picture hooks or adhesive hooks to hang your artwork on the wall. Make sure to measure and level the placement for a balanced display.
4. Gallery wall: Create a gallery wall by grouping multiple abstract paintings together. Arrange them in a visually pleasing way, considering color schemes and sizes.
Remember, the way you choose to display your artwork can greatly impact its overall impact and the way it is perceived. Experiment with different techniques and find the best way to showcase your creativity!
5.4. Choosing a frame
When it comes to creating DIY abstract art with acrylic paint, choosing the right frame is an important finishing touch. The frame not only provides a way to display your artwork but also enhances its overall aesthetic appeal. There are several factors to consider when selecting a frame for your abstract masterpiece.
Firstly, you should consider the style and theme of your artwork. The frame should complement and harmonize with the colors, shapes, and textures used in your painting. For example, if your abstract art features vibrant and bold colors, a sleek and modern frame in a neutral tone can create a striking contrast.
Secondly, the size and proportion of the frame should be proportional to the size of your artwork. A frame that is too small may make your artwork appear cramped, while a frame that is too large can overpower the visual impact of your painting. Take measurements of your artwork and consider the overall balance you want to achieve.
Additionally, the material and finish of the frame can play a significant role in enhancing the overall presentation of your abstract art. Wood frames offer a traditional and timeless look, while metal frames can add a contemporary or industrial touch. Consider the texture and color of the frame as well, as it should complement the textures and colors used in your painting.
Lastly, think about the display options for your DIY abstract art. Depending on the size and weight of your artwork, you can choose to hang it on the wall using hooks or place it on a stand or easel. Consider the location where you plan to display your artwork and ensure it is secure and visible.
By carefully selecting a frame that complements your artwork, you can add that perfect finishing touch to your DIY abstract art. The right frame will not only protect and display your creation but also enhance its visual impact, allowing your creativity to shine.
5.5. Hanging or displaying your artwork
When it comes to showcasing your artwork, how you choose to hang or display it can greatly impact its overall presentation. The right finishing touches and display methods can enhance the aesthetic appeal of your DIY abstract art created with acrylic paint.
One popular option for hanging artwork is to use picture frames. Choose frames that complement the style and color scheme of your artwork. You can opt for classic wooden frames, sleek metal frames, or even unconventional frames like shadow boxes or floating frames. Consider the size and weight of your artwork when selecting the appropriate frame.
If you prefer a more contemporary and minimalist look, you can also consider using clips or hangers to display your artwork. This method allows your artwork to appear as if it is floating on the wall, creating a unique and modern visual effect.
Another option to showcase your DIY abstract art is by using a gallery wall. This involves arranging multiple pieces of artwork together on a single wall. You can experiment with different sizes, shapes, and orientations to create an eye-catching display. Remember to maintain a balanced composition by spacing out the artworks evenly.
In addition to hanging your artwork, you can also consider displaying it on shelves or easels. This allows for a more versatile presentation, as you can easily change the arrangement or swap out pieces of art whenever desired.
Ultimately, the way you choose to hang or display your DIY abstract art should reflect your personal style and preferences. Experiment with different methods and arrangements to find the perfect way to showcase your creativity and add a finishing touch to your space.
Conclusion
In conclusion, DIY abstract art is a fantastic way to tap into your creativity and explore the world of acrylic paint. With its endless possibilities and the freedom it offers, you can truly unleash your artistic potential. So grab your brushes, mix your colors, and let your imagination run wild as you create stunning abstract masterpieces that reflect your unique style and passion.


These 10 innovative and imaginative DIY home decor ideas from [object Object] provide a refreshing approach to enhancing ones living…