

Are you tired of clutter and disorganization in your living space? Look no further! In this article, we will explore the world of DIY decorative storage boxes and discover creative ways to not only organize but also beautify your space. With these innovative ideas, you can turn ordinary storage solutions into stunning decor pieces that reflect your unique style. Get ready to transform your home into a clutter-free and aesthetically pleasing haven!
- 1. Introduction
- 1.1. What are DIY decorative storage boxes?
- 1.2. Benefits of using DIY decorative storage boxes
- 1.3. Materials required for DIY decorative storage boxes
- 1.4. Tips for choosing the right DIY decorative storage boxes
- 1.5. Popular styles and designs of DIY decorative storage boxes
- 2. Step-by-Step Guide
- 2.1. Gathering the necessary supplies
- 2.2. Measuring and cutting the box materials
- 2.3. Assembling the box structure
- 2.4. Decorating the exterior of the storage box
- 2.5. Adding finishing touches and personalization
- 3. Creative Ideas and Inspirations
1. Introduction
Decorative storage boxes are a fantastic way to organize and beautify your space. Whether you’re looking to add a touch of style to your living room, bedroom, or office, these DIY storage solutions offer a practical and aesthetically pleasing solution. With a little creativity and some basic crafting supplies, you can transform plain and boring boxes into unique and eye-catching storage pieces. From using patterned papers to painting and embellishing, the possibilities are endless when it comes to creating decorative storage boxes. In this article, we will explore various creative ideas and techniques to inspire you in your quest for a more organized and visually appealing space.
1.1. What are DIY decorative storage boxes?
DIY decorative storage boxes are an innovative and cost-effective solution to organize and beautify your living space. These boxes are designed to not only serve a practical storage purpose but also add a touch of style and creativity to any room. Whether you want to declutter your bedroom, living room, or office, decorative storage boxes offer a versatile and customizable way to keep your belongings neatly organized. With endless possibilities for design and personalization, these boxes can reflect your unique taste and complement your existing decor. In this article, we will explore various creative ways to use DIY decorative storage boxes to add functionality and aesthetic appeal to your home or workspace.
1.2. Benefits of using DIY decorative storage boxes
Decorative storage boxes are a versatile and stylish solution for organizing and beautifying your space. Whether you are looking to declutter your home or add a touch of personality to your office, DIY decorative storage boxes offer a range of benefits. From their practicality to their aesthetic appeal, these boxes are a must-have for anyone seeking an efficient and eye-catching storage solution.
One of the key advantages of using DIY decorative storage boxes is their ability to maximize space. With their sturdy construction and customizable design, these boxes allow you to make the most of every inch of your storage area. You can stack them, place them on shelves, or even use them as under-bed storage, effectively utilizing the often underutilized spaces in your home.
In addition to their space-saving functionality, decorative storage boxes also provide an opportunity to express your creativity. By choosing to DIY, you have the freedom to customize the boxes according to your personal style and preferences. You can paint them in vibrant colors, add patterns, or even decoupage them with fabric or paper. The possibilities are endless, and you can create storage boxes that perfectly complement your existing decor.
Another benefit of DIY decorative storage boxes is their cost-effectiveness. Instead of purchasing expensive storage solutions, you can transform ordinary cardboard boxes or plain plastic bins into beautiful and functional organizers. This not only helps you save money but also gives you the satisfaction of creating something unique and personalized.
Furthermore, using decorative storage boxes can contribute to an overall sense of order and harmony in your space. By having designated storage containers for different items, you can easily find and access what you need, reducing the time spent searching for things. Additionally, the visually pleasing appearance of these boxes adds a touch of elegance and sophistication to any room.
In conclusion, DIY decorative storage boxes offer numerous benefits. They provide efficient storage solutions, allow for creative expression, are cost-effective, and contribute to a well-organized and visually appealing space. Whether you are looking to tidy up your home or revamp your office, these boxes are a practical and stylish choice that will help you organize and beautify your space with ease.
1.3. Materials required for DIY decorative storage boxes
When it comes to organizing and beautifying your space, DIY decorative storage boxes can be a stylish and practical solution. The great thing about these boxes is that you can customize them to match your personal style and the decor of your room. To create your own unique storage boxes, you will need a few materials that are easily accessible. Here are some of the materials required for this fun and creative DIY project:
1. Empty cardboard boxes: You can repurpose old shoe boxes, gift boxes, or any other sturdy cardboard boxes that you have lying around. Make sure they are clean and in good condition.
2. Decorative paper or fabric: Choose paper or fabric that complements your room’s color scheme and overall theme. You can opt for patterned paper, solid-colored fabric, or even textured materials for added visual interest.
3. Adhesive: Use a strong adhesive such as glue or double-sided tape to securely attach the paper or fabric to the cardboard boxes.
4. Scissors and ruler: These tools will come in handy for measuring and cutting the paper or fabric to the right size for wrapping the boxes.
5. Optional embellishments: If you want to add some extra flair to your storage boxes, consider using embellishments like ribbons, beads, or decorative trims. These can be glued or sewn onto the boxes.
With these materials on hand, you’ll be ready to embark on your DIY decorative storage box project and transform your space into a more organized and visually appealing environment.
1.4. Tips for choosing the right DIY decorative storage boxes
When it comes to organizing and beautifying your space, DIY decorative storage boxes can be a great solution. Not only do they provide a practical way to store and organize your belongings, but they also add a touch of creativity and style to your home. However, with so many options available, it can be overwhelming to choose the right ones. To help you make the best decision, here are some tips for selecting the perfect DIY decorative storage boxes:
1. Determine your storage needs: Before purchasing any storage boxes, assess your storage needs. Consider the items you want to store and the amount of space you have available. This will help you determine the size and quantity of storage boxes you require.
2. Consider the design and style: DIY decorative storage boxes come in various designs and styles. Think about the overall aesthetic of your space and choose boxes that complement it. Whether you prefer a modern, rustic, or vintage look, there are options available to suit your taste.
3. Material and durability: Pay attention to the materials used in making the storage boxes. Opt for sturdy and durable materials such as wood, metal, or sturdy cardboard. This will ensure that your boxes can withstand regular use and keep your belongings safe.
4. Functionality and accessibility: Think about how you will be using the storage boxes. Are they primarily for display purposes or will they be used for everyday storage? Consider boxes with lids or handles for easy accessibility and convenience.
5. DIY potential: If you enjoy DIY projects, consider choosing storage boxes that can be customized or decorated. This will allow you to add a personal touch and make the boxes uniquely yours.
By following these tips, you can select the right DIY decorative storage boxes that not only serve their purpose but also enhance the beauty of your space.
1.5. Popular styles and designs of DIY decorative storage boxes
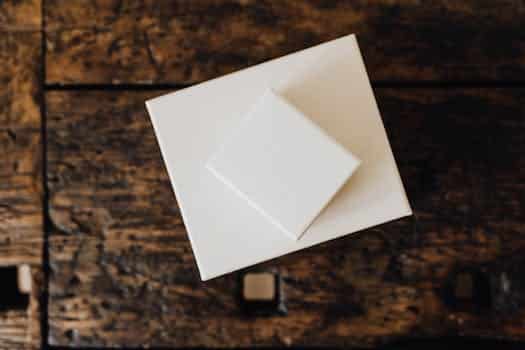
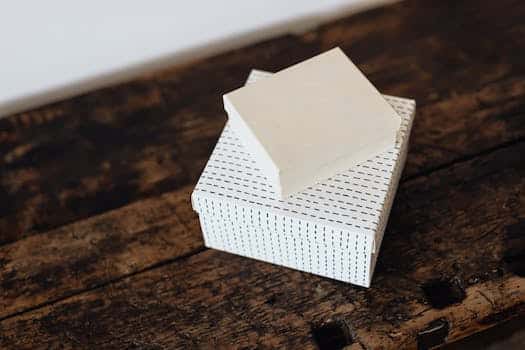
Decorative storage boxes are a popular choice for individuals who want to add a touch of style and organization to their living spaces. These DIY storage solutions not only serve as functional containers but also double up as decorative accents that can enhance the aesthetic appeal of any room. With a plethora of styles and designs available, you can easily find a DIY decorative storage box that complements your personal taste and home decor. From vintage-inspired boxes to modern and minimalist designs, the options are endless. In this article, we will explore some of the most popular styles and designs of DIY decorative storage boxes that can help you organize and beautify your space.
2. Step-by-Step Guide
Decorative storage boxes are a fantastic way to add style and organization to any space. Whether you want to tidy up your living room, bedroom, or office, these DIY storage boxes will do the trick. In this step-by-step guide, we will explore creative ways to make and decorate your own storage boxes.
Step 1: Gather Your Materials
To start this DIY project, you will need a few basic materials. These include sturdy cardboard boxes in various sizes, decorative paper or fabric, scissors, glue, a ruler, and a pencil. You may also want to gather additional embellishments such as ribbons, buttons, or beads to personalize your boxes.
Step 2: Measure and Cut
Using a ruler, measure the dimensions of your cardboard boxes. Then, mark these measurements on your chosen decorative paper or fabric. Carefully cut out the pieces using scissors, ensuring they are the correct size to cover the exterior of the boxes.
Step 3: Glue the Covering
Apply a thin layer of glue to one side of the cardboard box. Carefully place the cutout decorative paper or fabric on top, ensuring it is smooth and free from wrinkles or air bubbles. Press down firmly to secure the covering in place. Repeat this step for each side of the box.
Step 4: Add Embellishments
Now it’s time to get creative! Use ribbons, buttons, beads, or any other embellishments you have gathered to add a personal touch to your storage boxes. You can glue them directly onto the covering or create patterns and designs with them. Let your imagination run wild!
Step 5: Organize and Beautify
Once your decorative storage boxes are complete and the glue has dried, it’s time to organize and beautify your space. These stylish boxes are perfect for storing books, magazines, remote controls, accessories, or any other items that need a designated place. Arrange them on shelves, under a coffee table, or even stack them to create a unique decorative element.
By following this step-by-step guide, you can create beautiful and functional storage boxes that will bring a touch of elegance to your space. Enjoy the process of making them and revel in the satisfaction of an organized and beautiful home or office!
2.1. Gathering the necessary supplies
One of the first steps in creating DIY decorative storage boxes is gathering all the necessary supplies. Here is a step-by-step guide to help you with the process:
1. Cardboard boxes: Start by collecting cardboard boxes of various sizes and shapes. You can reuse old shoeboxes, shipping boxes, or even cereal boxes. Make sure the boxes are sturdy enough to hold your belongings.
2. Decorative paper or fabric: Next, gather decorative paper or fabric that you want to use to cover the boxes. You can choose patterned paper, textured fabric, or even wrapping paper. Be creative and select designs that match your personal style or the theme of the room.
3. Adhesive: You will need adhesive to attach the decorative material to the boxes. You can use glue, double-sided tape, or even a glue gun, depending on the type of material you are working with.
4. Scissors or craft knife: Having a pair of scissors or a craft knife will be essential for cutting the paper or fabric to the right size and shape. Make sure they are sharp and suitable for precision cutting.
5. Ruler and pencil: To ensure clean and straight lines, have a ruler and pencil on hand. These tools will help you measure and mark where you need to cut or fold the material.
6. Optional: If you want to add extra embellishments to your storage boxes, consider gathering additional supplies such as ribbons, buttons, beads, or any other decorative elements that you prefer.
By gathering all these supplies, you will be well-prepared to embark on the journey of creating beautiful and functional DIY decorative storage boxes for your space.
2.2. Measuring and cutting the box materials
Measuring and cutting the box materials is an essential step in creating DIY decorative storage boxes. By following this step-by-step guide, you can easily customize the size and shape of your boxes to fit your organizational needs and add a touch of creativity to your space.
1. Gather the necessary materials: Start by collecting the materials needed for the project, including sturdy cardboard or wooden boards, a ruler or measuring tape, a pencil, and a sharp utility knife.
2. Measure and mark the dimensions: Determine the desired dimensions for your storage box and use the ruler or measuring tape to measure and mark the length, width, and height on the cardboard or wooden boards.
3. Score the cutting lines: Using the pencil and ruler, lightly score the cutting lines on the marked dimensions. This will help guide the utility knife and ensure clean cuts.
4. Cut along the marked lines: Carefully follow the scored cutting lines with the sharp utility knife, applying even pressure to cut through the material. Take your time and make precise cuts to achieve neat edges.
5. Assemble the box: Once all the necessary pieces are cut, it’s time to assemble the box. Use adhesive or strong tape to secure the edges together, creating the desired shape.
6. Optional: Add decorative elements: If you want to enhance the appearance of your storage box, consider adding decorative elements such as patterned paper, fabric, or paint. This step can add a personal touch and make your storage boxes even more visually appealing.
By carefully measuring and cutting the box materials, you can ensure that your DIY decorative storage boxes are customized to fit your space and serve their purpose effectively. This process allows you to create functional and beautiful storage solutions that will help you organize and beautify your home or office.
2.3. Assembling the box structure
Assembling the box structure is an essential step in creating DIY decorative storage boxes. Follow this step-by-step guide to ensure a sturdy and well-built box:
1. Gather all the necessary materials for your box, including cardboard or wooden panels, a ruler, a pencil, a utility knife, adhesive or glue, and decorative paper or fabric.
2. Measure and mark the desired dimensions of your box on the cardboard or wooden panels. Make sure to account for the height, width, and depth of the box.
3. Use a ruler to draw straight lines connecting the marked points on the panels. This will serve as a guide for cutting.
4. Carefully cut along the marked lines using a utility knife. Take caution to maintain straight and accurate cuts.
5. Once all the panels are cut, begin assembling the box by applying adhesive or glue to the edges of the panels. Press the panels firmly together to ensure a strong bond.
6. Allow the adhesive or glue to dry completely before proceeding.
7. To add a decorative touch to your storage box, cover the exterior surfaces with decorative paper or fabric. Apply adhesive or glue to the back of the paper or fabric and carefully attach it to the box, smoothing out any wrinkles or air bubbles.
8. Trim any excess paper or fabric using a utility knife.
9. Finally, let the box dry completely before using it to store and organize your belongings.
By following this step-by-step guide, you can create beautiful and functional DIY decorative storage boxes that will add charm and organization to your space.
2.4. Decorating the exterior of the storage box
Decorating the exterior of the storage box is a fun and creative way to add a personal touch to your space. Whether you want to spruce up an old storage box or create a unique and stylish storage solution from scratch, there are plenty of options to choose from. In this step-by-step guide, we will walk you through the process of decorating your storage box to make it both functional and beautiful.
Step 1: Choose Your Design
The first step in decorating the exterior of your storage box is to decide on a design. You can opt for a simple and elegant look, or go for something more bold and colorful. Consider the overall theme and style of your space to ensure that the design of your storage box complements the rest of the room.
Step 2: Gather Your Materials
Once you have chosen a design, gather all the necessary materials. This may include paint, brushes, stencils, adhesive, decorative paper, fabric, or any other items you wish to use to decorate the box. Make sure to have everything you need before starting the project to avoid any interruptions.
Step 3: Prepare the Surface
Before applying any decorations, it is important to properly prepare the surface of the storage box. Clean the box thoroughly and ensure it is dry before moving forward. If necessary, sand any rough areas or apply a primer to create a smooth base for your design.
Step 4: Start Decorating
Now comes the fun part – decorating your storage box! Use your chosen materials and techniques to bring your design to life. You can paint the box, apply decorative paper or fabric, use stencils to create patterns, or even add embellishments like beads or buttons. Let your creativity shine and don’t be afraid to experiment!
Step 5: Finishing Touches
Once you are satisfied with the decorations, let them dry completely. This may take a few hours or even overnight, depending on the materials used. Once dry, you can add any finishing touches, such as a coat of varnish or sealant to protect the design and make it more durable.
Step 6: Enjoy Your Decorative Storage Box
Congratulations! You have successfully decorated the exterior of your storage box. Now you can proudly display it in your space and use it to organize your belongings. Not only is it functional, but it also adds a touch of style and personality to your home.
Remember, decorating a storage box is a versatile and budget-friendly way to organize and beautify your space. Let your imagination run wild and create a storage box that reflects your unique taste and style!
2.5. Adding finishing touches and personalization
Once you have completed the basic steps of creating your own decorative storage boxes, it’s time to add the finishing touches and personalize them to suit your style. This is where you can get creative and make your storage boxes truly unique.
One way to add a personal touch is by choosing decorative paper or fabric to cover the outside of the boxes. Look for patterns or colors that complement the theme or color scheme of the room where the boxes will be displayed. You can use adhesive or double-sided tape to attach the paper or fabric, ensuring a smooth and wrinkle-free finish.
Another option is to embellish the boxes with various decorative elements. For example, you can use ribbons, bows, or lace to add a touch of elegance. Consider using buttons, beads, or sequins for a more playful and whimsical look. You can also explore using stencils or stamps to create patterns or designs on the surface of the boxes.
Additionally, you can personalize the storage boxes by adding labels or tags. This is especially useful if you plan to store specific items in each box. You can either write directly on the boxes using a permanent marker or create custom labels using printable labels or adhesive paper. Don’t forget to include a brief description or name on each label to easily identify the contents of each box.
Lastly, consider adding some decorative handles or knobs to the boxes. This not only enhances the functionality of the boxes but also adds a stylish element. You can find a wide variety of handles and knobs in different shapes, colors, and materials at hardware or craft stores. Choose ones that match the overall aesthetic you want to achieve for your storage boxes.
Once you have completed these finishing touches and personalization steps, your DIY decorative storage boxes will be ready to use and display in your space. Enjoy the organized and beautified atmosphere they bring to your home.
3. Creative Ideas and Inspirations
Decorative storage boxes are a great way to add style and functionality to any space. Whether you’re looking to organize your home or office, these DIY projects offer creative ideas and inspirations. By customizing your own storage boxes, you can not only declutter your space but also beautify it. Here are some innovative ways to jazz up your storage boxes and make them a statement piece in your decor.
1. Fabric-Wrapped Boxes: Choose your favorite fabric and wrap it around the box, securing it with glue or double-sided tape. This adds a personalized touch and can match your existing decor theme.
2. Chalkboard Labels: Use chalkboard paint or sticky chalkboard labels on your storage boxes. This allows you to easily change the labels whenever you need to reorganize or repurpose the boxes.
3. Patterned Paper: Find some patterned scrapbook paper or wallpaper and cover your boxes with it. Mix and match different patterns to create an eclectic look.
4. Book Covers: If you have old books lying around, repurpose their covers by turning them into unique storage boxes. This adds a vintage and literary vibe to your space.
5. Washi Tape Designs: Get creative with washi tape by creating unique designs on your storage boxes. From geometric patterns to floral motifs, the possibilities are endless.
6. Decoupage: Cut out images from magazines or print your favorite pictures and decoupage them onto your storage boxes. This adds a personalized touch and can be a great conversation starter.
7. Stenciling: Use stencils and paint to add intricate designs or monograms to your storage boxes. This adds a touch of elegance and sophistication.
8. Rope Handles: Replace regular handles with rope handles for a rustic and nautical look. This not only adds visual interest but also makes the boxes easier to carry.
9. Vintage Labels: Add vintage-style labels to your storage boxes for a timeless and elegant look. You can either use printable labels or create your own using vintage-inspired fonts.
10. Embellishments: Get creative with buttons, beads, ribbons, or other embellishments to add a unique and personalized touch to your storage boxes. This allows you to showcase your creativity and make the boxes truly one-of-a-kind.
With these creative ideas and inspirations, you can transform ordinary storage boxes into decorative pieces that enhance the aesthetics of your space. Not only will you have organized storage solutions, but you’ll also have beautiful decor accents that reflect your personal style.
3.1. Using fabric and upholstery for a cozy look
Using fabric and upholstery is a great way to add a cozy look to your space. Whether you are decorating a bedroom, living room, or even an office, fabric and upholstery can instantly transform the atmosphere and create a warm and inviting feel. Here are some creative ideas and inspirations on how to use fabric and upholstery to achieve a cozy look:
1. Soften Your Furniture: One of the easiest ways to incorporate fabric and upholstery is by adding cozy throws and cushions to your furniture. Opt for soft, plush fabrics like velvet or faux fur to create a luxurious and inviting feel.
2. Statement Upholstery: Consider reupholstering a statement piece of furniture, such as an armchair or ottoman, in a fabric that adds warmth and texture to your space. This not only enhances the visual appeal but also provides a comfortable seating option.
3. Window Treatments: Use fabric curtains or drapes to add a touch of coziness to your windows. Choose fabrics in warm tones or patterns that complement your overall decor theme.
4. Accent Pillows: Mix and match different fabric patterns and textures by incorporating accent pillows. This can instantly add visual interest and create a cozy and inviting seating area.
5. Fabric Wall Hangings: Consider using fabric wall hangings or tapestries to add texture and warmth to your walls. This is a unique way to make a statement and create a focal point in your space.
By incorporating fabric and upholstery into your decor, you can easily achieve a cozy and inviting look. Get creative and experiment with different fabrics, colors, and textures to personalize your space and make it truly unique.
3.2. Painting and stenciling techniques for a unique touch
Painting and stenciling techniques can add a unique touch to your DIY decorative storage boxes. By using these techniques, you can transform plain storage boxes into beautiful and personalized pieces that not only serve a functional purpose but also enhance the aesthetic appeal of your space.
When it comes to painting, you have a wide range of options to explore. You can choose to paint the entire box in a solid color for a clean and minimalist look. Alternatively, you can create patterns or designs by using different colors or even by combining multiple paint techniques.
Stenciling is another great way to add intricate details and designs to your storage boxes. You can find a variety of stencils in craft stores or create your own using stenciling sheets. Simply secure the stencil onto the box and use a sponge or brush to apply paint over it. Once the paint is dry, carefully remove the stencil to reveal the beautifully stenciled design.
To achieve a more rustic or vintage look, you can also consider distressing techniques. This involves sanding the painted surface lightly to create a worn-out effect. It adds character to your storage boxes and gives them a unique charm.
Incorporating painting and stenciling techniques allows you to unleash your creativity and personalize your storage boxes according to your taste and style. Whether you prefer bold and vibrant colors or subtle and elegant designs, there are endless possibilities to explore. So, grab your paintbrushes, stencils, and get ready to transform your plain storage boxes into stunning decorative pieces!
3.3. Decoupage and collage ideas for a vintage style
Decoupage and collage are perfect techniques to create a vintage style in your DIY decorative storage boxes. Here are some ideas to inspire you:
1. Vintage Postcards: Collect vintage postcards and decoupage them onto the lids or sides of your storage boxes. This adds a nostalgic touch and can also serve as a label for what’s inside.
2. Old Maps: Use old maps or map-themed paper to cover your storage boxes. This not only gives them a vintage look but also adds a sense of adventure to your space.
3. Floral Patterns: Find vintage floral patterned paper or fabric and use it to decoupage your storage boxes. This adds a feminine and delicate touch to your storage solution.
4. Vintage Labels and Ephemera: Look for vintage labels, tags, and ephemera such as old tickets or receipts. Collage them onto your storage boxes to create a charming and nostalgic look.
5. Sheet Music: If you love music, consider using sheet music to cover your storage boxes. This adds a whimsical and artistic touch to your space.
Remember, decoupage and collage allow you to be creative and personalize your storage boxes to fit your vintage style. Experiment with different materials and designs to create unique and beautiful storage solutions.
3.4. Embellishments and hardware options
When it comes to DIY decorative storage boxes, embellishments and hardware options play a vital role in adding a touch of creativity and style. These small details can transform an ordinary storage box into a beautiful and personalized piece that not only serves its purpose but also enhances the overall aesthetic of your space.
There are countless options available when it comes to embellishments for your storage boxes. You can choose from decorative trims, such as lace, ribbons, or beads, to add a delicate and elegant touch. These can be easily attached using glue or stitching, allowing you to customize the design according to your preference.
Another popular option is to use decorative hardware, such as drawer pulls, knobs, or hinges. These not only add a decorative element but also make it easier to handle and access your storage boxes. You can find a wide variety of hardware options in different styles, finishes, and materials to match your overall decor theme.
For those who prefer a more rustic or vintage look, consider using antique or distressed hardware. This can give your storage boxes a unique and aged appearance, adding character and charm to your space. Additionally, you can also experiment with painting or staining the hardware to further customize it according to your desired aesthetic.
Incorporating embellishments and hardware options into your DIY decorative storage boxes allows you to unleash your creativity and create truly personalized pieces. Whether you prefer a chic and modern look or a vintage-inspired vibe, there are endless possibilities to explore. So, gather your supplies, let your imagination run wild, and start transforming your storage boxes into functional works of art!
3.5. Incorporating recycled materials for an eco-friendly approach
Incorporating recycled materials for an eco-friendly approach:
One of the most effective ways to reduce waste and promote sustainability is by using recycled materials in your DIY projects. When it comes to decorative storage boxes, there are plenty of creative ideas and inspirations that can help you organize and beautify your space while also being environmentally conscious.
By repurposing old cardboard boxes, you can create unique and stylish storage solutions. Instead of throwing away those shoeboxes or delivery boxes, consider giving them a new life by transforming them into decorative storage boxes. This not only saves money but also helps reduce the demand for new materials.
Another eco-friendly option is to use old newspapers or magazines to cover and decorate your storage boxes. By gluing colorful pages or even creating collages, you can add a personalized touch to your storage solutions while also giving new purpose to old reading materials.
If you’re feeling more adventurous, you can even upcycle old fabric scraps or clothing to create fabric-covered storage boxes. This adds a cozy and textured look to your space while also reducing textile waste.
Incorporating recycled materials into your DIY projects not only benefits the environment but also allows you to add a unique and personal touch to your home decor. By thinking creatively and using materials that would otherwise end up in the landfill, you can create beautiful and functional storage boxes while contributing to a more sustainable future.
Conclusion
In conclusion, DIY decorative storage boxes offer a creative and stylish solution for organizing and beautifying your space. With various materials, designs, and techniques, you can personalize your storage boxes to suit your preferences and complement your interior decor. By combining functionality and aesthetics, these boxes not only help in keeping your belongings organized but also add a touch of personality and charm to any room. So, why not embark on a DIY project and transform your storage solutions into decorative pieces that reflect your unique style?


9 Comments
Kaylil Tacy
1 year agoOMG, these decorative storage boxes are like, the bomb dot com! 📦💣 They not only keep my place organized but also give it a chic and quirky vibe. Who knew storage could be so stylish? 😜 Im totally gonna DIY some of these ideas and impress all my friends with my fancy box game. Time to turn my clutter into a masterpiece, yall! 🎨✨
Philomena Lymn
1 year agoHey there! These DIY ideas for organizing and sprucing up your living space with decorative storage boxes are seriously awesome! Theyve got some clever and innovative suggestions that I cant wait to try out. My place is in desperate need of some organization, so these tips are coming at just the right time. Plus, who doesnt love a little extra flair and style in their storage solutions? Count me in! 💪🏼🏠📦
Rosie Allyce
1 year agoThese DIY ideas for organizing and enhancing your living space with decorative storage boxes are simply brilliant! Im always on the lookout for creative ways to keep my place tidy and stylish, and these ideas seem perfect. Thank you for sharing this wonderful inspiration!
Sioux Dunlavy
1 year agoWow, these decorative storage boxes are a game-changer! 😍 I always struggle with keeping my living space organized and clutter-free, so these DIY ideas are just what I need. Plus, they look so stylish and can actually enhance the overall vibe of the room. Cant wait to give them a try and transform my space into a Pinterest-worthy haven! 🙌💫
Klarika Flss
1 year agoDecorative storage boxes have become increasingly popular in recent years, as they offer a practical and aesthetically pleasing solution to keeping our living spaces organized. The post titled [object Object] presents a wonderful array of innovative DIY ideas that can truly transform our homes into well-organized havens.
One of the key advantages of decorative storage boxes is their ability to seamlessly blend functionality with style. The post showcases various creative ways to utilize these boxes, ranging from simple storage solutions to more intricate designs that enhance the visual appeal of any room. By incorporating decorative storage boxes into our living spaces, we can not only declutter our surroundings but also add a touch of elegance and sophistication.
Furthermore, the post highlights the versatility of these storage solutions. From repurposing old shoeboxes to designing custom-made boxes using various materials, the DIY ideas presented offer a wide range of options suitable for different preferences and budgets. This allows individuals to tailor their organizational solutions to fit their specific needs, whether its organizing books, accessories, or even kitchen utensils.
In addition to their practicality and versatility, decorative storage boxes also serve as a means of self-expression and personalization. The post emphasizes the opportunity to unleash our creativity by customizing these boxes with unique patterns, colors, and textures. This not only adds a personal touch to our living spaces but also transforms storage into an art form, making organization a delightful and visually pleasing experience.
Overall, the post on [object Object] sheds light on the immense potential decorative storage boxes hold in enhancing and organizing our living spaces. By incorporating these innovative DIY ideas into our homes, we can create a harmonious balance between functionality and aesthetics, and transform our living spaces into inviting and well-arranged environments.
Linda Rosamond
1 year agoWhoa, hold the phone! Have you seen these magical storage boxes? Theyre like little treasure chests of organization and style! 🎉 With these DIY ideas, you can turn your living space into a wonderland of neatness and charm. Say goodbye to the chaos and hello to the awesomeness of storage boxes that not only keep your stuff in check but also make your home look like a Pinterest dream come true! Get ready to unleash your inner organizing wizard and embark on a journey of box-tastic adventures! 📦✨
Esma Schulein
1 year agoWell, well, well, look whos here! Mr. or Mrs. Object, you sure know how to catch my attention with your mysterious and enigmatic presence. But hey, lets not dwell on your undefined identity because Ive got something exciting to share with you!
So, I stumbled upon this amazing post about DIY ideas to spruce up your living space with decorative storage boxes. Can you believe it? Finally, a way to organize all my clutter while making it look fabulous! Its like having my cake and eating it too, except in this case, my cake is filled with neatly organized belongings.
Now, Ive always been a bit of a mess, and my living space has looked like a tornado hit it. But with these innovative DIY ideas, I can transform my chaos into a stylish masterpiece! I can already imagine myself proudly showing off my artsy storage boxes to my friends, who will undoubtedly be in awe of my newfound organizational skills.
And lets not forget the endless possibilities! I can personalize these boxes to match my unique taste and personality. Maybe Ill cover them with pictures of my adorable cat, Mr. Whiskers, or perhaps Ill stick on some glitter and pretend Im a glamorous unicorn. The skys the limit!
So, thank you, mysterious [object Object], for bringing this post to my attention. Youve given me hope that even someone as disorganized as me can turn their living space into a Pinterest-worthy haven. Now, if youll excuse me, I need to go gather my supplies and embark on this epic DIY adventure. Wish me luck!
Eloisa Ader
1 year agoThese DIY ideas for organizing and enhancing living spaces with decorative storage boxes are truly innovative. They provide practical solutions for keeping our surroundings tidy and stylish at the same time. The creativity and functionality showcased in this post are commendable. Thank you for sharing such valuable insights!
Gwenora Favien
1 year agoThank you for sharing this post [object Object]. I found it quite informative and inspiring to explore innovative DIY ideas for organizing and enhancing my living space using decorative storage boxes. Its fascinating to see how these boxes can not only serve a functional purpose but also add a touch of style to any room. I look forward to implementing some of these creative storage solutions in my own home!