
How to Make Button Up Wall Art Putting some thought and effort into your home’s decor can be a lot of fun. Create one-of-a-kind, eye-catching wall art using buttons of varying sizes, colors, and forms. This project is suitable for crafters of all skill levels, since its clear instructions will lead to lovely, unique items that will wow visitors and liven up your home.
- 1. Introduction
- 1.1. Why DIY wall art with buttons?
- 1.2. What you’ll need
- 1.3. Tips and tricks
- 2. Choosing Your Buttons
- 2.1. Consider color scheme
- 2.2. Think about size and shape
- 2.3. Mix and match
- 2.4. Experiment with texture
- 2.5. Make a statement with novelty buttons
- 3. Preparing Your Canvas
- 3.1. Select a canvas size
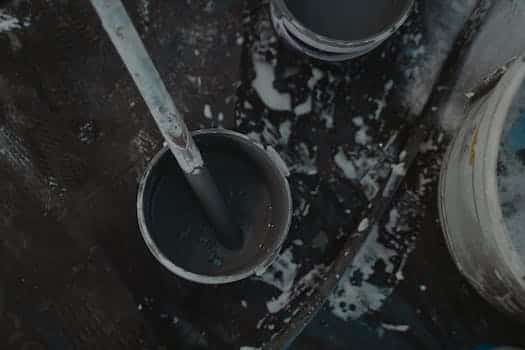
- 3.2. Choose your paint colors
- 3.3. Apply a base coat
- 3.4. Sketch your design
- 3.5. Mark button placement
- 4. Attaching Your Buttons
- 4.1. Start with larger buttons
- 4.2. Work in sections
- 4.3. Use strong adhesive
- 4.4. Consider sewing for added security
- 4.5. Add small embellishments as finishing touches
- 5. Displaying Your Artwork
1. Introduction
Making your own wall art is a fun and easy way to express your individuality via your home decor. The use of colorful buttons to create original motifs and patterns has become a popular DIY wall art fad. This is a great activity for people of all skill levels in the arts and crafts community. If you’re looking to brighten up your living room, bedroom, or office on a dime, button art is a practical and inexpensive choice. With the ideas and advice in this post, you’ll be able to take your button art and home decoration to the next level.
1.2. What you’ll need
DIY button wall art is simple to make and only requires a few inexpensive materials. You’ll need a wooden plaque or canvas to start. A photo frame is another option for those seeking a more three-dimensional look. You’ll also need buttons of various sizes, colors, and shapes. Buttons can be found at any craft store or recycled from outgrown garments. A pair of scissors, a hot glue gun, and glue sticks are also required tools. Now that you have everything you need, you can get started making your own button wall art and giving your home a truly one-of-a-kind look.
1.3. Tips and tricks
Do you want to put your stamp on your property without emptying your bank account? DIY wall decor is what you need. You can turn any boring wall into a showpiece with just a few inexpensive supplies and a little imagination. This essay will concentrate on one specific type of do-it-yourself wall decoration: button art. Both inexperienced and experienced DIYers will enjoy working on this fun and straightforward project. Let’s get started, so pick up that glue gun.
2.1. Consider color scheme
If you want your button wall art to look its best and go in with the rest of your design, you need to give careful consideration to the colors you use. Think on the room’s design and the colors already present in the space. Choose vibrant and bold colored buttons to liven up a room with a subdued or neutral color scheme. If the area is already filled with vivid colors, use buttons in shades that are similar or equivalent to those already present. You may add dimension and visual interest to your homemade wall art by using buttons of varying sizes and shapes.
2.2. Think about size and shape
There are a few factors to think about when deciding which buttons to utilize in your DIY button wall art project. The size and design of the buttons is a crucial element. Smaller buttons could be the way to go if you’re going for a more detailed design. However, larger buttons can make a statement and serve as a design focal point. The aesthetic value of your work might also be affected by the button shapes you use. It’s possible that buttons with a rounder shape are more traditionally elegant, while those with a more unusual design can be more trendy and eclectic. Think carefully about the size and form of buttons that would complement your finished product.
2.3. Mix and match
There is no limit to the creativity that can go into making button wall art as a do-it-yourself project. Create something one-of-a-kind and eye-catching by experimenting with a variety of button sizes, colors, and shapes. The buttons can be arranged in a variety of patterns and shapes, including hearts and stars. Try out different combinations of buttons; have some fun with it!
But before you go crazy pasting buttons onto your canvas or frame, make sure it fits nicely with the rest of the room’s decor. You should take into account the room’s current color scheme and decor when deciding which buttons to use. A room with a lot of neutral tones would benefit from the addition of buttons in contrasting hues. Buttons in more subdued or complementary hues may be preferable if your room features a lot of bold colors.
In the end, it’s all about letting your imagination go wild while picking out your buttons. You can give any area in your house a dose of your unique style and character with a little bit of experimenting and a lot of inspiration in the form of a unique piece of wall art.
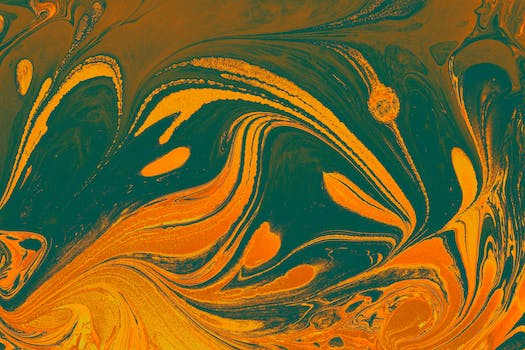
2.4. Experiment with texture
Adding depth and visual appeal to your DIY wall art project is as simple as experimenting with texture. Buttons can be found in a wide range of finishes, from smooth and sparkly to rough and matte, giving you plenty of options for giving your work some visual depth. One way to make a design that stands out is to use buttons of varying sizes and textures. Whether you go for a monochrome theme or a rainbow of colors, experimenting with texture is a surefire way to make your wall hangings stand out.
3. Preparing Your Canvas
Getting the canvas ready is the first step in making your own DIY wall art. The canvas is the basis of your painting and can have significant effects on the final product. Get started by making sure your canvas is spotless and dust-free. You can wipe away any grime or dust with a gentle cloth or brush. The next step is to think about priming your canvas. This will aid in the smoothing process and give your artwork a foundational hue. Pick a shade of paint that goes well with the buttons you’ve chosen. Next, construct a rough draft of your design by arranging your buttons on the canvas. Before gluing the buttons down, you may have a feel for how the finished product will look like and make any required alterations. Now that you have your canvas stretched, you can begin making your own work of art for the walls.
3.1. Select a canvas size
The key to making the best do-it-yourself wall art is picking the correct canvas size. Choose a canvas that will fit proportionately on the wall space you have available. It’s important to remember that while smaller canvases are ideal for making a gallery wall, larger ones can create a far more subtle but no less striking statement. When you’ve settled on the perfect canvas, the next step is to get it ready for use. To prepare a smooth canvas for painting, first prime it with gesso. Do not apply paint or anything else to the gesso until it has dried fully.
3.2. Choose your paint colors
You can make or destroy your do-it-yourself wall art project by picking the wrong paint colors. Think about the atmosphere you want to create and pick colors that go well together. If you aren’t sure where to begin, choose a neutral paint tone for the walls and then add bolder colors with accessories and artwork. Keep in mind that it’s much simpler to add more color to a wall after the fact than it is to remove it.
3.3. Apply a base coat
It’s necessary to prime the canvas before beginning your do-it-yourself wall hanging. An even and smooth surface for your artwork is the result of applying a base coat. Remove any dust or debris from your canvas by wiping it off with a moist cloth. Then, cover the entire canvas with gesso or white acrylic paint. You can avoid paint bleeding and uneven coverage by doing this. Don’t bother with the design until the base coat is dry. You can now make a one-of-a-kind button art creation that will reflect your personality and taste in home design.
3.4. Sketch your design
DIY wall art requires some forethought and preparation before you can begin making your masterpiece. The wall or other flat surface will serve as your canvas for creating button art. Be sure the area is dry and free of debris. In order to provide a more even surface for your buttons, you may find it necessary to sand down a rough surface. You may want to sketch out your design first on paper to see how the buttons will appear and how they will go together. If you follow these steps, you can rest assured that your finished product will look fantastic.
4.2. Work in sections
You can begin affixing buttons to the canvas after you have enough of them. Partially completing it is the most efficient method. To begin, choose out the area you wish to fill with buttons on the canvas. The next step is to attach each button to the canvas and press it down firmly. Keep plugging away at it, section by section, until the whole canvas is covered in buttons. Wait till your homemade wall decoration is totally dried to hang it.
4.3. Use strong adhesive
Use an adhesive that will hold the weight of the buttons and the canvas together securely when applying the buttons to the canvas. A hot glue gun or very strong craft glue are two viable options. Each button should have a dab of glue applied on its back before being pressed firmly onto the canvas. Put them in a pattern you desire with consistent spacing. After the glue has set, you can hang up your button masterpiece.
4.4. Consider sewing for added security
DIY projects can be made more secure by learning to sew. Sewing can be a useful tool for preserving the integrity of your homemade wall art. Adding a few stitches to secure buttons or other embellishments may make a huge impact. Your wall decor will have a more polished look and will last longer.
4.5. Add small embellishments as finishing touches
The next step is to glue the buttons to the canvas after they have been arranged in the appropriate pattern. Put a dab of glue on the back of each button and push it gently onto the canvas using a hot glue gun. Keep in mind that the glue will cure quickly, and work quickly. Glitter and tiny beads are just two examples of the kinds of decorations you may use to give your artwork a little something extra. Use them, but don’t go overboard, otherwise they’ll ruin the whole look.
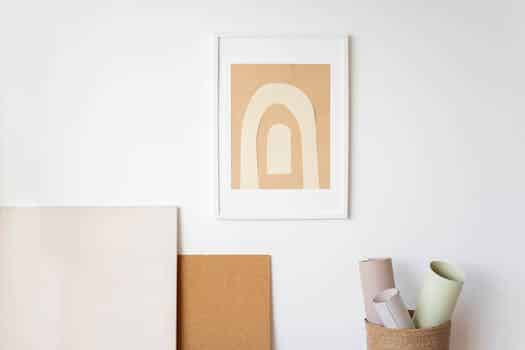
5. Displaying Your Artwork
Putting your artwork on display in your home is a great approach to get it noticed. This not only makes your art more accessible to you, but it also gives your space a more personalized feel. There is a wide variety of choices available to you when it comes to exhibiting your work. You can put your pictures in anything from store-bought frames to ones you make yourself. The purpose of this post is to provide some inspiration for showcasing your artwork and injecting your individuality into your interior design.
5.1. Frame your canvas
Displaying your DIY wall art in a way that does it justice is the next step once you’ve completed making it. Putting your canvas in a frame is a terrific method to do this. It serves two purposes: it keeps your artwork safe from dust and damage, and it gives your space a polished look. Think about how the frame’s color and style will complement the canvas and the rest of the decor in the room. You have the option of selecting a simple wooden frame, a modern metal frame, or a strikingly colored frame. Make sure it’s the right size for your canvas and that it will stay put securely. Use picture hooks or adhesive strips to secure your canvas to the wall after framing it. You may rest assured that your artwork will be securely hung for everybody to admire.
5.2. Hang with picture wire
Hanging your artwork from the wall with picture wire is a great option. When working with bulkier or larger items, this technique is ideal. To begin, find the exact spot on the wall where you wish to hang the artwork and make a mark. Screw D-rings to the back of your artwork after you’re done. Next, you’ll need to take your measurements and cut a piece of picture wire, allowing for some slack for hanging. Connect each D-ring with the wire and secure it. Put picture hooks in the wall, and then hang your artwork. Voila! Your work is showcased splendidly for others to admire.
5.3. Create a gallery wall
Making a gallery wall is a fun way to show off your artwork and express your individuality via interior design. An art gallery wall is an arrangement of individual works of art that works together as a whole. Pick out the pieces of art you’d want to hang on your gallery wall. Select objects that share a common color palette or design aesthetic. For a more diverse look, combine works in varying mediums, frames, and sizes. Once you’ve chosen your pieces, hang them on the wall in a method that’s pleasing to the eye. Place the largest piece in the middle, and then fill in the surrounding spaces with the smaller ones as you work outward. Artwork can be laid out on the floor to get a feel for how it will look before being hung on the wall. With some time and effort, you can make a stunning gallery wall that reflects your own sense of design.
5.4. Incorporate into a larger design scheme
It’s crucial to exhibit your DIY wall art as part of a cohesive design when hanging it up. This involves thinking about the room’s color scheme, materials, and design aesthetic as a whole. Putting together a gallery wall with various pieces of art and images is one possibility. The DIY wall art you create could also serve as a focal point around which the room is styled. Make sure your DIY wall art fits in with the style of the rest of your house whichever route you take.
5.5. Enjoy your one-of-a-kind creation!
Now that you’ve spent time and effort making DIY wall art, you can show it off with pride. Place it where everyone can see it and admire it. Take pride in the originality and elegance of your handmade piece. Your artwork, whether it’s bright and vibrant or muted and elegant, will be a topic of discussion and a point of pride. Display it proudly and enjoy the acclaim.
Conclusion
Wall decor that you make yourself can not only save you money but also give your home a unique feel. Button art is a fun and unique way to decorate your house with texture and color. Get the materials you need and get to work right away making some one-of-a-kind button artwork for your walls.


These 10 innovative and imaginative DIY home decor ideas from [object Object] provide a refreshing approach to enhancing ones living…