

Are you looking for creative and colorful ways to decorate your home? Look no further than DIY wall art with paint chips! With an array of vibrant colors and endless possibilities, paint chips offer a budget-friendly and unique option for adding a personal touch to your living space. In this article, we will explore some innovative ideas to inspire you to transform those humble paint chips into stunning wall art pieces. Get ready to unleash your creativity and bring a burst of color to your home!
- 1. Introduction
- 1.1. What is DIY wall art?
- 1.2. Why use paint chips for DIY wall art?
- 1.3. Benefits of creating DIY wall art with paint chips
- 1.4. Materials needed for DIY wall art with paint chips
- 1.5. Tips for choosing the right paint chips for your DIY wall art
- 2. Step-by-Step Guide
- 2.1. Prepare the paint chips
- 2.2. Create a design or pattern
- 2.3. Cut and arrange the paint chips
- 2.4. Secure the paint chips to the wall
- 2.5. Add finishing touches
- 3. Inspiration and Ideas
1. Introduction
Decorating your home with wall art is a great way to add personality and style to your living space. If you’re looking for an affordable and creative way to beautify your walls, consider using paint chips to create unique DIY wall art. Paint chips are small swatches of color that are readily available at most home improvement stores. With a little imagination and some basic crafting supplies, you can transform these simple chips into stunning pieces of art that will make a colorful statement in your home. In this article, we will explore various creative ideas for using paint chips to create beautiful and eye-catching wall art for a truly colorful home.
1.1. What is DIY wall art?
DIY wall art refers to the practice of creating unique and personalized artwork for your walls using various materials and techniques. It is a creative and cost-effective way to add a touch of individuality and style to your home decor. With DIY wall art, you have the freedom to express your creativity and showcase your personal taste in a visually appealing manner. From simple and minimalist designs to intricate and elaborate artworks, the possibilities are endless when it comes to DIY wall art. By using paint chips, you can add a vibrant and colorful element to your DIY wall art projects, making them visually stunning and eye-catching. In this article, we will explore creative ideas and techniques for using paint chips to create beautiful and colorful wall art for your home.
1.2. Why use paint chips for DIY wall art?
Paint chips are a versatile and affordable material that can be used to create unique and eye-catching DIY wall art. Whether you want to add a pop of color to your home or showcase your artistic skills, paint chips offer endless possibilities. In this article, we will explore why using paint chips for DIY wall art is a great idea, providing you with inspiration and creative ideas to transform your space into a colorful haven.
1.3. Benefits of creating DIY wall art with paint chips
Creating DIY wall art with paint chips can be a fun and creative way to add a pop of color to your home. Paint chips are readily available at most home improvement stores and come in a wide range of colors, making them the perfect material for creating unique and vibrant wall art. Whether you’re looking to spruce up a boring wall or add a personal touch to your space, DIY wall art with paint chips offers several benefits. Not only is it a budget-friendly option, but it also allows you to customize your art to match your home decor and personal style. Additionally, the process of creating DIY wall art can be a therapeutic and enjoyable activity, allowing you to unleash your creativity and bring your vision to life. In this article, we will explore various creative ideas for using paint chips to create stunning wall art that will transform your home into a colorful oasis.
1.4. Materials needed for DIY wall art with paint chips
Creating DIY wall art with paint chips is a fun and budget-friendly way to add a pop of color to your home. Whether you are a seasoned crafter or a beginner, this creative project is easy to do and can result in stunning pieces of artwork that reflect your personal style. In this article, we will explore different materials needed to get started on your own DIY wall art using paint chips. From paint chips in various colors and sizes to basic art supplies, here are the essential materials you will need for this project.
1.5. Tips for choosing the right paint chips for your DIY wall art
When it comes to creating DIY wall art, paint chips can be a fantastic and budget-friendly option. These small, colorful samples of paint can be found at any local home improvement store and offer a wide range of hues to choose from. Whether you’re looking to add a pop of color to your living room or create a unique statement piece for your bedroom, paint chips can provide endless possibilities.
However, with so many options available, it can be overwhelming to select the right paint chips for your project. To help you make the best choice, here are some tips to keep in mind:
1. Consider the color scheme: Think about the existing color scheme in the room where you plan to hang your DIY wall art. Do you want to complement the existing colors or create a striking contrast? Look for paint chips that align with your desired color palette.
2. Experiment with shades: Don’t be afraid to mix and match different shades within the same color family. This can add depth and dimension to your wall art. Grab a variety of paint chips in different shades and hold them up against each other to see how they interact.
3. Think about the size and shape: Paint chips come in various sizes and shapes, including squares, rectangles, and even irregular shapes. Consider the dimensions of the space where you want to display your art and choose paint chips that will fit well.
4. Try different patterns and arrangements: Get creative with how you arrange your paint chips. You can create a geometric pattern, a ombre effect, or even a random collage. Play around with different layouts before settling on the final design.
5. Don’t forget about texture: Some paint chips have a glossy finish, while others have a matte or textured surface. Think about the overall look and feel you want to achieve and select paint chips accordingly.
By keeping these tips in mind, you can choose the right paint chips for your DIY wall art project and create a colorful and eye-catching addition to your home decor.
2. Step-by-Step Guide
DIY Wall Art with Paint Chips: Creative Ideas for a Colorful Home
Are you looking to add some vibrant and eye-catching artwork to your walls? Look no further than the creative world of DIY wall art with paint chips. Paint chips are those small color samples you can find at any paint store, and they come in a wide variety of shades and hues. With a little imagination and some basic crafting supplies, you can transform these humble paint chips into stunning pieces of wall art that will add a pop of color and personality to any room.
To get started on your DIY wall art project, gather a collection of paint chips in the colors that inspire you. You can choose a monochromatic color scheme for a more subtle and sophisticated look, or go for a bold and eclectic mix of colors for a playful vibe. The choice is yours!
Once you have your paint chips, it’s time to brainstorm some creative ideas for your wall art. One simple yet effective idea is to create a geometric design by cutting the paint chips into various shapes and arranging them on a blank canvas. You can experiment with different patterns and layouts until you find a design that speaks to you.
Another idea is to create a gradient effect by arranging the paint chips in a color spectrum from light to dark. This can be done by either cutting the paint chips into strips or using them as they are. The result is a visually striking piece of wall art that will surely impress your guests.
If you’re feeling extra crafty, you can even try your hand at creating a mosaic-style artwork using paint chips. Cut the chips into small, uniform shapes and arrange them in a pattern of your choice. This technique requires a bit more time and patience, but the end result is a truly unique and personalized piece of wall art.
Once you have your design in mind, it’s time to bring it to life. Use a strong adhesive, such as a glue gun or craft glue, to secure the paint chips onto your chosen canvas or backing. Make sure to press them down firmly to ensure they adhere properly. If desired, you can also add additional embellishments, such as sequins or beads, to further enhance the visual appeal of your artwork.
Once your DIY wall art is complete, it’s time to hang it up and admire your handiwork. You can display it as a standalone piece or create a gallery wall by combining multiple artworks. Either way, your colorful and creative wall art is sure to be a conversation starter and a reflection of your unique style.
In conclusion, DIY wall art with paint chips is a fun and budget-friendly way to add a splash of color to your home. Whether you opt for a simple geometric design or a complex mosaic-style artwork, the possibilities are endless. So grab some paint chips, unleash your creativity, and get ready to transform your walls into a colorful and artistic masterpiece!
2.1. Prepare the paint chips
Before you begin creating your DIY wall art with paint chips, it’s important to properly prepare the paint chips. This step-by-step guide will walk you through the process.
1. Gather the paint chips: Start by collecting a variety of paint chips in different colors and shades. You can find these at your local hardware store or ask for them at a paint supply shop.
2. Clean the paint chips: Once you have your paint chips, use a soft cloth or sponge to gently wipe them clean. This will ensure that any dust or dirt is removed before you start working with them.
3. Cut the paint chips: Depending on the design you have in mind, you may need to cut the paint chips into smaller pieces. Use scissors or a craft knife to carefully cut the chips into your desired shapes and sizes.
4. Arrange the paint chips: Lay out the paint chips on a flat surface and experiment with different patterns and arrangements. This will help you visualize how the final piece will look and allow you to make any adjustments before gluing them down.
5. Glue the paint chips: Once you’re satisfied with the arrangement, use a strong adhesive or glue to secure the paint chips onto a canvas, wooden board, or any other surface you’ve chosen for your wall art.
By following these steps, you’ll be ready to embark on your DIY wall art project using paint chips. Get creative, have fun, and enjoy the colorful transformation of your home!
2.2. Create a design or pattern
Step 1: Gather your materials. For this DIY project, you will need a variety of paint chips in different colors. You can obtain paint chips from your local hardware store or paint supply shop. Make sure to choose a wide range of colors to create a vibrant and eye-catching design.
Step 2: Prepare your workspace. Find a clean and well-lit area where you can work comfortably. Lay down some newspapers or a drop cloth to protect your working surface from any paint spills or splatters.
Step 3: Plan your design. Before you start sticking the paint chips onto your wall, it’s a good idea to plan out your design or pattern. You can sketch it out on a piece of paper or use a design software to visualize how it will look on your wall.
Step 4: Cut and arrange the paint chips. Using a pair of scissors or a craft knife, cut the paint chips into different shapes and sizes. Play around with the arrangement and try different combinations until you find a composition that you like.
Step 5: Attach the paint chips to the wall. Once you’re happy with your design, it’s time to start sticking the paint chips onto the wall. You can use double-sided tape or adhesive putty to secure them in place. Take your time and be careful not to damage the paint chips as you attach them.
Step 6: Step back and admire your colorful creation. Once all the paint chips are in place, take a step back and marvel at your DIY wall art. The vibrant colors and unique design will instantly add a pop of personality to any room in your home.
Step 7: Share your creation. Don’t forget to share pictures of your DIY wall art on social media or with friends and family. Inspire others to get creative and add some color to their own homes!
2.3. Cut and arrange the paint chips
If you’re looking for a fun and creative way to add some color to your home, consider making DIY wall art with paint chips. This simple and affordable project allows you to create unique and personalized artwork using paint chips in a variety of colors. One of the first steps in this process is to cut and arrange the paint chips. Here’s a step-by-step guide to help you get started:
1. Gather your materials: To begin, gather all the necessary materials for this project. You’ll need a variety of paint chips in different colors, a pair of scissors, adhesive or double-sided tape, and a blank canvas or art board.
2. Choose your color scheme: Decide on the color scheme you want for your wall art. You can choose a monochromatic scheme using different shades of the same color, or opt for a more vibrant and eclectic mix of colors.
3. Cut the paint chips: Using your scissors, carefully cut the paint chips into different shapes and sizes. You can cut them into squares, rectangles, triangles, or any other shape that appeals to you. Experiment with different cutting techniques to create interesting patterns and designs.
4. Arrange the paint chips: Once you have a collection of cut paint chips, lay them out on your canvas or art board. Play around with different arrangements until you find a design that you like. You can create a geometric pattern, a random mix of colors, or even a specific image or shape.
5. Secure the paint chips: Once you’re happy with the arrangement, use adhesive or double-sided tape to secure the paint chips onto the canvas or art board. Make sure each chip is firmly attached to prevent them from falling off.
6. Display your artwork: Once the paint chips are securely attached, your DIY wall art is ready to be displayed. Hang it on a wall, prop it up on a shelf, or place it on a mantel – the choice is yours!
Creating DIY wall art with paint chips is a fantastic way to add a pop of color and personality to your home. With just a few simple steps, you can create a stunning piece of artwork that is unique to you.
2.4. Secure the paint chips to the wall
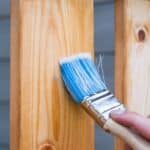
To create a unique and colorful wall art for your home, one creative idea is to use paint chips. These small, rectangular pieces of colored paper can be easily obtained from any hardware or paint store. Once you have gathered a collection of paint chips in various shades and hues, you can begin the process of securing them to the wall.
Here is a step-by-step guide to help you create your own DIY wall art with paint chips:
1. Prepare the materials: Gather a variety of paint chips in your desired colors. You can choose a specific color scheme or go for a more eclectic mix of shades.
2. Plan your design: Before you start attaching the paint chips to the wall, it’s a good idea to plan out your design. You can create a pattern, arrange them randomly, or even spell out words or phrases.
3. Clean the wall: Make sure the wall surface is clean and free from any dust or debris. This will ensure that the paint chips adhere properly.
4. Attach the paint chips: Use a double-sided adhesive tape or glue dots to secure the paint chips to the wall. Apply a small amount of adhesive to the back of each chip and press firmly onto the wall. Start from one corner and work your way across.
5. Experiment with placement: Feel free to experiment with different arrangements and patterns as you attach the paint chips. You can overlap them, create geometric shapes, or even create a gradient effect.
6. Fill in any gaps: Once you have attached all the paint chips, check for any gaps or uneven areas. You can trim or cut smaller chips to fill in these spaces and create a more cohesive look.
7. Add finishing touches: To give your DIY wall art a polished look, consider adding a frame or border around the edges. This will help define the artwork and make it stand out even more.
With these simple steps, you can easily create a stunning and colorful piece of wall art using paint chips. Not only is it a budget-friendly option, but it also allows you to showcase your creativity and add a vibrant touch to your home decor.
2.5. Add finishing touches
Once you have completed the main design of your DIY wall art with paint chips, it’s time to add the finishing touches. These final details will elevate your artwork and make it truly stand out in your home. Here is a step-by-step guide to help you add those special touches:
1. Frame it: Consider framing your paint chip artwork to give it a polished and professional look. You can choose a frame that complements the colors in your design or opt for a simple black or white frame for a sleek and modern feel.
2. Add texture: If you want to add an extra dimension to your wall art, consider adding some texture. You can do this by gluing small beads, sequins, or other embellishments onto the paint chips. This will create a tactile and visually interesting piece.
3. Experiment with different layouts: Play around with the arrangement of your paint chips. You can create a geometric pattern, a gradient effect, or even a random collage. Don’t be afraid to try different layouts until you find one that you love.
4. Incorporate other materials: To make your wall art even more unique, consider incorporating other materials alongside the paint chips. You can use fabric, paper cutouts, or even small pieces of wood to create a mixed-media masterpiece.
5. Seal it: To protect your artwork and ensure its longevity, consider applying a protective sealant. This will prevent the colors from fading or smudging over time. Make sure to choose a sealant that is appropriate for the materials you used.
By following these steps, you can add the perfect finishing touches to your DIY wall art with paint chips. Get creative and have fun with it, and soon you’ll have a colorful and eye-catching piece to display in your home.
3. Inspiration and Ideas
When it comes to adding a pop of color and personality to your home, DIY wall art with paint chips can be a fun and budget-friendly option. Paint chips, those small and colorful samples you find at the hardware store, can be transformed into unique and eye-catching pieces of art. Whether you’re looking to create a focal point in your living room or add a touch of whimsy to your bedroom, there are countless creative ideas to explore.
One idea is to create a geometric masterpiece using paint chips of different shades within the same color family. Cut the paint chips into various shapes, such as triangles or rectangles, and arrange them in a pattern on a canvas or a wooden board. This modern and minimalist design can instantly add a contemporary touch to any room.
If you’re feeling more adventurous, consider creating a vibrant mosaic using paint chips of various colors. Cut the chips into small squares or other shapes and glue them onto a surface, such as a mirror frame or a wooden panel. This colorful and eclectic piece of wall art will surely become a conversation starter.
Another simple yet stylish idea is to create a gradient effect using paint chips. Start with a single color and progressively transition to lighter or darker shades of the same color. This ombre effect can be achieved by arranging the paint chips in a vertical or horizontal manner and can add a soothing and calming ambiance to your space.
For those who prefer a more abstract and artistic approach, consider tearing or cutting the paint chips into irregular shapes and layering them on a canvas or a piece of cardboard. This collage-style wall art can be as wild and unique as your imagination allows, and it can bring a sense of creativity and energy to any room.
The possibilities for DIY wall art with paint chips are truly endless. Whether you choose to create a simple and sleek design or an elaborate and intricate masterpiece, this colorful and cost-effective medium can elevate the aesthetics of your home while showcasing your personal style and creativity.
3.1. Geometric shapes and patterns
Geometric shapes and patterns can add a modern and visually appealing touch to any DIY wall art project. With their clean lines and symmetrical designs, they offer a versatile and stylish option for creating a colorful home. Whether you’re a fan of bold and vibrant colors or prefer a more subtle and muted palette, there are endless possibilities when it comes to incorporating geometric shapes into your wall art.
One idea is to create a geometric pattern using paint chips. These small, colorful samples are readily available at most home improvement stores and can be easily transformed into a unique piece of art. You can arrange them in different shapes such as triangles, squares, or hexagons to create a visually striking design.
Another option is to paint geometric shapes directly onto a blank canvas. You can use masking tape to create crisp lines and angles, or freehand the shapes for a more organic and artistic look. Experiment with different color combinations to achieve the desired effect.
Geometric patterns can also be incorporated into wall stencils. You can purchase pre-made stencils with various geometric designs or create your own using cardboard or acetate sheets. Simply trace the stencil onto the wall and fill in the shapes with your chosen colors.
Additionally, you can use geometric-shaped objects such as frames, mirrors, or shelves to enhance the overall geometric theme of your wall art. Arrange them in a visually pleasing manner to create a cohesive and stylish display.
In summary, geometric shapes and patterns offer a creative and visually appealing approach to DIY wall art. Whether you choose to use paint chips, paint directly onto a canvas, incorporate stencils, or utilize geometric-shaped objects, the possibilities are endless. Get inspired and let your imagination run wild to create a colorful and unique home decor.
3.2. Nature-inspired designs
Nature-inspired designs can add a touch of tranquility and beauty to any space. Incorporating elements from the natural world into your DIY wall art can create a peaceful and inviting atmosphere in your home. Whether you’re a fan of lush green forests, serene ocean waves, or vibrant floral patterns, there are endless nature-inspired designs to choose from. By using paint chips, you can bring these designs to life with a colorful twist. Let your creativity soar with these creative ideas for a colorful home.
3.3. Typography and quotes
Typography is an essential element in DIY wall art projects. The right choice of fonts can add a unique touch to your creations, making them visually appealing and engaging. Whether you want to create a statement piece or simply add some decorative elements to your walls, typography can play a crucial role.
Incorporating quotes into your DIY wall art is another great way to add a personal touch and inspire others. Quotes can convey powerful messages and evoke emotions, making them perfect for creating a meaningful and inspiring atmosphere in your home. By using different fonts and typography techniques, you can make the quotes stand out and become the focal point of your wall art.
When it comes to typography and quotes, the options are endless. You can choose from a wide range of font styles, sizes, and colors to match your overall design theme. Additionally, you can experiment with different layouts and arrangements to create a visually stunning composition.
Whether you prefer bold and eye-catching typography or elegant and minimalistic designs, typography and quotes can add a vibrant and artistic touch to your DIY wall art projects. So, get creative and let your imagination run wild when designing your next colorful masterpiece!
3.4. Abstract and artistic creations
Abstract and artistic creations for section with title Inspiration and Ideas for article DIY Wall Art with Paint Chips: Creative Ideas for a Colorful Home
3.5. Seasonal and holiday-themed wall art
Seasonal and holiday-themed wall art can add a touch of festive cheer to any home decor. Whether you’re looking to spruce up your living room for the holiday season or want to add a pop of color to your bedroom for the changing seasons, there are plenty of creative ideas to explore.
One popular option is to create a seasonal gallery wall using framed prints or canvases. For example, during the winter months, you can display artwork featuring snowflakes, cozy winter scenes, or holiday motifs like Christmas trees and ornaments. In the spring, you can switch it up with floral prints or vibrant landscapes.
Another idea is to incorporate holiday-themed wall decals or stickers. These can be easily applied and removed, making them a versatile option for seasonal decor. From spooky Halloween decals to cheerful Easter bunny stickers, you can find a wide range of designs to suit any occasion.
If you’re feeling crafty, you can also make your own seasonal wall art using paint chips. Paint chips come in a variety of colors and can be easily cut into different shapes and sizes. You can create a colorful mosaic by arranging the paint chips in a pattern or design of your choice. For example, for Halloween, you can arrange black, orange, and purple paint chips to create a spooky silhouette.
No matter the season or holiday, adding seasonal and holiday-themed wall art is a fun and creative way to update your home decor. It allows you to express your personal style and create a festive atmosphere that will delight both residents and guests alike.
Conclusion
In conclusion, DIY wall art with paint chips offers endless possibilities for creating a colorful and vibrant home. With a little creativity and some basic materials, you can transform plain walls into stunning focal points. Whether you opt for a geometric pattern or a more abstract design, the use of paint chips allows you to customize your wall art to match your personal style. So why not unleash your inner artist and give your home a touch of color with these creative ideas?

These 10 innovative and imaginative DIY home decor ideas from [object Object] provide a refreshing approach to enhancing ones living…