

DIY Wall Art with String and Nails: Creative and Easy Ideas is a great way to add a personal touch to your home decor. By using simple materials such as string and nails, you can create unique and eye-catching designs that are sure to impress. Whether you’re a seasoned DIYer or just starting out, these ideas are easy to follow and perfect for any skill level. With a little creativity and some basic supplies, you can transform any room in your home into a work of art. So, grab your string and nails and let’s get started!
- 1. Introduction
- 1.1. What is DIY wall art?
- 1.2. Why use string and nails?
- 1.3. What are the benefits of creating DIY wall art with string and nails?
- 1.4. What materials do you need?
- 1.5. How much time does it take to create DIY wall art with string and nails?
- 2. Step 1: Choose your design
- 2.1. Research different designs
- 2.2. Sketch your design
- 2.3. Gather inspiration
- 2.4. Choose your colors
- 2.5. Consider the size of your wall art
- 3. Step 2: Gather your materials
- 3.1. Purchase string and nails
- 3.2. Choose a surface to work on
- 3.3. Gather any additional materials needed
- 3.4. Prepare your workspace
- 3.5. Organize your materials
- 4. Step 3: Begin creating your wall art
- 4.1. Outline your design with nails
- 4.2. Tie your string onto the first nail
- 4.3. Begin weaving your string
- 4.4. Use different techniques to create texture
- 4.5. Experiment with different patterns
- 5. Step 4: Finishing touches
1. Introduction
Are you looking for a fun and easy way to add some personality to your walls? Look no further than DIY wall art with string and nails! With just a few simple materials, you can create unique and eye-catching designs that will impress all your guests. Plus, it’s a great way to get creative and express your personal style. In this article, we’ll share some creative and easy ideas for DIY wall art with string and nails. So grab your hammer, some string, and let’s get started!
1.1. What is DIY wall art?
DIY wall art refers to the process of creating artwork or decorative pieces for your walls using your creativity and some basic materials. It is a fun and affordable way to personalize your space and add a unique touch to your home decor. DIY wall art can range from simple and minimalist designs to more intricate and complex pieces, depending on your skill level and preferences. With the right tools and techniques, you can create beautiful and eye-catching wall art that reflects your personality and style.
1.2. Why use string and nails?
String and nails are versatile materials that can be used to create unique and creative wall art. By using string and nails, you can create intricate designs that are sure to catch the eye. Additionally, string and nails are affordable materials, making them a great option for those on a budget. With a little creativity and some basic supplies, you can easily create stunning DIY wall art that will add a personal touch to your living space.
1.3. What are the benefits of creating DIY wall art with string and nails?
There are several benefits to creating DIY wall art with string and nails. Firstly, it is a great way to express your creativity and add a personal touch to your home decor. Secondly, it is a cost-effective way to decorate your walls as you do not need to spend a lot of money on expensive art pieces. Thirdly, it is a fun and enjoyable activity that you can do with your family and friends. Lastly, by creating your own wall art, you can be sure that it is unique and one-of-a-kind, which adds to its value and beauty.
1.4. What materials do you need?
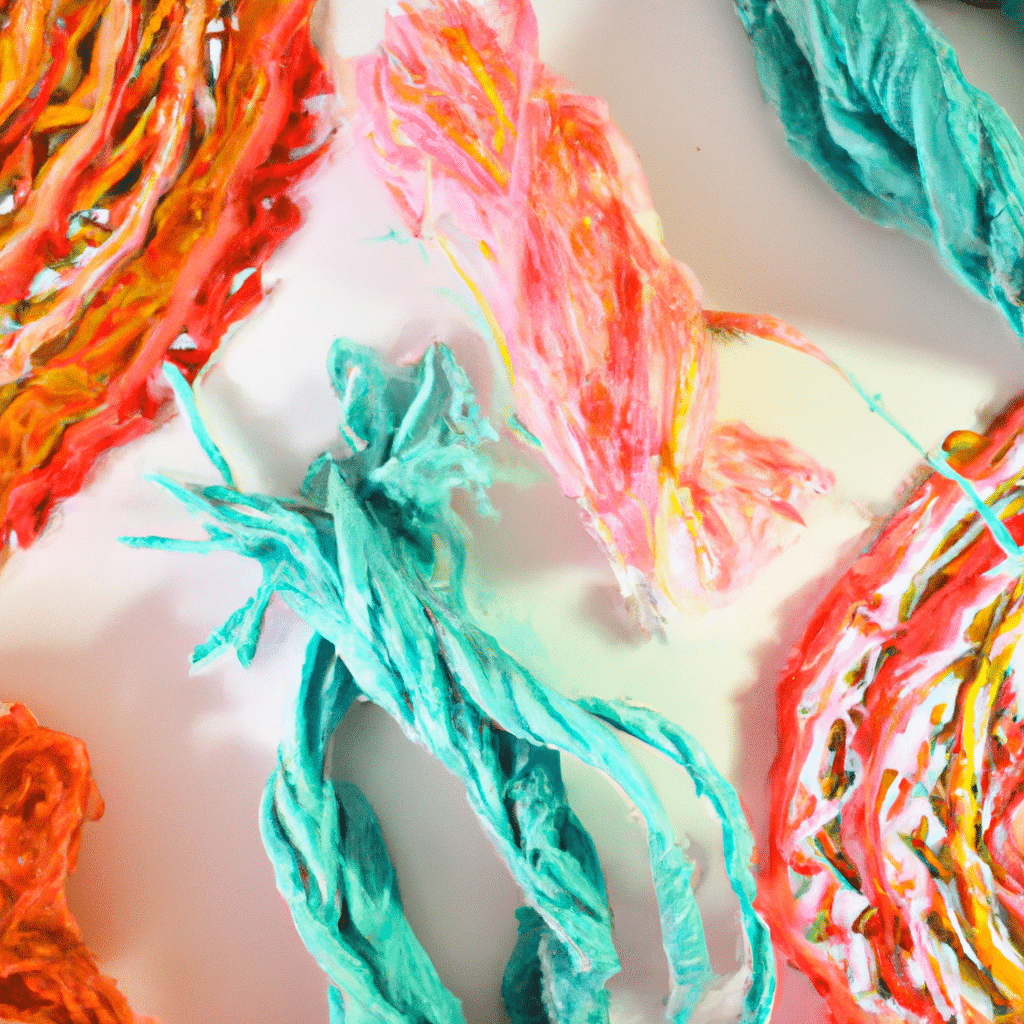
To create DIY wall art with string and nails, you’ll need a few materials. First, you’ll need a piece of wood or canvas to use as your canvas. You’ll also need a hammer and nails, string or twine, and a ruler or measuring tape to ensure your design is symmetrical. Optional materials include paint or stain to customize your canvas, and decorative items like beads or feathers to add a unique touch.
1.5. How much time does it take to create DIY wall art with string and nails?
DIY wall art with string and nails is a great way to add a unique touch to your home decor. Not only is it creative and fun, but it’s also easy to make. One question that often comes up when considering this type of project is, how much time does it take to create DIY wall art with string and nails? In this article, we’ll explore some creative and easy ideas for DIY wall art with string and nails, and provide some insight into the time commitment required for each project.
2. Step 1: Choose your design
Before you start creating your DIY wall art with string and nails, you need to decide on the design you want to make. There are endless possibilities when it comes to string art, so take some time to browse through different designs and choose the one that speaks to you the most. You can find inspiration online, in magazines, or even create your own design. Once you have chosen your design, gather all the materials you will need to bring it to life.
2.1. Research different designs
When it comes to creating DIY wall art with string and nails, the first step is to choose your design. There are many different designs to choose from, so it’s important to do your research and find one that suits your style and skill level. Some popular designs include geometric shapes, animals, and abstract patterns. You can also create your own design by sketching it out on paper and then transferring it onto your wall. Whatever design you choose, make sure to have the necessary materials on hand, such as string, nails, a hammer, and a ruler.
2.2. Sketch your design
Before you can start creating your DIY wall art with string and nails, you need to choose a design. This can be anything from a simple geometric shape to a more complex picture or pattern. Some popular designs include hearts, arrows, letters, and trees. You can find inspiration online or create your own design. Once you have your design in mind, you can move on to the next step.
2.3. Gather inspiration
Before you start creating your DIY wall art with string and nails, you need to choose a design. There are many different designs to choose from, depending on your personal style and the look you want to achieve. Some popular options include geometric shapes, abstract designs, and word art. You can also find inspiration online by browsing through Pinterest or other DIY websites. Once you have a design in mind, gather your materials and get ready to create!
2.4. Choose your colors
Before you begin creating your DIY wall art with string and nails, you’ll want to choose the colors you want to use. Consider the color scheme of the room where you plan to hang your art, as well as any other decorative elements you may already have. You can choose a single color for a monochromatic look, complementary colors for a bold statement, or a range of colors for a more eclectic vibe. Whatever colors you choose, make sure they work well together and complement each other.
2.5. Consider the size of your wall art
When it comes to creating DIY wall art with string and nails, one of the most important factors to consider is the size of your artwork. The size of your artwork will largely depend on the size of the wall you are planning to hang it on. If you have a large wall, you may want to consider creating a larger artwork to fill the space. On the other hand, if you have a smaller wall or limited space, a smaller artwork may be more appropriate. Additionally, you should consider the scale of your design. A simple design may look best on a smaller scale, while a more intricate or detailed design may require a larger canvas to truly shine.
3. Step 2: Gather your materials
Before you start creating your DIY wall art with string and nails, you need to gather all the necessary materials. Here are the things you will need:
– A wooden board or canvas
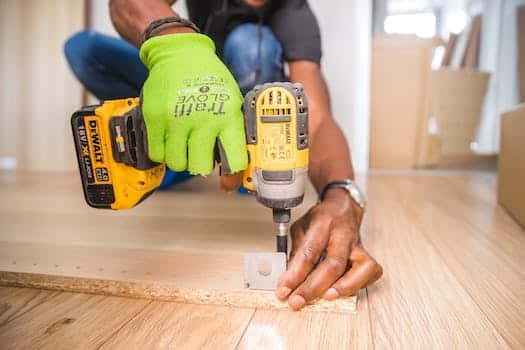
– Nails (make sure they are long enough to hold the string)
– Hammer
– String (choose the color that matches your design)
– Scissors
– Pencil or marker
Make sure you have enough nails and string to complete your design. You can also add other materials such as beads, ribbons, or feathers to enhance the look of your wall art. Once you have gathered all the materials, you can proceed to the next step.
3.1. Purchase string and nails
Before starting your DIY wall art project, make sure you have all the necessary materials on hand. For this project, you will need string and nails. You can purchase these items at your local hardware store or online. When selecting your string, choose a color that complements your room’s decor. As for nails, make sure they are sturdy enough to hold the weight of the string and any additional decorations you plan to add to your wall art.
3.2. Choose a surface to work on
Before you start creating your string and nail wall art, it’s important to choose the right surface to work on. Ideally, you want a surface that is smooth and even, such as a wooden board, canvas or a piece of cardboard. Make sure your surface is clean and free of any debris or dust that could interfere with your design. If you’re using a wooden board, you may want to sand it down first to create a smoother surface. Once you’ve chosen your surface, you’re ready to move on to the next step.
3.3. Gather any additional materials needed
Before starting with the DIY wall art project, it is important to gather all the necessary materials. Here are the materials you will need:
1. String: Choose a color that complements your room’s decor.
2. Nails: Get different sizes and shapes of nails to create different effects.
3. Hammer: You will need a hammer to drive the nails into the wall.
4. Scissors: To cut the string to the desired length.
5. Ruler or measuring tape: To measure the distance between nails and ensure that the string is straight.
6. Pencil: To mark the spots where you want to place the nails.
7. Optional: Paint or markers to color the nails or string.
Once you have gathered all the materials, you are ready to move on to the next step.
3.4. Prepare your workspace
Before you start creating your DIY wall art with string and nails, it’s important to prepare your workspace. Make sure you have a clear and clean surface to work on, and that you have all the necessary tools and materials within reach. This will save you time and make the process smoother.
3.5. Organize your materials
Now that you have decided on the design and pattern for your DIY wall art with string and nails, it’s time to gather your materials. Here’s a list of things you will need:
1. Nails – Choose nails that are long enough to hold the string securely but not too long that they damage your wall.
2. Hammer – You will need a hammer to drive the nails into the wall.
3. String – Pick a color that complements your design. You can use any type of string – jute, cotton, or nylon.
4. Scissors – You will need scissors to cut the string.
5. Measuring tape – Use a measuring tape to ensure that your design is symmetrical and proportionate.
6. Pencil – Use a pencil to mark the spots where you want to place the nails.
Make sure you have all the materials before you start creating your DIY wall art with string and nails. It will save you time and hassle later.
4. Step 3: Begin creating your wall art
Now that you have gathered all the necessary materials and have planned out your design, it’s time to begin creating your string and nail wall art! First, start by hammering the nails into the wall in the pattern that you have chosen. Make sure to space them out evenly and to hammer them in firmly so that they can hold the weight of the string. Once you have all your nails in place, it’s time to start stringing! Take your string or yarn and tie it around one nail. From there, begin weaving the string back and forth, looping it around each nail as you go. You can create any pattern or design that you like, whether it’s a simple geometric shape or a more intricate design. The key is to keep the tension in the string consistent and to make sure that it’s wrapped tightly around each nail. Once you have finished your design, tie off the string on one of the nails and trim any excess. Voila! You now have a beautiful and unique piece of DIY wall art that you can proudly display in your home.
4.1. Outline your design with nails
Before you start hammering in nails, it’s important to plan out your design. Use a pencil to lightly sketch your design onto the wall. Then, mark the spots where you want to place your nails. These marks will serve as a guide for hammering in the nails and will ensure that your design is symmetrical and well-proportioned. Don’t worry if your design isn’t perfect – the beauty of string art is that imperfections can add character and texture to the finished piece.
4.2. Tie your string onto the first nail
Once you have your nails in place, it’s time to start stringing your design! Begin by tying one end of your string onto the first nail. Make sure to tie it tightly so that it doesn’t come undone. You can use any type of string or yarn that you like, but thicker strings will create a bolder look. Once you have your string tied onto the first nail, you can begin weaving it back and forth between the nails to create your design.
4.3. Begin weaving your string
Now that you have your supplies and your plan in place, it’s time to start creating your string art masterpiece! Begin by selecting a spot on your board where you want to start your design. This could be in the center, off to one side, or anywhere else you choose.
Next, hammer a nail into the board at your starting point. Make sure it’s securely in place, but don’t hammer it all the way in – you want to leave enough room for your string to wrap around it. Repeat this step for any other starting points you want to use.
Now, tie one end of your string to one of the nails. Make sure it’s tied tightly and won’t come loose. From there, start wrapping your string around your nails to create your design. You can use a single color of string or multiple colors, depending on the look you’re going for.
As you work, try to keep your string taut and evenly spaced. This will help create a clean, professional-looking design. If you make a mistake or want to change things up, simply unwind the string and start again.
Once you’ve completed your design, tie off the end of your string and trim any excess. Your string art is now ready to be displayed on your wall!
4.4. Use different techniques to create texture
Now that you have gathered all the materials and decided on a design, it’s time to start creating your wall art. One technique you can use to add texture to your piece is by incorporating different materials. For example, you can use string or yarn to create a woven effect, or incorporate small beads or sequins for a more glittery look. Another technique is to vary the thickness and direction of your nails to add depth and dimension to your design. Experiment with different techniques and materials to create a unique and personalized piece of wall art that will add character and style to any room in your home.
4.5. Experiment with different patterns
Now that you have your materials ready, it’s time to get creative with the patterns you can create using string and nails. You can create simple geometric shapes like triangles, squares, and circles, or you can try more intricate patterns like chevron or herringbone. You can also experiment with different color combinations by using multiple strings in different colors. The possibilities are endless, so don’t be afraid to try something new and see what works best for your space.
5. Step 4: Finishing touches
Once the string and nails are in place, you can add some finishing touches to your DIY wall art piece. Here are a few ideas:
1. Paint the nails: If you want a more colorful and vibrant look, consider painting the nails before wrapping the string around them. You can use acrylic paint or nail polish to achieve the desired color.
2. Add embellishments: To make your wall art piece more unique and personalized, add some embellishments. You can use beads, sequins, feathers, or any other decorative items that you like.
3. Frame it: If you want to give your DIY wall art piece a more polished look, consider framing it. You can use a simple wooden frame or a more ornate one, depending on your style.
4. Create a series: If you love the look of your DIY wall art piece, consider creating a series of them. You can use different colors, shapes, and sizes to make a cohesive and eye-catching display on your wall.
5.1. Trim any excess string
The final step in creating your DIY string and nail wall art is to trim any excess string. Using a pair of scissors, carefully cut off any excess string that may be hanging off the nails or not fitting properly within the design. This will give your wall art a polished and professional look. Once you have trimmed the excess string, step back and admire your work! Your unique and creative piece of wall art is now ready to be displayed and admired by all.
5.2. Secure loose strings with glue
After you have finished wrapping the string around the nails to create your desired design, you may notice some loose strings that are not completely taut. To ensure that your wall art looks polished and complete, use a small amount of glue to secure the loose strings to the nails. This will also prevent the strings from unraveling over time and keep your DIY wall art looking fresh for longer!
5.3. Hang your wall art
Once you have created your string art masterpiece, it’s time to hang it up on your wall. First, decide on the placement of your art. Use a level and a pencil to mark where you want the top corners to be. Next, hammer a small nail into each of the two top corners. Then, tie a piece of string to one nail and stretch it over to the other nail, making sure it’s taut. Tie the string to the other nail and adjust the placement until the art hangs straight. Finally, trim any excess string and enjoy your beautiful new wall decor!
5.4. Take a step back and admire your work
Once you have completed your DIY string art project, take a step back and admire your work. Appreciate the effort you put into creating something unique and beautiful. You can hang it up on your wall and show it off to your friends and family. This is a great way to add a personal touch to your home decor and showcase your creativity. So, take a moment to bask in the glory of your finished project!
Conclusion
In conclusion, creating DIY wall art with string and nails is a fun and easy way to add a personal touch to your home decor. With these creative ideas, anyone can create a unique and eye-catching piece of art that reflects their individual style and personality.


These 10 innovative and imaginative DIY home decor ideas from [object Object] provide a refreshing approach to enhancing ones living…