

Are you looking to add a touch of personality and style to your living space without breaking the bank? Look no further! In this article, we will guide you through some easy DIY home accents that will effortlessly spruce up your space. Whether you’re a seasoned DIY enthusiast or just starting out, these simple and stylish decor ideas will inspire and transform your home. Get ready to unleash your creativity and create a space that truly reflects your unique taste and personality.
- 1. Introduction
- 1.1. Why choose DIY home accents?
- 1.2. Benefits of DIY home accents
- 1.3. Materials and tools needed
- 1.4. Safety precautions
- 1.5. Tips for successful DIY home accents
- 2. Simple DIY Home Accents Ideas
- 2.1. 1. Painted Mason Jars
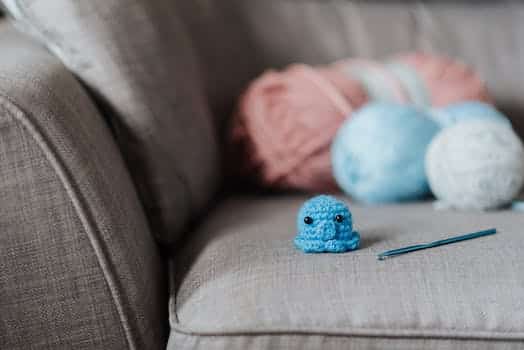
- 2.2. 2. Decorative Throw Pillows
- 2.3. 3. Wall Art with Repurposed Materials
- 2.4. 4. Personalized Picture Frames
- 2.5. 5. Homemade Candles
- 3. Step-by-Step Guide for DIY Home Accents
1. Introduction
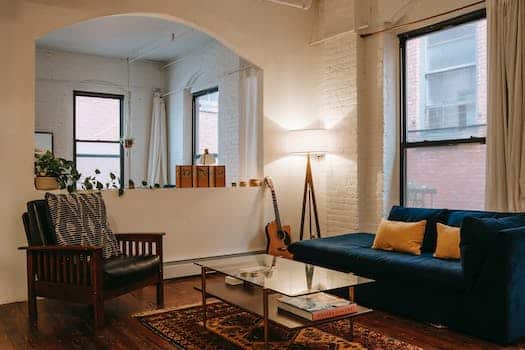
When it comes to decorating our homes, we all want to create a space that reflects our personal style and feels inviting. However, hiring a professional interior designer can be expensive and time-consuming. The good news is that you don’t have to break the bank or spend hours searching for the perfect home accents. With a little creativity and some DIY spirit, you can easily spruce up your space with simple and stylish decor. In this article, we will explore some easy DIY home accents that will add charm and personality to any room in your house.
1.1. Why choose DIY home accents?
Are you looking to add a personal touch to your home decor? DIY home accents might be just what you need! There are several reasons why choosing to create your own home accents can be a great idea. Not only does it allow you to express your creativity and style, but it also gives you the opportunity to save money and have unique pieces that can’t be found in stores.
When you opt for DIY home accents, you have the freedom to customize your decor to match your personal taste and preferences. You can choose the colors, materials, and designs that resonate with you, creating a space that truly reflects your personality. Plus, the satisfaction of seeing your own creations displayed in your home is unmatched.
Another advantage of DIY home accents is the cost-effectiveness. Store-bought decor items can often be expensive, especially if you’re looking for high-quality pieces. By making your own accents, you can save a significant amount of money while still achieving the desired aesthetic. Additionally, you can repurpose old or unused materials, giving them a new life and reducing waste.
Lastly, DIY home accents allow you to have one-of-a-kind decorations that can’t be found anywhere else. With store-bought decor, there’s always a chance of running into someone with the same piece. But when you create your own accents, you can guarantee that your space will be truly unique and tailored to your style.
So why settle for generic decor when you can unleash your creativity and design your own DIY home accents? In the following sections, we will explore various easy and stylish ideas to spruce up your living space and make it truly yours.
1.2. Benefits of DIY home accents
Are you looking to add a personal touch to your home decor? DIY home accents are a fantastic way to spruce up your space with simple and stylish decor. Not only do they allow you to unleash your creativity, but they also offer several benefits that make them a worthwhile endeavor.
Firstly, DIY home accents are cost-effective. By creating your own decor pieces, you can save a significant amount of money compared to buying expensive items from stores. With a little bit of creativity and resourcefulness, you can transform ordinary objects into stunning decorative pieces without breaking the bank.
Secondly, DIY home accents give you the opportunity to express your unique style and personality. Instead of settling for generic mass-produced items, you can design and create decor that reflects your individual taste. Whether you prefer a modern minimalist look or a bohemian vibe, DIY projects allow you to tailor your home decor to suit your preferences.
Additionally, engaging in DIY projects can be a fun and fulfilling hobby. It provides a sense of accomplishment and satisfaction when you see the finished results of your hard work. It also allows you to learn new skills and techniques, such as painting, woodworking, or crafting, which can be useful for future projects.
Furthermore, DIY home accents offer the flexibility to customize and update your decor whenever you desire. With store-bought items, you are limited to the available options and may have to settle for something that doesn’t perfectly match your vision. However, with DIY projects, you have the freedom to choose colors, patterns, and materials that align with your desired aesthetic.
In conclusion, DIY home accents provide numerous benefits for those who want to add a personal touch to their living spaces. They are cost-effective, allow for self-expression, offer a fulfilling hobby, and provide the flexibility to customize your decor. So why not get creative and start sprucing up your space with simple and stylish DIY decor?
1.3. Materials and tools needed
When it comes to adding a touch of style and personality to your home, easy DIY home accents can make a big difference. With just a few materials and tools, you can transform your space into a stylish haven that reflects your unique taste and creativity. Whether you’re a seasoned DIY enthusiast or just starting out, these simple and stylish decor ideas will help you spruce up your space with ease. From handmade wall art to customized throw pillows, there are endless possibilities to explore. So, let’s gather the necessary materials and tools before diving into these exciting DIY projects.
1.4. Safety precautions
When it comes to creating DIY home accents, it’s important to prioritize safety. Before diving into any project, make sure to take the necessary precautions to ensure a safe and accident-free experience. This article will provide you with some essential safety tips to keep in mind while sprucing up your space with simple and stylish decor.
1.5. Tips for successful DIY home accents
Do-it-yourself (DIY) home accents are a fantastic way to add a personal touch to your space without breaking the bank. Whether you’re a beginner or a seasoned DIY enthusiast, sprucing up your home with simple and stylish decor is an enjoyable and rewarding project. By following a few tips, you can create beautiful and unique accents that reflect your personal style and enhance the overall ambiance of your living space.
2. Simple DIY Home Accents Ideas
Are you looking to add a touch of style and personality to your living space? Look no further! In this article, we will explore some simple and easy DIY home accents that will spruce up your space in no time. These ideas are not only budget-friendly but also allow you to express your creativity and make your home truly unique.
1. Gallery Wall: Create a stunning focal point in any room by curating a gallery wall. Start by selecting a variety of frames in different sizes and styles. Then, choose a mix of artwork, photographs, and meaningful quotes to fill the frames. Arrange them on a blank wall to create an eye-catching display.
2. Painted Furniture: Give your old furniture a fresh new look by painting it. Choose a color that complements your existing decor or go for a bold statement with a contrasting shade. Sand the surface lightly, apply a primer, and then coat it with your chosen paint color. You can also add decorative stencils or patterns for an extra flair.
3. DIY Planters: Bring nature indoors with handmade planters. Upcycle old tin cans or mason jars by painting them and adding drainage holes. Fill them with your favorite plants or herbs and place them on windowsills or shelves. Not only will they add a touch of greenery to your space, but they will also purify the air.
4. Customized Pillows: Make your own personalized pillows to add comfort and style to your living room or bedroom. Choose a fabric that complements your decor, cut it into desired shapes, and sew them together, leaving one side open. Fill the pillow with stuffing or use an old pillow insert. Finally, hand-stitch the open side closed for a professional finish.
5. Decorative Mirrors: Mirrors not only create an illusion of space but also add a decorative touch to any room. Buy inexpensive mirrors from thrift stores or yard sales and give them a makeover. Paint the frames in metallic shades or add embellishments like seashells or beads for a unique look.
These simple DIY home accents are a great way to add personality and charm to your space without breaking the bank. Get creative, unleash your inner designer, and transform your home into a stylish haven with these easy-to-follow ideas!
2.1. 1. Painted Mason Jars
One popular and easy DIY home accent idea is to paint mason jars. Mason jars are versatile and can be used in various ways to add a touch of charm to your space. Painting them in different colors or patterns can create a visually appealing display. You can use these painted mason jars as vases for fresh flowers, as candle holders, or even as storage containers for small items. They can be placed on shelves, tables, or hung as decorative pieces. The possibilities are endless when it comes to using painted mason jars as home accents.
2.2. 2. Decorative Throw Pillows
Decorative throw pillows are a fantastic way to add a pop of color and personality to any room. Whether you want to update your living room, bedroom, or even outdoor patio, throw pillows can instantly transform the look and feel of your space. These simple DIY home accents are not only easy to make but also cost-effective, allowing you to unleash your creativity without breaking the bank.
To create your own decorative throw pillows, start by choosing a fabric that matches your desired color scheme and style. Consider using bold patterns, textured fabrics, or even repurposing old clothing or linens for a unique touch. Measure and cut the fabric into two equal-sized squares or rectangles, depending on your preferred pillow shape and size.
Next, place the fabric pieces together with the right sides facing each other, and sew along the edges, leaving a small opening. This opening will allow you to stuff the pillow later on. Once sewn, turn the fabric right side out through the opening, and use a pencil or chopstick to push out the corners for a crisp finish.
Now comes the fun part – stuffing the pillow! You can use polyester fiberfill, old pillow stuffing, or even repurpose old clothing or fabric scraps for a more eco-friendly option. Fill the pillow to your desired level of fluffiness, making sure to distribute the stuffing evenly. Finally, hand stitch the small opening closed using a needle and thread, and your decorative throw pillow is ready!
Don’t be afraid to experiment with different shapes, sizes, and textures of throw pillows. Mix and match colors and patterns to create a visually appealing arrangement that complements your existing décor. Remember, throw pillows are not just for sofas and beds – you can also use them to add comfort and style to chairs, benches, and even outdoor seating areas.
In conclusion, DIY decorative throw pillows offer a simple and budget-friendly way to enhance the look of your home. With a little creativity and some basic sewing skills, you can easily transform your space into a cozy and stylish haven. So, why wait? Grab your fabrics, needles, and threads, and start crafting your own unique throw pillows today!
2.3. 3. Wall Art with Repurposed Materials
One creative way to add a unique touch to your home decor is by incorporating wall art made from repurposed materials. Not only is this a sustainable approach, but it also gives your space a rustic and eclectic vibe. Here are a few simple DIY ideas for creating wall art using repurposed materials:
1. Pallet Wood Art: Find an old wooden pallet and carefully dismantle it. Use the individual planks to create a collage or arrange them in a geometric pattern. You can paint them in different colors or leave them as is for a natural look.
2. Vintage Window Frames: Hunt for vintage window frames at thrift stores or flea markets. Clean them up and remove any broken glass. These frames can be used as-is or painted in a color of your choice. Add some artwork or photographs behind each frame for a charming display.
3. Tin Can Planters: Collect empty tin cans and remove the labels. Paint them in vibrant colors or cover them with patterned paper. Attach them to a wooden board or hang them directly on the wall. Fill each can with small plants or flowers to bring a touch of nature indoors.
4. Vinyl Record Art: If you have old vinyl records lying around, don’t throw them away! Create unique wall art by painting the records in different colors and arranging them in a visually pleasing pattern. You can hang them individually or create a collage.
These are just a few ideas to get you started. The key is to think outside the box and repurpose materials that would otherwise go to waste. Not only will you have one-of-a-kind wall art, but you’ll also be reducing your environmental footprint.
2.4. 4. Personalized Picture Frames
Personalized picture frames are a great way to add a personal touch to your home decor. Whether you want to display cherished family photos or showcase your favorite artwork, customized frames can elevate the aesthetics of any space. With a few simple materials and a little creativity, you can easily create your own personalized picture frames. Here are some easy DIY ideas to inspire you:
1. Monogrammed Frames: Add a touch of elegance to your pictures by incorporating monograms. Paint or stencil your initials or full name onto the frame for a personalized and sophisticated look.
2. Vintage-inspired Frames: If you love the charm of vintage decor, consider distressing your frames to give them an antique look. Sand the edges and apply a coat of paint in a complementary color to achieve a rustic and vintage vibe.
3. Nature-inspired Frames: Bring the outdoors inside by decorating your frames with natural elements like twigs, leaves, or seashells. Use hot glue to attach these items to the frame, creating a unique and organic design.
4. Collage Frames: Instead of displaying just one photo, create a collage frame to showcase multiple memories. Arrange different-sized frames in an interesting pattern on your wall or shelf, and fill them with a collection of your favorite pictures.
These personalized picture frames are not only a fun DIY project but also a wonderful way to add a personal touch to your home decor. Get creative and let your imagination run wild!
2.5. 5. Homemade Candles
Making homemade candles is a wonderful way to add a personal touch to your home decor. Not only are they easy to create, but they also make for great gifts. With just a few simple ingredients and some creativity, you can create beautiful candles that will enhance the ambiance of any room. Here are five easy homemade candle ideas to inspire you:
1. Essential Oil Soy Candles: Start by melting soy wax flakes in a double boiler. Once melted, add a few drops of your favorite essential oil and stir well. Pour the mixture into candle molds or empty glass jars with wicks. Allow the candles to cool and solidify before trimming the wicks.
2. Mason Jar Candles: Fill mason jars with layers of colored wax flakes to create a unique and colorful look. Place a pre-waxed wick in the center of each jar and secure it with a small piece of tape. Melt the wax flakes in a microwave-safe container and carefully pour the melted wax into the jars. Let the candles cool and harden before removing the tape and trimming the wicks.
3. Scented Teacup Candles: Find vintage teacups or small ceramic containers to repurpose as candle holders. Melt soy wax flakes in a microwave-safe container and add your desired fragrance oil or essential oil. Place a pre-waxed wick in the center of each teacup and carefully pour the melted wax into the cups. Allow the candles to cool and solidify before trimming the wicks.
4. Citronella Candles: If you love spending time in your outdoor space, citronella candles are a must-have. Melt soy wax flakes and add citronella essential oil for a natural bug repellent. Pour the mixture into small metal or glass containers and insert a pre-waxed wick. Let the candles cool and harden before lighting them up in your patio or garden.
5. Layered Sand Candles: Create a beachy vibe with layered sand candles. Fill a glass container halfway with sand and press it down firmly. Place a pre-waxed wick in the center and pour a layer of melted wax over the sand. Let it cool and harden before adding another layer of sand and repeating the process. Continue layering until the container is full and finish with a final layer of sand.
These homemade candles will not only add warmth and fragrance to your space but also showcase your creativity. Experiment with different colors, scents, and containers to create candles that reflect your personal style. Enjoy the process of making these simple DIY home accents and transform your living space into a cozy haven.
3. Step-by-Step Guide for DIY Home Accents
DIY home accents are a fantastic way to add a personal touch to your living space without breaking the bank. With just a few simple materials and a little creativity, you can transform your home into a stylish and inviting oasis. In this step-by-step guide, we will walk you through some easy and fun DIY projects that will spruce up your space and leave your guests impressed.
1. Start with a Plan
Before diving into any DIY project, it’s essential to have a clear plan in mind. Decide on the type of accents you want to create and envision how they will fit into your existing decor. Consider the color scheme, style, and theme of your home to ensure that the accents you make will seamlessly blend in.
2. Gather Your Materials
Once you have a plan, it’s time to gather the necessary materials. Depending on the project, you may need items such as paint, brushes, fabric, glue, scissors, and decorative elements like beads or ribbons. Make a list of everything you need and head to your local craft store or search online for the best deals.
3. Start Small
If you’re new to DIY home decor, it’s best to start with small and simple projects. This way, you can practice your skills and build confidence before taking on more complex tasks. Consider making a decorative tray, a personalized photo frame, or a set of hand-painted coasters. These projects require minimal materials and can be completed in a short amount of time.
4. Get Creative with Paint
Paint is a powerful tool when it comes to DIY home accents. Whether you want to breathe new life into an old piece of furniture or add a pop of color to a plain wall, paint can do wonders. Experiment with different techniques such as stenciling, ombre effects, or color blocking to create unique and eye-catching accents.
5. Upcycle and Repurpose
Don’t underestimate the power of upcycling and repurposing items you already have at home. Look for old jars, bottles, or cans that can be transformed into stylish vases or candle holders. Consider giving new life to an old piece of furniture by reupholstering it or adding decorative knobs. The possibilities are endless, and you’ll be amazed at what you can create with a little imagination.
6. Pay Attention to Detail
The beauty of DIY home accents lies in the details. Take the time to add those finishing touches that will elevate your creations. Whether it’s adding a decorative trim to a pillow or attaching delicate charms to a handmade necklace, these small details will make a big difference.
7. Enjoy the Process
Last but not least, remember to enjoy the process of creating DIY home accents. It’s a chance to express your creativity, relax, and have fun. Don’t worry about perfection – embrace the imperfections and let your personal style shine through.
By following this step-by-step guide, you’ll be able to create beautiful and unique DIY home accents that will transform your space into a cozy and stylish haven. Get ready to impress your friends and family with your creative skills!
3.1. 1. Choose your desired accent
When it comes to DIY home accents, one of the first steps is choosing the desired accent for your space. Whether you prefer a modern, rustic, or bohemian style, selecting the right accent pieces can greatly enhance the overall aesthetic of your home. From wall hangings and artwork to decorative pillows and plants, there are countless options to choose from. Consider your personal taste and the existing décor of your space to find the perfect accent that reflects your style and personality. In this step-by-step guide, we will explore various DIY home accents that can easily spruce up your space with simple and stylish decor.
3.2. 2. Gather necessary materials
To begin your DIY home accents project, it is important to gather all the necessary materials beforehand. Having everything ready will save you time and ensure a smooth process. Here is a step-by-step guide to help you collect the required materials:
1. Determine the type of home accents you want to create. Whether it’s decorative pillows, wall art, or candle holders, make a list of the specific items you wish to make.
2. Create a shopping list. Based on the items you want to make, write down all the materials needed for each project. This could include fabric, paint, brushes, glue, scissors, frames, or any other supplies.
3. Check your inventory. Before heading to the store, go through your existing craft supplies and see if you already have any of the materials on your shopping list. This will help you avoid unnecessary purchases and save money.
4. Research and compare prices. If you need to buy new materials, take some time to research different stores and online shops. Compare prices and quality to find the best deals.
5. Get organized. Once you have your shopping list and know where to buy everything, organize your list by store or location. This will make your shopping trip more efficient and prevent you from forgetting anything.
6. Purchase the materials. Visit the selected stores and purchase all the required materials. Double-check your list to ensure you have everything before leaving the store.
By following this step-by-step guide, you will have all the necessary materials in hand, ready to start your DIY home accents project with ease.
3.3. 3. Prepare the workspace
Before you begin creating your DIY home accents, it’s important to prepare your workspace. Follow this step-by-step guide to ensure you have everything you need:
1. Clear the area: Start by clearing a clean and clutter-free space where you can work comfortably. Remove any unnecessary items or furniture to give yourself ample room to move around.
2. Gather your materials: Take inventory of the materials and tools you’ll need for your home accents project. This may include paint, brushes, glue, scissors, fabric, and any other decorative items you plan to use.
3. Set up a worktable: Find a sturdy table or workbench to use as your designated workspace. Make sure it’s a suitable size for your project and has a smooth surface that can be easily cleaned.
4. Protect your surface: Lay down a protective covering on your worktable to prevent any damage from spills or scratches. This could be an old sheet, plastic tablecloth, or even newspapers.
5. Organize your supplies: Arrange your materials and tools in a tidy and accessible manner. Use containers, trays, or dividers to keep everything organized and within reach.
6. Have proper lighting: Ensure that your workspace is well-lit to avoid any mistakes or accidents. Natural light is ideal, but if that’s not possible, use a combination of overhead and task lighting.
By following these steps, you’ll be ready to embark on your DIY home accents project with ease and efficiency.
3.4. 4. Follow a tutorial or create your own design
Creating your own DIY home accents is a great way to add a personal touch to your space without breaking the bank. Whether you’re a seasoned DIY enthusiast or just starting out, following a tutorial or creating your own design can be a fun and rewarding project. In this step-by-step guide, we’ll walk you through the process of creating simple and stylish home accents that will instantly spruce up your space.
1. Choose a project: Start by deciding what type of home accent you want to create. It could be anything from a decorative wall hanging to a unique centerpiece for your dining table. Browse through DIY websites or magazines for inspiration and choose a project that matches your style and skill level.
2. Gather your materials: Once you have chosen a project, make a list of all the materials you’ll need. This may include various craft supplies like paint, brushes, glue, fabric, and other decorative elements. Check your existing stash of supplies and purchase any necessary items from a craft store.
3. Prepare your workspace: Before you begin, it’s important to set up a dedicated workspace for your DIY project. Clear a table or desk and lay down a protective cover to prevent any damage. Gather all your materials and tools within easy reach, ensuring you have good lighting and ventilation.
4. Follow the tutorial or create your own design: If you found a tutorial that matches your chosen project, follow the step-by-step instructions provided. Pay attention to details like measurements, color schemes, and techniques. If you prefer to create your own design, sketch out your ideas on paper and plan the steps accordingly.
5. Start crafting: Once you have a clear plan, it’s time to start crafting. Take your time and follow each step carefully. Don’t be afraid to make mistakes – they can often lead to creative discoveries. Enjoy the process and let your imagination guide you.
6. Finishing touches: After completing your DIY home accent, take a step back and assess the final result. Make any necessary adjustments or add extra embellishments to enhance its overall look. Once you’re satisfied, find the perfect spot in your home to display your creation.
Remember, DIY home accents are all about personal expression and creativity. Don’t be afraid to experiment and make the project your own. With a little time and effort, you can transform your space with simple and stylish decor that reflects your unique style.
3.5. 5. Take your time and pay attention to details
Step-by-Step Guide for DIY Home Accents:
1. Choose a theme or style: Before starting any DIY home accent project, it is essential to decide on a theme or style that you want to incorporate into your space. This will help you stay focused and create a cohesive look.
2. Gather materials and tools: Once you have decided on a theme, make a list of the materials and tools you will need for your DIY project. This might include items such as paint, brushes, fabric, glue, scissors, etc.
3. Plan your project: Take some time to plan out your DIY home accent project. Sketch out your ideas, measure the space where the accent will be placed, and create a rough timeline for completing the project.
4. Start with small projects: If you are new to DIY home accents, it is a good idea to start with small projects. This will help you gain confidence and hone your skills before tackling larger and more complex projects.
5. Take your time and pay attention to details: DIY home accents require patience and attention to detail. Take your time to ensure that each step is done correctly and that the final result is polished and professional.
By following this step-by-step guide, you can create beautiful and stylish DIY home accents that will enhance the look and feel of your space.
Conclusion
In conclusion, adding easy DIY home accents is a great way to spruce up your space with simple and stylish decor. By incorporating these simple techniques, you can transform your home into a personal sanctuary that reflects your unique style and personality.


These 10 innovative and imaginative DIY home decor ideas from [object Object] provide a refreshing approach to enhancing ones living…