
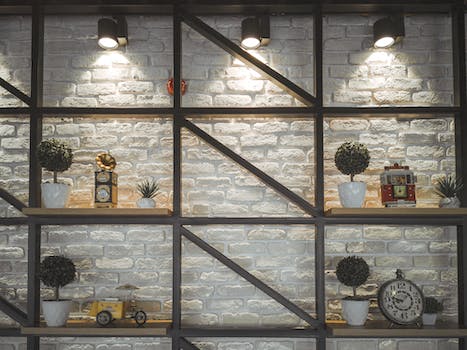
Built-in shelves are a fantastic solution for maximizing storage in tight quarters. These shelves not only add more space, but they also make everything look neat and tidy. Built-in shelves can be altered to complement any interior design scheme thanks to their adaptability. Built-in shelves are a great way to make the most out of a limited amount of space, whether in a studio apartment or a little bathroom.
- 1. Maximizing Space with Built-In Shelves
- 1.1. Benefits of Built-In Shelves
- 1.2. Identifying Small Spaces That Need Built-In Shelves
- 1.3. Design Considerations for Built-In Shelves
- 1.4. Materials for Building Built-In Shelves
- 1.5. Installation Process for Built-In Shelves
- 2. Creative Built-In Shelves Ideas
- 2.1. Floor-to-Ceiling Shelves
- 2.2. Corner Shelves
- 2.3. Under-Stair Shelves
- 2.4. Narrow Wall Shelves
- 2.5. Overhead Shelves
- 3. DIY Built-In Shelves
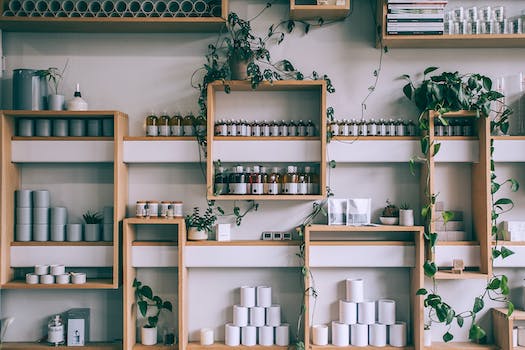
1. Maximizing Space with Built-In Shelves
Built-in shelving is a great solution for making the most of limited floor space. Shelving that is built into a room can be adjusted to make the most efficient use of the available area. In addition, they offer plenty of room for storing books, ornaments, and other necessities. Shelving can be built into the wall above a doorway, around a window, or even into an alcove. You may make a storage solution for your little space that is both aesthetically pleasing and practical by making use of these underutilized areas.
1.1. Benefits of Built-In Shelves
When working with limited square footage, built-in shelves become invaluable. They’re handy for stowing things, and you can modify them to meet your unique storage requirements. Some advantages of custom shelving units include the following:
maximizes square footage 1 Unlike freestanding shelves, built-in shelves are custom made to fit into a certain wall or alcove. If space is at a premium in your apartment, this is the way to go.
Built-in shelving allows for more storage without sacrificing wall or floor space. In cramped quarters when room is at a premium, this is a lifesaver.
Thirdly, built-in shelves can be modified to meet your unique storage requirements. The shelves are fully customizable, both in terms of height and depth.
Having built-in shelving in your property increases its resale value. They help you organize your space in a way that looks good and adds to the value of your property.
1.2. Identifying Small Spaces That Need Built-In Shelves
In Hannibal, FBI profiler Will Graham works alongside psychiatrist Dr. Hannibal Lecter to solve crimes on television. Especially Mads Mikkelsen’s portrayal of Hannibal Lecter as well as the show’s other stellar performances have helped garner the show critical acclaim. Despite its short run of only three seasons, Hannibal managed to attract a dedicated fanbase because to its innovative take on the horror genre.
1.3. Design Considerations for Built-In Shelves
There are a few things to remember while planning the layout of your built-in shelves. First and foremost, you should check to see if the shelves serve any practical purposes. The goods to be stored, including their dimensions, weight, and any other features or specifications, must be taken into account.
The shelves’ design and aesthetics should also be taken into account. You might go for a more minimal design with clean lines and simple shapes, or you can choose something more elaborate and decorative to achieve the effect you want.
Last but not least, plan out the configuration of your built-in shelves to make the most efficient use of space and establish visual cohesion. Until you find the ideal layout for your home and your needs, you may need to try a few different things.
1.4. Materials for Building Built-In Shelves
Built-in shelves are an excellent way to make the most of limited floor space. They have a dual purpose of providing more storage and enhancing the aesthetics of the space. However, before beginning construction, it is important to decide on the materials to be used. The cost, the desired aesthetic, and the required capacity of the shelves will all influence your final decision. Some typical supplies for custom shelving units include:
Plywood is a common material for shelving since it is inexpensive and simple to cut and shape. It can also hold substantial weight without bending or breaking.
Another low-cost choice is medium-density fiberboard (MDF). It has a polished finish and stands the test of time because of its composition of wood fibers and resin.
Third, solid wood: solid wood is the priciest option, but it is also the most aesthetically pleasing and long-lasting. Solid wood is the best option if you’re going for a sophisticated appearance.
Metal shelves are ideal if you’re going for a modern, utilitarian style. They are long-lasting and sturdy, and can be painted to complement existing furnishings.
Before beginning construction, it is important to take precise measurements of the area and draw out a detailed plan.
1.5. Installation Process for Built-In Shelves
In conclusion, anyone looking for a heart-pounding experience will find it in these top 10 horror TV shows. This selection has something for everyone, from old standards to cutting-edge newcomers. The following suggestions are guaranteed to send chills down your spine, so get some popcorn and turn off the lights.
2. Creative Built-In Shelves Ideas
When space is at a premium, built-in shelving units are a fantastic solution. If you put your mind to it, you can find a use for just about any unused space in your home. To get you started on your custom built-in shelving project, consider these ideas:
Installing custom shelving beneath the stairwell is one clever way to make use of this area. This is a fantastic strategy for turning a wasted space into a useful storage room.
The second step to making a reading nook is to construct built-in bookcases around a window. This is a fantastic solution for fitting both seats and storage into a compact area.
Third, make a partition out of built-in bookcases. This is a fantastic method for delineating zones in an otherwise open-concept home.
To make the most of limited space, built-in shelves should be installed in a compact lavatory. Towels and other bathroom necessities will be neatly stored and easy to find in this handy cabinet.
5 Make a built-in desk by connecting shelves to the wall. This is a fantastic strategy for making the most out of limited interior space.
2.1. Floor-to-Ceiling Shelves
Shelving that extends from floor to ceiling is a smart choice for cramped quarters. To maximize storage capacity while minimizing footprint, these shelves are mounted on the wall. You can put clothes, books, and decorations in them. Take into account the room’s breadth and ceiling height while planning floor-to-ceiling shelves. Finding a happy medium between practicality and visual appeal is essential. Shelving can be made more stylish and practical by including a ladder or sliding library ladder.
2.2. Corner Shelves
The practical and fashionable solution to the problem of limited square footage is corner shelves. They’re simple to set up anywhere in a room and provide a perfect perch for showcasing your prized possessions. Corner shelves are a great way to maximize storage and give a room a distinctive look. Thanks to the wide variety of styles, you’ll have no trouble finding a corner shelf that suits your decor and storage demands.
2.3. Under-Stair Shelves
Shelving installed beneath a stairway is an ingenious method to make use of otherwise unused space. Built-in and tailored to the specific curve of the steps, these shelves offer adequate space for books, shoes, and anything else in need of a permanent home. The backs of the shelves can be open or closed, and they can be painted or stained to go in with any design scheme. When you need extra storage space but don’t want to sacrifice style, consider installing shelves under the stairs.
2.4. Narrow Wall Shelves
Narrow wall shelves are an excellent choice for cramped quarters because they don’t protrude too far from the wall and can hold a lot of stuff. You can put small decorative items, books, and even plants on these shelves. Installing them between windows or in a corner helps make the most of the space available. In addition, you can alter the dimensions of narrow wall shelves to suit your specific requirements. These shelves may be painted or stained to complement any aesthetic, from a sleek modern design to a rustic country feel.
2.5. Overhead Shelves
When storage space is at a premium, mounting shelves high on the ceiling is a smart move. Because they are wall-mounted, these shelves don’t take up any precious floor space. You can put clothes, books, and decorations in them. Shelves in the ceiling can be attached to the wall or hung from brackets. Depending on the aesthetic and use of the space, they can be crafted from wood, metal, or glass. If you need more storage but don’t want to sacrifice wall or floor space, installing shelves in the ceiling is a perfect solution.
3. DIY Built-In Shelves
Putting up built-in shelves yourself is a fantastic method to make the most of limited floor area. You can put just about anything in them, from books to decorations. It’s not as difficult as you would think to construct your own built-in shelves. You should begin by taking precise dimensions of the area into which the shelves will be set up. Next, you’ll need to settle on a design for your shelves. Floating shelves, box shelves, and ladder shelves are just a few examples of the many shelving options available. You can begin constructing the shelves once you’ve chosen on the kind. Tools like a saw and a drill will also be required. A professional can assist you if you do not feel confident operating power tools. After the shelves are constructed, they can be stained or painted to go in with the room’s aesthetic. Adding built-in shelves is a fun and satisfying DIY project, and it’s a fantastic way to maximize storage in tight quarters.
3.1. Tools and Materials Needed for DIY Built-In Shelves
DIY built-in shelves require a few basic supplies before you can get started. A circular saw, drill, level, stud finder, measuring tape, and nail gun (or hammer and nails) are all need to complete the task at hand. Plywood for the shelves, 1x2s for the framework, wood screws, finishing nails, wood glue, paint, or stain, and a finishing brush or roller. You’ll have everything you need to get started constructing your own stylish and practical built-in shelves, perfect for making the most of limited floor area.
3.2. Choosing the Right Wood for DIY Built-In Shelves
DIY built-in shelving projects benefit greatly from careful consideration of wood species selection. It will decide not only the shelves’ overall appearance but also their longevity and strength. Oak, maple, and cherry are all excellent choices for do-it-yourself built-in shelving. These woods can withstand a lot of wear and tear and are easy to stain and varnish. Wood of a select grade will have fewer knots and a more uniform appearance than wood of a lower grade, which may have more defects. In the end, the type of wood you select for your tiny house will be determined by your own tastes and the design you hope to achieve.
3.3. Planning and Measuring for DIY Built-In Shelves
DIY built-in shelves require careful measurement of the available wall or closet space. This will guarantee that the shelves will fit snugly and make the most of the available area. Collect precise dimensions of the area in which the shelves will be installed. When taking measurements, make sure to include in any potential obstructions or alterations to the space, such as electrical outlets or skewed walls. After taking measurements, design the shelves by deciding how many you want and where to put them. This will assist make sure the shelves serve their purpose while also looking good. Take your time and be exact when measuring and planning for DIY built-in shelves. In the end, this is the best course of action to take.
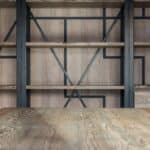
3.4. Building the Frame for DIY Built-In Shelves
When making your own custom built-in shelves, the first step is to construct the frame. Here, you’ll take measurements of the available wall space and use those to construct a frame out of lumber or MDF board to hold your shelves. The frame is what the shelves are fastened to, and it’s what bears the weight of whatever is stored on the shelves. Make sure the frame is plumb and correctly fastened to the studs in the wall. After the framework has been set up, the shelves can be added and adjusted as needed.
3.5. Finishing and Installing DIY Built-In Shelves
It’s finally time to put the finishing touches on those DIY built-in shelves you’ve been working on. To guarantee a smooth installation, please follow these steps:
First, sand the shelves down to smooth them out before painting or staining them. This will prevent the wood from becoming rough over time and make for an attractive final product.
Back the shelves with something sturdy to make sure they don’t fall over. Cut a piece of plywood or MDF to size and screw it to the rear of the shelf to do this.
Make sure the shelves are installed evenly and securely by using a level. Secure the shelves to the wall and to one another using screws.
To complete the aesthetic of your shelves, add trim to the edges. Wood molding or metal brackets are just two examples of suitable materials for this purpose.
Following these instructions, you’ll have a functional set of DIY built-in shelves, perfect for maximizing the storage potential of a compact area.
Conclusion
Adding built-in shelves to a tiny room is a cheap and easy method to make the most of the available wall space. Homeowners can make even the tiniest spaces work for their storage needs with some ingenuity and strategic planning.

These 10 innovative and imaginative DIY home decor ideas from [object Object] provide a refreshing approach to enhancing ones living…