

Making a table lamp can seem like a daunting task, especially if you’ve never done it before. However, with a little bit of guidance and some basic tools and materials, it’s a project that anyone can tackle. In this step-by-step guide, we’ll walk you through the process of making your own table lamp from start to finish. By the end, you’ll have a beautiful and functional piece of home decor that you can be proud of.
- 1. Introduction
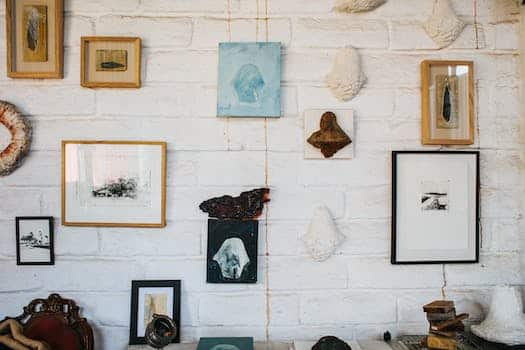
- 1.1. Why make your own lamp?
- 1.2. Materials needed
- 1.3. Tools needed
- 1.4. Safety precautions
- 1.5. Difficulty level
- 2. Step 1: Choose a design
- 2.1. Select a style
- 2.2. Choose a base
- 2.3. Pick a shade
- 2.4. Consider the bulb
- 2.5. Gather inspiration
- 3. Step 2: Gather materials
- 3.1. Purchase lamp kit
- 3.2. Select lampshade materials
- 3.3. Choose base materials
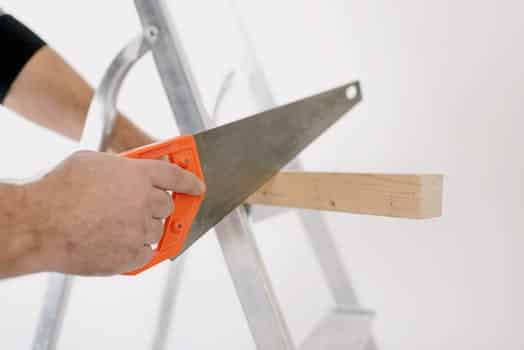
- 3.4. Gather tools
- 4. Step 3: Prepare the base
- 4.1. Sand and finish the base
- 4.2. Drill hole for lamp kit
- 4.3. Attach lamp kit
- 5. Step 4: Create the shade
- 5.1. Measure and cut fabric
- 5.2. Attach fabric to shade frame
- 5.3. Trim excess fabric
- 5.4. Attach shade to lamp
- 6. Step 5: Add finishing touches
- 6.1. Install light bulb
- 6.2. Test lamp
- 6.3. Add decorative elements
- 6.4. Enjoy your new lamp!
1. Introduction
Table lamps are a great way to add some mood lighting to a room, and they can also be a fun DIY project. Making your own table lamp might seem intimidating at first, but with a little bit of guidance, it’s actually quite simple. In this step-by-step guide, we’ll walk you through the process of making your own table lamp from start to finish. Whether you’re a seasoned DIY pro or a beginner looking for a fun weekend project, this guide is for you.
1.1. Why make your own lamp?
Making your own lamp can be a fun and rewarding experience. Not only do you get to create a unique piece that fits your personal style, but you also have the satisfaction of knowing that you made it yourself. In addition, making your own lamp can be a cost-effective way to add a customized lighting element to your home decor. Whether you are a DIY enthusiast or just looking for a new project to try, making a table lamp is a great place to start.
1.2. Materials needed
Before we dive into the step-by-step guide for making a table lamp, let’s first discuss the materials needed for this DIY project. You will need:
– Lamp kit (which includes the socket, cord, and plug)
– Lamp base
– Lampshade
– Light bulb
– Drill
– Hole saw
– Screwdriver
– Pliers
– Wire stripper
– Glue
– Sandpaper
Make sure you have all of these materials on hand before beginning your project. Now, let’s get started with the guide!
1.3. Tools needed
Before we dive into the step-by-step guide to making a table lamp, it’s important to gather all the necessary tools and materials. Here are the tools you’ll need:
– Saw or handsaw
– Power drill
– Hole saw or spade bit
– Screwdriver
– Pliers
– Wire stripper
– Wire cutter
– Hot glue gun
– Scissors
– Sandpaper (in varying grits)
– Safety glasses
– Work gloves
Once you have all the necessary tools, you can move on to gathering the materials for your table lamp.
1.4. Safety precautions
Before beginning any DIY project, it is important to take proper safety precautions. When making a table lamp, there are a few specific safety measures to keep in mind. Firstly, always wear protective eyewear and gloves. This will prevent any accidental injury from tools or materials. Secondly, make sure to work in a well-ventilated area, especially when using any chemicals or paints. Lastly, be mindful of electrical safety when wiring the lamp. Always turn off the power source and double check all connections before plugging in the lamp. By following these safety guidelines, you can ensure a successful and safe DIY project.
1.5. Difficulty level
Making a table lamp may seem like a daunting task, but with the right tools and materials, it can be a fun and rewarding project. This step-by-step guide will walk you through the process, from choosing the right lamp base to wiring the lamp and adding a shade. Whether you’re a beginner or an experienced DIYer, this project can be tailored to your skill level and personal style.
2. Step 1: Choose a design
The first step in making a table lamp is to choose a design that you like. There are many different styles and types of table lamps to choose from, so take some time to browse through catalogs and online stores to find inspiration. Consider the overall look and feel of the room where the lamp will be placed, as well as the size and shape of the table you’ll be using it on. Once you’ve found a design that you like, you can move on to gathering the necessary materials and tools.
2.1. Select a style
The first step in making a table lamp is to choose a design that suits your taste and fits the intended space. There are countless styles of table lamps to choose from, including modern, rustic, vintage, and more. Consider the overall aesthetic of the room where the lamp will be placed, as well as the purpose of the lamp. Will it be used for reading or as a decorative accent? Once you have a clear idea of the style you want, you can move on to selecting materials and gathering supplies.
2.2. Choose a base
When it comes to making a table lamp, the first step is to choose a design. There are countless styles and options to choose from, so it’s important to consider what will fit best in your space. Are you looking for a classic look or something more modern? Do you want your lamp to be a statement piece or blend in with your decor? Once you have an idea of what you’re looking for, you can start to narrow down your options and choose a base that will work with your design.
2.3. Pick a shade
One of the first things to consider when making a table lamp is the shade. The shade can set the mood of the room and can even affect the quality of light that the lamp emits. When choosing a shade, it is important to consider the overall design of the lamp and the room it will be placed in. Here are some tips to help you pick the perfect shade:
1. Consider the size and shape of the lamp base. A large, round base may look best with a drum shade, while a tall, skinny base may look better with a tapered shade.
2. Think about the purpose of the lamp. If it will be used for reading or tasks, a white or light-colored shade will provide the most light. If the lamp is purely decorative, a darker shade may be more appropriate.
3. Look at the color scheme of the room. A shade that complements the colors in the room will tie everything together and create a cohesive look.
4. Don’t be afraid to mix and match patterns and textures. A patterned shade can add interest to a plain lamp base, while a textured shade can add depth and dimension.
2.4. Consider the bulb
When it comes to making a table lamp, the first step is to choose a design. One important component of any lamp is the bulb. There are many different types of bulbs available, including LED, incandescent, and halogen. Consider the amount of light you want the lamp to emit and the energy efficiency of the bulb. Additionally, think about the color temperature and the ambiance you want to create in the room. Once you have chosen a bulb, you can move on to selecting the other materials and components for your lamp.
2.5. Gather inspiration
The first step in creating a table lamp is to choose a design. There are many different styles to choose from, such as modern, traditional, and rustic. Take some time to gather inspiration from home decor magazines, Pinterest, and online furniture stores. Consider the overall style of the room where the lamp will be placed and choose a design that complements it. Once you have a clear idea of the style you want, you can move on to selecting materials and gathering tools.
3. Step 2: Gather materials
Now that you have a plan for your table lamp, it’s time to gather the materials you’ll need to bring it to life. Here’s a list of what you’ll need:
– Lamp base
– Lampshade
– Light bulb
– Lamp harp
– Lamp finial
– Lamp kit
– Electrical tape
– Wire strippers
– Pliers
– Screwdriver
Make sure you have all of these items before you begin the next step.
3.1. Purchase lamp kit
To begin the process of making a table lamp, the first step is to gather all the necessary materials. One of the most important materials is the lamp kit, which includes the socket, cord, and plug. This can be purchased at most hardware or home improvement stores. Other materials needed include a lamp base, lampshade, light bulb, and any decorative elements you wish to add to the lamp. It is important to choose materials that are compatible with each other and fit your design aesthetic. Once you have gathered all the necessary materials, you can move on to the next step in the process.
3.2. Select lampshade materials
When it comes to selecting materials for your lampshade, there are a few options to consider. The most common materials for lampshades are fabric, paper, and plastic. Fabric lampshades offer a wide variety of options in terms of color and pattern, and can be easily customized to fit your personal style. Paper lampshades are often used for their affordability and simplicity, and can be a great option for a minimalist look. Plastic lampshades are durable and easy to clean, making them a good choice for high-traffic areas. Consider the overall design and purpose of your lamp when selecting your materials, and choose something that will complement the overall aesthetic of your space.
3.3. Choose base materials
After deciding on the style and design of your table lamp, the next step is to choose the base materials. This will depend on your personal preference and the purpose of the lamp. Some popular materials for lamp bases include wood, metal, glass, and ceramic. Consider the overall look and feel you want to achieve, as well as the durability and functionality of the materials. Once you have decided on the base materials, it’s time to gather all the necessary materials to start making your table lamp.
3.4. Gather tools
Before you begin making your own table lamp, you need to gather all of the necessary tools and materials. Depending on the design you choose, the tools and materials needed may vary. However, here are some basic items you will likely need:
– Lamp kit (which usually includes a socket, cord, and plug)
– Lamp base
– Lamp shade
– Bulb
– Drill
– Hole saw
– Screwdriver
– Electrical tape
– Wire cutter
– Pliers
– Sandpaper
Make sure to read the instructions and safety precautions for each tool and material you plan to use. Also, consider any additional items you may need for your specific design, such as decorative elements or paint.
4. Step 3: Prepare the base
Before you start making your table lamp, it’s important to gather all the necessary materials and tools. This includes the lamp kit, lampshade, lamp base, light bulb, wire cutters, pliers, and a screwdriver. Once you have everything you need, it’s time to prepare the base of your lamp.
Start by choosing a base that is sturdy and fits the style of your lampshade. You can choose from a variety of materials such as wood, metal, or glass. If your base is unfinished, you may want to paint or stain it to match your decor.
Next, you’ll need to drill a hole in the center of your base to accommodate the lamp kit. Be sure to measure the size of the kit and choose a drill bit that is slightly larger. Once you’ve drilled the hole, insert the lamp kit according to the manufacturer’s instructions.
Finally, attach the lampshade to the top of the lamp kit using the screw provided. Your lamp base is now ready to be wired and lit up.
4.1. Sand and finish the base
Before you can start building a table lamp, you need to prepare the base. This involves sanding and finishing the surface to ensure that it is smooth and free from imperfections. Follow these simple steps to prepare the base of your table lamp:
1. Start by cleaning the surface of the base with a damp cloth to remove any dirt or debris.
2. Using a fine-grit sandpaper, sand the surface of the base in a circular motion. Be sure to sand evenly and avoid applying too much pressure, as this can damage the wood.
3. Once you have sanded the entire surface, wipe it down with a clean cloth to remove any dust or debris.
4. Apply a wood finish or stain to the surface of the base, following the manufacturer’s instructions. This will protect the wood and give it a professional, polished look.
5. Allow the finish to dry completely before moving on to the next step of building your table lamp.
4.2. Drill hole for lamp kit
Using a drill and a 1-inch hole saw bit, carefully drill a hole in the center of the wooden base. This hole should be large enough to accommodate the lamp kit’s threaded rod. Make sure to measure and mark the center point of the base before drilling to ensure accuracy. Be sure to wear protective eyewear and work in a well-ventilated area.
4.3. Attach lamp kit
To attach the lamp kit, first, you need to prepare the base. Make sure that the base is stable and able to support the weight of the lampshade and bulb. If necessary, sand the base to smooth any rough edges. Then, drill a hole in the center of the base that is large enough to fit the threaded rod from the lamp kit. Insert the rod into the hole and tighten it securely with a nut. Finally, attach the harp and lampshade according to the instructions that came with the kit.
5. Step 4: Create the shade
To create the shade for your table lamp, you will need a few materials such as a lamp shade frame, fabric, glue, and scissors. First, measure the height and circumference of your lamp shade frame and cut your fabric accordingly, leaving a few extra inches on each side. Next, apply glue to the frame and carefully wrap the fabric around it, smoothing out any wrinkles or bubbles as you go. Once the glue has dried, trim any excess fabric and attach the shade to the lamp base. You can also add decorative elements such as ribbon or trim to the top and bottom edges of the shade for a personalized touch.
5.1. Measure and cut fabric
To create the shade for your table lamp, you’ll need to measure and cut your fabric. First, measure the circumference of your lampshade frame and add an inch to allow for overlap. Next, measure the height of the frame and add an inch for the top and bottom hems. Cut your fabric to these measurements. Pro tip: if you’re using patterned fabric, make sure to align the pattern evenly around the circumference of the shade.
5.2. Attach fabric to shade frame
After constructing the frame for your shade, it’s time to attach the fabric. Begin by cutting the fabric to the appropriate size, leaving a little extra on each side to fold over the edges. Place the fabric over the shade frame and secure it in place with small clips or clothespins. Make sure the fabric is taut and smooth. Once you’re happy with the placement, use a hot glue gun to attach the fabric to the frame. Start at the top and work your way down, gluing small sections at a time. Be careful not to use too much glue, as it can seep through the fabric and create unsightly stains. Once the fabric is securely attached, trim any excess and fold over the edges, gluing them in place. Your shade is now complete and ready to be attached to your table lamp.
5.3. Trim excess fabric
After the glue has dried, it is time to trim the excess fabric from the top and bottom of the shade. Use a sharp pair of scissors to carefully trim away the excess fabric, leaving about 1/2 inch of fabric hanging over the top and bottom wire rings. Be sure to cut the fabric close to the wire rings, but not so close that it starts to fray or come apart. Once the excess fabric has been trimmed away, the shade should look neat and tidy.
5.4. Attach shade to lamp
To create the shade for your table lamp, you will need to select a fabric that complements the base of the lamp. Measure the diameter of the top of the lamp and add an inch to ensure that the shade will fit securely. Cut a piece of fabric to the appropriate size, and then cut a strip of fabric that is long enough to wrap around the circumference of the top of the shade with a little extra to overlap. Hem the edges of both the top piece and the strip. Sew the strip to the top piece, making sure to overlap the edges slightly. Finally, attach the shade to the lamp by screwing on the shade holder. Voila! Your table lamp is now complete.
6. Step 5: Add finishing touches
Once you have assembled your table lamp, it is time to add those finishing touches to make it truly stand out. Here are some suggestions:
1. Choose the right light bulb: The type of bulb you use can greatly affect the overall look and feel of your lamp. Consider the color temperature, wattage, and style of bulb that will best complement your lampshade and base.
2. Add a dimmer switch: Adding a dimmer switch to your lamp will allow you to adjust the lighting to fit any mood or occasion.
3. Experiment with lampshades: Don’t be afraid to switch out the lampshade for a different style or material to achieve the perfect look.
4. Add decorative elements: Consider adding a decorative finial or embellishments to the base or shade of your lamp to give it a unique touch.
With these finishing touches, your table lamp will be ready to light up any space in style.
6.1. Install light bulb
Now it’s time to install the light bulb. Make sure the lamp is unplugged and the socket is clean and free from debris. Choose the appropriate wattage bulb for your lamp and screw it into the socket. Be careful not to overtighten the bulb, as this can cause damage to the socket. Once the bulb is securely in place, plug in the lamp and test it to make sure it works properly.
6.2. Test lamp
Once you’ve assembled your lamp, it’s time to test it out. Plug it in and turn it on to make sure it works properly. Check that the switch and cord are functioning correctly and that the light bulb is screwed in tightly. If everything looks good, you’re ready to move on to the final step: adding some finishing touches to make your lamp look polished and professional.
6.3. Add decorative elements
Once you have completed all the major steps in making your table lamp, it’s time to add some decorative elements to give it a personalized touch and make it stand out. One simple way to do this is by adding a decorative lamp shade. This can be anything from a plain white shade to a colorful patterned one, depending on your personal style and the overall look you are going for. Another option is to add some embellishments to the lamp base itself. This could include anything from a coat of paint to stenciling or even adding some decorative trim. Just remember to keep the overall theme of your lamp in mind when choosing your finishing touches.
6.4. Enjoy your new lamp!
Now that your table lamp is complete, it’s time to enjoy the fruits of your labor! Turn on your new lamp and bask in the warm glow it emits. Take a moment to admire the craftsmanship and attention to detail you put into making it. Whether you plan to use it as a reading lamp, a decorative piece, or both, your new lamp is sure to add a touch of elegance and functionality to any room in your home. So sit back, relax, and enjoy your new lamp!
Conclusion
In conclusion, making a table lamp is a fun and rewarding DIY project that anyone can do with a little bit of patience and creativity. By following the step-by-step guide outlined in this article, you’ll be able to create a unique and stylish lamp that will brighten up any room in your home. So why not give it a try and see what you can create?


These 10 innovative and imaginative DIY home decor ideas from [object Object] provide a refreshing approach to enhancing ones living…