
Vintage furniture holds a timeless charm that can be effortlessly enhanced through creative makeovers. With a keen eye for detail and a touch of imagination, these transformed pieces can breathe new life into any space. This article delves into the fascinating world of transforming vintage furniture, providing inspiration and ideas for those seeking to infuse their interiors with character and style.
- 1. Introduction
- 1.1. The popularity of vintage furniture
- 1.2. Benefits of vintage furniture makeovers
- 1.3. Choosing the right vintage furniture piece
- 1.4. Essential tools and materials for vintage furniture makeovers
- 1.5. Tips for successful vintage furniture makeovers
- 2. Preparing the Furniture
- 2.1. Cleaning and removing old finishes
- 2.2. Repairing any damages
- 2.3. Sanding and smoothing the surfaces
- 2.4. Applying necessary primers
- 2.5. Choosing the perfect paint or stain
- 3. Transforming the Look
1. Introduction
Vintage furniture is a treasure trove of potential. With a little creativity and some DIY skills, you can transform these old pieces into stunning works of art. Whether it’s a rustic dresser, a weathered chair, or a vintage table, the possibilities are endless. In this article, we will explore the art of giving vintage furniture a creative makeover. From repainting and refinishing to upcycling and repurposing, we will delve into various techniques and ideas to breathe new life into these timeless pieces. So, if you have a knack for DIY projects and a love for vintage aesthetics, get ready to be inspired!
1.1. The popularity of vintage furniture
Vintage furniture has become increasingly popular in recent years, as more and more people are drawn to its unique charm and character. With its timeless appeal and durability, vintage furniture has the ability to transform any space into a nostalgic haven. Whether it’s a mid-century modern sideboard, an intricately carved Victorian armchair, or a rustic farmhouse dining table, these pieces have a story to tell. They add a touch of history and personality to modern interiors, making them stand out from the mass-produced furniture found in most retail stores. In this article, we will explore the growing popularity of vintage furniture and how creative makeovers can breathe new life into these treasures from the past.
1.2. Benefits of vintage furniture makeovers
Vintage furniture makeovers offer a plethora of benefits that go beyond just giving old pieces a fresh look. These creative transformations not only add charm and character to a space but also provide numerous advantages for homeowners and interior enthusiasts alike.
One of the key benefits of vintage furniture makeovers is the opportunity to create unique and personalized pieces. By refurbishing and repurposing old furniture, individuals can showcase their creativity and style, resulting in one-of-a-kind items that cannot be found in mainstream stores. This allows for a more distinctive and individualistic interior design.
In addition to the aesthetic appeal, vintage furniture makeovers can also be a cost-effective solution. Instead of purchasing brand new furniture, which can be quite expensive, revamping old pieces can significantly reduce costs. With some creativity, basic DIY skills, and a few affordable materials, vintage furniture can be transformed into stunning focal points for any room.
Furthermore, engaging in furniture makeovers promotes sustainability and eco-friendliness. By giving new life to old furniture, we contribute to reducing waste and the demand for new manufacturing. This practice aligns with the principles of recycling and upcycling, as it helps to minimize the environmental impact of the furniture industry.
Lastly, vintage furniture makeovers allow individuals to preserve and appreciate the history and craftsmanship of older pieces. Restoring and enhancing antique or vintage furniture not only adds value to the item itself but also honors the craftsmanship and artistry of the past. It provides a connection to our heritage and a sense of nostalgia, making each piece of furniture a conversation starter with its own unique story.
In conclusion, vintage furniture makeovers offer a multitude of benefits, including the ability to create personalized and distinctive pieces, cost-effectiveness, sustainability, and the preservation of history and craftsmanship. It’s time to unleash your creativity and embark on a journey of transforming vintage furniture with innovative and imaginative makeovers.
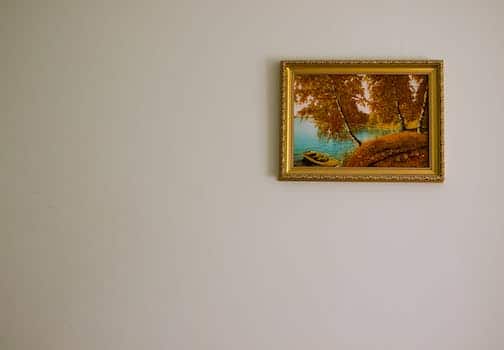
1.3. Choosing the right vintage furniture piece
Vintage furniture is a timeless addition to any home decor, bringing character and charm to a space. However, choosing the right vintage furniture piece can be a daunting task. With so many options available, it’s important to consider a few key factors before making a purchase. This section will guide you through the process of selecting the perfect vintage furniture piece for your home.
1.4. Essential tools and materials for vintage furniture makeovers
When it comes to transforming vintage furniture with creative makeovers, having the right tools and materials is essential. These items will help you achieve professional-looking results and make the process much easier. Whether you’re a beginner or an experienced DIY enthusiast, here are some must-have tools and materials for your vintage furniture makeovers:
1. Sandpaper: A variety of sandpaper grits is necessary for sanding down the furniture’s surface and creating a smooth base for painting or staining.
2. Paintbrushes: Invest in high-quality paintbrushes of different sizes for applying paint or primer evenly and achieving a professional finish.
3. Paint or Stain: Choose paints or stains that are specifically formulated for furniture makeovers. Opt for colors or finishes that enhance the vintage charm of the piece.
4. Varnish or Sealant: Applying a protective layer of varnish or sealant will ensure that your transformed furniture piece is durable and long-lasting.
5. Decorative Hardware: Upgrading the hardware, such as knobs or pulls, can give your vintage furniture a fresh look. Choose hardware that complements the style and era of the piece.
6. Upholstery Fabrics: If your vintage furniture has upholstered elements, consider replacing or reupholstering them with new fabrics that suit your design aesthetic.
7. Wood Filler: Fill any cracks, dents, or imperfections in the wood with a suitable wood filler before painting or staining.
8. Screwdriver and Drill: These tools are essential for removing and replacing hardware, as well as making any necessary repairs.
9. Safety Gear: Don’t forget to prioritize safety by wearing goggles, gloves, and a mask when working with chemicals or power tools.
By having these essential tools and materials on hand, you’ll be well-equipped to embark on your vintage furniture makeover journey. Let your creativity flow and enjoy the process of transforming old pieces into stunning additions to your home decor!
1.5. Tips for successful vintage furniture makeovers
Vintage furniture makeovers can be a fun and rewarding project for any DIY enthusiast. By breathing new life into old pieces, you can create unique and stylish furniture that adds character to your home. However, successful vintage furniture makeovers require careful planning and execution. In this article, we will provide you with some valuable tips to help you achieve successful transformations and unleash your creativity.
2. Preparing the Furniture
Transforming vintage furniture with creative makeovers is a popular trend that allows you to breathe new life into old and worn-out pieces. Whether you have inherited some vintage furniture or stumbled upon a hidden gem at a thrift store, giving it a fresh and modern look can completely change the atmosphere of your space. However, before you start the transformation process, it is important to properly prepare the furniture to ensure the best results.
The first step in preparing the furniture is to thoroughly clean it. Remove any dust, dirt, or grime using a mild soap and water solution. For stubborn stains, you may need to use a gentle cleanser or specialized furniture cleaner. Once the surface is clean, allow it to dry completely before moving on to the next step.
Next, inspect the furniture for any damages or repairs that need to be addressed. Check for loose joints, broken pieces, or missing hardware. Depending on the extent of the damage, you may need to consult a professional or consider DIY repairs. Taking care of these issues before starting the makeover will ensure that the furniture is sturdy and safe to use.
After cleaning and repairing, it is time to prepare the surface for painting or refinishing. If the furniture has an existing finish, you will need to remove it using sandpaper or a paint stripper. This step is crucial as it allows the new paint or stain to adhere properly. Follow the manufacturer’s instructions and wear protective gear as needed.
Once the old finish is removed, sand the entire surface to create a smooth and even base. Start with a coarse-grit sandpaper and gradually move to finer grits for a polished look. Wipe away any dust or debris with a clean cloth before applying the new finish.
In conclusion, preparing vintage furniture for a creative makeover involves cleaning, repairing, and prepping the surface for a fresh finish. By taking the time to properly prepare the furniture, you can ensure that your transformation project will yield beautiful and long-lasting results.
2.1. Cleaning and removing old finishes
Cleaning and removing old finishes is an essential step in preparing vintage furniture for a creative makeover. Before applying any new paint or stain, it is important to thoroughly clean the surfaces of the furniture to remove dirt, grime, and any previous coatings. This ensures better adhesion and a smoother finish for the final transformation.
To start, gather the necessary cleaning supplies such as mild soap, water, soft cloths, and a gentle scrub brush. Begin by wiping down the furniture with a damp cloth to remove any surface dust. For stubborn dirt or stains, create a solution of mild soap and water, and gently scrub the affected areas using the soft brush.
Once the furniture is clean, it may be necessary to remove any old finishes or coatings that are peeling, chipping, or no longer desired. This can be done using various methods depending on the type of finish. For painted surfaces, sanding with fine-grit sandpaper or using a paint stripper may be necessary. For stained finishes, a wood stain remover or sanding can help eliminate the old color.
Always follow the manufacturer’s instructions when using any chemical products or tools for stripping old finishes. It is important to work in a well-ventilated area and wear protective gear such as gloves and goggles to ensure personal safety.
After removing old finishes, make sure to thoroughly clean and dry the furniture again to remove any residue. This will provide a clean surface for the next steps in the creative makeover process. With the furniture now cleaned and prepared, it is ready to be transformed with your creative ideas and makeovers.
2.2. Repairing any damages
Repairing any damages: To ensure that your vintage furniture is in its best condition before starting a creative makeover, it is important to address any damages it may have. Begin by thoroughly examining the piece for any cracks, chips, or loose joints. Repair any structural damages using appropriate adhesives or wood fillers. For minor scratches or dents, consider using touch-up markers or wood polishes to restore the furniture’s original charm. Don’t forget to tighten loose screws or replace missing hardware. Taking the time to repair any damages will ensure a sturdy foundation for your creative transformation.
2.3. Sanding and smoothing the surfaces
Sanding and smoothing the surfaces
Before embarking on a creative makeover for vintage furniture, it is crucial to properly prepare the surfaces by sanding and smoothing them. Sanding helps to remove any existing finishes, such as varnish or paint, and creates a smooth and even surface for the new makeover. It also helps to remove any imperfections, scratches, or dents that may be present on the furniture.
To start the sanding process, gather a variety of sandpaper grits, ranging from coarse to fine. Begin with a coarser grit to remove the existing finish and then gradually move to finer grits for a smoother finish. Use a sanding block or a power sander for larger surfaces to ensure even sanding.
While sanding, be sure to follow the wood grain to avoid creating any scratches or marks. Take your time and apply consistent pressure to achieve an even result. Once the surfaces are sanded, use a tack cloth or a soft brush to remove any dust or debris.
After sanding, it is important to smooth the surfaces using a wood filler or putty. Fill in any holes, cracks, or gaps with the filler and allow it to dry completely. Once dry, sand the filled areas gently to create a seamless and smooth surface.
By sanding and smoothing the surfaces of vintage furniture, you are laying the foundation for a successful and creative makeover. The smooth surface will allow the new paint or finish to adhere properly and result in a stunning transformation.
2.4. Applying necessary primers
Before starting the creative makeover process for your vintage furniture, it is important to apply necessary primers to ensure a smooth and long-lasting transformation. Primers act as a base coat that helps the paint adhere better to the surface and provides a better finish. Here are a few steps to follow when preparing your furniture for a creative makeover:
1. Clean the surface: Begin by thoroughly cleaning the furniture using a mild detergent and water. Remove any dirt, dust, or grime that may have accumulated over the years. This will ensure that the primer and paint adhere well to the surface.
2. Sand the furniture: Next, lightly sand the surface of the furniture using a fine-grit sandpaper. This step helps in creating a rough texture, allowing the primer to adhere better. Sanding also helps in removing any existing paint or varnish, providing a clean canvas for your creative makeover.
3. Repair any damages: Inspect the furniture for any damages such as cracks, dents, or loose joints. Use wood filler or epoxy putty to fill in any holes or cracks. Ensure that the furniture is in good structural condition before proceeding with the makeover.
4. Apply the primer: Once the surface is clean, sanded, and repaired, it’s time to apply the primer. Choose a primer suitable for the type of furniture material you are working with. Apply the primer evenly using a brush or roller, following the manufacturer’s instructions. Allow the primer to dry completely before proceeding to the next step.
By applying these necessary primers, you are ensuring a solid foundation for your creative makeover. The primers will help in achieving a professional-looking finish and enhance the durability of your transformed vintage furniture.
2.5. Choosing the perfect paint or stain
Choosing the perfect paint or stain for transforming vintage furniture with creative makeovers can be a crucial step in achieving the desired result. Whether you are looking to update an old piece or give it a completely new look, selecting the right finish is essential. Here are some factors to consider when choosing between paint and stain.
1. Style and aesthetic: Think about the overall style and aesthetic you want to achieve. Paint offers a wide range of color options, allowing you to create bold and vibrant looks. On the other hand, stain enhances the natural beauty of wood and can give a more rustic or traditional appearance.
2. Durability: Consider the level of durability you need for the furniture. Paint provides a protective layer that can withstand wear and tear, making it suitable for pieces that will be frequently used or exposed to elements. Stain, on the other hand, penetrates the wood and can provide long-lasting protection while still allowing the natural texture to show.
3. Surface preparation: The type of finish you choose may also depend on the condition of the furniture. Paint can cover imperfections and blemishes effectively, while stain may highlight or accentuate them. If the piece requires extensive repairs or has significant damage, paint might be a better option.
4. Maintenance: Consider the level of maintenance you are willing to commit to. Painted surfaces are generally easier to clean and maintain compared to stained surfaces, which may require periodic reapplication or touch-ups.
In conclusion, understanding your desired style, durability needs, surface condition, and maintenance preferences will help you make an informed decision when choosing between paint and stain for transforming vintage furniture. Take your time to evaluate each factor and select the finish that best aligns with your vision and practical requirements.
3. Transforming the Look
Vintage furniture can be a treasure trove of hidden potential. With a little creativity and some DIY skills, you can transform these old pieces into stunning statement pieces that add character to any space. Whether it’s a worn-out dresser, a shabby chic side table, or a rusty metal chair, there are endless possibilities for giving vintage furniture a fresh and modern look.
One of the simplest ways to revive vintage furniture is by giving it a fresh coat of paint. A bold and vibrant color can instantly breathe new life into a dull piece. You can choose a color that complements your existing décor or go for something more unexpected to create a focal point in the room.
Another popular technique for transforming vintage furniture is decoupage. This involves applying decorative paper or fabric to the surface of the furniture using a special adhesive. It’s a fantastic way to add patterns, textures, or even vintage-inspired designs to give the piece a unique and personalized touch.
If you’re feeling particularly adventurous, you can try your hand at reupholstering vintage furniture. This involves replacing the old fabric with new upholstery, giving the piece a complete makeover. You can choose a fabric that matches your style and preferences, ensuring that the piece seamlessly integrates into your existing interior design.
Don’t be afraid to experiment with different techniques and materials when transforming vintage furniture. From stenciling and distressing to adding new hardware or even repurposing certain elements, there’s no limit to the creative possibilities. With a little imagination and some patience, you can turn outdated and overlooked furniture into stunning focal points that tell a story and reflect your unique style.
3.1. Applying paint or stain
Applying paint or stain is a crucial step in transforming the look of vintage furniture with creative makeovers. Whether you want to rejuvenate an old piece or give it a completely new style, the right choice of paint or stain can make all the difference.
When it comes to painting vintage furniture, there are a few things to consider. First, you need to prepare the surface by cleaning it thoroughly and removing any existing finish. This can be done using sandpaper or a chemical stripper, depending on the condition of the furniture.
Once the surface is prepared, you can start applying the paint. It’s important to choose a high-quality paint that is suitable for the type of furniture you are working with. If you want a smooth and flawless finish, consider using a paint sprayer or a foam roller. However, if you prefer a more distressed or rustic look, you can use a brush to create texture.
Another option for transforming vintage furniture is using stain. Staining allows you to enhance the natural beauty of the wood while adding color and protection. Before applying the stain, make sure the surface is clean and free from any dust or debris. Apply the stain using a brush or a cloth, following the wood grain for an even and professional result.
In conclusion, applying paint or stain is a crucial part of transforming the look of vintage furniture. Whether you choose to paint or stain, make sure to properly prepare the surface and select the right products for the desired effect. With a little creativity and the right techniques, you can give your vintage furniture a whole new life.
3.2. Adding decorative elements
Adding decorative elements to vintage furniture can completely transform its look. With creative makeovers, you can give new life to old pieces and make them stand out in any room. There are various ways to add decorative elements to vintage furniture, such as painting, stenciling, or decoupage. By incorporating these techniques, you can customize the furniture to match your personal style and create a unique statement piece. Additionally, you can consider adding hardware accents, such as vintage knobs or handles, to enhance the overall aesthetic. These small details can make a big difference in the appearance of the furniture and add an extra touch of elegance. Whether you’re updating a family heirloom or thrift store find, adding decorative elements is a fun and creative way to transform vintage furniture into something truly special.
3.3. Experimenting with distressing techniques
Experimenting with distressing techniques can completely transform the look of vintage furniture. By using various methods such as sanding, painting, and waxing, you can achieve a beautifully aged and worn appearance. Distressing allows you to add character and charm to your furniture, giving it a unique and antique feel.
One popular distressing technique is sanding. This involves using sandpaper or a sanding block to rub away the top layer of paint or finish. By focusing on areas that would naturally wear over time, such as edges, corners, and handles, you can create a realistic aged effect. Sanding also helps to smooth out any rough patches and prepare the surface for further distressing.
Another technique is painting. You can use different colors of paint to achieve a distressed look. Start by applying a base coat of paint in your desired color. Once dry, apply a second coat in a contrasting color. Then, using sandpaper or a sanding block, gently sand the edges and raised areas to reveal the base coat underneath. This creates a worn and weathered appearance.
Waxing is another method to distress furniture. After applying a coat of paint, you can use a waxing brush or cloth to apply a layer of furniture wax. Focus on areas that would naturally accumulate wear, such as corners and edges. Then, using a clean cloth, gently buff the waxed areas to create a subtle sheen and smooth finish. This technique adds depth and richness to the distressed look.
Experimenting with distressing techniques allows you to unleash your creativity and give new life to old furniture. Whether you prefer a rustic, shabby chic, or vintage look, there are endless possibilities for transforming your vintage furniture with creative makeovers.
3.4. Updating hardware and fittings
Updating hardware and fittings is a crucial step in transforming the look of vintage furniture. By replacing worn-out or outdated hardware, such as drawer pulls, hinges, and knobs, you can instantly give your furniture a fresh and modern appearance. Consider choosing hardware that complements the style and era of the piece, whether it’s sleek and contemporary or vintage and ornate. Additionally, updating fittings such as chair legs or table bases can completely change the overall aesthetic of a piece. Swapping out old, wobbly legs for sturdy and stylish ones can enhance both the functionality and visual appeal of the furniture. When updating hardware and fittings, be sure to choose high-quality materials that will withstand everyday use and provide long-lasting durability. With a little creativity and attention to detail, updating the hardware and fittings of vintage furniture can truly transform its look and breathe new life into your space.
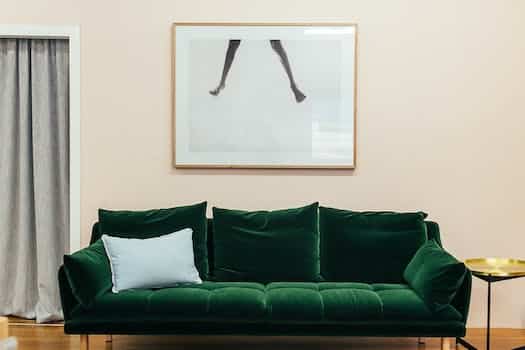
3.5. Using upholstery to revamp the furniture
Using upholstery to revamp the furniture is a great way to transform its look. Upholstery can give a fresh and updated appearance to vintage furniture, making it look more modern and stylish. Whether it’s a worn-out armchair, a faded sofa, or a tired ottoman, upholstery can breathe new life into these pieces. By choosing the right fabric, color, and pattern, you can completely transform the overall aesthetic of the furniture. Moreover, upholstery also provides an opportunity to incorporate your personal taste and style into the design. With the help of a skilled upholsterer, you can revitalize old furniture and create a stunning focal point in any room. So, if you have vintage furniture that needs a makeover, consider using upholstery to give it a whole new look.
Conclusion
In conclusion, transforming vintage furniture with creative makeovers not only breathes new life into old pieces but also adds a unique touch to any space. Whether it’s repainting, reupholstering, or repurposing, the possibilities are endless when it comes to giving vintage furniture a fresh and modern look. With a little creativity and some DIY skills, anyone can take an outdated piece and turn it into a stunning and one-of-a-kind statement piece that reflects their personal style.


These 10 innovative and imaginative DIY home decor ideas from [object Object] provide a refreshing approach to enhancing ones living…